msa quick start - ajtruckle/meeting-schedule-assistant-support GitHub Wiki
So you want to get up and running quickly? Follow these essential steps and you’ll be creating schedules in no time.
Use the Custom Assignments Manager to add in any additional assignments into the software to meet your congregation uses.
This ensures the editors know exactly which assignments to include.
Before you can create schedules, you need to populate the main databases.
Open the Congregations database manager.
Designed for the Public Talk Coordinator.
You can manage:
- congregations
- speakers
- talk outlines
- talk availability
You must add your own congregation and set it as Local, even if you don’t add speakers yet.
Note: Several parts of the software rely on the Local Congregation setting. Don’t forget to set both Meeting Day and Meeting Time.
Open the Publishers database manager.
Designed for the Life and Ministry Meeting Overseer, Coordinator of the Body of Elders, and anyone responsible for scheduling (e.g., Sound or Attendant Overseer).
You can manage:
- assignments
- availability
- Field Service Group
- other publisher details
Open the Public Talks database manager.
Designed for the Public Talk Coordinator.
Track:
- requested talk outlines
- digital media availability
- excluded outlines
You can review congregation, publisher, and public talk information using the Report Viewer, available from the Tools menu.
We are nearly ready to start using the software! Just a few more things to configure.
Open the Options menu to fine‑tune how the editors behave.
You can configure:
- Settings — meeting days, automatic backup, editor behaviour
- Headings — how headings appear on Assignment schedules
- Special Events — upcoming theocratic events
- Calendar Options — connect to Google or Outlook calendars
Create a Backup so you can quickly recover in a disaster‑recovery situation.
Return to the main window and choose a date range.
You can select a range by:
- clicking and dragging
- clicking the start date and Shift‑clicking the end date
- clicking the start date, holding Shift, and using the arrow keys
Create your schedule using either:
- the Assignments Editor
- the Meeting Editor
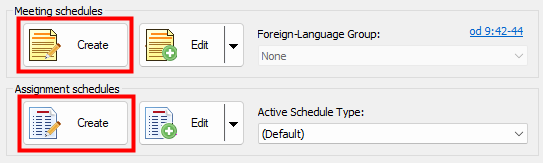
Figure 2. The Create buttons for Meeting and Assignment schedules.
 And that’s it!
If you want to explore more features, make a cup of tea and browse the rest of the help documentation.
- Parent topic: Overview
- Next topic: Using Meeting Schedule Assistant