msa options headings - ajtruckle/meeting-schedule-assistant-support GitHub Wiki
Headings
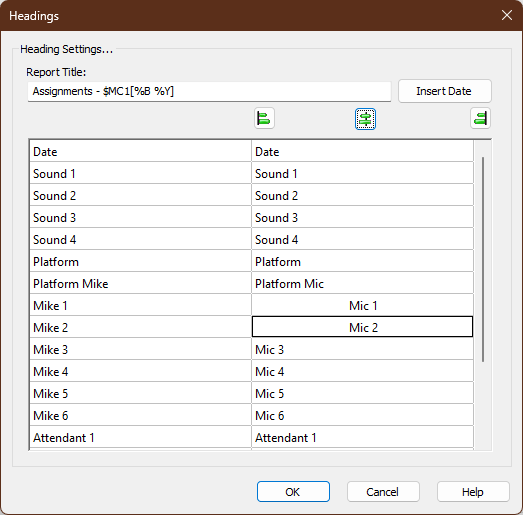
Figure 146. The Headings window.
Use the Headings window to control the default report title and column headings that appear on new schedules. These headings are used throughout the Assignments Editor, where they form the column titles on the generated schedule.
Select a heading from the list to edit its text. Any changes you make will be reflected on printed and exported schedules, and saved with the schedule file if you choose to save it.
How to Access
You can access this feature from:
- Options — Headings
Report Title
The report title appears at the top of printed and exported schedules. You can type the title directly into the Report Title box, or you can insert special date variables using the Insert Date button. These variables automatically display the start, end, or meeting date for the schedule.
Insert Date
Press Insert Date to open the pop‑up window. Although you can type the variables manually, using this window is the simplest way to insert them.

Figure 147. The Insert Date window.
Note: The Meeting Date option is only active when using the Customise Lists feature in the Meeting Editor.
In the Insert Date window:
- Select the date you want to insert (Start, End, or Meeting).
- Choose how the date should appear:
• Full Month
• Abbreviated Month
• Customised Date (see Custom Date Formats for details) - Click OK to insert the variable at the current cursor position in the title.
Variable Syntax
| Date Type | Full Month | Abbreviated Month | Custom Format |
|---|---|---|---|
| Start | $M1 | $MA1 | $MC1[...] |
| End | $M2 | $MA2 | $MC2[...] |
| Meeting | $MG | $MGA | $MGC[...] |
Example:
Sound and Attendants for $M1 – $M2
Heading Alignment
To change the alignment of a heading, select (or edit) the heading concerned and click the appropriate alignment button. All headings default to left alignment, but you can choose centre or right alignment as needed.

Figure 148. Alignment buttons for the heading.
Video Tutorial
(Note: This video tutorial is based on an older version of the software.)
Watch the video tutorial on YouTube.
Navigation
- Parent topic: Options Menu
- Previous topic: Settings
- Next topic: Calendars