srr editor - ajtruckle/meeting-schedule-assistant-support GitHub Wiki
The Assignments Editor is the main workspace for creating and managing assignment schedules. Whether you create a new schedule or open an existing one, this is where you enter assignments, review availability, preview the finished schedule, and prepare it for printing or exporting.
When you open an existing schedule, all previously saved assignments are displayed automatically. The active schedule name appears in the upper-left corner of the window, and any changes you make remain in the editor until you save or discard them.
💡 Tip: As you navigate through the schedule, the Not Available list updates automatically, to show brothers who cannot be assigned to the currently selected meeting. This helps you avoid conflicts while assigning duties.
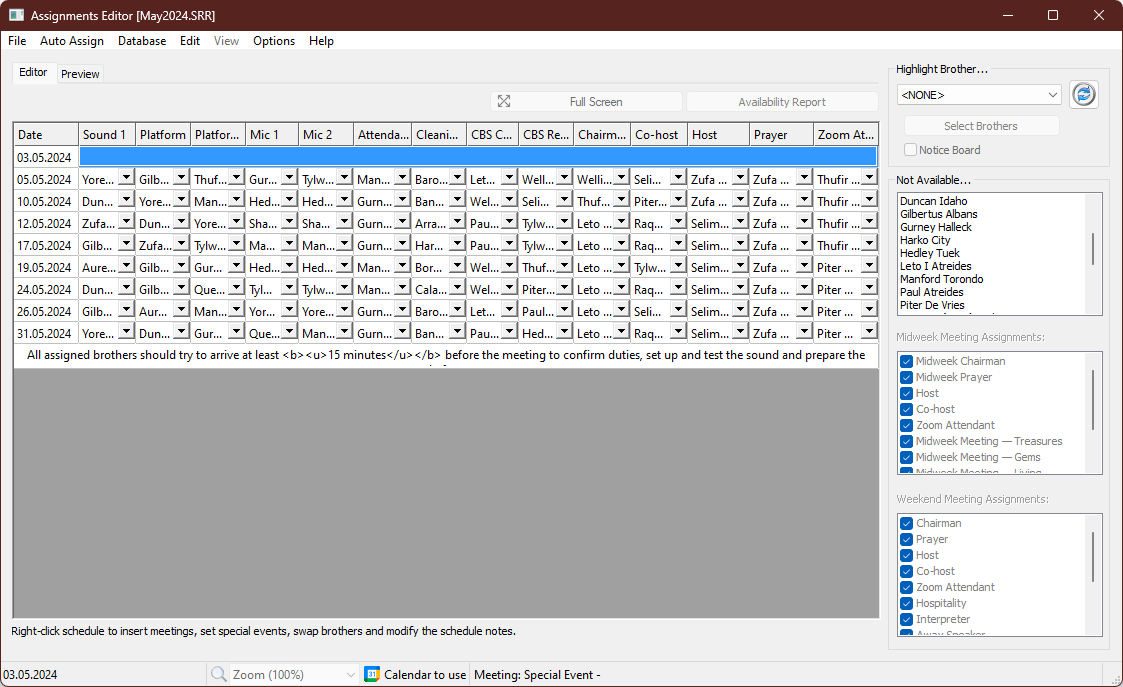
Figure 182. The Assignments Editor window.
You can open the Assignments Editor in any of the following ways:
-
Select File → Create Assignments Schedule to create a new schedule.
-
Select File → Edit Assignments Schedule to open an existing schedule.
-
Use the Assignment Schedules panel on the main window:
- Click Create to create a new schedule for the selected date range.
- Click Edit to open an existing schedule or choose one from the recent schedules list.
The Assignments Editor is divided into several areas, each designed for a specific task. Most of your work takes place on the Editor tab, where you create and modify assignments. When your schedule is complete, switch to the Preview tab to review the finished layout before printing or exporting.
💡 Tip: You don't need to complete a schedule in one session. Save your work at any time and reopen it later to continue editing.
The Assignments Editor provides several menus for creating and saving schedules, automatically assigning duties, editing schedules, changing the display, accessing supporting databases, and configuring editor behaviour.
ℹ️ See also: Menus for a complete overview of each menu and links to detailed topics.
The Assignments Editor features two tabs, each serving a distinct purpose:
| Tab | Purpose |
|---|---|
| Editor | Create schedules, add or modify meetings, and assign brothers. |
| Preview | Review the finished schedule using your current report settings before printing or exporting. |
💡 Tip: Switch to the Preview tab before printing or exporting to ensure the schedule appears as expected.
Meeting dates are filled in automatically based on the selected date range and your configured date format.
You can change a date by double‑clicking it and adjusting the values using the arrows or by typing manually.
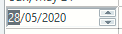
Note
Dates are displayed using your PC's regional settings unless you have configured a custom date format.
To fill an assignment manually, click the drop-down list to display available names and select one.
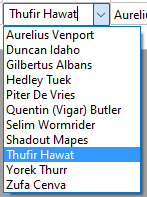
The list depends on:
- Names stored in the Publishers Database.
- The meeting day (only those available for that meeting appear).
- Any exclusions applied to that meeting.
You can also double-click a cell to type directly. This is useful for entering a temporary name or clearing the cell.
You can add notes that appear at the bottom of the printed or exported schedule.
Manage them via the context menu.
💡 Tip: Double-click the notes cell to edit existing text.
This list shows publishers who will be ignored when using Auto Assign or Single Column tools.
It updates automatically as you select rows in the schedule.
Names are added to the list according to the following order of precedence:
- Names that do not appear in any assignment cell drop-down list.
- Names excluded by default.
- Names with Midweek Meeting assignments.
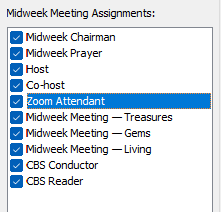
Publishers assigned to the selected Midweek Meeting parts can automatically be added to the Not Available list.
Toggle checkboxes as needed — settings are schedule‑type aware.
The list is disabled when the row is not classified as a Midweek or Weekly meeting.
Assignment data is retrieved from the Assignment History database.
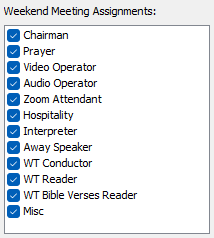
Similar to Midweek Meeting Assignments, toggle checkboxes to mark brothers unavailable for weekend meetings.
The list is disabled when the row is not a Weekend or Weekly meeting.
Assignment data is also retrieved from the Assignment History database.
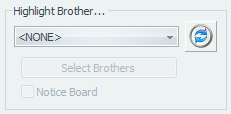
The Highlight Brother panel lets you highlight assignments for one or more brothers when previewing, printing, or exporting schedules.
| Option | Description |
|---|---|
| None | Removes all highlighting and prints the schedule normally. |
| All (Separate Pages) | Prints or exports a report for each brother with assignments highlighted. |
| Selected (Separate Pages) | Same as above, but only for selected brothers. Use the Select Brothers button to choose who to include. |
💡 Tip: When highlighting is enabled, highlighted assignments are shown in cyan.
When Selected (Separate Pages) is chosen, click Select Brothers to choose which brothers to include in the report.
This allows you to create individual reports without generating pages for every brother in the schedule.
If a schedule contains manually entered names or names not found in the Publishers Database, click the Refresh button to update the list of available brothers.
The Refresh button scans the active schedule and adds any assigned names to the selection list.
💡 Tip: Use Refresh after adding a new name manually so it becomes available for selection.
Note
The refreshed list is temporary and is rebuilt each time the Assignments Editor is opened.
Enable this option to create an additional version of the schedule without highlighting, suitable for displaying on a notice board.
The status bar shows information about the selected row and provides shortcuts to common features.
Displays the date for the selected row, using your PC’s regional settings or custom format.
Adjusts the zoom level when previewing the schedule.
Available only in Preview mode.
Hover over this statusbar pane to see which calendars you are synchronising with.

Shows the meeting type for the selected date.

The Assignments Editor supports the following keyboard shortcut:
| Hotkey | Action |
|---|---|
| ALT + SHIFT + W | Opens the working data folder in File Explorer and selects the active schedule template file. |
Click Exit to close the Assignments Editor and return to the main window.
If there are unsaved changes, you’ll be prompted to save before closing.
- Parent topic: Editors
- Next topic: Meeting Editor