Image filter - chung-leong/zigar GitHub Wiki
This example demonstrates how to use Zigar to apply a sepia filter on an image. It utilizes sample code written original for Adobe Flash that has been translated into Zig using pb2zig.
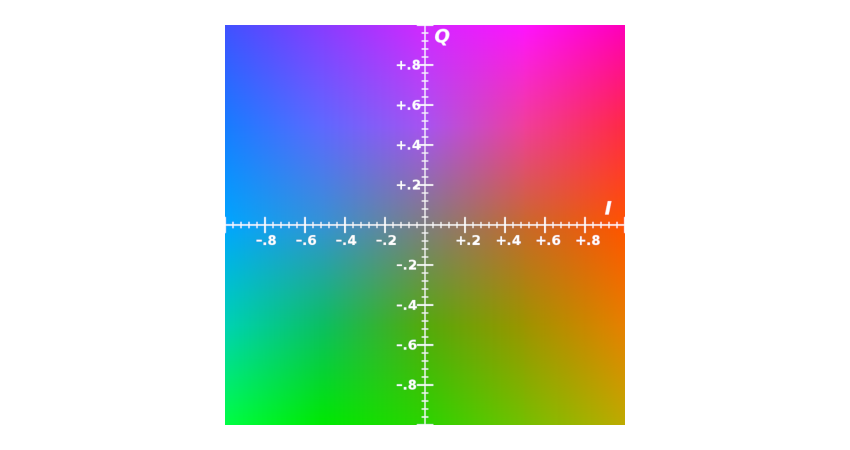
The working principle of the filter in question is quite simple. We transform each pixel of the image from RGB color space into YIQ, the color space used for NTSC broadcast. Acting like an old television set, we toss away the chromatic components (I and Q). Then we add a yellowish tint by assigning a specific value to I.

As you can see in the picture below depicting the YIQ color space at Y = 0.5, the I channel represents the reddish orange color:
The original Pixel Bender code can be found here. The key function is listed below:
    // evaluatePixel(): The function of the filter that actually does the
    //                  processing of the image.  This function is called once
    //                  for each pixel of the output image.
    void
    evaluatePixel()
    {
        // temporary variables to hold the colors.
        float4 rgbaColor;
        float4 yiqaColor;

        // The language implements matrices in column major order.  This means
        // that mathematically, the transform will look like the following:
        // |Y|   |0.299     0.587   0.114   0.0| |R|
        // |I| = |0.596     -0.275  -0.321  0.0| |G|
        // |Q|   |0.212     -0.523  0.311   0.0| |B|
        // |A|   |0.0       0.0     0.0     1.0| |A|
        float4x4 YIQMatrix = float4x4(
            0.299,  0.596,  0.212, 0.000,
            0.587, -0.275, -0.523, 0.000,
            0.114, -0.321,  0.311, 0.000,
            0.000,  0.000,  0.000, 1.000
        );

        // Similar to the above matrix, the matrix is in column order.  Thus,
        // the transform will look like the following:
        // |R|   |1.0   0.956   0.621   0.0| |Y|
        // |G| = |1.0   -0.272  -0.647  0.0| |I|
        // |B|   |1.0   -1.11   1.70    0.0| |Q|
        // |A|   |0.0   0.0     0.0     1.0| |A|
        float4x4 inverseYIQ = float4x4(
            1.0,    1.0,    1.0,    0.0,
            0.956, -0.272, -1.10,  0.0,
            0.621, -0.647,  1.70,   0.0,
            0.0,    0.0,    0.0,    1.0
        );

        // get the pixel value at our current location
        rgbaColor = sampleNearest(src, outCoord());

        yiqaColor = YIQMatrix * rgbaColor;

        // Here we set the I value of the YIQ color to the intensity
        // specified in the UI.  This is a good demonstration of how
        // to use swizzling to access vector elements.  The different
        // options are the following:
        //    rgba, xyzw, stuv  where:
        //    r, x, or s correspond to the first element
        //    g, y, or t correspond to the second element
        //    etc.
        yiqaColor.y = intensity;
        // zero out the Q to apply the sepia tone
        yiqaColor.z = 0.0;

        // convert back to RGBA and set the output value to the modified color.
        dst = inverseYIQ * yiqaColor;
    }
And here's the critical part in Zig:
        rgbaColor = src.sampleNearest(self.outCoord());
        yiqaColor = @"M * V"(YIQMatrix, rgbaColor);
        yiqaColor[1] = intensity;
        yiqaColor[2] = 0.0;
        self.dst = @"M * V"(inverseYIQ, yiqaColor);
This example is available for multiple JavaScript ecosystems. Choose the one you're interested in: