Setup - ncbi/workshop-asm-ngs-2022 GitHub Wiki
A few basic things need to be set up before we can get to the actual work. In the interests of time and speed we have setup a You'll need to create and start a VM based on a snapshot we provide that has a lot of bioinformatics software pre-installed. As you know getting bioinformatics software installed is often a time-consuming task that we have done for you.
You will need a Google account to run this workshop. If you have a google account you want to use for this workshop you can skip this step.
If you don't have a Google account you can create one at https://account.google.com by clicking on the Create account link. You'll have to go through several screens following the instructions to create the account.
Once you have an account you should be able to go to
https://console.cloud.google.com/getting-started
That's all you need to start Introductory Exercises, Project_A, and Project 1. Continue below to setup a VM for Project 2 and Project 3.
Go to Compute Engine->Virtual Machines -> VM Instances

Use the name "asm-ngs-$USER" with $USER replaced with your username

Set Region to "us-cental1 (Iowa)" and Zone to "us-cental1a"

In Machine Configuration, set to "e2-standard-8"

Change the standard Boot Disk by clicking on the Change button

Select Operating System Ubuntu, then select Ubuntu 20.04 amd64 focal image

Increase the size of the disk to 100 GB and click SELECT

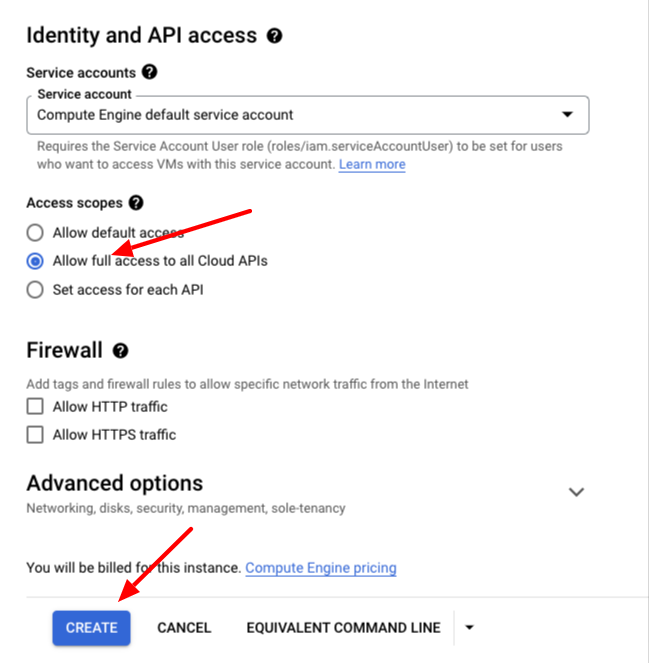
Set allow full Access to all Cloud APIs and allow HTTPs traffic and then hit the Create button at the bottom
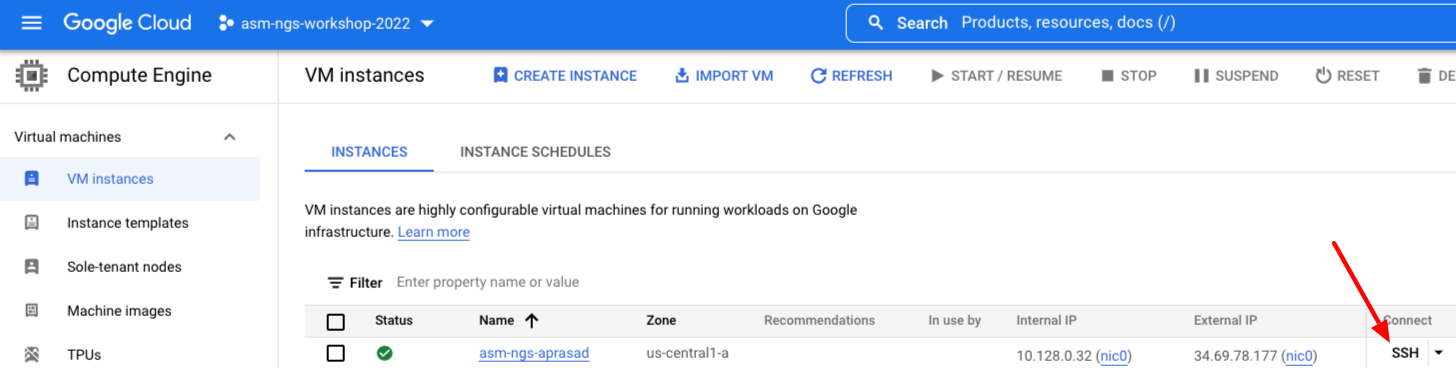
It will take a few minutes to create the new VM. Once it is running click the SSH button to the right of the VM list.
It may take a few moments to make the connection, transfer SSH keys, etc. You can just close the "Please consider adding..." dialog box if it appears.
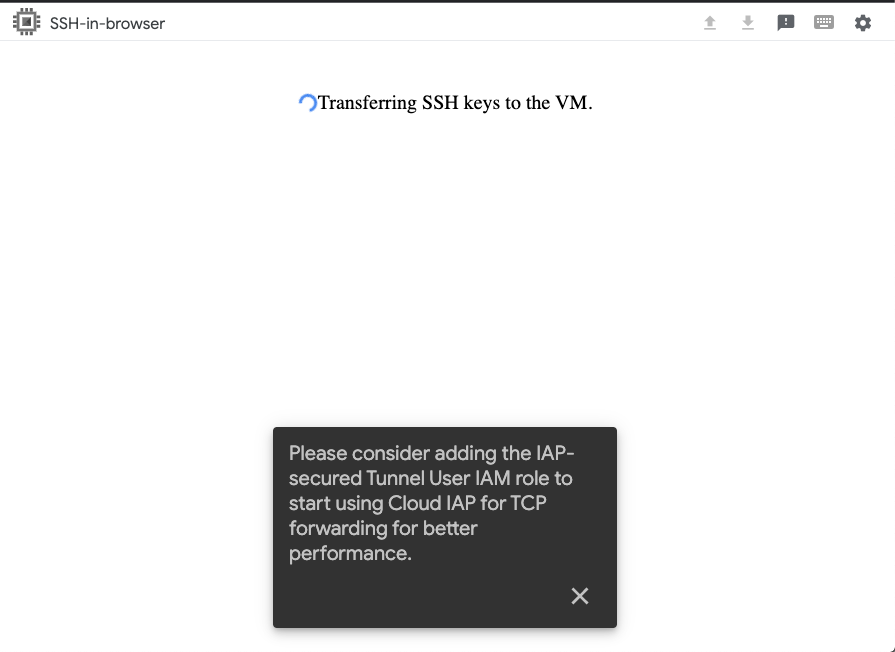
If you successfully login you should be in the terminal and able to type commands in

To use google cloud utilities you will need to give permissions to the google cloud tools access to your account. The following command gives the VM full access. We're doing this for simplicity in this workshop; you may want to grant more limited permissions you grant for your own work.
Paste in the following command and follow the instructions.
gcloud auth loginNote you will have to accept some scary warnings and copy and paste a string back into the ssh window.

sudo apt-get update
sudo apt-get -y install git unzip parallelsudo apt-get -y install build-essentialhttps://github.com/amkozlov/raxml-ng/wiki
mkdir -p src/raxml
cd src/raxml
wget https://github.com/amkozlov/raxml-ng/releases/download/1.1.0/raxml-ng_v1.1.0_linux_x86_64.zip
unzip raxml-ng_v1.1.0_linux_x86_64.zip
sudo cp raxml-ng /usr/local/binhttps://bioinf.shenwei.me/seqkit/
mkdir ~/src/seqkit
pushd ~/src/seqkit
wget https://github.com/shenwei356/seqkit/releases/download/v2.3.0/seqkit_linux_amd64.tar.gz
tar xvfz seqkit_linux_amd64.tar.gz
sudo cp seqkit /usr/local/binpushd ~/src
wget https://github.com/rcedgar/muscle/releases/download/v5.1/muscle5.1.linux_intel64
chmod 755 muscle5.1.linux_intel64
sudo mv muscle5.1.linux_intel64 /usr/local/bin
pushd /usr/local/bin
sudo ln -s muscle5.1.linux_intel64 muscle
popdsudo apt-get install -y cmake libcurl4-openssl-dev curl zlib1g
cd ~/src
git clone https://github.com/veg/hyphy.git
cd hyphy
cmake .
make -j MP
sudo make installcat <<END >> ~/.bashrc
export HISTCONTROL=ignoredups
alias ll='ls -ltrF'
export PATH=$PATH:/snap/bin:/usr/local/bin
# set PATH so it includes user's private bin if it exists
if [ -d "$HOME/bin" ] ; then
PATH="$HOME/bin:$PATH"
fi
# set PATH so it includes user's private bin if it exists
if [ -d "$HOME/.local/bin" ] ; then
PATH="$HOME/.local/bin:$PATH"
fi
END
. ~/.bashrc