Manage Discard Category - hmislk/hmis GitHub Wiki
Note: As of July 2026, this admin screen and its "Discard Category" field are labeled "Issue Category" in the UI (the underlying "Discard" feature was renamed to "Issue" — see Pharmacy Issue). The page URL and privilege name are unchanged. This guide uses the current on-screen label.
Managing Issue Categories (Pharmacy Metadata)
Issue Categories are one of several Pharmaceutical Fundamentals metadata lists (alongside Dosage Forms, ATC Classification, Units, and Adjustment Categories) that pharmacy administrators maintain from the same "Pharmacy Administration" screen. This page covers Issue Categories specifically; the other lists on that screen follow the same Add / Save / Delete pattern.
An Issue Category classifies why stock is being issued out of a department for internal consumption/disposal (e.g. Expired, Damaged, Quality Rejection) — see Discard Categories for example category names. It is selected on the Issue Category field of the Pharmacy Issue bill.
Full Navigation Path
- Log in and select your department.
- Click the Pharmacy icon/menu in the top navigation bar.
- Click Administration in the top menu bar.
- On the Pharmacy Administration page, in the left-hand accordion, open the Pharmaceutical Fundamentals tab (it is open by default).
- Click the Issue Categories button.
The Issue Category list and editor load in the right-hand panel:
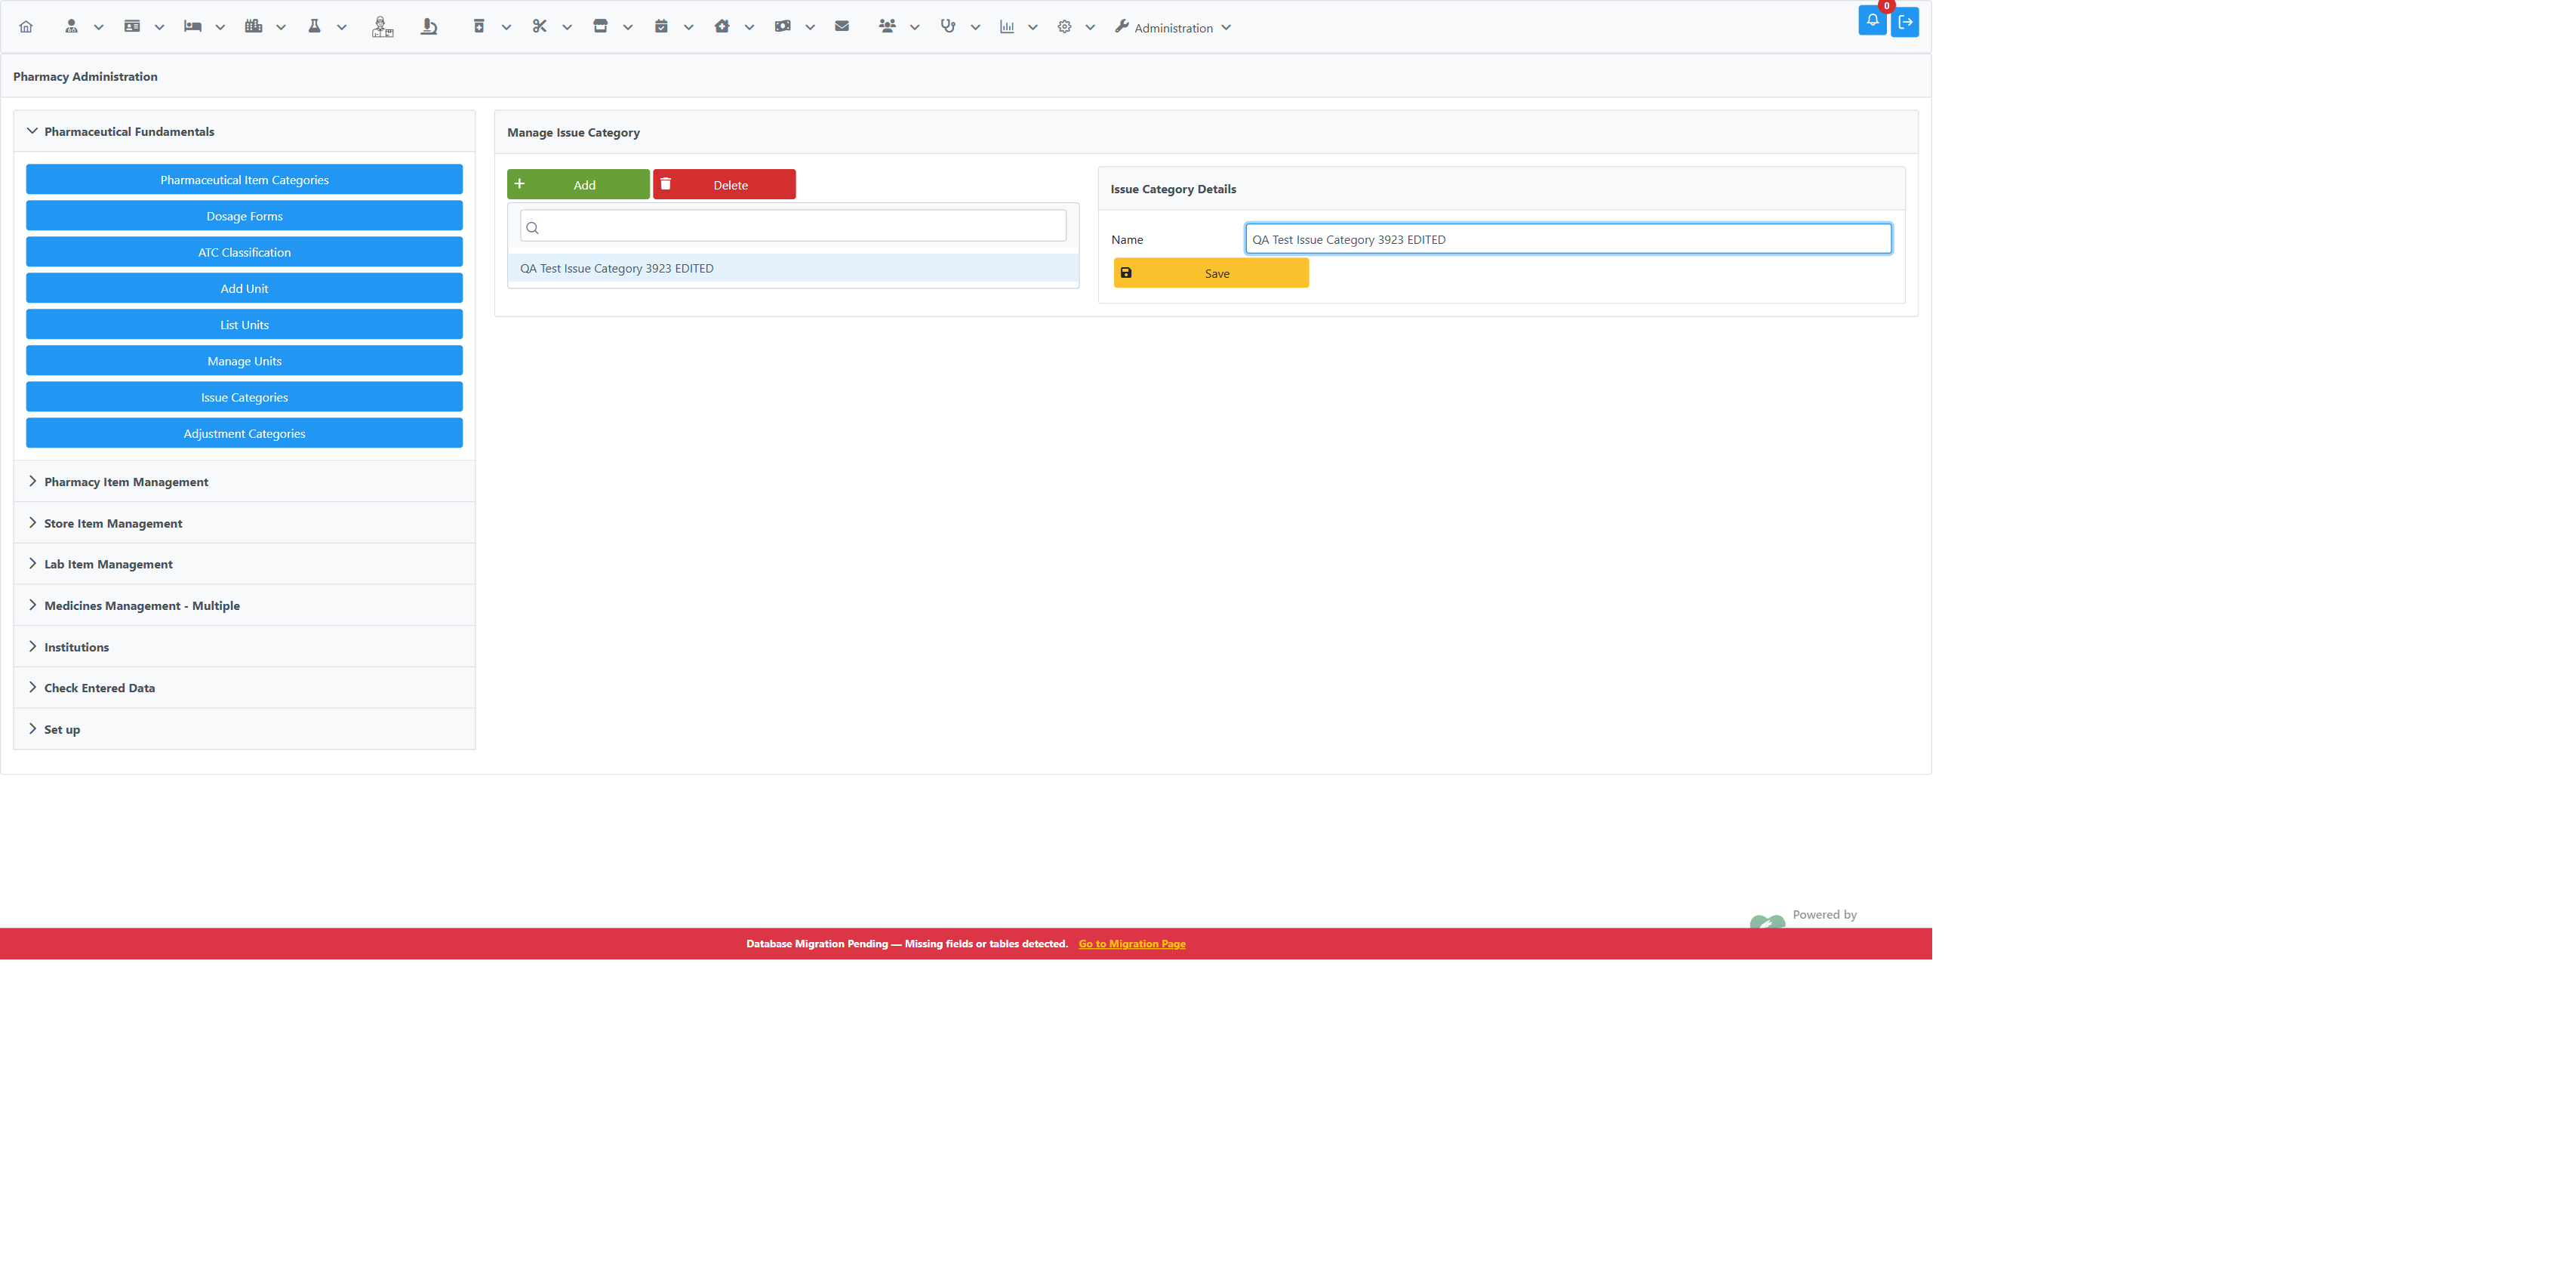
Required Privilege
Pharmacy Issue Category Manage (internal privilege key: PharmacyDiscardCategoryManage, unchanged for backward compatibility). Without it, the panel shows "You are NOT authorized" and the Issue Categories button itself is hidden from the accordion.
Adding a New Issue Category
- Click the green + Add button (top-left of the list). This clears the Name field on the right for a new entry.
- Type the category name into the Name field.
- Click Save.
A "Saved Successfully" message confirms the new category now appears in the list on the left.
Editing an Existing Issue Category
- Select the category from the list on the left (or type into the Filter box above it to narrow a long list).
- Its name loads into the Name field on the right.
- Change the name.
- Click Save.
An "Updated Successfully" message confirms the change. This updates the existing record in place — it does not create a duplicate.
Deleting (Retiring) an Issue Category
- Select the category from the list on the left.
- Click the red Delete button.
- Confirm the prompt.
Deleting retires the category (soft delete) rather than permanently erasing it — historical Issue bills that already reference it keep showing the name correctly.