Guide to exporting traces - galizia-lab/pyview GitHub Wiki
This page provides a step by step procedure for exporting ROI traces (here called "GloDataMixes") for a list of animals.
Pre-requirements
- Organization of raw datasets in the recommended folder structure(guide)
- Creation of measurement lists for each dataset (guide)
- Creation of a YML file for the project (guide)
- Saving ROI files, either one per animal or one per measurement
Step 1:
Load the measurements of your animal of interest into VIEW and then into ILTIS. Look at your responses in detail and create ROIs and save them using the menu "VIEW-Related". Note that you can save one set of ROIs for all measurements of an animal, or different ROIs for different measurements.
Step 2:
A templated script for exporting traces is available at "VIEWTemplates/export_traces_template.py" of the repository. Copy/download this template to your "Progs" folder (see here for more info) and rename it to remove the "template" part of it's filename. Note that the template file is available as part of the source code you have downloaded while installing/updating.
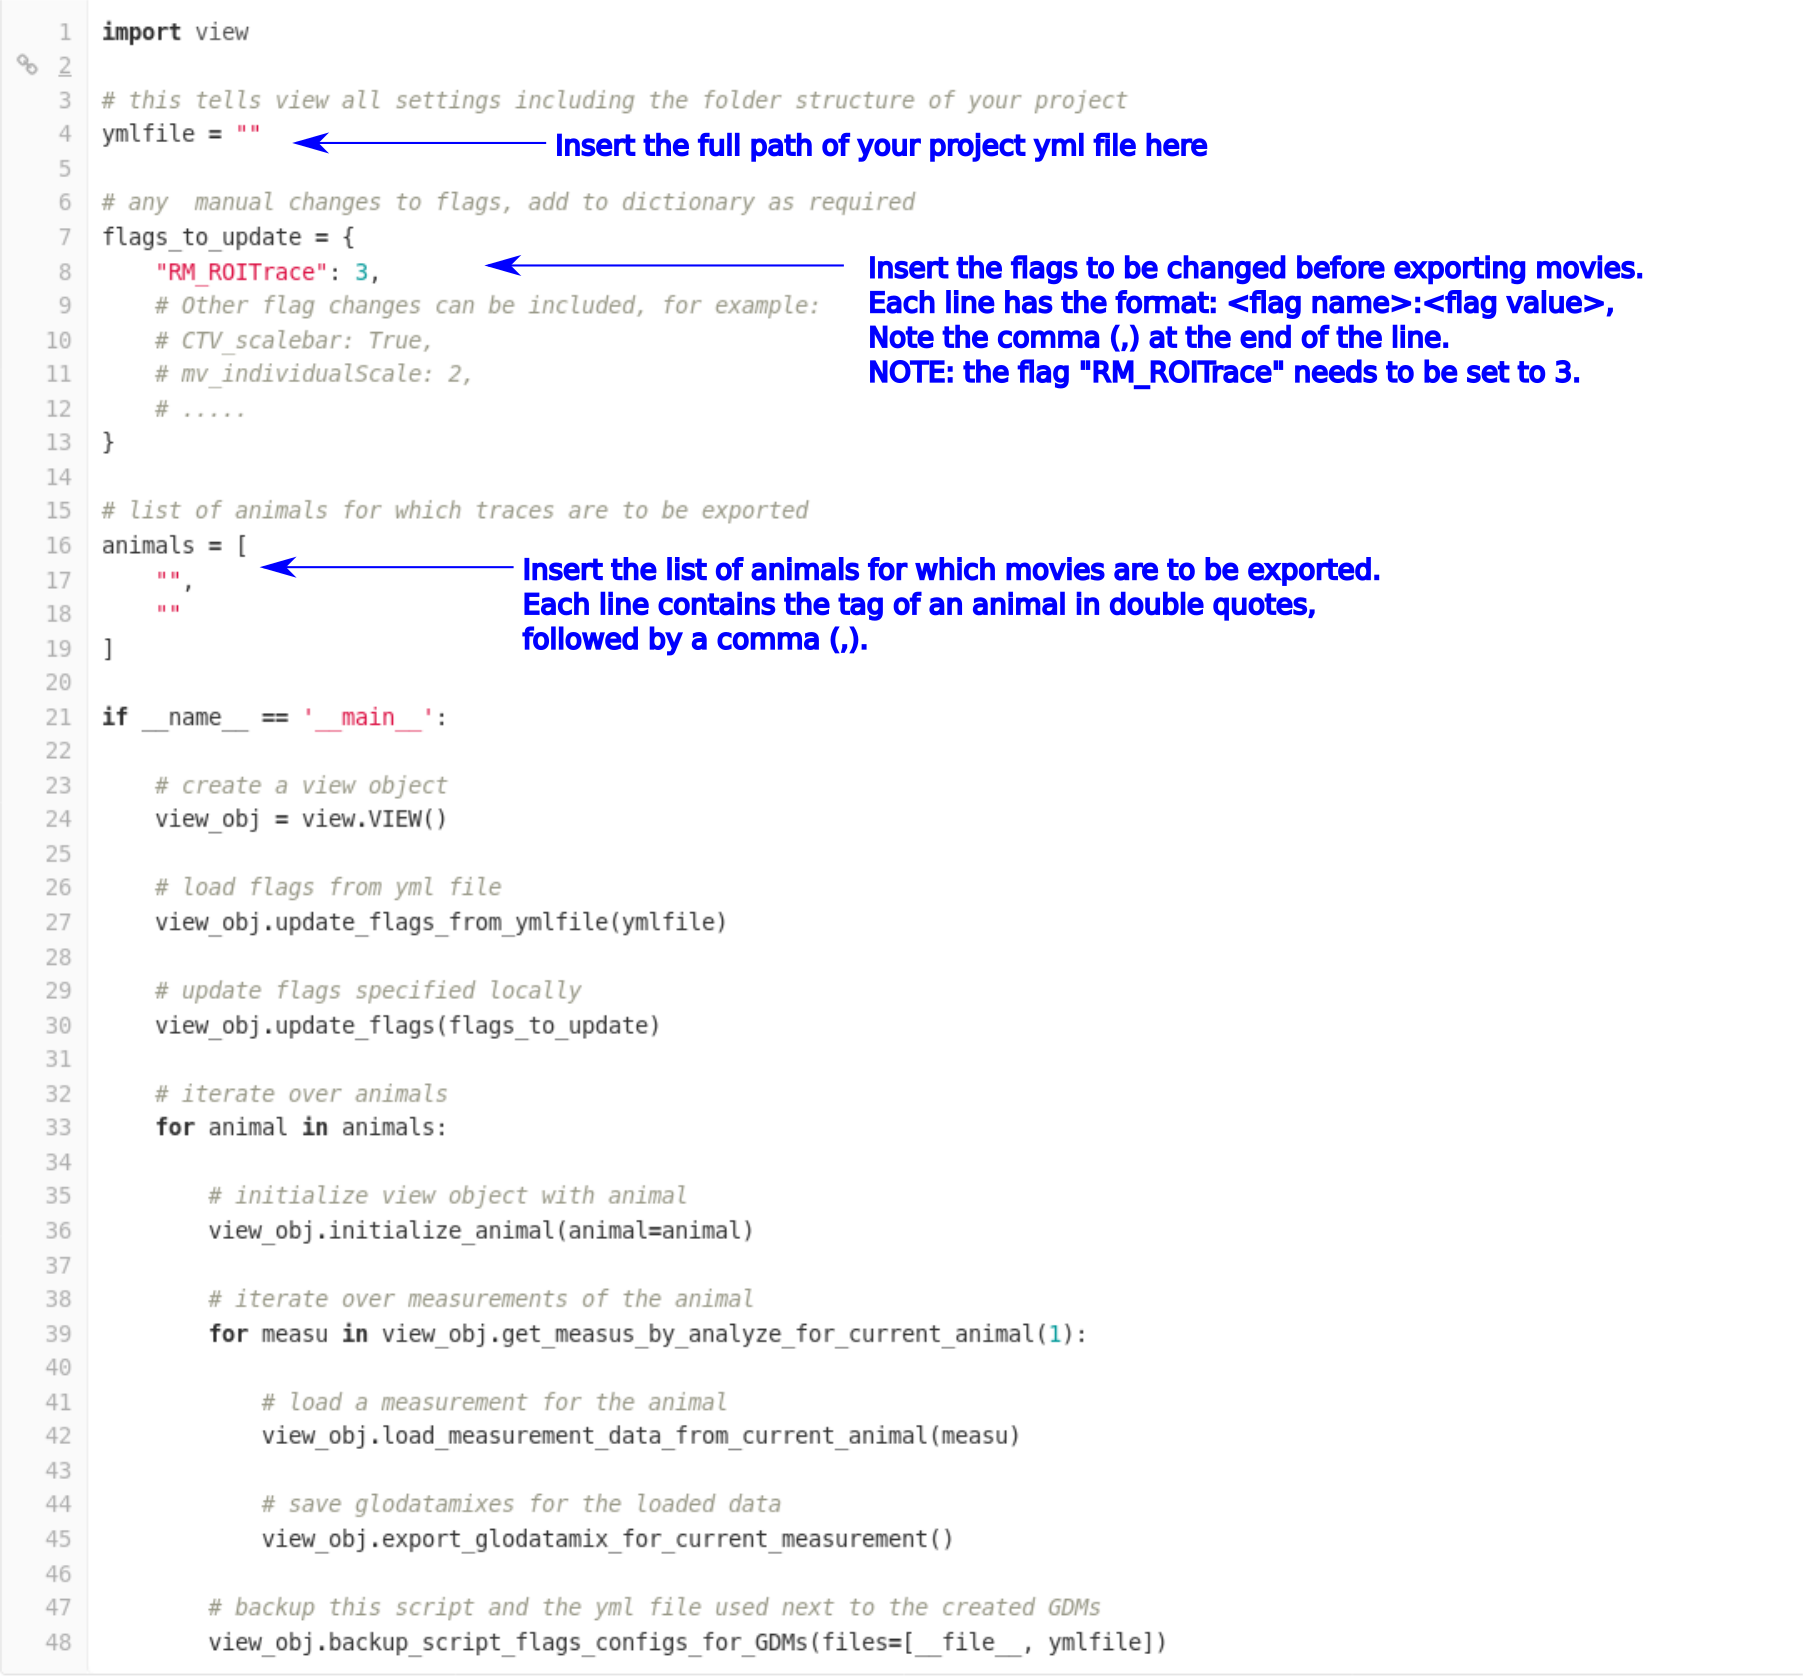
Step 3:
Open the file in a text editor and edit it as indicated:
Step 3:
Open a terminal/Powershell.
Step 4:
Activate the environment created during installation, for example using conda activate <environment name> or pipenv shell
Step 5:
Run the script. You can drag and drop the script from your file exporer to the terminal/powershell to get its full path.
python <full path of the script>
Step 6:
One or more CSV files will be created in your output folder according to this folder structure. Have a look!
Some useful info about CSV files:
- All columns to the right of the column with header "PlaceHolder" are traces values, one frame per column
- All columns to the left of the column with header "PlaceHolder" are metadata values. Please see this file for the description of metadata.