Sonarr Setup Guide - ajgillis04/GillisDockerDepot GitHub Wiki
Sonarr is a TV collection manager for Usenet and BitTorrent users. It can monitor multiple RSS feeds for new movies and will automatically grab, sort, and rename them.
Before setting up Sonarr, consider deploying the following containers first to simplify integration and avoid jumping between configuration steps:
- Sabnzbd (for Usenet downloading)
- Profilarr (For Sonarr / Radarr to customize media profiles)
- Prowlarr (for indexer / torrent searching)
- Transmission-openvpn (for Torrent downloading)
- Bazarr (if handling subtitles)
- Plex
These services work closely with Sonarr, and having them set up beforehand streamlines the process.
💡 Highly Recommended: Use a VPN
When downloading torrents, your IP address is exposed to the public, making you vulnerable to tracking, data collection, and potential legal issues. Using a VPN ensures your internet traffic is encrypted and anonymized, protecting your identity and preventing unwanted scrutiny. Setting up Transmission-OpenVPN provides an extra layer of security, keeping your torrenting activities private and secure.
- Docker installed
- Sonarr container running in your Docker stack
When rebuilding your NAS, ensure permissions for media directories are reset to match the account specified in your PUID and PGID environment variables. This ensures proper access for all services.
Use the following commands (replace /path/to/your/media with your media directory path):
sudo chown -R <PUID>:<PGID> /path/to/your/Media
sudo chmod -R 770 /path/to/your/Media
sudo chown -R <PUID>:<PGID> /path/to/your/Downloads
sudo chmod -R 770 /path/to/your/Downloads
- Open your browser and navigate to
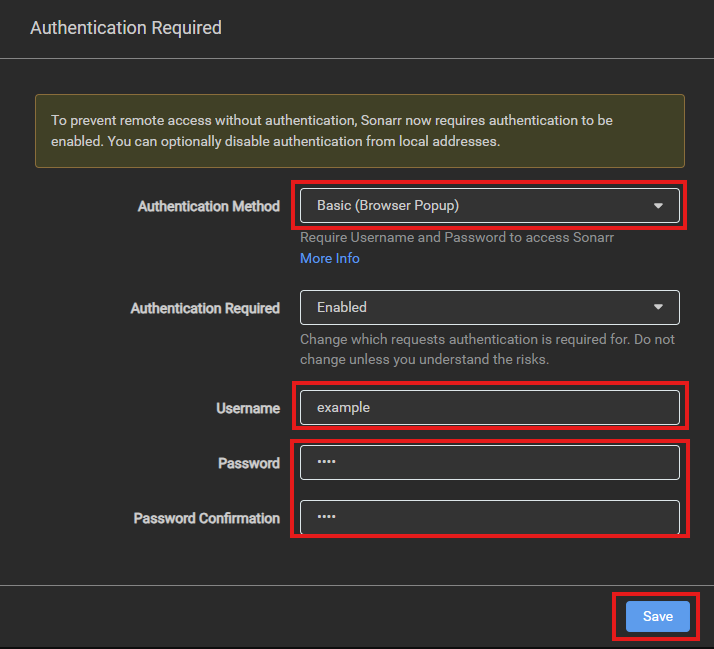
http://<your-ip-address>:8989. - Upon first logon you will be asked to setup Authentication
**
⚠️ Hint: You can disable Authentication, I would only recommend if you are using some other authentication method. edit config.xml and replace<AuthenticationMethod>Basic</AuthenticationMethod>with<AuthenticationMethod>External</AuthenticationMethod>
- Set Authentication Method
Basic - Username
<Choose a username> - Password
<Choose a password> - Save
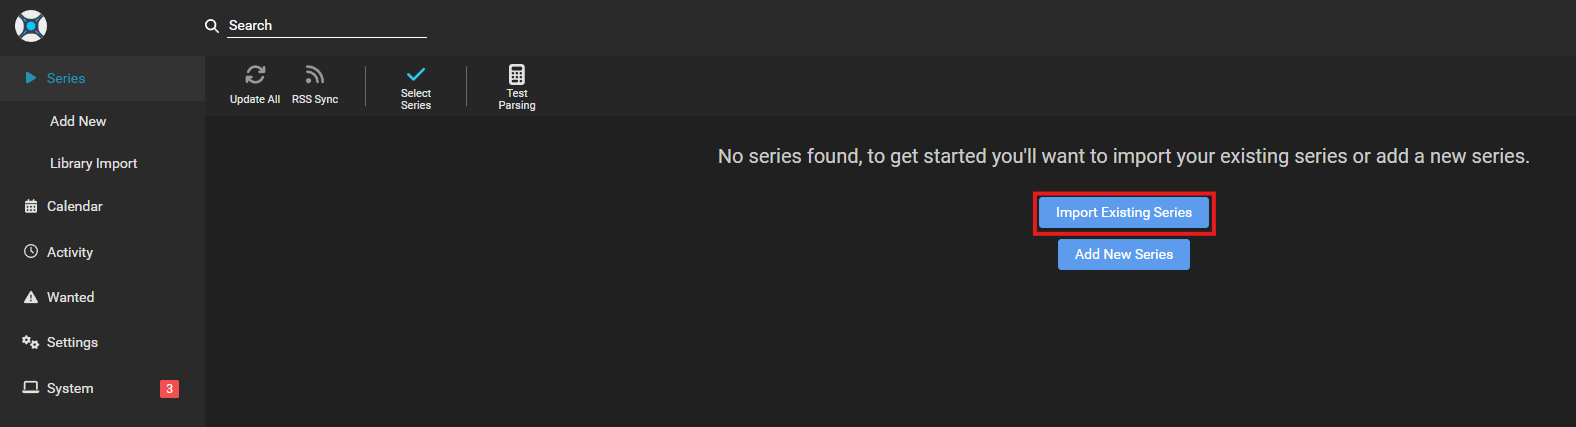
- Sonarr will open to the Series page and you need to select
Import Existing Seriesclick on it - Select Start Import
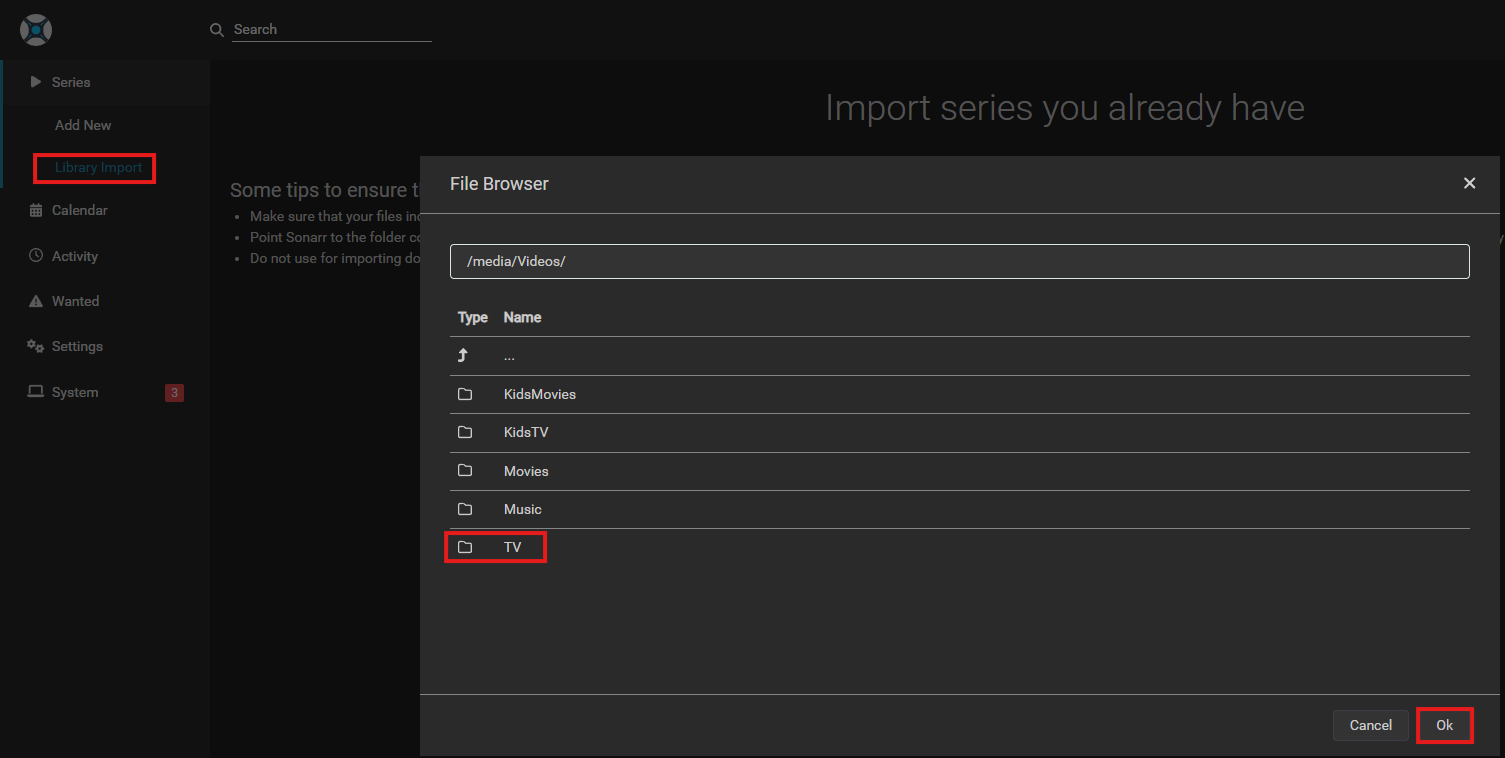
- Click
Add Root Folderand select the directory where your movie files are stored. - Click
Save.
- You will be redirected to the Series Import page and the Series you have locally will begin to match to Series from TVDB
- Once all the series are matched you can change the Monitor status, Qualify Profile, etc from the drop down menus
- Select
Import x Series
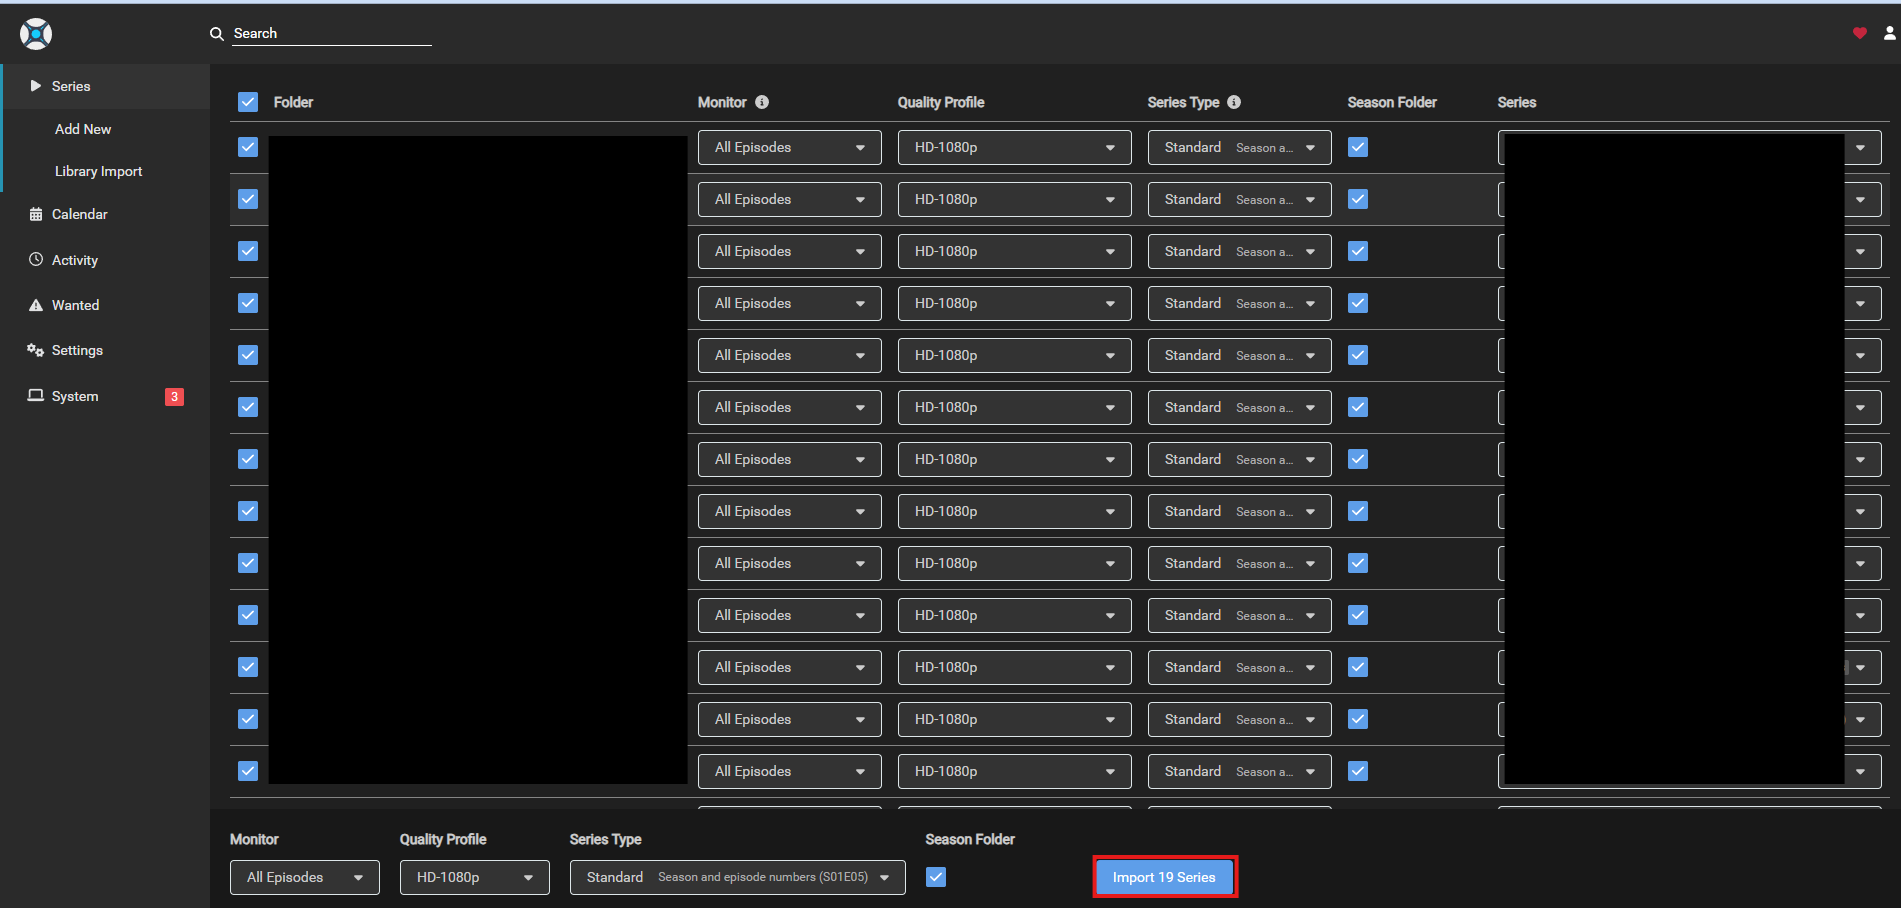
- It will take a few minutes to import. If a movies fails to match you will be returned to the import screen. Match the movie manually.
- Go to
Media Management, Make sureShow Advancedis turned on - Enable
Rename Episodes - Change Anime Episode Format to
{Series Title} - S{season:00}E{episode:00} - {absolute:000} - {Episode Title} ({Quality Full}) {MediaInfo AudioLanguages}
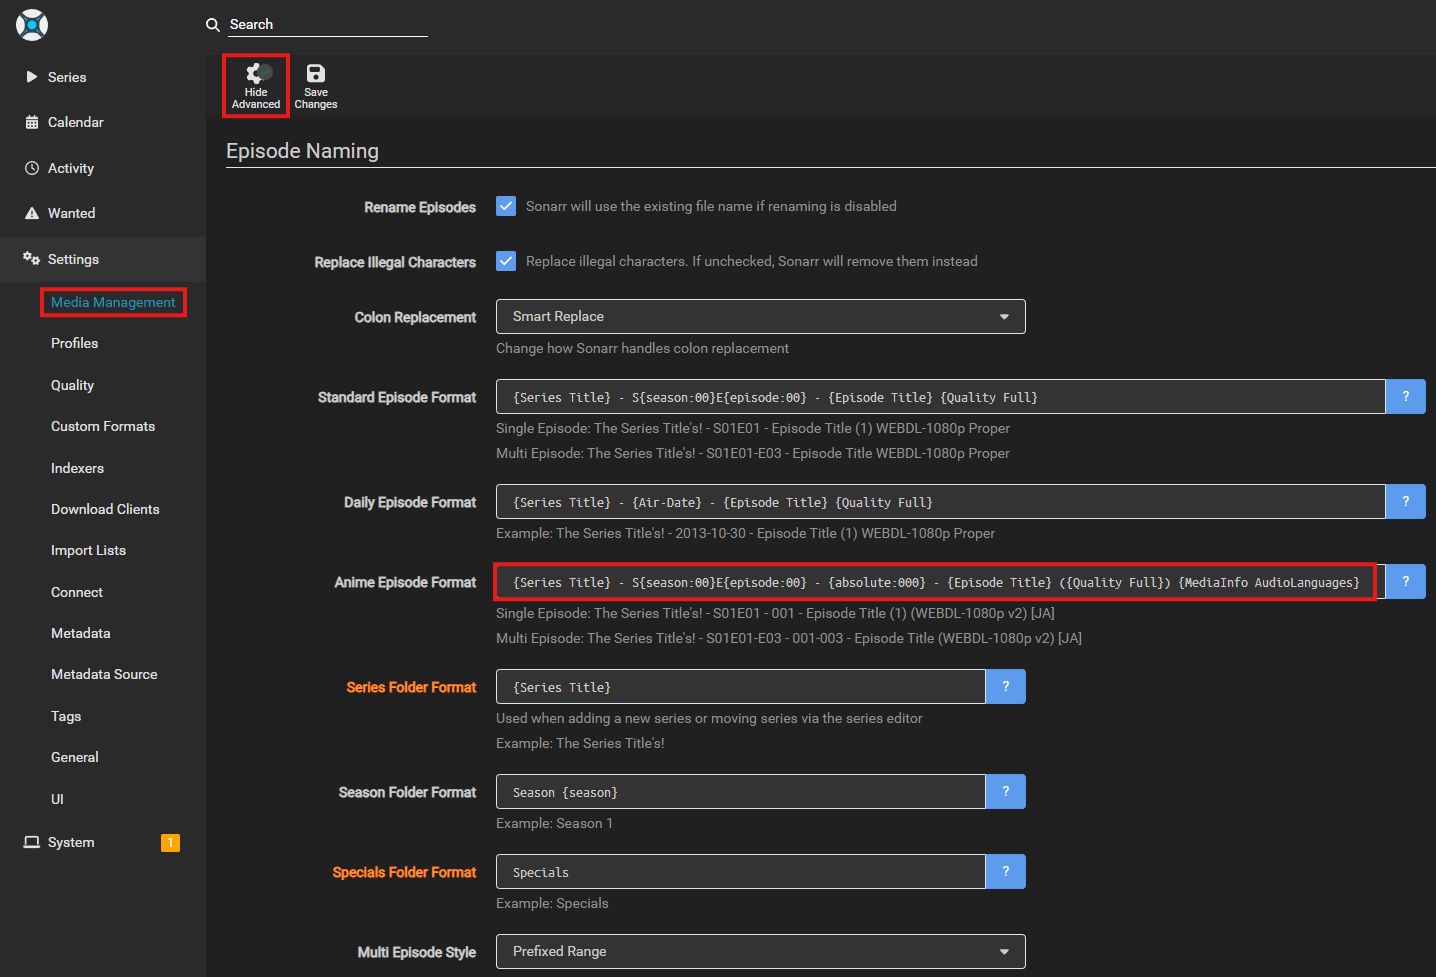
- Enable
Import Extra Files, and leavesrtin the Import Extra Files
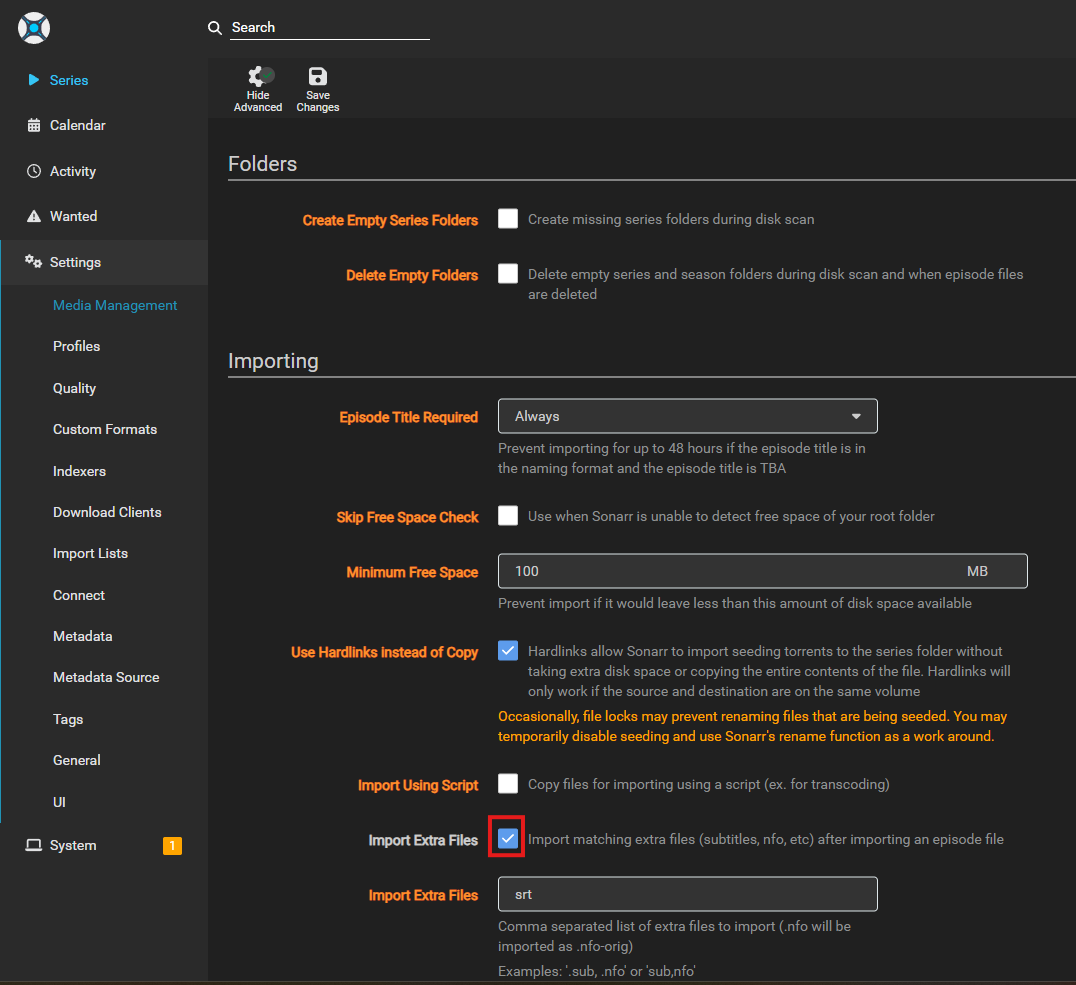
- Leave the other settings to defaults
- You can leave all these to defaults. I used to set
Maxto 75% to force smaller file sizes but have since moved to using Profilarr with quality profiles which seems to be doing a good balance of file size vs quality. - Optional, I do still set the Preferred to around 50%
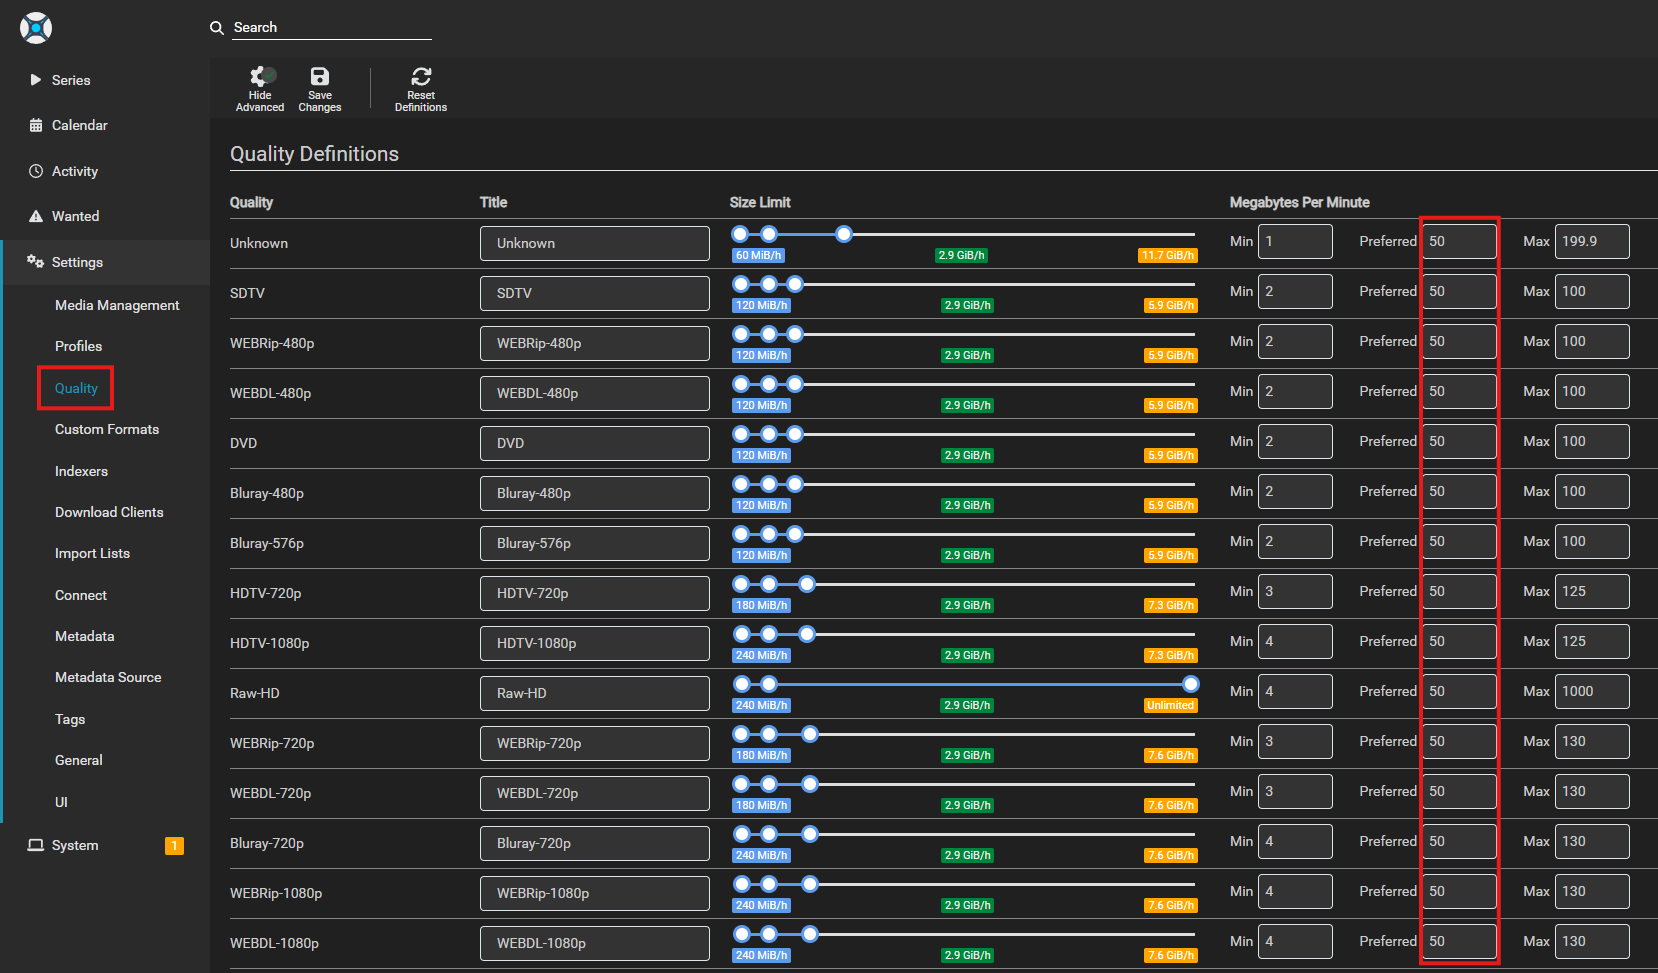
- I leave this defaults
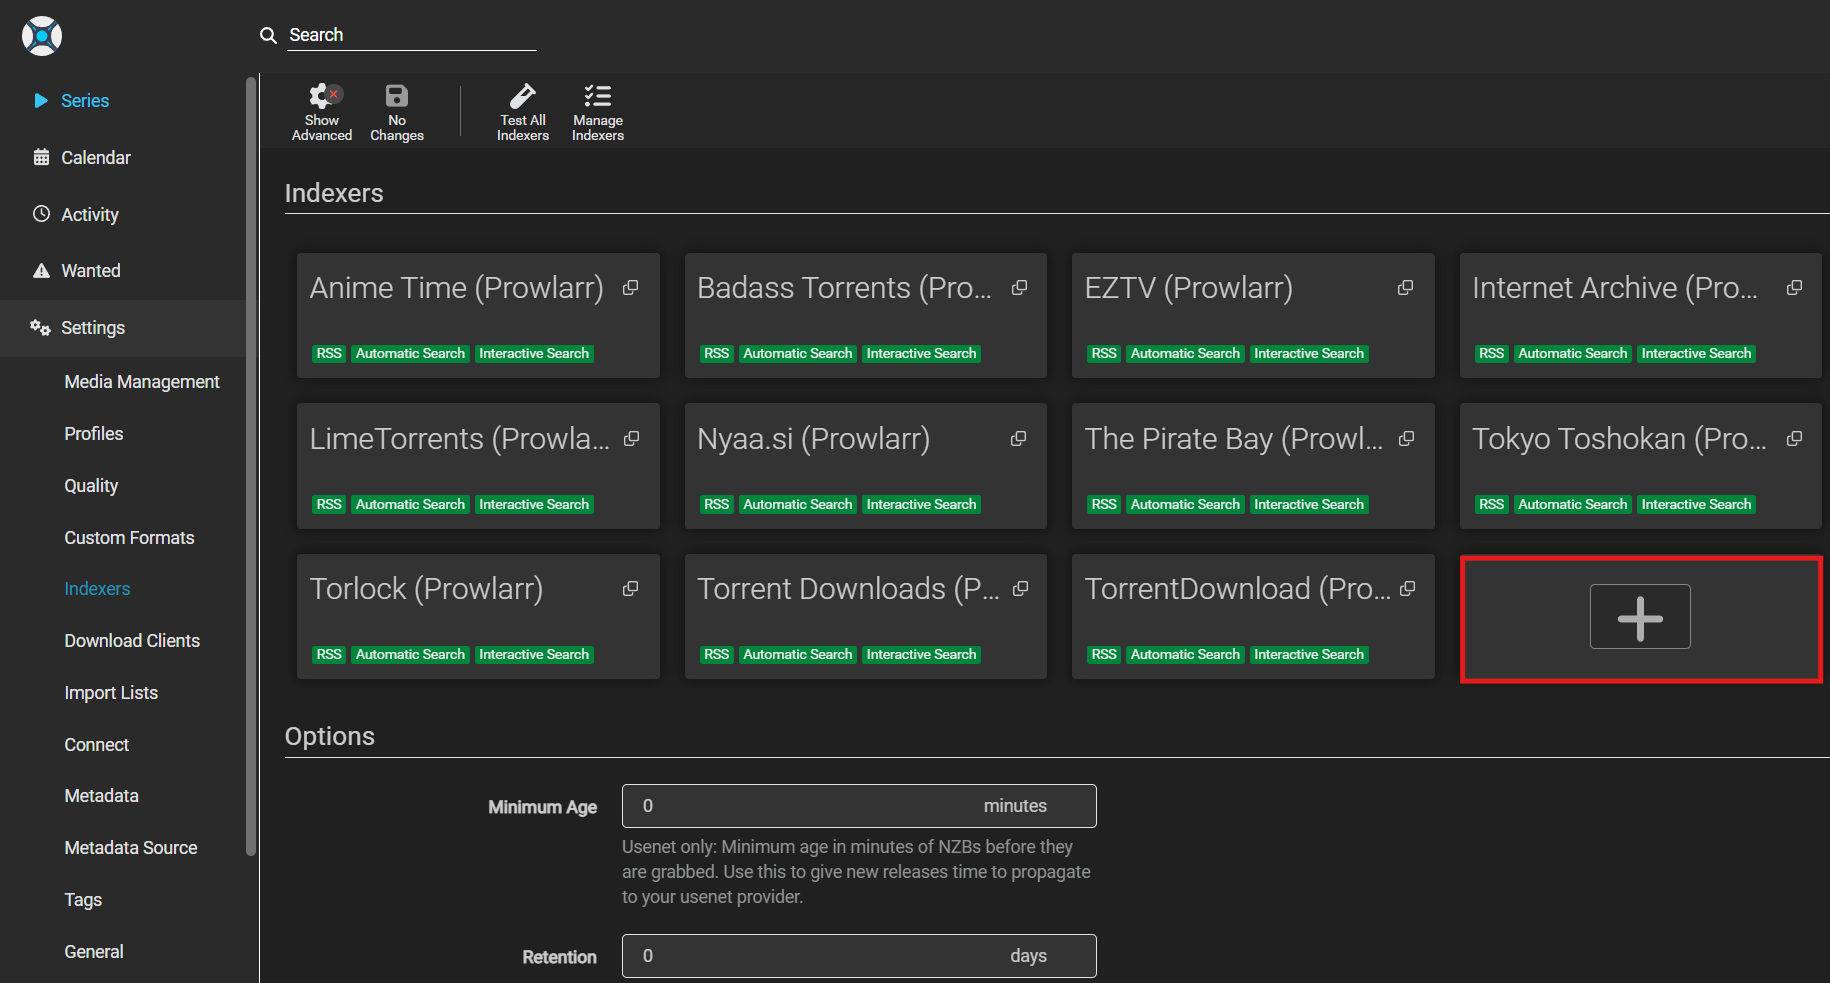
- Go to the
Settingstab. - Navigate to the
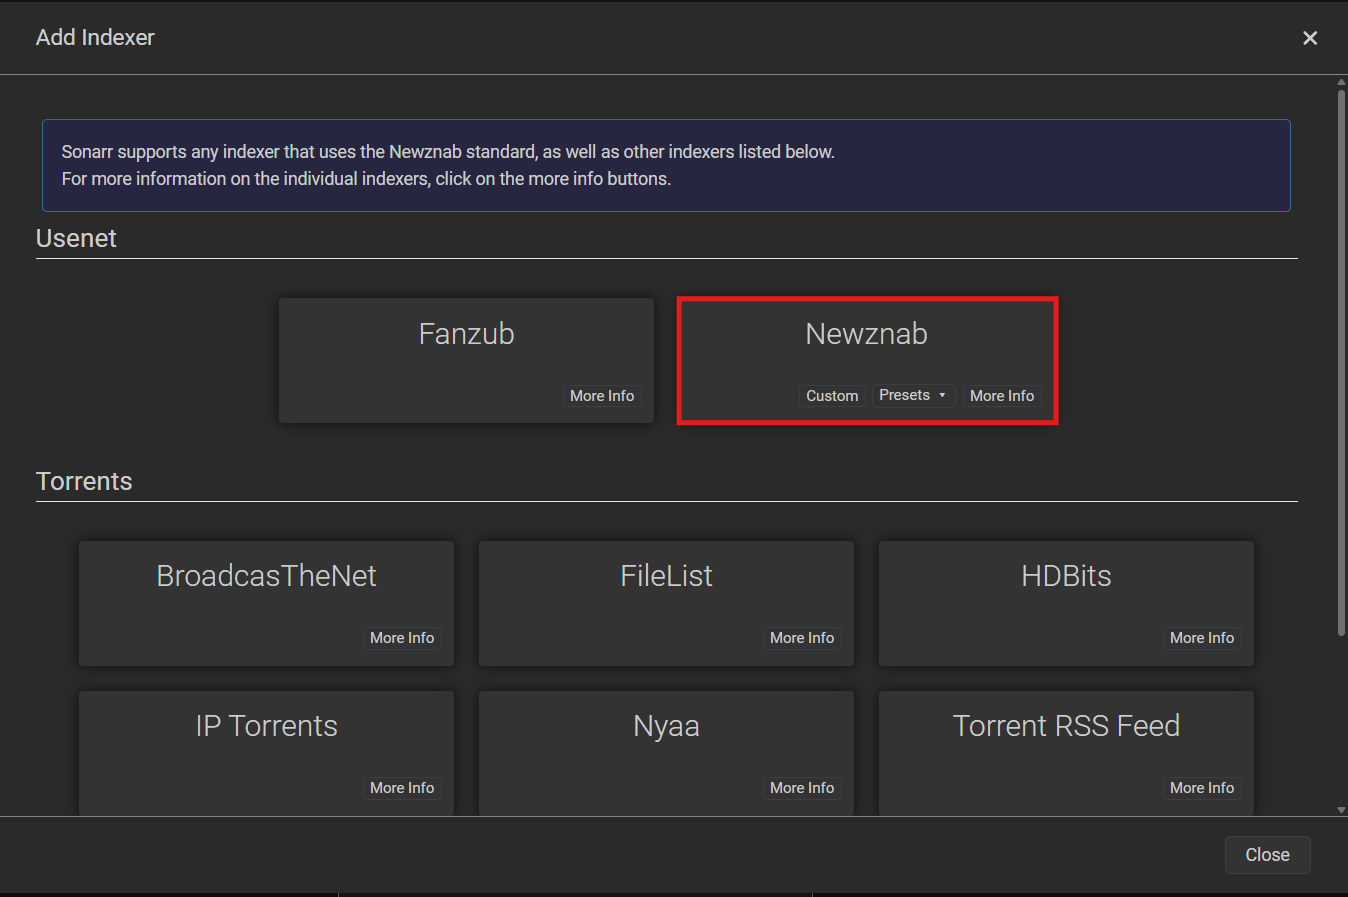
Indexerssection. There are two types: Torrents and Usenet.
⚠️ Hint: If you followed the recommended Pre-Setup steps, the Indexers for Torrents will already be populated. You can add Usenet indexers here if desired.
-
Click
Add Indexerand select your preferred indexers. -
Enter the necessary API keys or login credentials for each indexer.
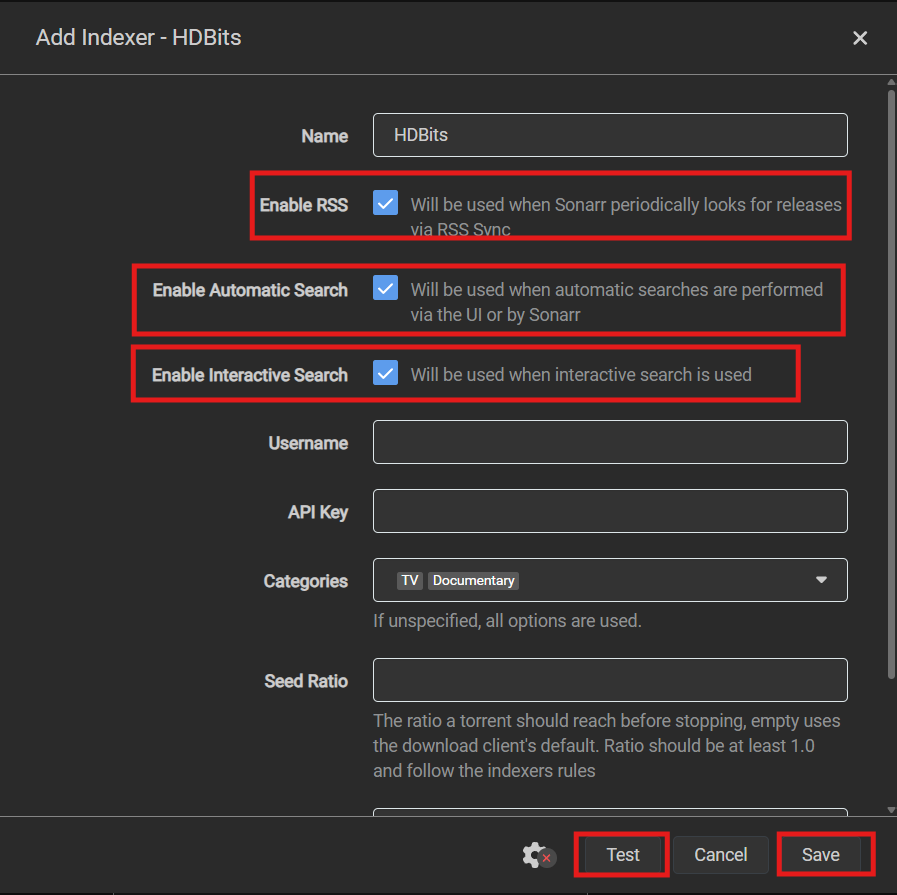
Torrent Indexer Settings:
- Name: Enter any friendly name—it doesn’t affect functionality.
- Enable RSS: Checked – This allows the indexer to fetch new releases automatically.
- Enable Automatic Search: Checked – Ensures the indexer can automatically search for missing content.
- Enable Interactive Search: Checked – Allows manual searches through the interface when needed.
- URL: – Use the public URL of the indexer.
-
API Key:
<KEY>– If an API is required enter the API Key provided by the indexer. This is essential for authentication. -
Categories:
SD HD– Specify the categories to filter the content you want (e.g., SD, HD).
Usenet: - Name: Enter any friendly name—this won’t impact functionality.
- Enable RSS: Checked – Allows the indexer to fetch new releases automatically without requiring manual searches.
- Enable Automatic Search: Checked – Ensures missing content is searched for and added automatically.
- Enable Interactive Search: Checked – Provides a manual search option within the interface when needed.
-
URL:
<Usenet URL>– Use the public URL provided by your chosen Usenet indexer. -
API Key:
<KEY>– Some Usenet indexers require an API Key for authentication—enter it here if applicable. -
Categories:
SD HD– Define which categories the indexer should retrieve, such as Standard Definition (SD) or High Definition (HD).
Optional Settings for Anime Content
If you’re including anime-specific content in your searches:-
Anime Categories:
Anime– Filters results specifically for anime-related content. - Anime Standard Format Search: Checked – Ensures compatibility with common anime naming conventions, improving search accuracy.
💡 Tip: Unlike torrents, Usenet downloads are encrypted, meaning they’re inherently safer. However, using SSL connections and ensuring your provider doesn’t log searches enhances privacy and security.
- Select
Testand if it is successfulSaverepeat as many times as needed. It is a good idea to add multiple torrent sites.
Torrents
Usenet

Setting up a download client allows Prowlarr to automatically send requests to the appropriate service for handling downloads.
-
Navigate to the
Settingstab. -
Go to the
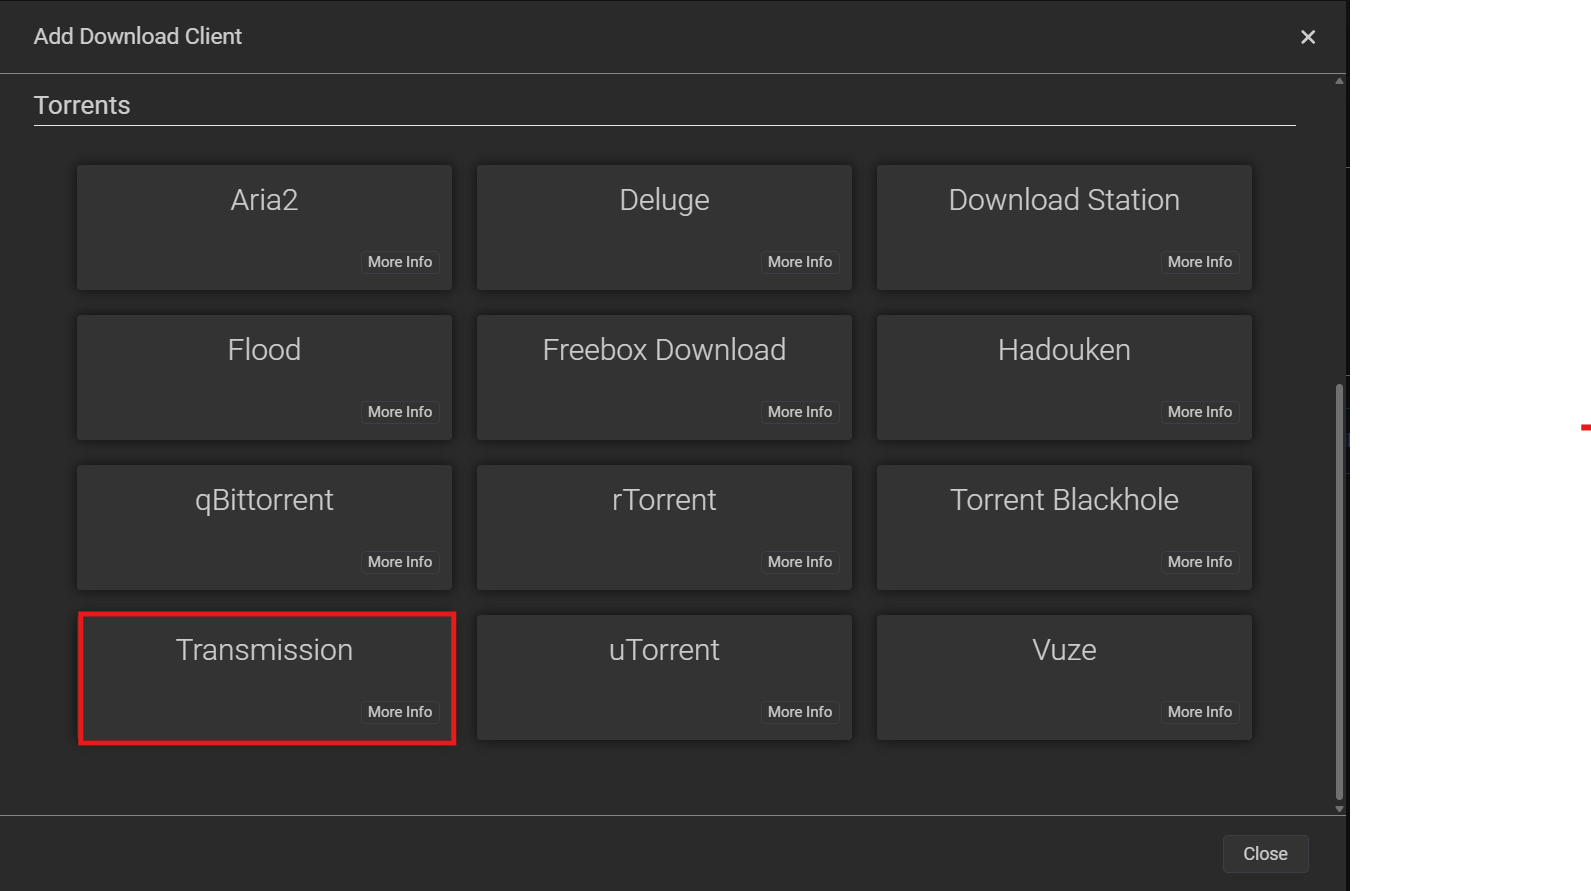
Download Clientssection. -
Click
Add Clientand select your preferred download client (e.g., SABnzbd, Transmission, qBittorrent, NZBGet). -
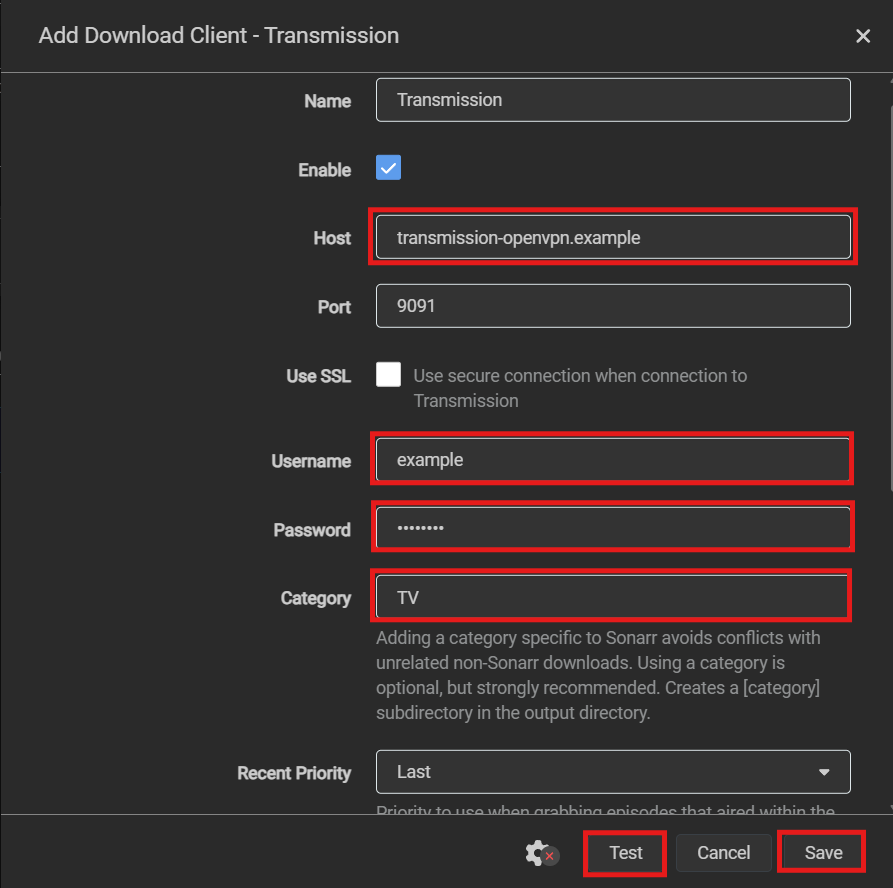
Enter the necessary connection details:
- Name: Enter a friendly name—this can be anything, but it helps with organization.
- Enable: ✅ Checked – Ensures the client is active and receiving requests.
-
Host:
<Host Name>– The address of the client (e.g.,localhost,transmission-openvpn.example,<Host IP><Container IP>). -
Port:
<Port Number>– Default values depend on the client:- Transmission:
9091 - qBittorrent:
8080 - Deluge:
8112 - Custom: (Check your client’s settings)
- Transmission:
-
Username:
<Username>– If authentication is required, enter your credentials. -
Password:
<Password>– Use the password for your download client if applicable. -
Categories:
TV,Movies,Music– Define categories to filter content and ensure proper sorting.
- Name: Enter a friendly name for organizational purposes.
- Enable: ✅ Checked – Ensures the client is actively processing Usenet downloads.
-
Host:
<Host Name>– The address of your Usenet client (e.g.,localhost,sabnzbd.example,<Host IP>). -
Port:
<Port Number>– Default ports:- SABnzbd:
8080 - NZBGet:
6789 - Custom: (Check your client’s settings)
- SABnzbd:
-
API Key:
<KEY>– Copy the API Key from your Usenet client's settings (Settings > General > API Key). -
Categories:
Movies,TV Shows,Music– Define categories for better organization.
-
Click
Save.
Torrents

Usenet
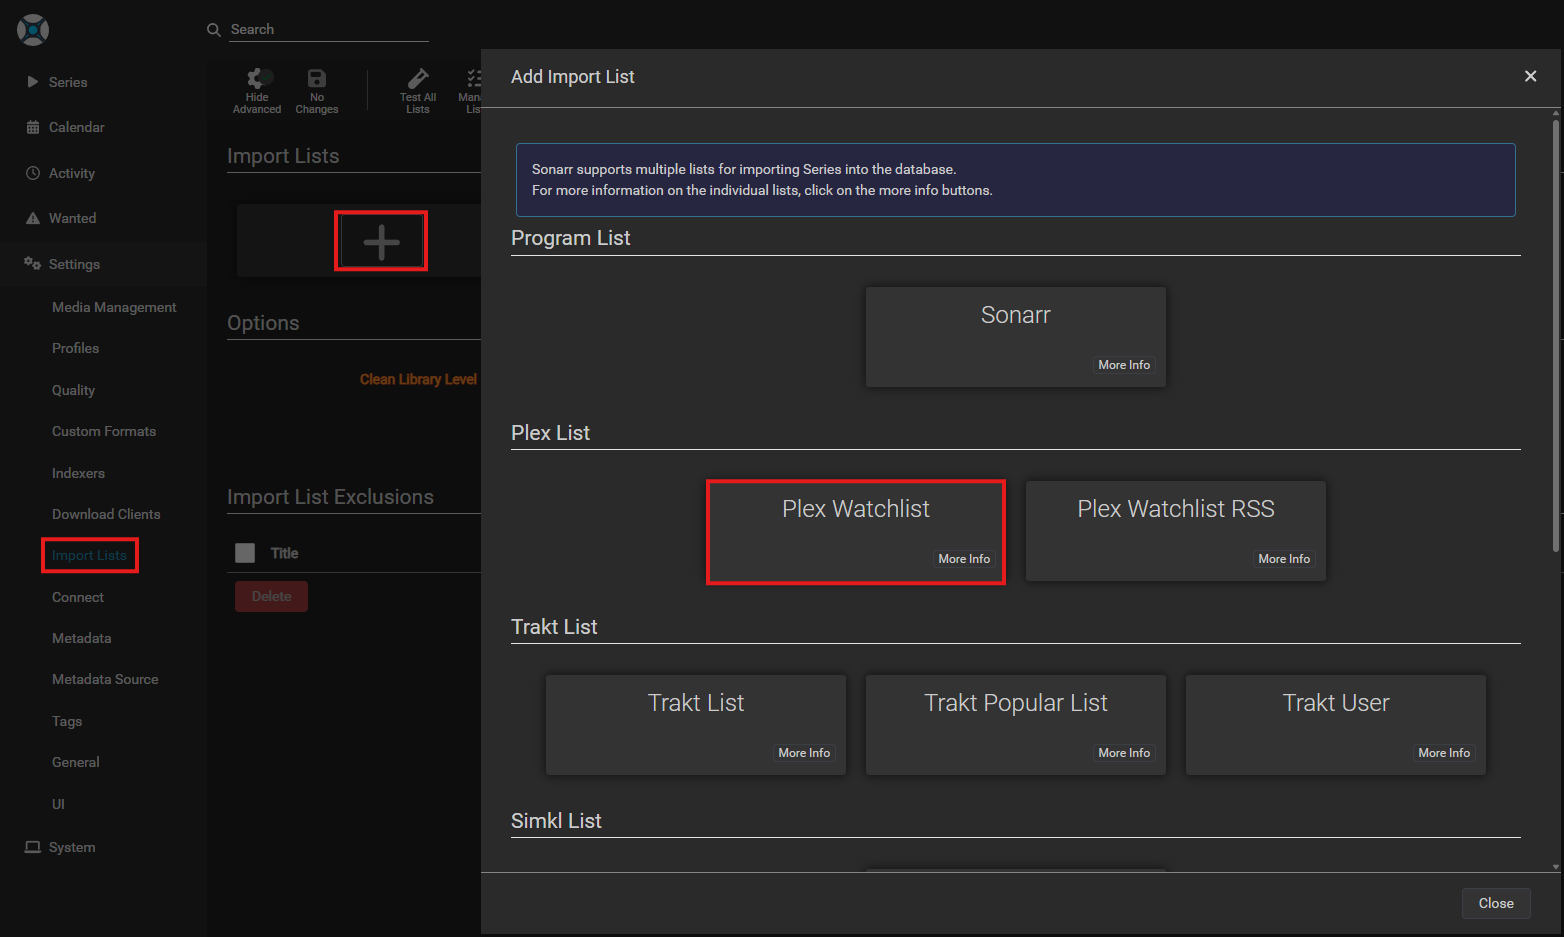
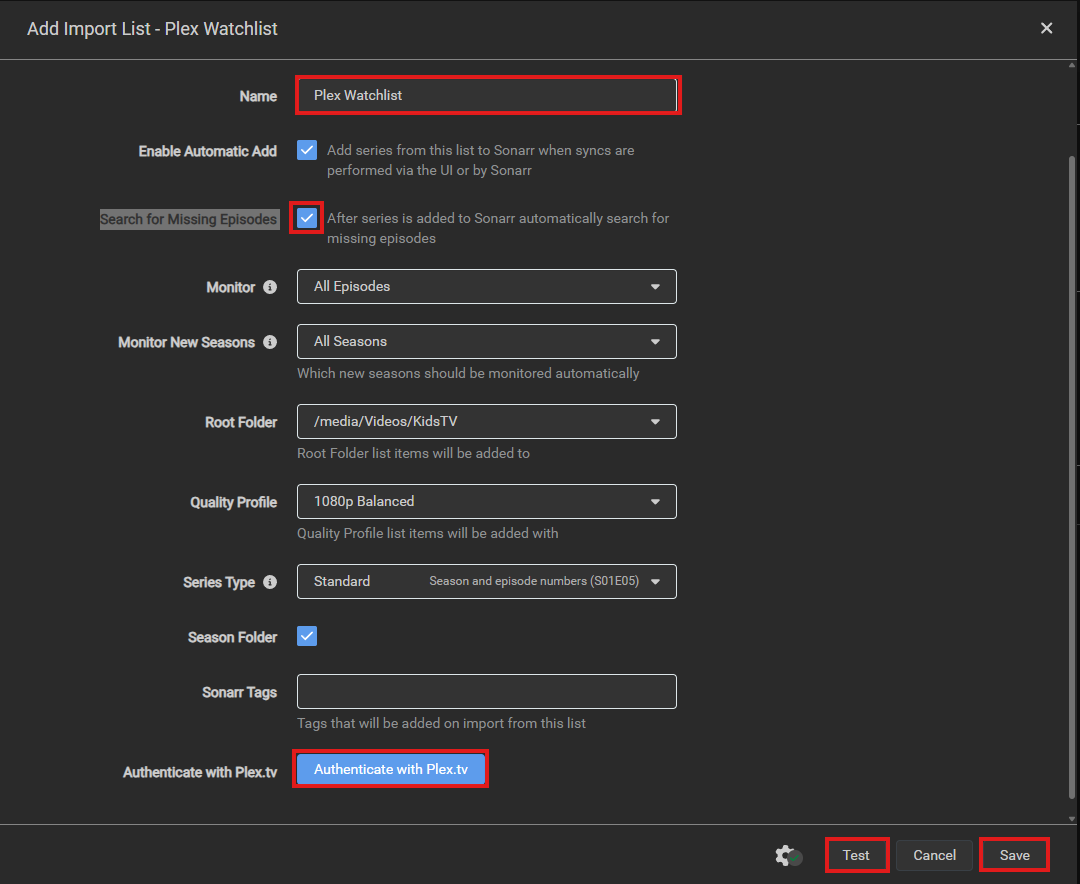
- Click the
+icon to add Plex Watchlist. This allows Sonarr to import your Plex Watchlist, automatically adding and downloading the TV / Movies from your list. - Enable
Search for Missing Episodes - Select
Authenticate with Plex.tv Test- If Test successful choose
Save - You can add other type of Import lists as well like Trakt, or IMDB
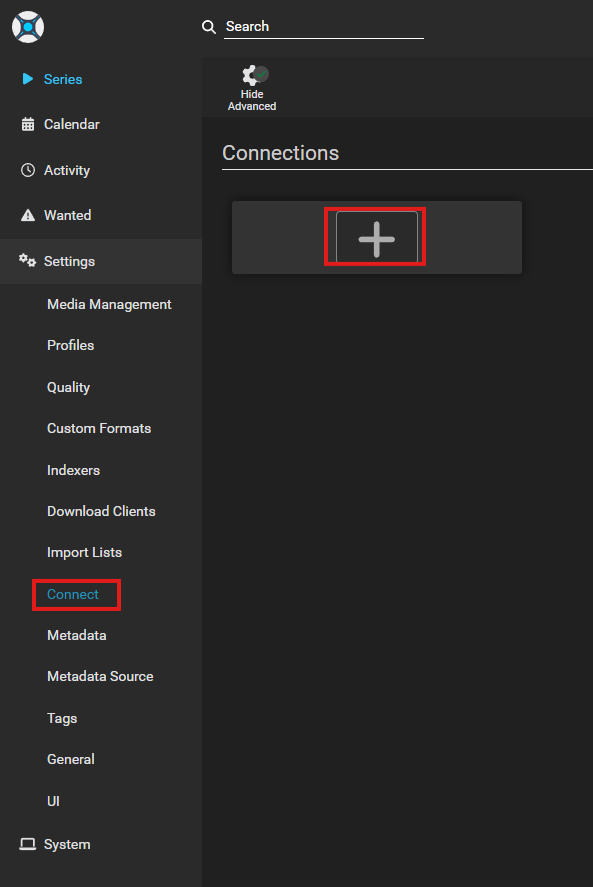
- Navigate to the
Connectionstab. - Click
+. - Choose
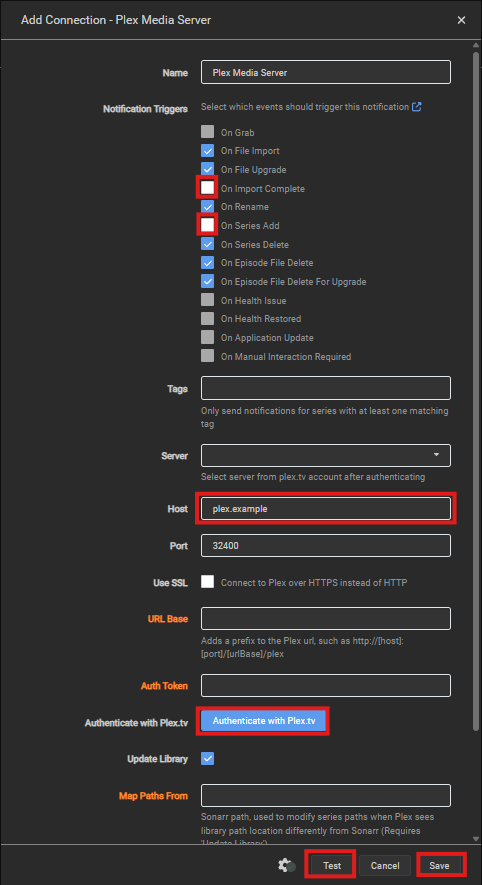
Plex Media Server. We are setting this up to notify plex when videos are downloaded - Disable
On Import Copmlete, andOn Series Add - Enter the Host name, i use the container name (e.g. plex.example)
- Select
Authenticate with Plex.tv, andTest7 If the test is successful chooseSave`
- Navigate to the
Metadatatab. - Choose Plex and
Enable Save
- Ensure all paths and environment variables are updated in the
.envfile. - Regularly backup your
configdirectory to save your settings.
- Common Issues: List common issues and solutions.
- Logs: Check Sonarr logs for error messages.
- Support: Link to the Sonarr community and support resources.