Prowlarr Setup Guide - ajgillis04/GillisDockerDepot GitHub Wiki
Prowlarr is an indexer manager/proxy that integrates with various applications like Sonarr, Radarr, and others. It allows you to manage indexers for Usenet and BitTorrent trackers in one place.
Before setting up Prowlarr, consider deploying the following containers first to simplify integration and avoid jumping between configuration steps:
- Transmission-OpenVPN (for Torrent downloading)
💡 Highly Recommended: Use a VPN
When downloading torrents, your IP address is exposed to the public, making you vulnerable to tracking, data collection, and potential legal issues. Using a VPN ensures your internet traffic is encrypted and anonymized, protecting your identity and preventing unwanted scrutiny. Setting up VPN provides an extra layer of security, keeping your torrenting activities private and secure.
- Transmission-openvpn (for Torrent downloading)
These services work closely with Sonarr, and having them set up beforehand streamlines the process.
- Docker installed
- Prowlarr container running in your Docker stack
- Open your browser and navigate to
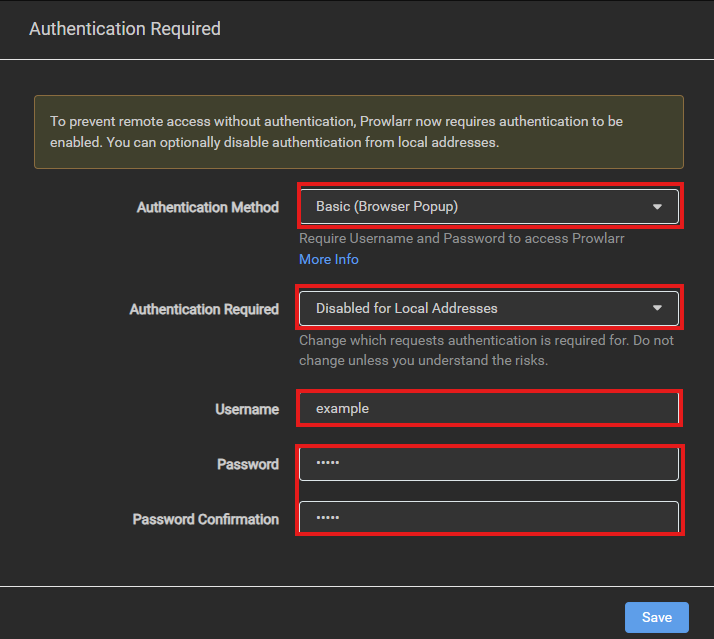
http://<your-ip-address>:9696. - Upon first logon you will be asked to setup Authentication
**
⚠️ Hint: You can disable Authentication, I would only recommend if you are using some other authentication method. edit config.xml and replace<AuthenticationMethod>Basic</AuthenticationMethod>with<AuthenticationMethod>External</AuthenticationMethod>
- Set Authentication Method
Basic - Username
<Choose a username> - Password
<Choose a password> - Save
-
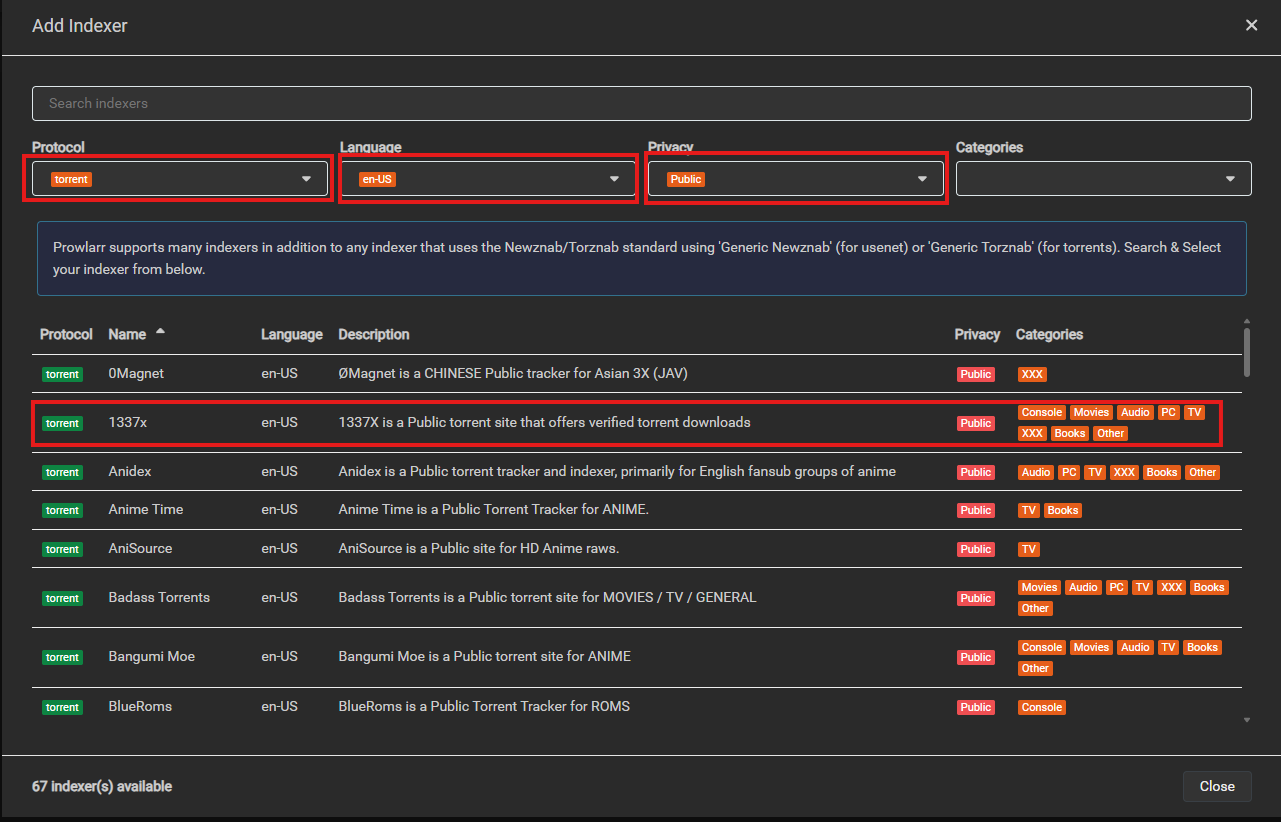
Open Prowlarr and navigate to the Indexers page. Select
Add New Indexer. -
Apply the following filter preferences to optimize your search results: These settings help streamline the indexer setup process based on personal usage preferences.
-
Protocol:
Torrent– I use Prowlarr exclusively for torrents and rely on Sabnzbd for Usenet downloads. -
Language:
en-US– English is my primary language, so I filter results accordingly. -
Privacy:
Public– I prefer free, public torrent indexers and allocate my budget for Usenet subscriptions.
-
Protocol:
-
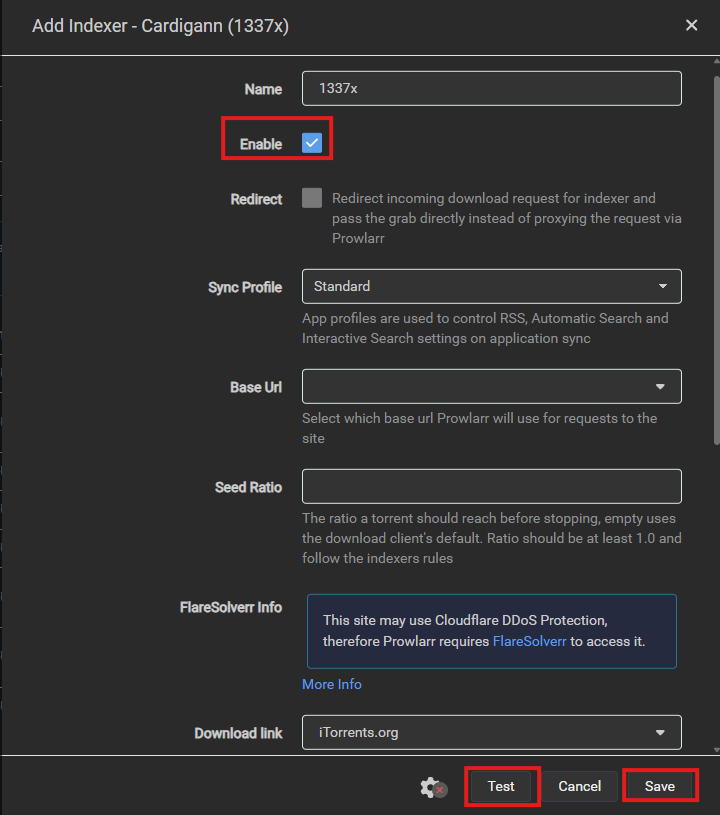
Select the Indexer you wish to add. The Add Indexer page will appear. Usually, the default settings work fine. Click
Testto ensure the indexer is functional. If the test is successful, clickSave.💡 Important Note: Avoid using indexers like TheRARBG and Knaben, as they are currently distributing malicious downloads (Virus). Stay vigilant and prioritize safe indexers.

- In the Add Indexer page
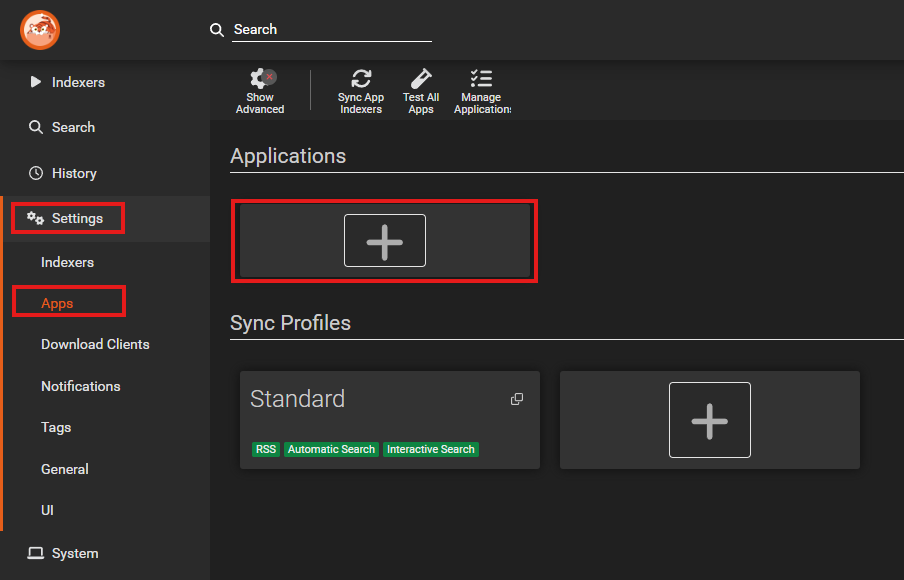
- Navigate to the
Settingsblade, and underneath you will findApps. - Click
+, and than add a service you wish
-
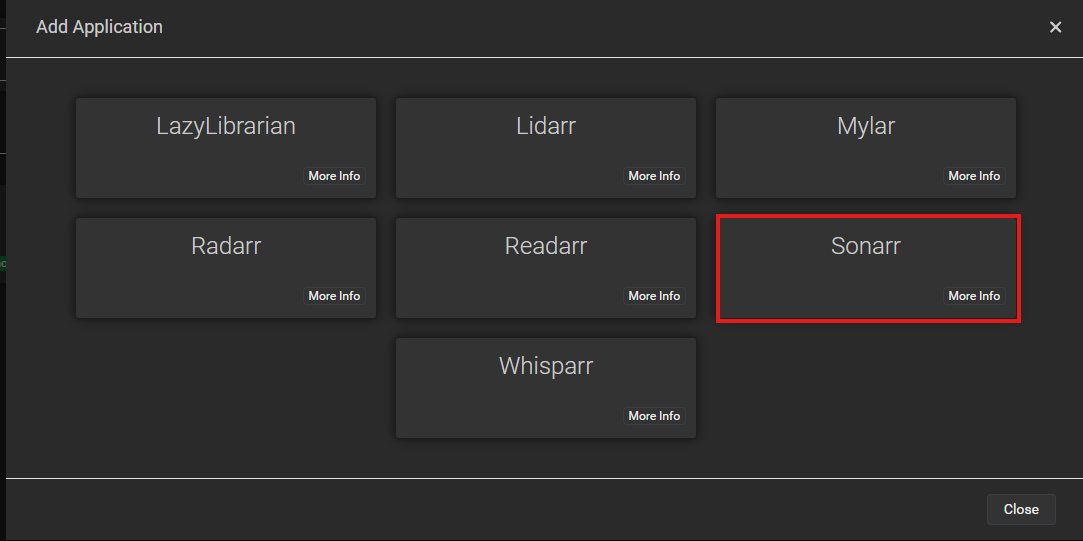
Adding Applications in Prowlarr
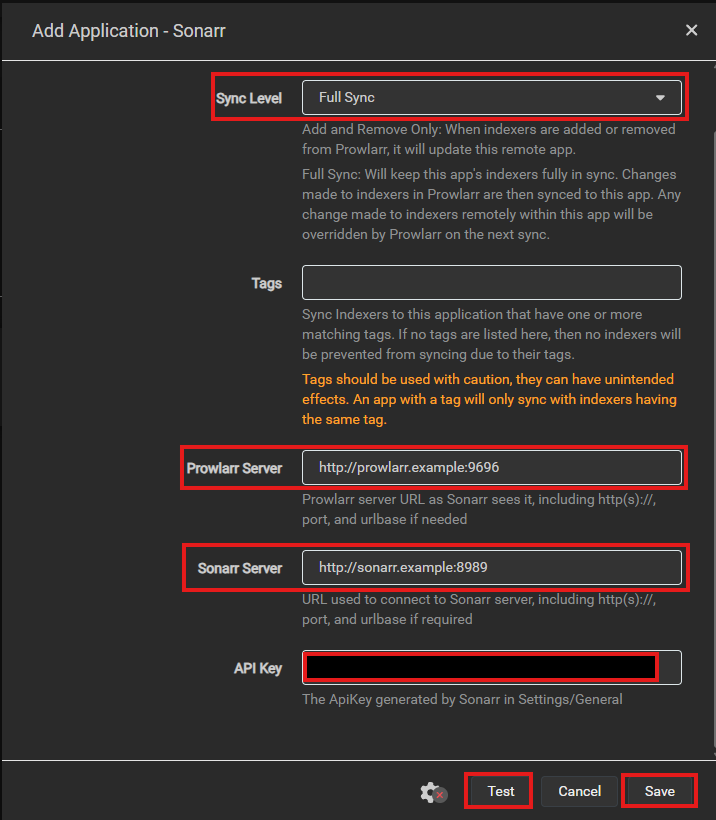
When the Add Application - screen appears, configure the following settings:
- Name: Choose a friendly service name—this can be anything you prefer.
-
Sync Level:
Full Sync– Ensures services like Sonarr and Radarr are updated whenever new indexers are added. -
Prowlarr Server: The address of your Prowlarr server. Select one of the following options based on your setup:
http://prowlarr.example:9696http://localhost:9696http://prowlarr:9696http://<Host IP>:9696http://<Container IP>:9696
-
Server: The address of your service (Sonarr, Radarr) server. Choose the appropriate option based on your setup:
http://sonarr.example:8989http://localhost:8989http://prowlarr:8989http://<Host IP>:8989http://<Container IP>:8989
-
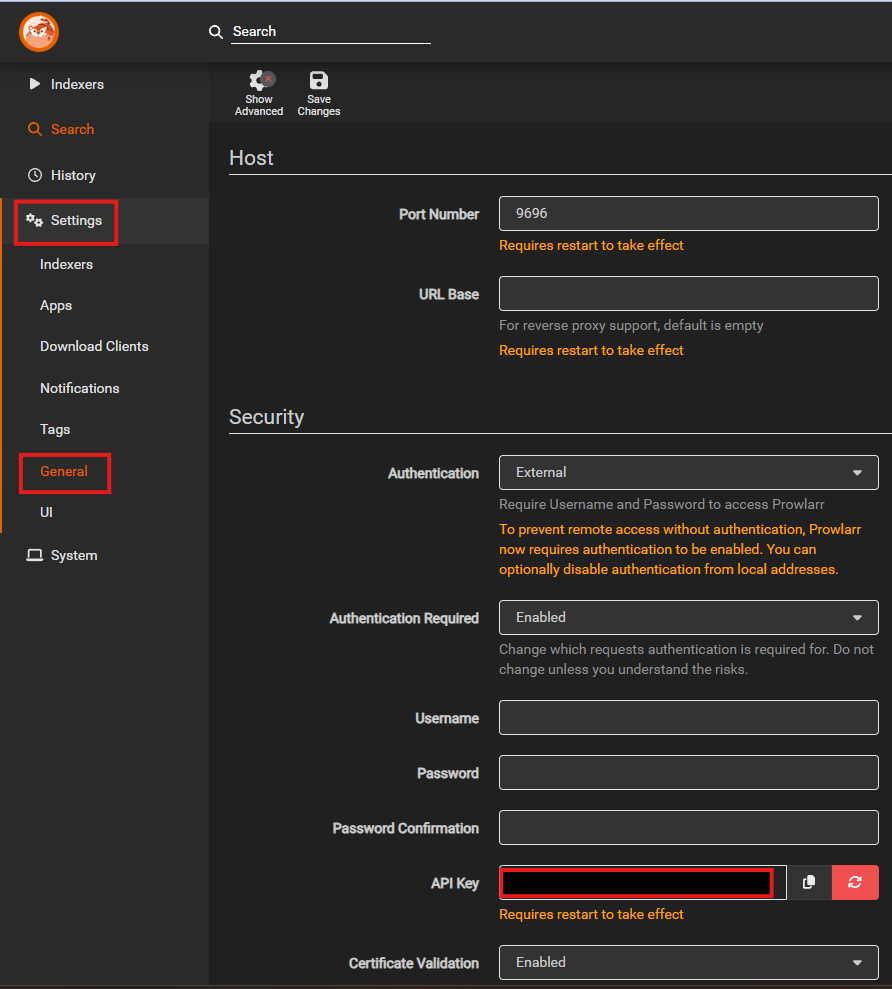
API Key: The API Key for the service you're connecting to. Find this in the service's webpage under
Settings > General > API Key, then copy and paste it into Prowlarr. Also, add it to your.envfile, as other containers will require it.
💡 Preferred Address: If you’re using my Docker Git repository, I recommend following the
<service>.exampleformat (e.g.,sonarr. <hostname>). This ensures consistent naming across services and prevents reliance on dynamic IP addresses.
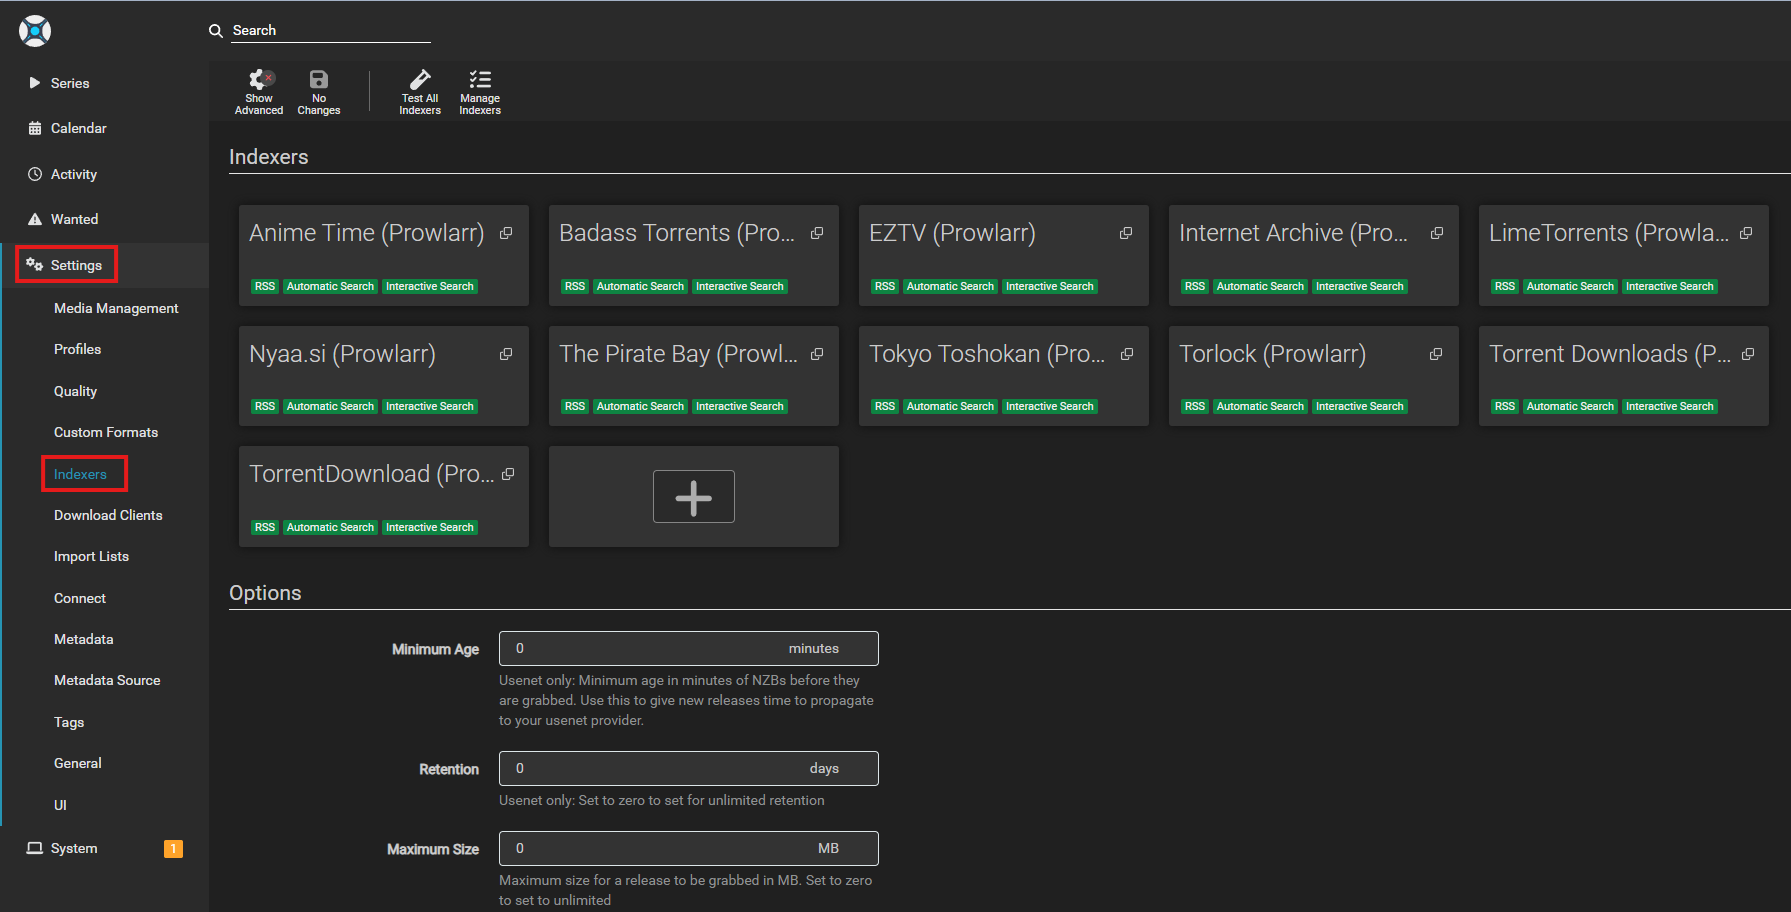
- Verify Prowlarr is pushing the indexers to the service you configured
- go to the service home page,
Settings, Indexers
- go to the service home page,
- Go to the
Settingstab. - Click
+. - Choose the download client you have setup.
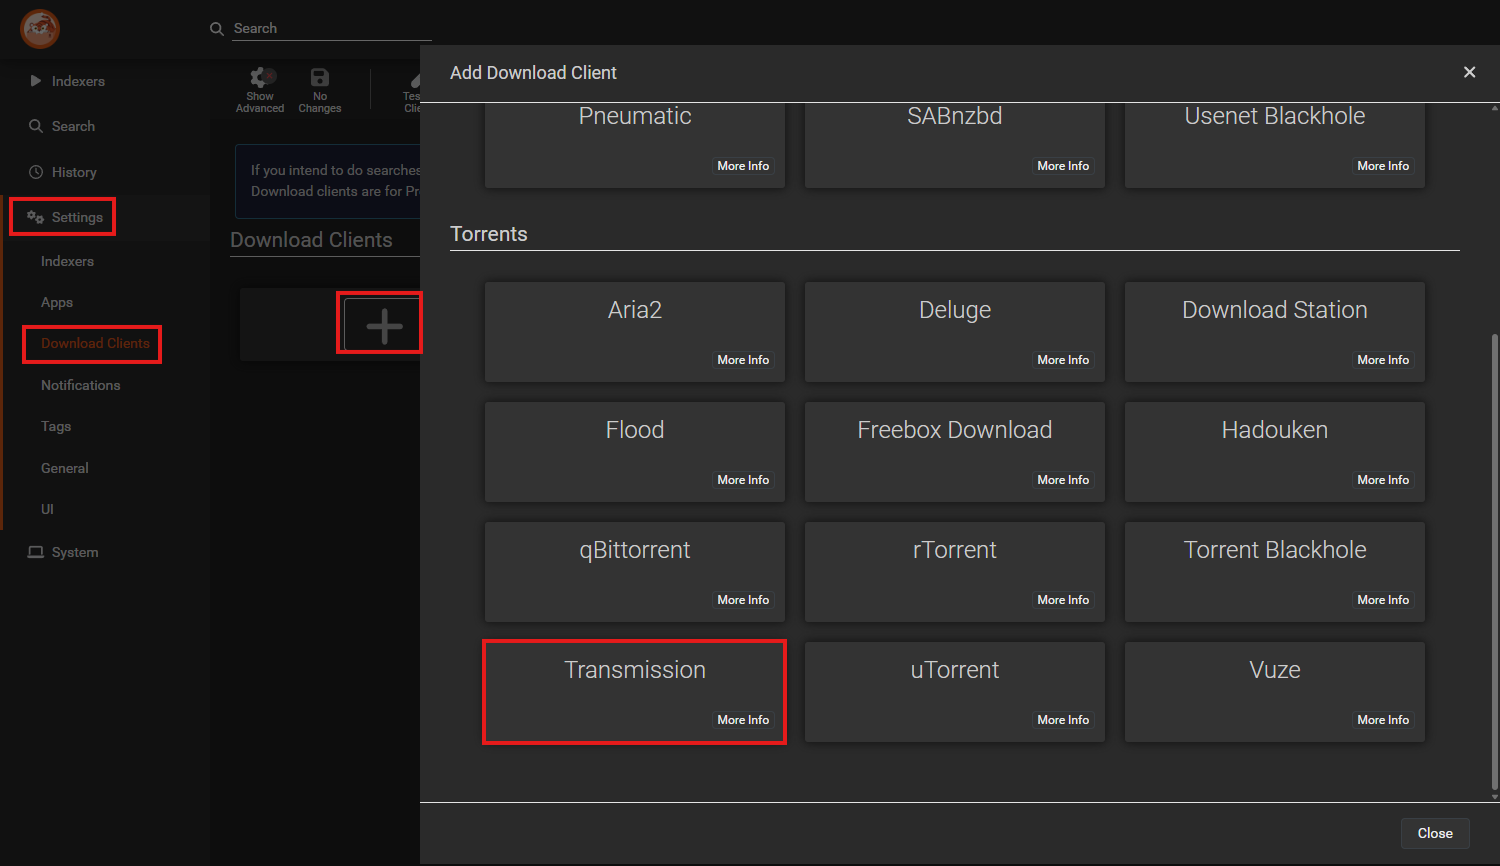
- Add the Download Client
- Name: Choose a friendly service name—this can be anything you prefer.
- Enable: checked - this will enable the client
- Prowlarr Server: The address of your Prowlarr server. Select one of the following options based on your setup:
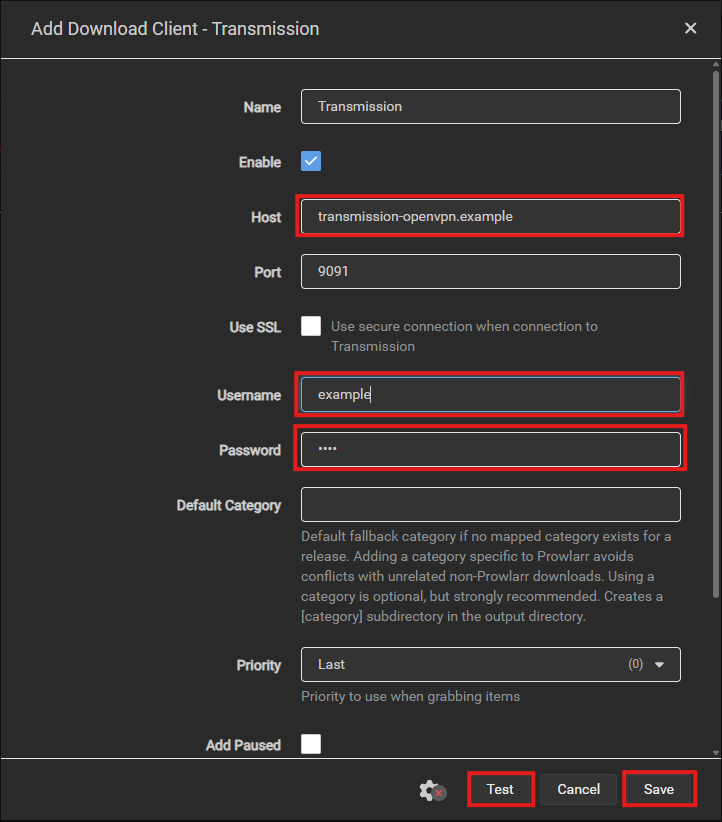
- Click
Testto ensure the Client is functional. If the test is successful, clickSave.
- Navigate to the
Notificationstab. - Click
Add Notification. - Configure your preferred notification methods (e.g., Discord, Email).
- Click
Save.
- Ensure all paths and environment variables are updated in the
prowlarr.yamlfile. - Regularly backup your
configdirectory to save your settings.
- Logs: Check Prowlarr logs for error messages.
- Support: Discord