Seerr Setup Guide - ajgillis04/GillisDockerDepot GitHub Wiki
Seerr Setup Guide
Introduction
Seerr is the official successor and unified evolution of Overseerr and Jellyseerr. It provides a modern, high-performance request management and media discovery interface for personal media servers (Plex, Jellyfin, and Emby). It connects directly to Radarr and Sonarr to automate downloads and media organization.
Service Definition
# ------------------------------------------------------------------------------
# Seerr - Successor to Overseerr. Drop-in replacement with automatic migration.
# Uses the SAME config folder as Overseerr for seamless migration.
# ------------------------------------------------------------------------------
services:
  seerr:
    container_name: seerr.${HOST_NAME}
    hostname: seerr.${HOST_NAME}.lan
    image: ghcr.io/seerr-team/seerr:latest
    environment:
      TZ: ${TZ}
      PUID: ${PUID}
      PGID: ${PGID}
      DOMAINNAME: ${DOMAINNAME}
    networks:
      - mediaserver
    ports:
      - "${SEERR_PORT}:5055"
    volumes:
      #- ${DOCKERDIR}/overseerr/config:/app/config # Use for Migration Step 1
      - ${DOCKERDIR}/seerr/config:/app/config      # Use after Migration Step 5
      - ${DOCKERDIR}/logs/seerr:/var/log
    restart: always
    security_opt:
      - no-new-privileges:true
    healthcheck:
      test: wget --no-verbose --tries=1 --spider http://localhost:5055/api/v1/settings/public || exit 1
      start_period: 20s
      timeout: 3s
      interval: 15s
      retries: 3
    labels:
      - "com.centurylinklabs.watchtower.enable=true"
      - "homepage.group=Media"
      - "homepage.name=Seerr"
      - "homepage.icon=seerr.png"
      - "homepage.href=https://seerr.${DOMAINNAME}/"
      - "homepage.description=Request and manage your media"
      - "homepage.widget.type=overseerr"
      - "homepage.widget.url=http://seerr.${HOST_NAME}:5055"
      - "homepage.widget.key=${SEERR_API_KEY}"
Overseerr → Seerr Migration Procedure
Follow these steps in exact sequence to migrate existing data cleanly:
-
Stop Overseerr:
docker stop overseerr.${HOST_NAME} -
Start Seerr against the existing Overseerr directory: Temporarily update
volumesinseerr.yamlto point to${DOCKERDIR}/overseerr/config:/app/config, then launch Seerr:docker compose -p mediaserver -f docker-compose-server1.yaml up -d seerrSeerr will detect the database and automatically migrate users, requests, settings, and history.
-
Verify Migration in Seerr UI: Navigate to Settings -> About to confirm there are no migration errors. Check that your users and requests are intact.
-
Decommission Overseerr:
docker stop overseerr.${HOST_NAME} docker rm overseerr.${HOST_NAME} -
Rename the AppData Directory:
mv ${DOCKERDIR}/appdata/overseerr ${DOCKERDIR}/appdata/seerr -
Finalize Seerr Configuration: Switch the volume path in
seerr.yamlback to${DOCKERDIR}/seerr/config:/app/configand restart:docker compose -p mediaserver -f docker-compose-server1.yaml up -d --force-recreate seerr
Recommended Pre-Setup
Before running the Seerr wizard, ensure these backend containers are operational:
Initial Setup Wizard
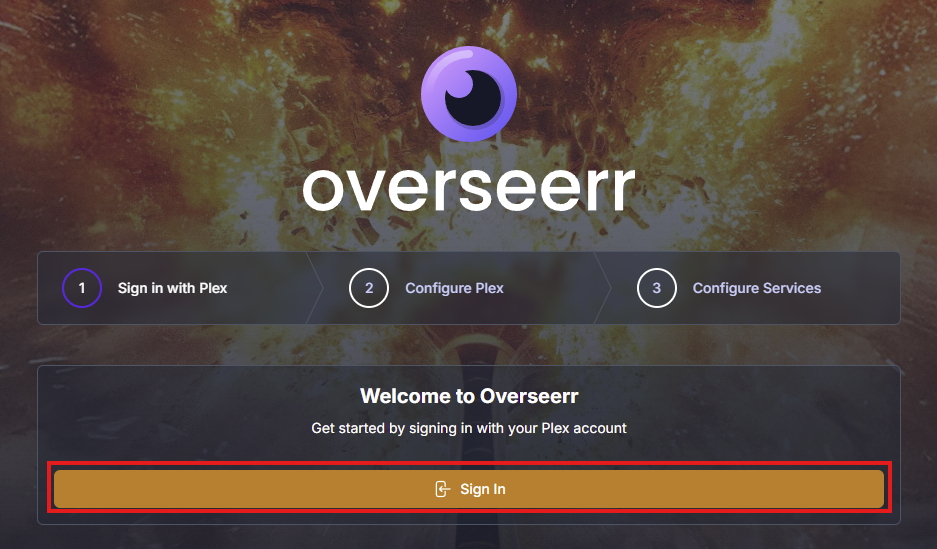
Step 1: Sign In & Connect Media Server
- Navigate to
http://<your-ip-address>:5055(or host port set by${SEERR_PORT}). - Select Sign in with Plex (or your preferred media server).
Step 2: Configure Plex Server & Libraries
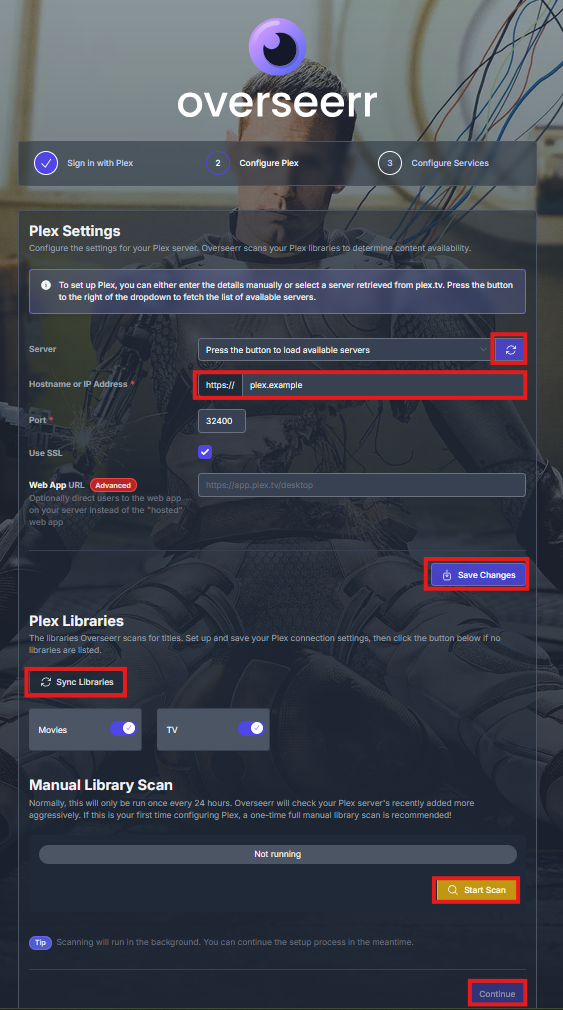
- Seerr will auto-detect your local Plex server. If not detected automatically, enter the hostname or container IP manually under Hostname or IP Address.
- Click Save Changes.
- Enable the Plex Libraries you want users to browse and request against.
- Click Start scan to index existing titles, then select Continue.
Step 3: Connecting Services (Radarr & Sonarr)
Radarr Setup (Movies)
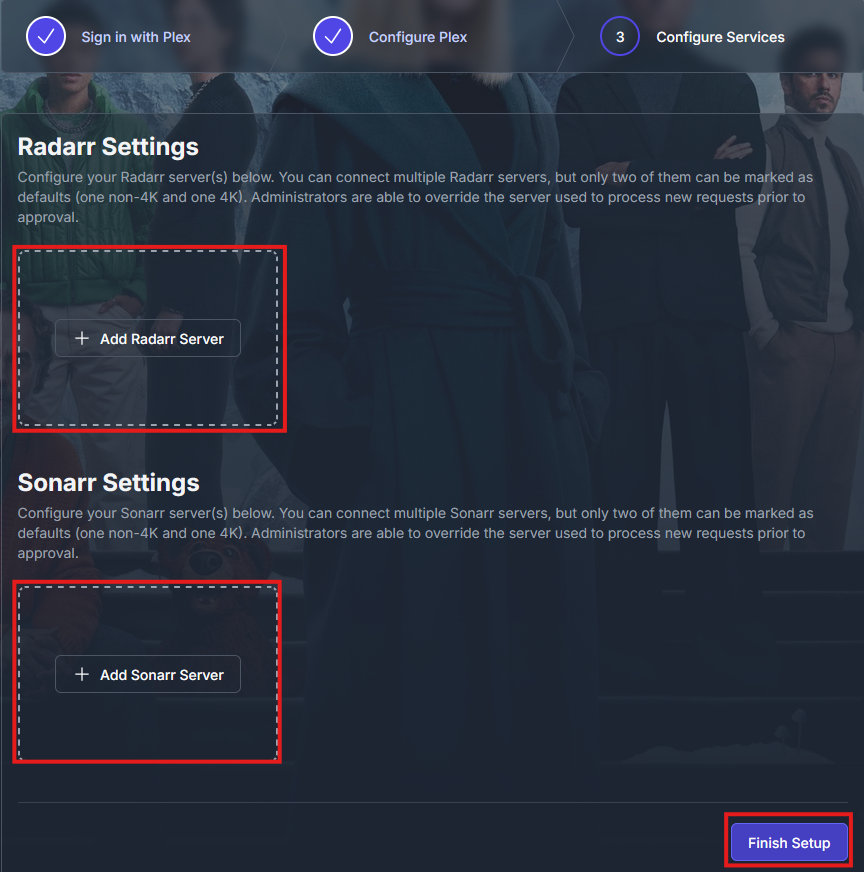
- Navigate to Services and click + Add Radarr Server.
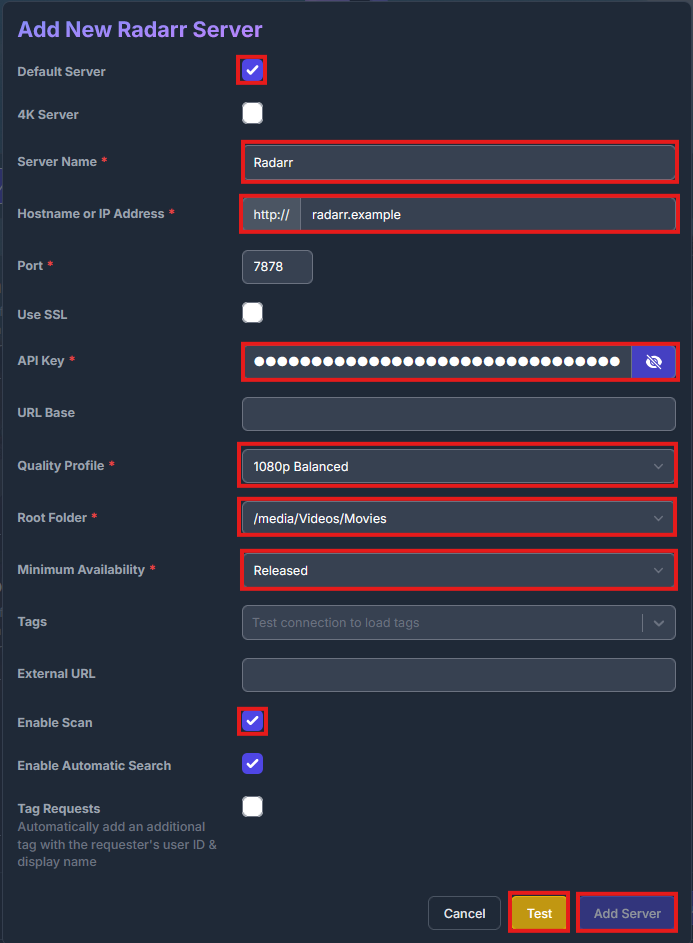
- Enable Default Server.
- Fill in:
- Server Name:
Radarr - Hostname/IP:
radarr(or container IP) - Port:
7878 - API Key: Paste from your
.envor Radarr settings.
- Server Name:
- Click Test. Once successful, select your Quality Profile and Root Folder.
- Set Minimum Availability to
Released. - Enable Scan, then click Add Server.
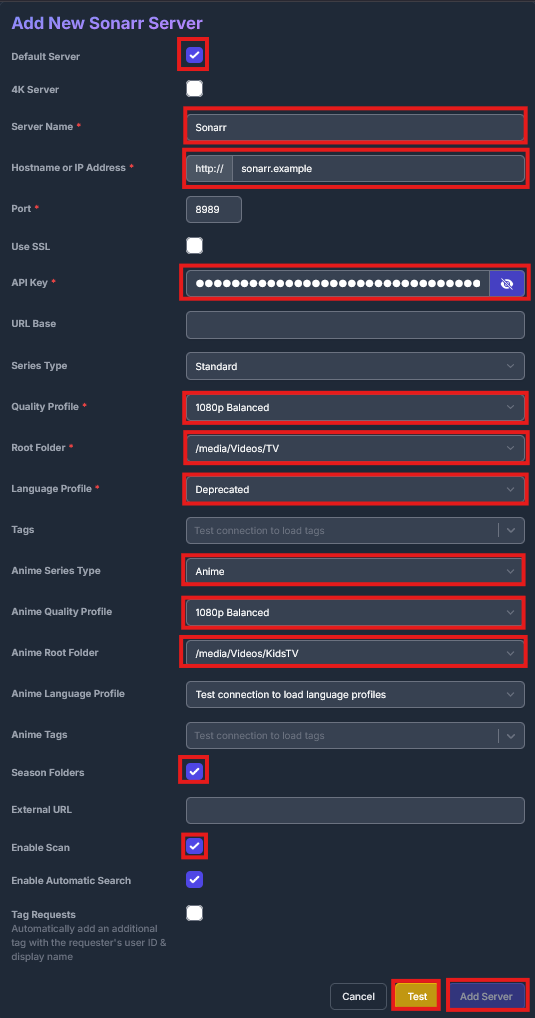
Sonarr Setup (TV Shows)
- Select + Add Sonarr Server.
- Enable Default Server.
- Fill in Hostname, Port (
8989), and API Key, then click Test. - Choose your default Quality Profile and Root Folder.
- Set up optional Anime profiles or root paths if applicable.
- Enable Scan and click Add Server.
Step 4: Settings & Permissions
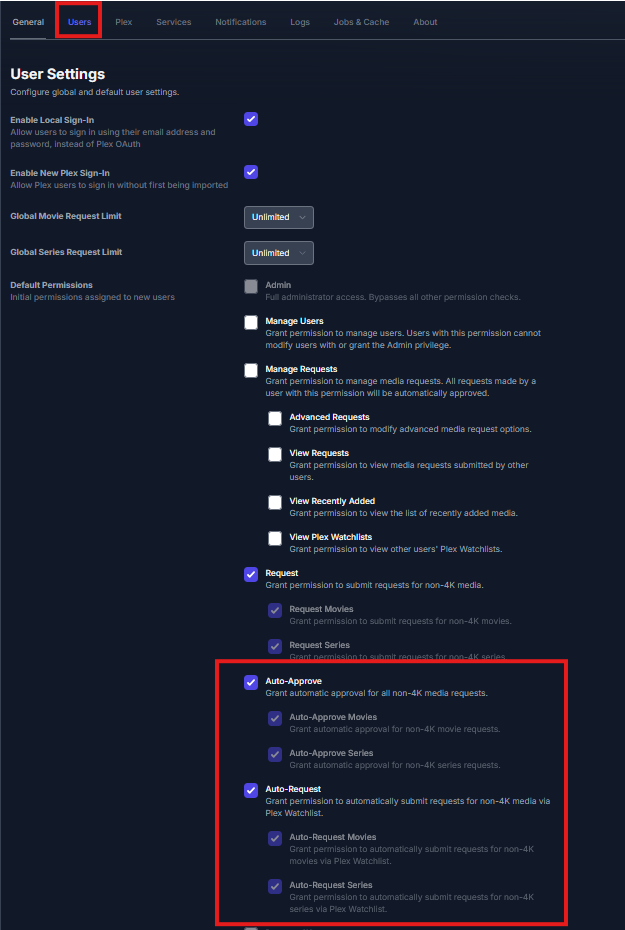
- Go to Settings -> General and copy the API Key into your root
.envunder${SEERR_API_KEY}(enabling the Homepage dashboard widget). - Go to Users to manage global request rules, auto-approvals, and user permissions.
Step 5: Tautulli Integration
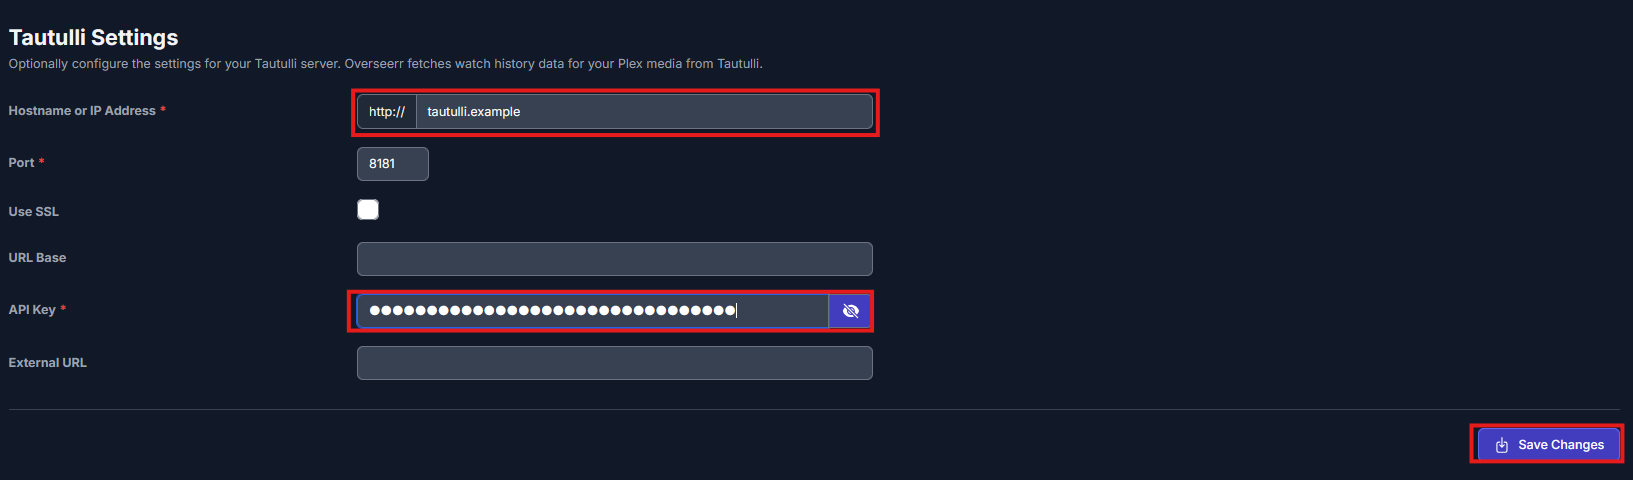
- Go to Settings -> Plex and scroll to Tautulli Settings.
- Enter your Tautulli Hostname/IP and API Key.
- Click Save Changes.
Management Commands
-
Deploy / Start Service:
docker compose -p mediaserver -f docker-compose-server1.yaml up -d seerr -
View Live Container Logs:
docker compose -p mediaserver -f docker-compose-server1.yaml logs -f seerr