Lidarr Setup Guide - ajgillis04/GillisDockerDepot GitHub Wiki
Lidarr is a music collection manager for Usenet and BitTorrent users. It can monitor multiple RSS feeds for new tracks and will automatically grab, sort, and rename them.
Before setting up Lidarr, consider deploying the following containers first to simplify integration and avoid jumping between configuration steps:
- Sabnzbd (for Usenet downloading)
- Prowlarr (for indexer / torrent searching)
- Transmission-openvpn (for Torrent downloading)
- Plex
These services work closely with Lidarr, and having them set up beforehand streamlines the process.
💡 Highly Recommended: Use a VPN
When downloading torrents, your IP address is exposed to the public, making you vulnerable to tracking, data collection, and potential legal issues. Using a VPN ensures your internet traffic is encrypted and anonymized, protecting your identity and preventing unwanted scrutiny. Setting up Transmission-OpenVPN provides an extra layer of security, keeping your torrenting activities private and secure.
- Docker installed
- Lidarr container running in your Docker stack
When rebuilding your NAS, ensure permissions for media directories are reset to match the account specified in your PUID and PGID environment variables. This ensures proper access for all services.
Use the following commands (replace /path/to/your/media with your media directory path):
sudo chown -R <PUID>:<PGID> /path/to/your/Music
sudo chmod -R 775 /path/to/your/Music
- Open your browser and navigate to
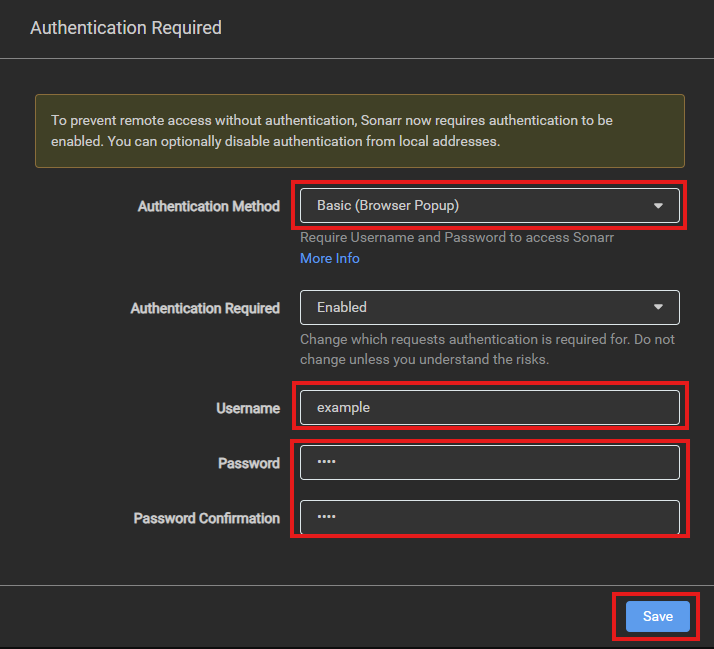
http://<your-ip-address>:8686. - Upon first logon you will be asked to setup Authentication
**
⚠️ Hint: You can disable Authentication, I would only recommend if you are using some other authentication method. edit config.xml and replace<AuthenticationMethod>Basic</AuthenticationMethod>with<AuthenticationMethod>External</AuthenticationMethod>
- Set Authentication Method
Basic - Username
<Choose a username> - Password
<Choose a password> - Save
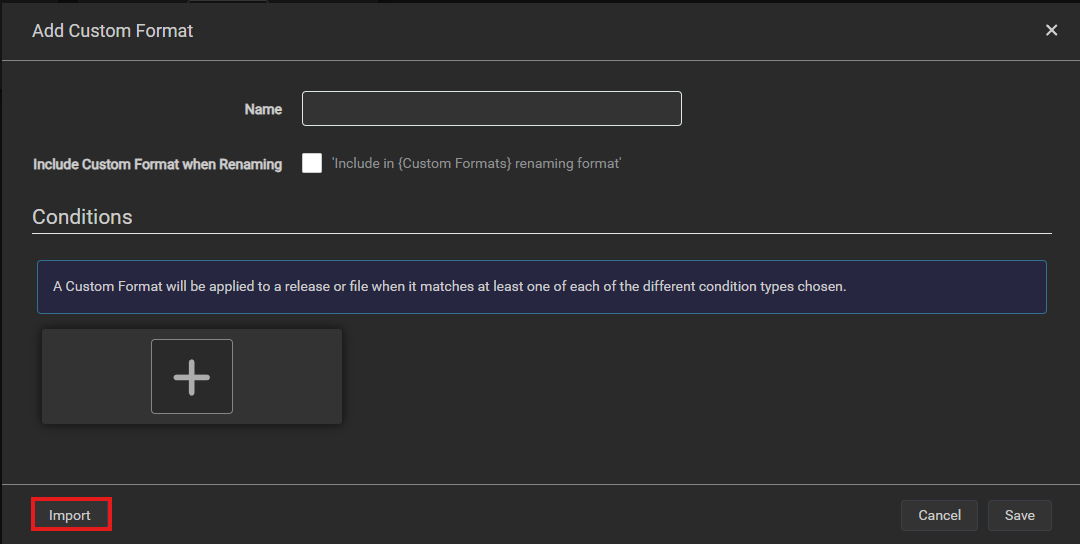
- Navigate to the
Custom Formatstab. - Click the
+ - Here are the custom formats I add. Choose Import and paste the code sections below. One for each new format
{
  "name": "CD",
  "includeCustomFormatWhenRenaming": false,
  "specifications": [
    {
      "name": "CD",
      "implementation": "ReleaseTitleSpecification",
      "negate": false,
      "required": false,
      "fields": {
        "value": "\\bCD\\b"
      }
    }
  ]
}
{
  "name": "FLAC",
  "includeCustomFormatWhenRenaming": false,
  "specifications": [
    {
      "name": "FLAC",
      "implementation": "ReleaseTitleSpecification",
      "negate": false,
      "required": false,
      "fields": {
        "value": "\\bFLAC\\b"
      }
    }
  ]
}
{
  "name": "FLAC 24-bit",
  "includeCustomFormatWhenRenaming": false,
  "specifications": [
    {
      "name": "FLAC 24-bit",
      "implementation": "ReleaseTitleSpecification",
      "negate": false,
      "required": false,
      "fields": {
        "value": "\\bFLAC\\b.*?\\b24-bit\\b|\\bFLAC\\b.*?\\b24Bit-\\d+kHz\\b|\\bFLAC\\b.*?\\bHi-Res\\b|\\bTR24\\b|\\bOF\\b"
      }
    }
  ]
}
{
  "name": "Lossless",
  "includeCustomFormatWhenRenaming": false,
  "specifications": [
    {
      "name": "Flac",
      "implementation": "ReleaseTitleSpecification",
      "negate": false,
      "required": false,
      "fields": {
        "value": "\\blossless\\b"
      }
    }
  ]
}
{
  "name": "MP3-320",
  "includeCustomFormatWhenRenaming": false,
  "specifications": [
    {
      "name": "MP3-320",
      "implementation": "ReleaseTitleSpecification",
      "negate": false,
      "required": false,
      "fields": {
        "value": "\\bMP3-320\\b|\\b320kbps\\b|\\b320_kbps\\b|\\b320 kbps\\b|\\b320 KBPS\\b|\\bmp3 320kbps\\b|\\bCDQ\\b|\\bQuality\\b"
      }
    }
  ]
}
{
  "name": "Preferred Groups",
  "includeCustomFormatWhenRenaming": false,
  "specifications": [
    {
      "name": "DeVOiD",
      "implementation": "ReleaseGroupSpecification",
      "negate": false,
      "required": false,
      "fields": {
        "value": "\\bDeVOiD\\b"
      }
    },
    {
      "name": "PERFECT",
      "implementation": "ReleaseGroupSpecification",
      "negate": false,
      "required": false,
      "fields": {
        "value": "\\bPERFECT\\b"
      }
    },
    {
      "name": "ENRiCH",
      "implementation": "ReleaseGroupSpecification",
      "negate": false,
      "required": false,
      "fields": {
        "value": "\\bENRiCH\\b"
      }
    }
  ]
}
{
  "name": "Vinyl",
  "includeCustomFormatWhenRenaming": false,
  "specifications": [
    {
      "name": "Vinyl",
      "implementation": "ReleaseTitleSpecification",
      "negate": false,
      "required": false,
      "fields": {
        "value": "\\bVinyl\\b"
      }
    }
  ]
}
{
  "name": "WEB",
  "includeCustomFormatWhenRenaming": false,
  "specifications": [
    {
      "name": "WEB",
      "implementation": "ReleaseTitleSpecification",
      "negate": false,
      "required": false,
      "fields": {
        "value": "\\bWEB\\b"
      }
    }
  ]
}
**
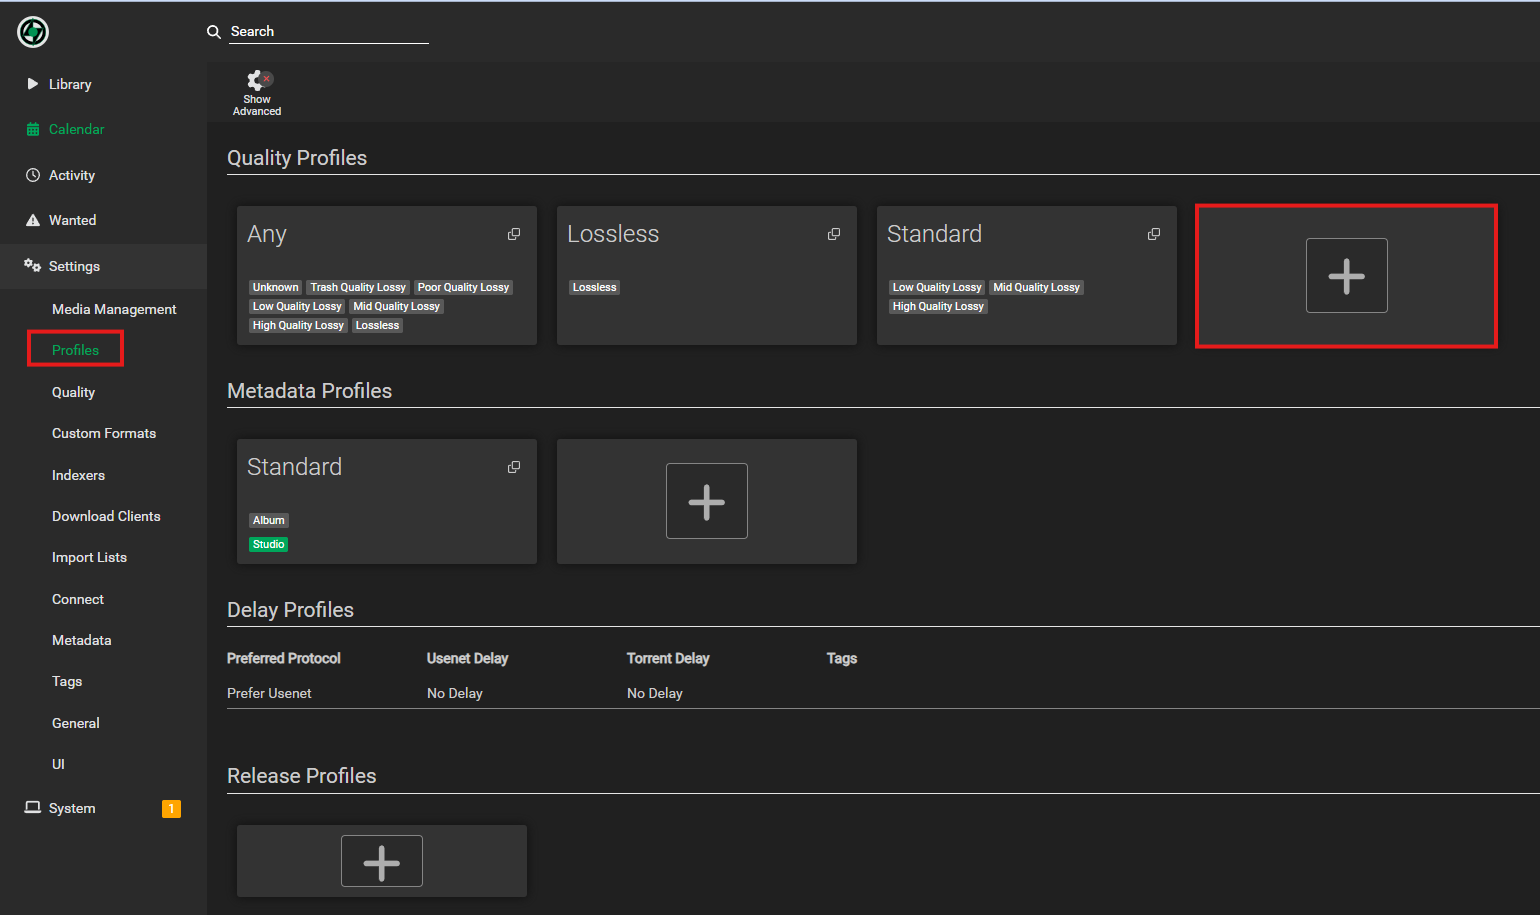
- Navigate to the
Profilestab. - Select the
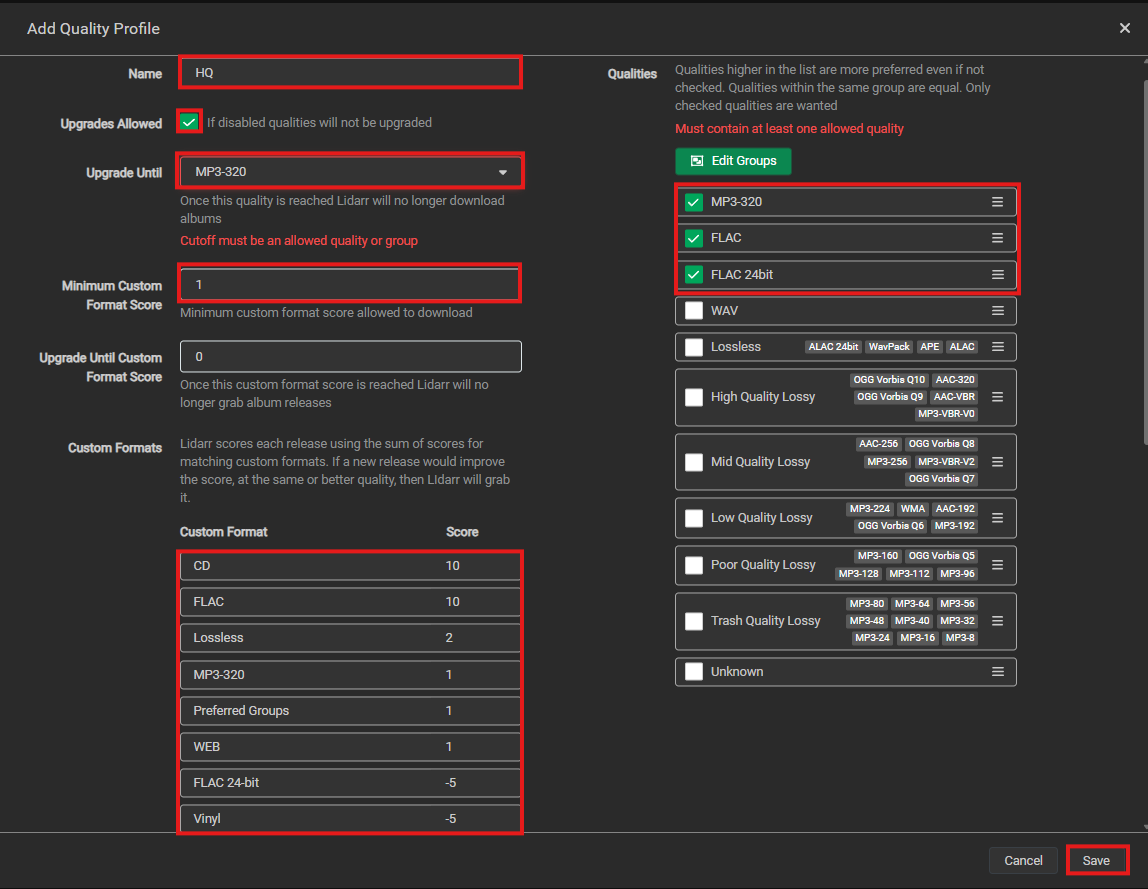
+icon under Quality Profiles - Add Quality Profile
Name:
HQUpgrade Allowed: Enabled Qualities:MP3-320FLAC 24bitFLACUpgrades Allowed: Enabled Minimum Custom Format Score:1CD:10FLAC:10Lossless:10MP3-320:1Preferred Groups:1Web:1FLAC 24-bit:-5Finding FLAC 24-bit too large Vinyl:-5 - Save
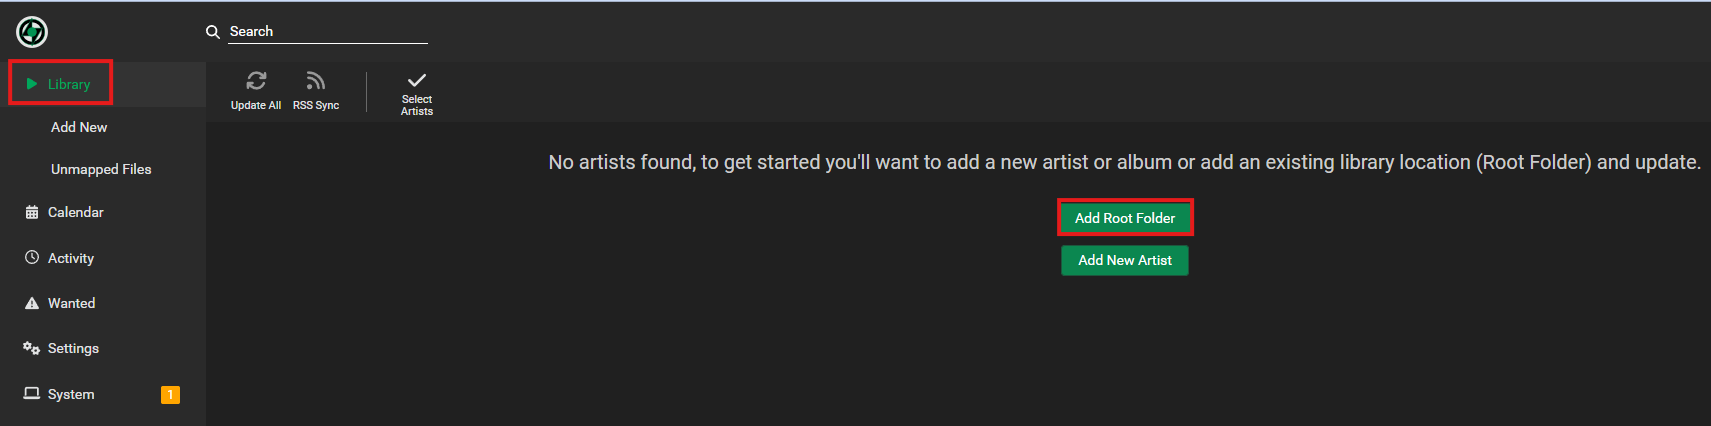
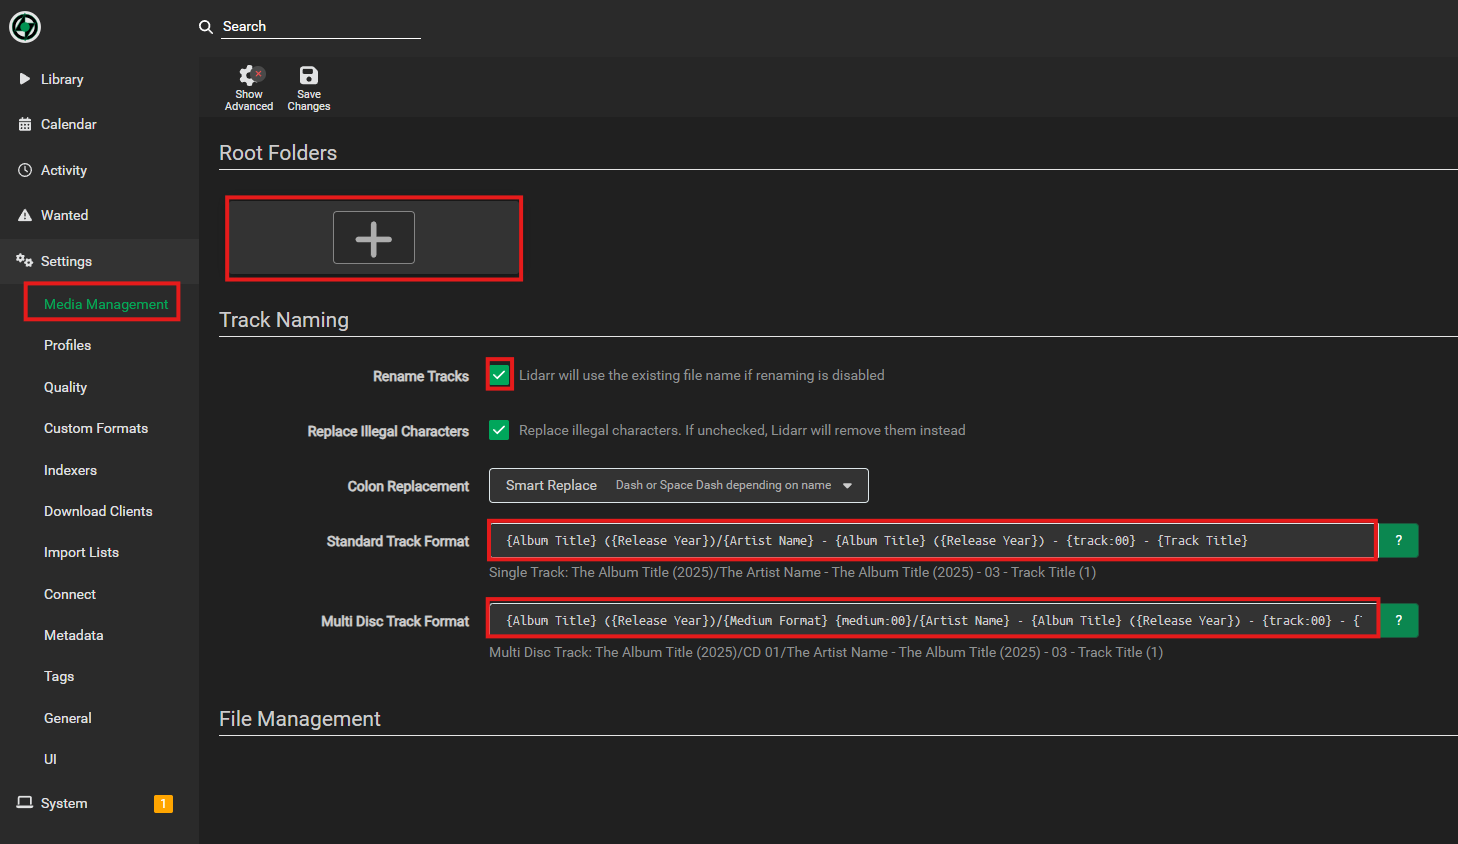
- Go to
Media Managementand selectAdd Root Folderbutton - Enable Rename Tracks, and change the Standard Track Format, and
Multi Disc Track Format{Album Title} ({Release Year})/{Artist Name} - {Album Title} ({Release Year}) - {track:00} - {Track Title}{Album Title} ({Release Year})/{Medium Format} {medium:00}/{Artist Name} - {Album Title} ({Release Year}) - {track:00} - {Track Title} - Choose the
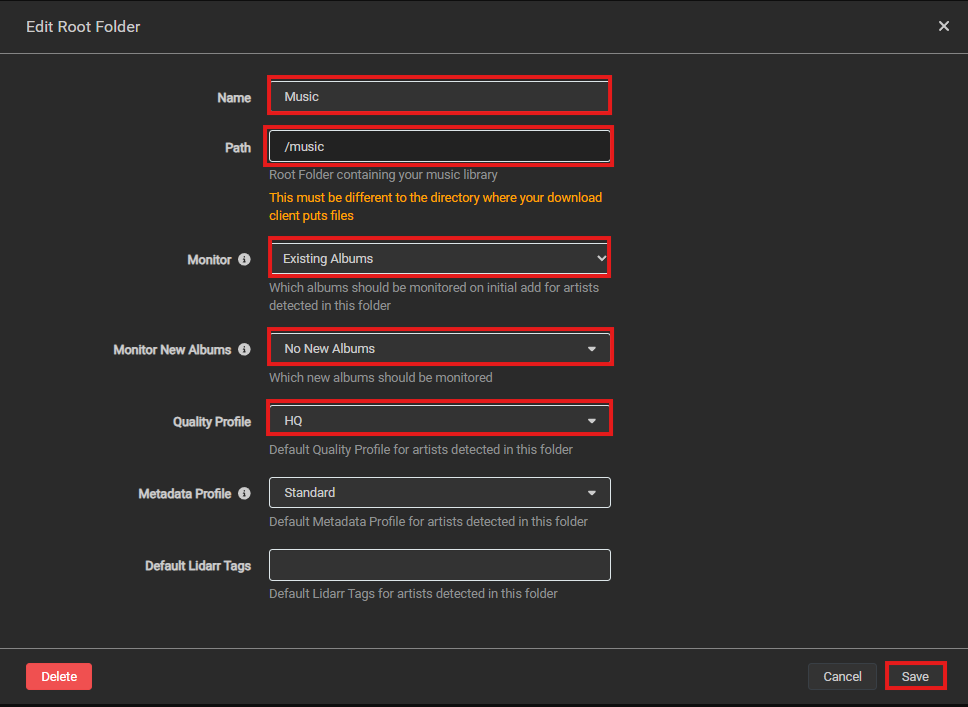
+ - Setting the following
Name:
Path:
Monitor:
Existing Albums(Personally i only want to Lidarr to Monitor what I have not everything the artist has produced) Monitor New Albums:No New Albums(Do not download anything new by the artist) Quality Profile:HQ - Save
- Disable Use Hardlinks instead of Copy
- Save Changes
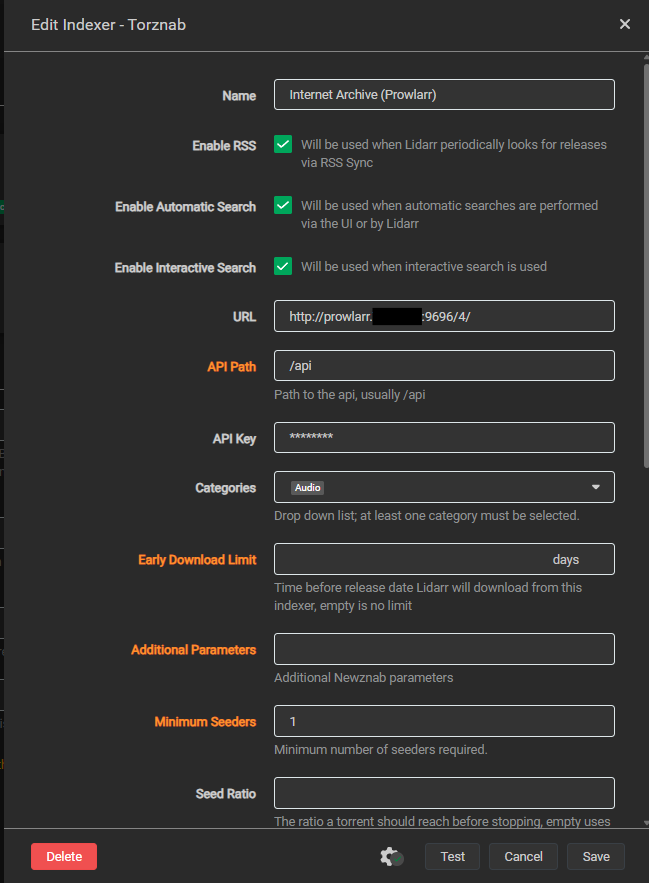
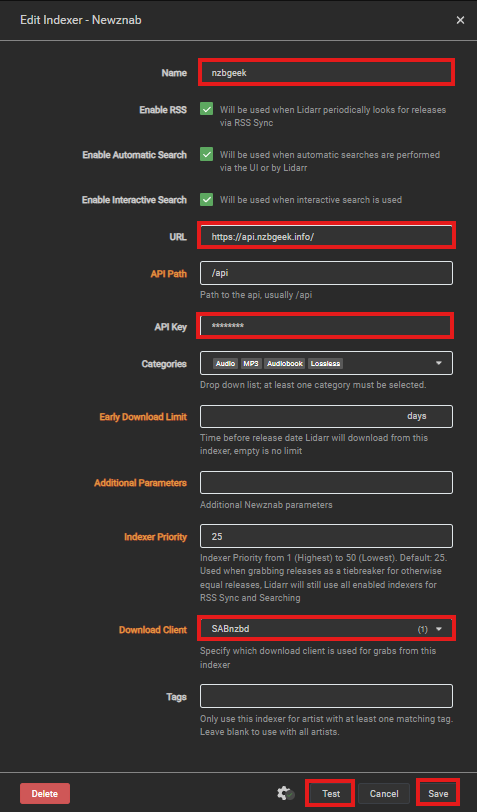
- Go to the
Indexerstab. - Navigate to the
Indexerssection. - Click
Add Indexerand select your preferred indexers. - Enter the necessary API keys or login credentials for each indexer.
- Click
Save.
Pre-Populated Example:
Sabnzbd:
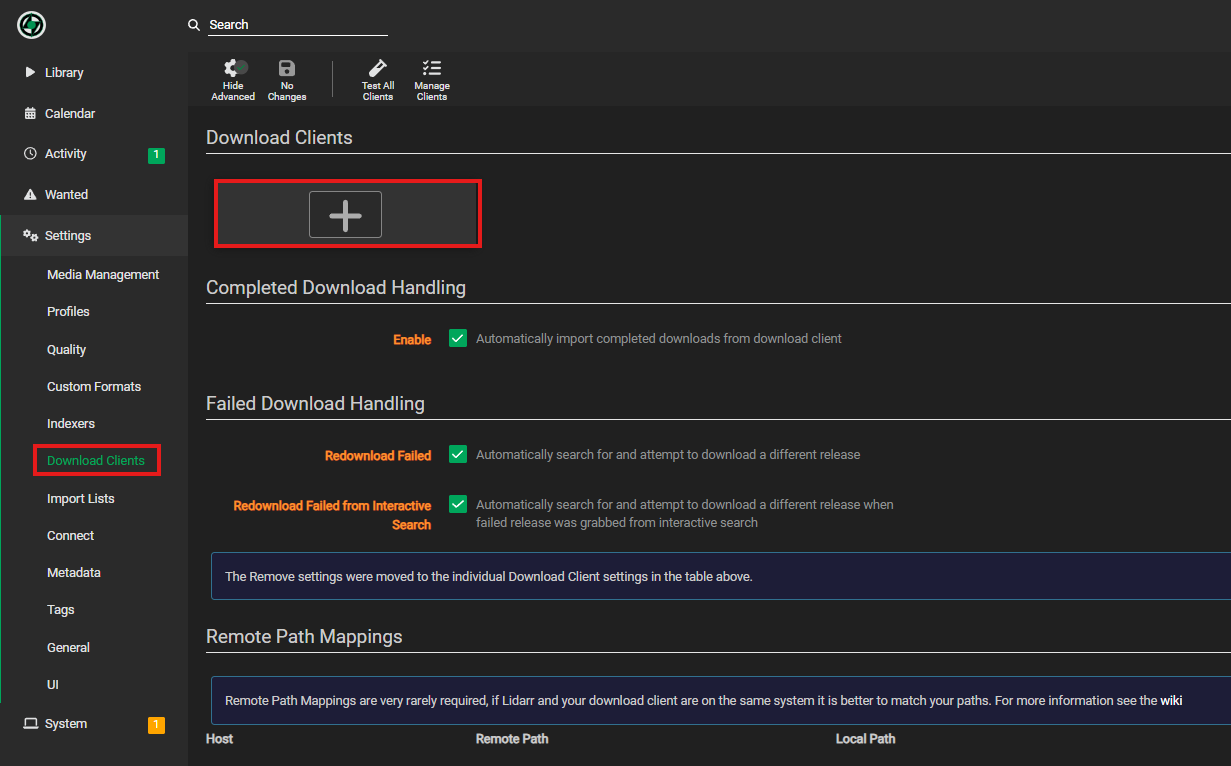
- Navigate to the
Settingstab. - Go to the
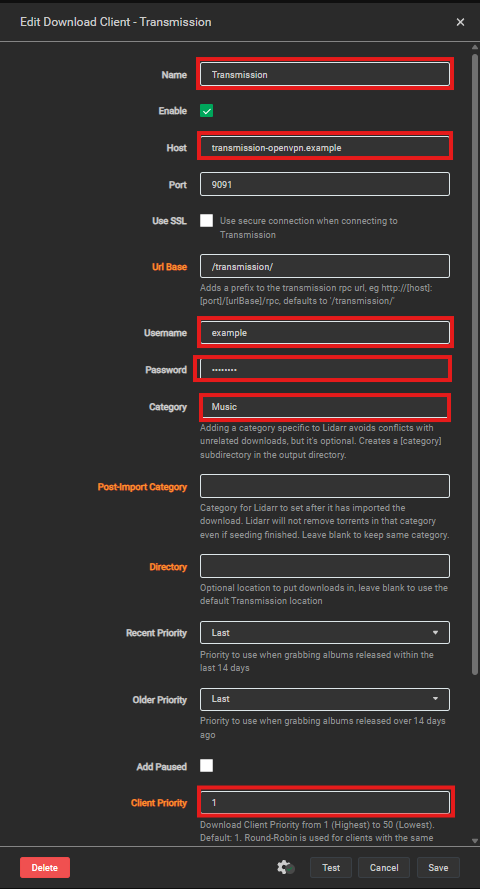
Download Clientssection. - Click
+and select your preferred download client (e.g., SABnzbd, Transmission). - Enter the necessary connection details (hostname, port, API key).
- Click
Save.

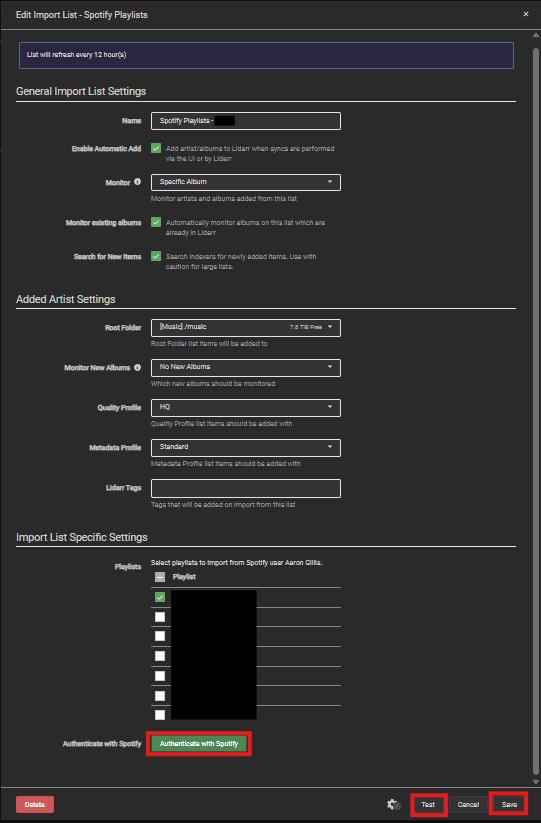
- Navigate to the
Import Liststab. - Select the
+ - Give the Import a Name
- Setup import settings, and Added Artists settings however you like
- Select the Authenticate with Spotify button and enter your Spotify credentials. Lidar will show your playlists
- Select which playlist you wish to import
-
Test,Save8 Lidarr will add the artists and albums from the songs in your playlists.
- Navigate to the
Connecttab. - Select
+ - Select Plex Media Server
- Enter the Host
- Select Authenticate with Plex.tv
-
Test, andSave
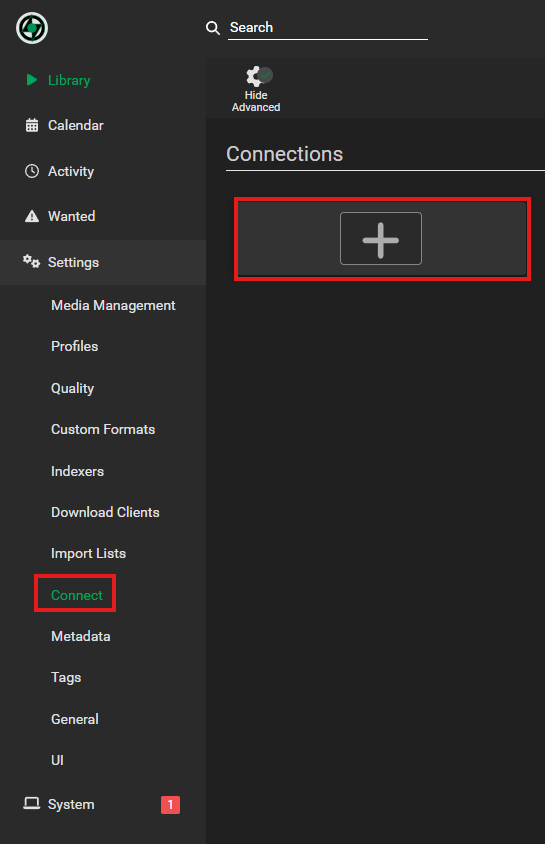
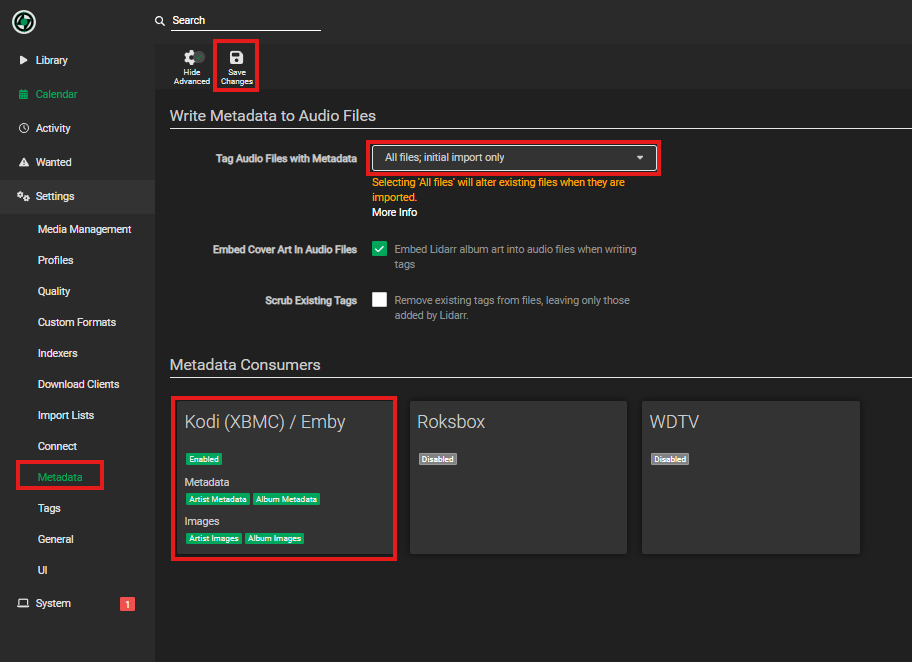
- Navigate to the
Connecttab. - Set the following
Tag Audio Files with Metadata:
All Files; initial import onlyEnable Kodi
- Navigate to the
Librarytab. - Click
Add New. - Search for and select the artists you want Lidarr to monitor.
- Configure the monitoring options (e.g., album releases, track releases).
- Click
Save.
- Ensure all paths and environment variables are updated in the
.envfile. - Regularly backup your
configdirectory to save your settings.
- Common Issues: List common issues and solutions.
- Logs: Check Lidarr logs for error messages.
- Support: Link to the Lidarr community and support resources.