Manual Output Profiles - ShadobaDev/Platemaker-qt GitHub Wiki
Output profiles
An output profile describes what comes out of a render — how wide, how tall each slice, in what file format, and with what encoding settings.
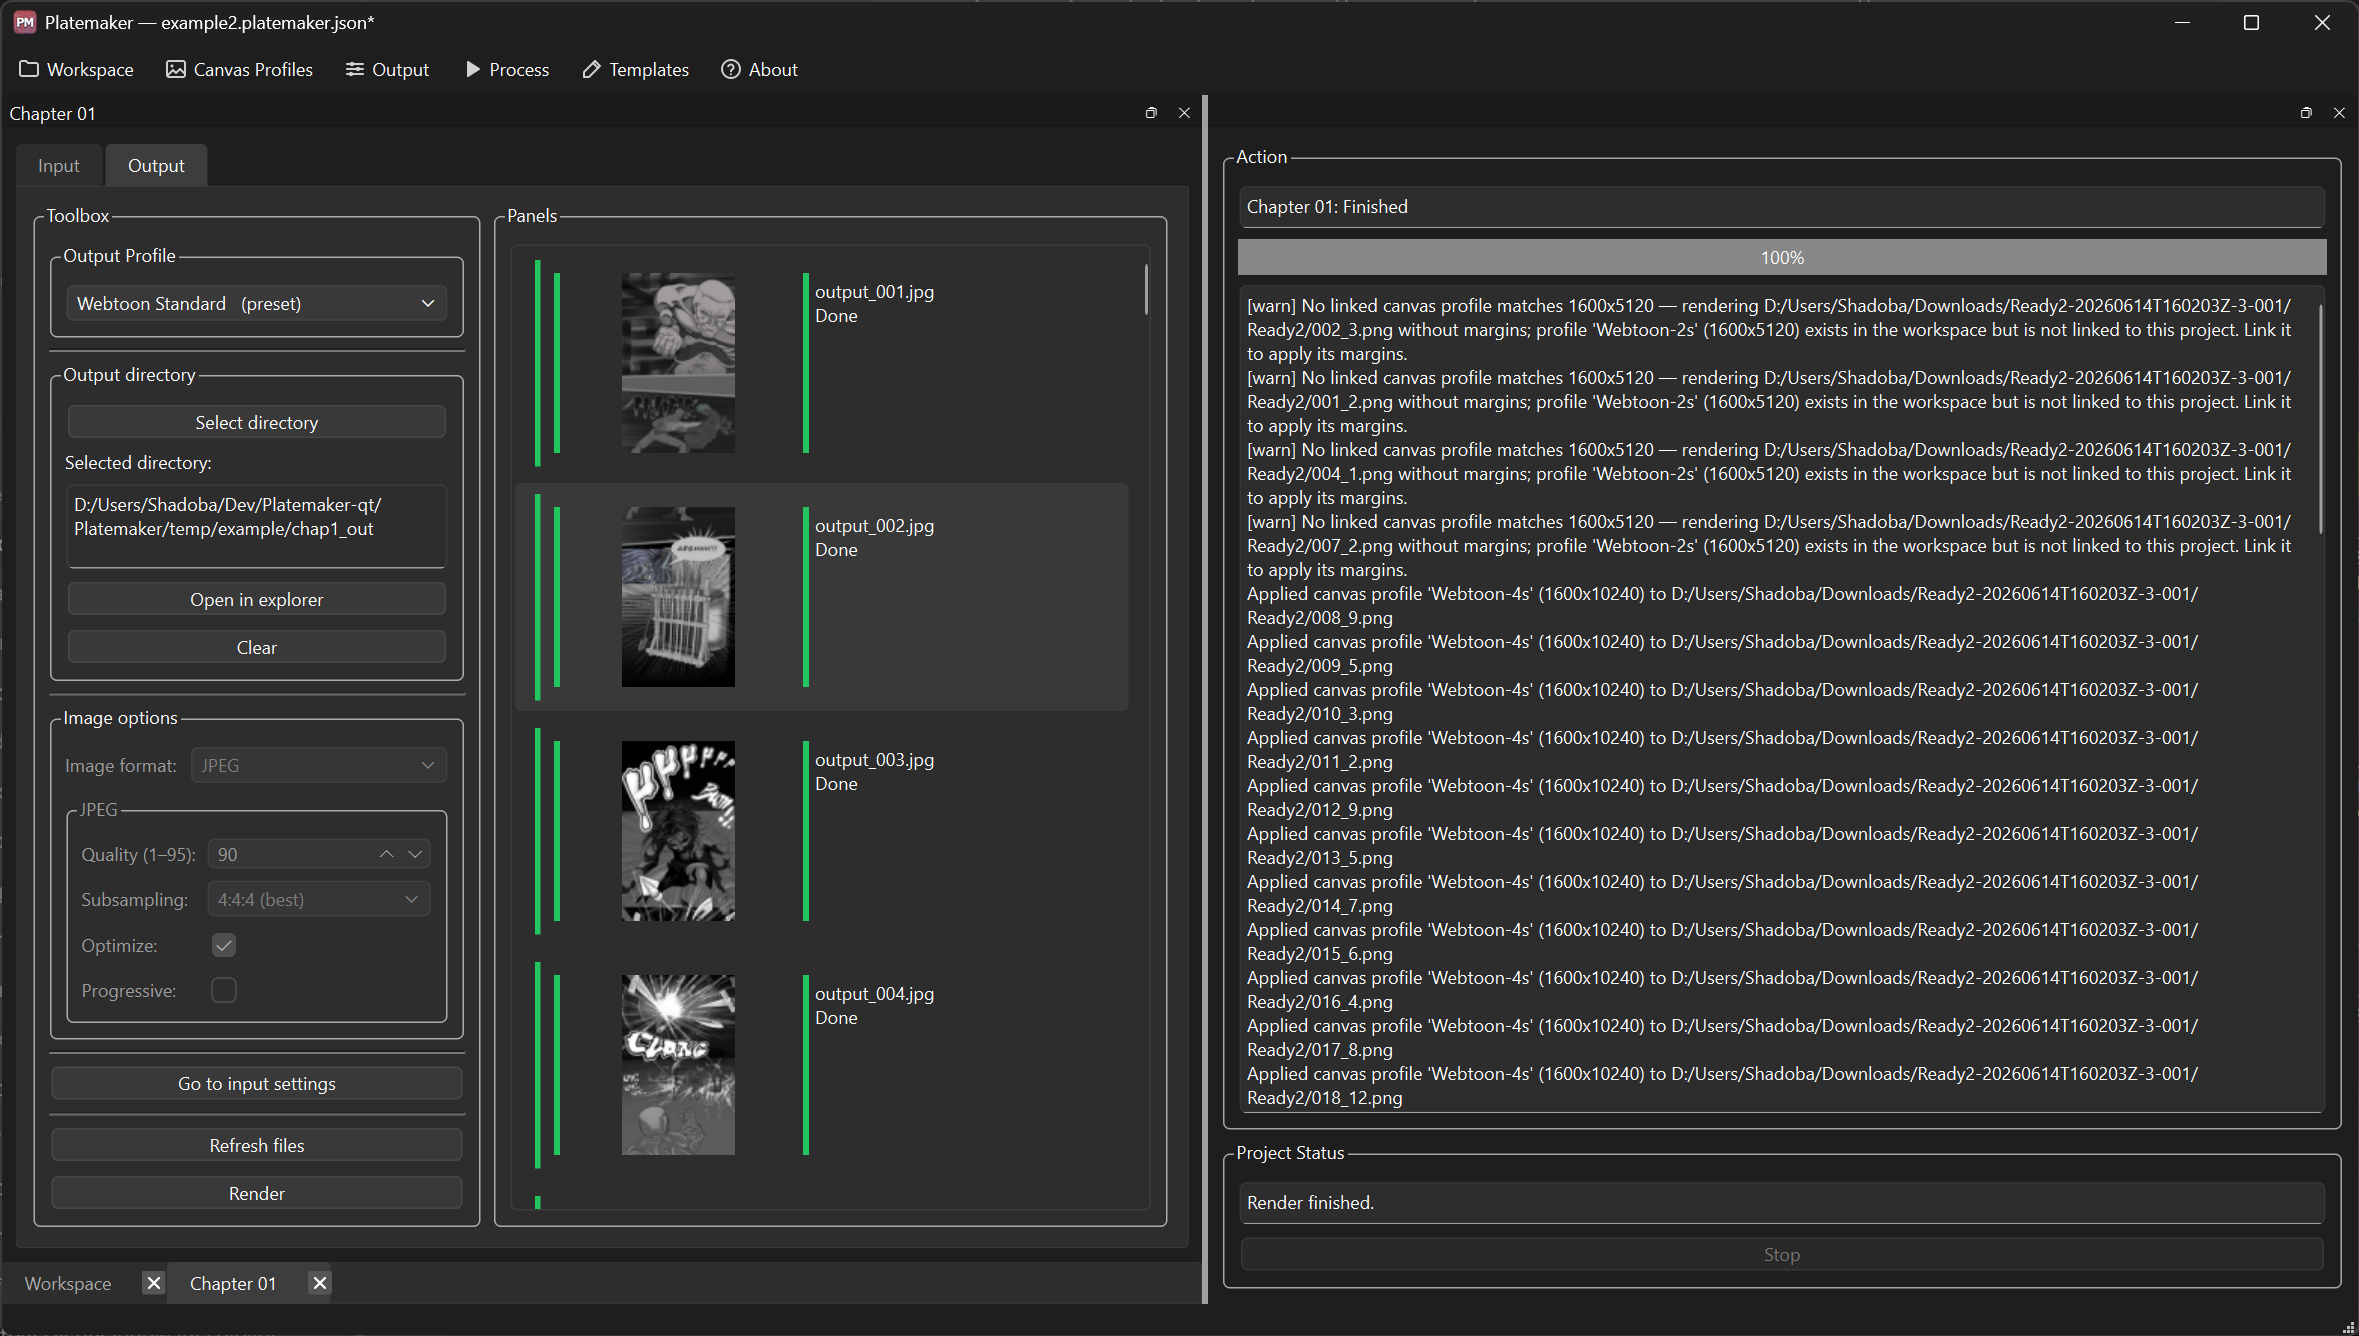
What an output profile defines
Output profiles live in the workspace and are shared by every project in it. Each project picks one from the Output Profile dropdown on its Output tab.
The profile controls the target width, the slice height, the file format and its encoding options. The output directory is set per project, not stored in the profile — see Setting the output directory below.
Target width and slice height
The built-in Webtoon Standard preset uses 800 px wide and 1280 px tall, matching the specifications published by that platform. Other platforms publish different numbers — see Targeting a different platform below.
The profile dialog
Output → Manage output profiles → Edit… opens the profile itself, where everything above lives in one place:
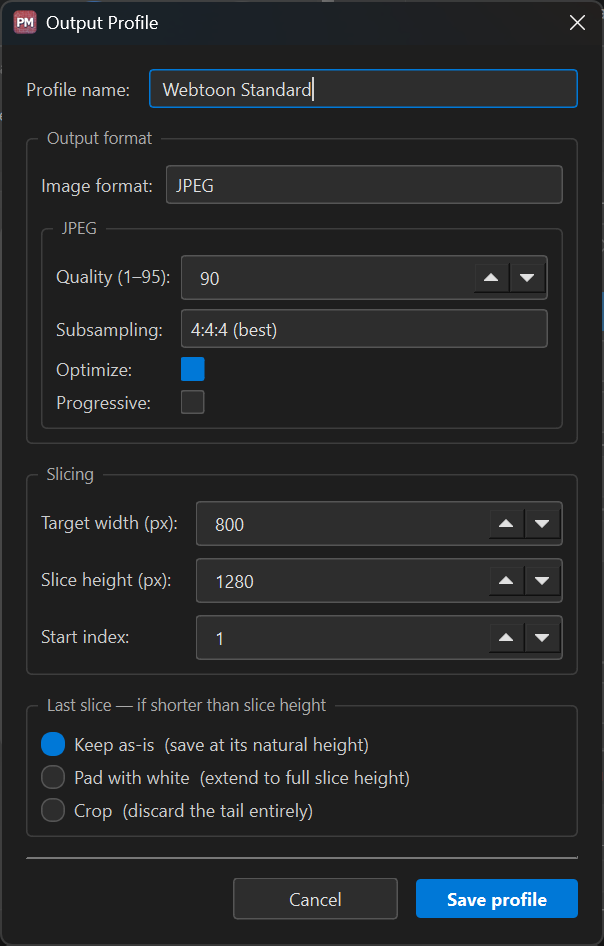
Slicing holds Target width, Slice height, Start index and Resolution; Output format holds the format and its options; Last slice is the tail policy below.
Resolution (dpi) is written into every slice, 72 by default (every preset uses 72). Screens and web platforms ignore it; it matters only if the files go to print.
Last slice — if shorter than slice height
The final slice is rarely exactly the full height. This setting decides what happens to it.
| Policy | Result |
|---|---|
| Keep as-is | Saved at its natural, shorter height |
| Pad with white | Extended to the full slice height with white |
| Crop | The tail is discarded entirely |
Use Keep as-is. It publishes the tail at its real height, which is what you almost always want. Pad with white only adds blank space at the end of your chapter, and Crop silently throws away the last piece of artwork — there is no known case where that is the right answer.
Output format and its options
The Image format dropdown in the Output tab's Image options box chooses the container, and the controls beneath it change to match:
| Format | Options |
|---|---|
| JPEG | Quality (1–95), Subsampling (4:4:4 / 4:2:2 / 4:2:0), Optimize, Progressive |
| PNG | Compression (0–9), Interlaced |
| WebP | Quality (0–100), Lossless, Effort (0–6) |
The same options are also editable through Manage output profiles — the Output tab's box edits whichever profile the project has selected.
Output file numbering
Managing output profiles
Output → Manage output profiles opens the workspace-wide list, with the same New / Edit / Duplicate / Set active / Delete controls as canvas profiles, and a ★ marking the active profile.
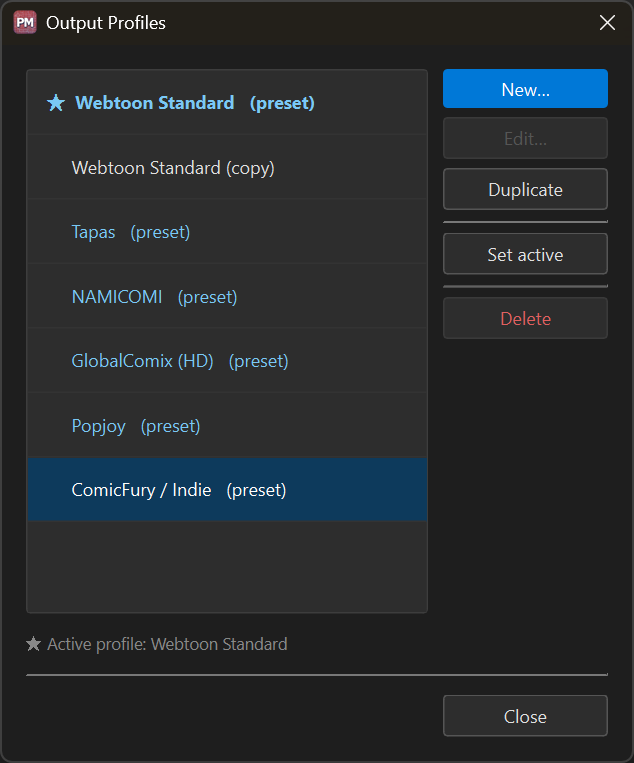
Here the built-in Webtoon Standard (preset) sits alongside a user's editable Webtoon Standard (copy) made with Duplicate — the preset appears once, marked, and cannot be duplicated into a second stored copy of itself.
Presets
Some profiles ship with the application rather than belonging to your workspace. Each is listed
with a (preset) marker, and its Edit and Delete buttons are disabled; hovering either
explains why.
Since 1.3.0 the catalogue covers several platforms, each sized so the preset always produces an uploadable file for its target — slice heights stay conservative and compressed formats are preferred. If you want to push size or quality further, duplicate the preset and change the copy.
| Preset | Width × slice | Format |
|---|---|---|
| Webtoon Standard | 800 × 1280 | JPEG (q90, 4:4:4) |
| Tapas | 940 × 1504 | JPEG |
| NAMICOMI | 1200 × 1600 | PNG |
| GlobalComix (HD) | 1280 × 2560 | WebP |
| Popjoy | 1000 × 2000 | JPEG |
| ComicFury / Indie | 950 × 1500 | JPEG |
These figures come from each platform's published requirements at release time. Platforms change their specs; verify against the platform's own creator docs before a chapter matters.
A preset is shared by every workspace, so it has to mean the same thing everywhere. That is why it cannot be edited.
The same guard applies to the other way in: Output → Edit active output profile on a preset tells you it is built-in and cannot be edited, rather than opening the dialog.
To get a version you can change, select the preset and press Duplicate. The copy is an ordinary profile — fully editable, belonging to your workspace, and free to diverge.
How presets are stored
Since 1.2.0 a preset is never saved into your workspace. It lives in the application, and the workspace only references it by a stable id. This has two useful consequences:
- You will not end up with a stray copy of a preset cluttering your profile list, or two entries of the same name — a problem older versions could produce.
- Opening a workspace made by an older build migrates it: a stored copy of a preset is dropped and anything pointing at it is relinked to the built-in; a profile that had diverged from the preset keeps its own settings under a fresh identity; a profile of yours that merely resembles a preset is left untouched.
Nothing is lost in migration — a profile you customised stays exactly as you set it.
Targeting a different platform
If your platform is one of the presets above, select it and you are done. For anything else, build a profile from its published specifications: set the target width it requires, a slice height that keeps each file under its per-file cap, and a format it accepts (a compressed one — JPEG or WebP — if size is tight).
Platemaker cannot guarantee a platform will accept a file; it only produces one to the settings you give. Always check the platform's current creator requirements.
File size is not checked
Platemaker does not enforce a size limit — it will not warn you before a render or refuse to write files that are too big for a platform. Publishing platforms do cap file size (the first chapter behind this project was shipped as JPEG specifically to fit a 20 MB per-chapter limit).
Since 1.4.0, though, you no longer have to add up the folder by hand: the render summary in the action log reports the total output size and the heaviest slice. Check that against your platform's cap, and if it is too heavy, lower the JPEG quality or switch format and re-render. See Rendering.
Setting the output directory
The output directory is set per project, in the Output directory box on the Output tab:
- Select directory — pick where this project's slices are written; the chosen path is shown below the button
- Open in explorer — open that folder in the file manager
- Clear — forget the directory
The rest of the Output tab
Below Image options the Toolbox has three buttons:
- Go to input settings — switch back to the Input tab
- Refresh files — re-scan and repaint statuses (see Projects)
- Render — render this project (see Rendering)
See also: Rendering · Concepts · File statuses · Publishing