Getting started - LemmusLemmus/GlosSI-Integration-Playnite GitHub Wiki
Playnite 9 or 10 (latest version as of writing), Steam and GlosSI must be installed. The latest version of GlosSI can be downloaded here Maintenence of GlosSI has stopped for the time being, see the GlosSI GitHub readme. For instructions on how to install GlosSI, take a look at the GlosSI website. For instructions on how to install Playnite extensions like this one, see the relevant Playnite wiki page. Note that you can use GlosSI and Playnite without this extension: the extension simply automates things.
You can modify the behavior of the extension via the settings panel. Only the path settings are required to be set.
If you are familiar with GlosSI, the default configuration to be used when automatically creating Steam shortcuts for games can be changed via the "Edit the GlosSI configuration used when creating new shortcuts" button. This will open the .json file used to store configurations. It can either be modified directly or you can replace its contents with a configuration made through the GlosSIConfig user interface.
Enable "When the game overlay is closed, also close the game" if you want the Steam overlay button "Force Quit"/"Exit Shortcut" to also kill the game (instead of only killing the overlay). Note that support for this is currently spotty: it may not work for some games, due to multiple executables being used by the game. This could be fixed in the future...
A default Steam overlay can be used. When the integration is enabled, the default Steam overlay will be opened if the game lacks a game specific overlay (see "adding integration" for how to add a game specific overlay).
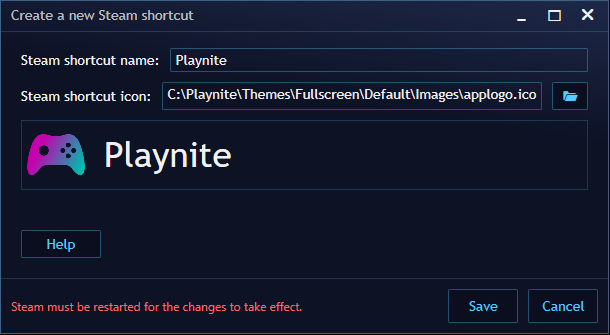
Press ➕ to automatically create a new overlay. Choose a name and an icon (or leave the icon path empty) for the Steam shortcut that will be created. Note that the path to the image may not be changed afterwards, or else Steam will not be able to find it.
- If you want to add an already existing shortcut, simply enter the name of the shortcut in the settings menu (make sure that it has been added to Steam).
- If you want to change something about the overlay, edit the shortcut in Steam or in GlosSIConfig. Note that if the name is changed it also has to be updated in the settings menu.
Toggle whether Steam shortcuts should be launched when starting games by default when the application is started.
One can toggle whether the extension should be used in fullscreen mode. Additionally, a Playnite Steam Overlay can be used. If configured, this Steam overlay will be used while navigating your Playnite library. To configure it, see "Configuring the overlay".
The paths to your Steam shortcuts.vdf file and GlosSI folder are required.
-
shortcuts.vdfis the file that stores information about the non-Steam shortcuts. If it was not automatically found, it can be found in your Steam installation folder, underSteam\userdata\<your ID>\config. - The GlosSI folder is the folder where GlosSIConfig.exe and GlosSITarget.exe can be found.
If you have a controller connected, you may want to use Steam's big-picture overlay. To do so, make sure to enable in the Steam "Settings" → "In-Game" → "Use the Big Picture Overlay when using a Steam Input Enabled controller from the desktop." Also check out "Settings" → "Controller" → "General Controller Settings" and enable everything that is relevant to you.