Calibrating pumps - HenriquesLab/NanoJ-Fluidics GitHub Wiki
Calibration
There will be some variability between pumps in the torque they can apply. This means that they need to be calibrated to ensure that we can inject the correct volume.
Calibration procedure summary
The procedure requires a syringe with a known internal diameter D. The diameter is usually provided in the syringe's spec sheet, but can also be found on google easily. We then pump a liquid at full speed for X amount of time and then measure the resulting volume V in micro-liters. We will then know that the pump can achieve the maximum flow-rate V/X at diameter D. By inputting this calibration value into the software, it will try to extrapolate what is the correct flow-rate at different syringe diameters whenever these are required.
Measuring the volume
The most precise way of measuring the resulting liquid volume is to use an analytical balance to weigh the injected liquid. If you weigh 23 milligrams of water after injecting for 10 seconds, then you will know that the pumps injected ~23 micro-liters; this corresponds to a flow-rate of 2.3 micro-liters per second.
Please note that, if using a liquid other than water, then you will have to take the density of the liquid into account.
Caveats
It should be noted that there are a few things that can make the calibration unreliable.
- First, it should only be considered valid for liquids with a similar viscosity: a pump calibrated with water will give a different flow-rate with glycerol and vice-versa.
- Second, syringes with a larger internal diameter (i. e. 20 ml and up) will require a bit higher torque. Therefore, pumps calibrated with smaller syringes might not be as accurate with higher volume syringes and vice-versa.
Calibration procedure
Pre-requisites
Before proceeding with the below guide, there are a few things you need to be familiar with.
- Please read the section on how to use the pumps.
- Choose appropriate tubing and needles for the syringes you'd like to use.
- Install the GUI.
- Connect the pumps.
Once you have installed the GUI and are familiar with the usage instructions, you are ready to begin a calibration procedure. This is described below as a step by step guide.
Step by step guide
-
Choose a syringe size and write down it's internal diameter. This PDF is a good reference for syringe sizes and diameters.
-
Fill the syringe with liquid.
-
Connect the appropriate [needle][needle] and tubing to the syringe.
-
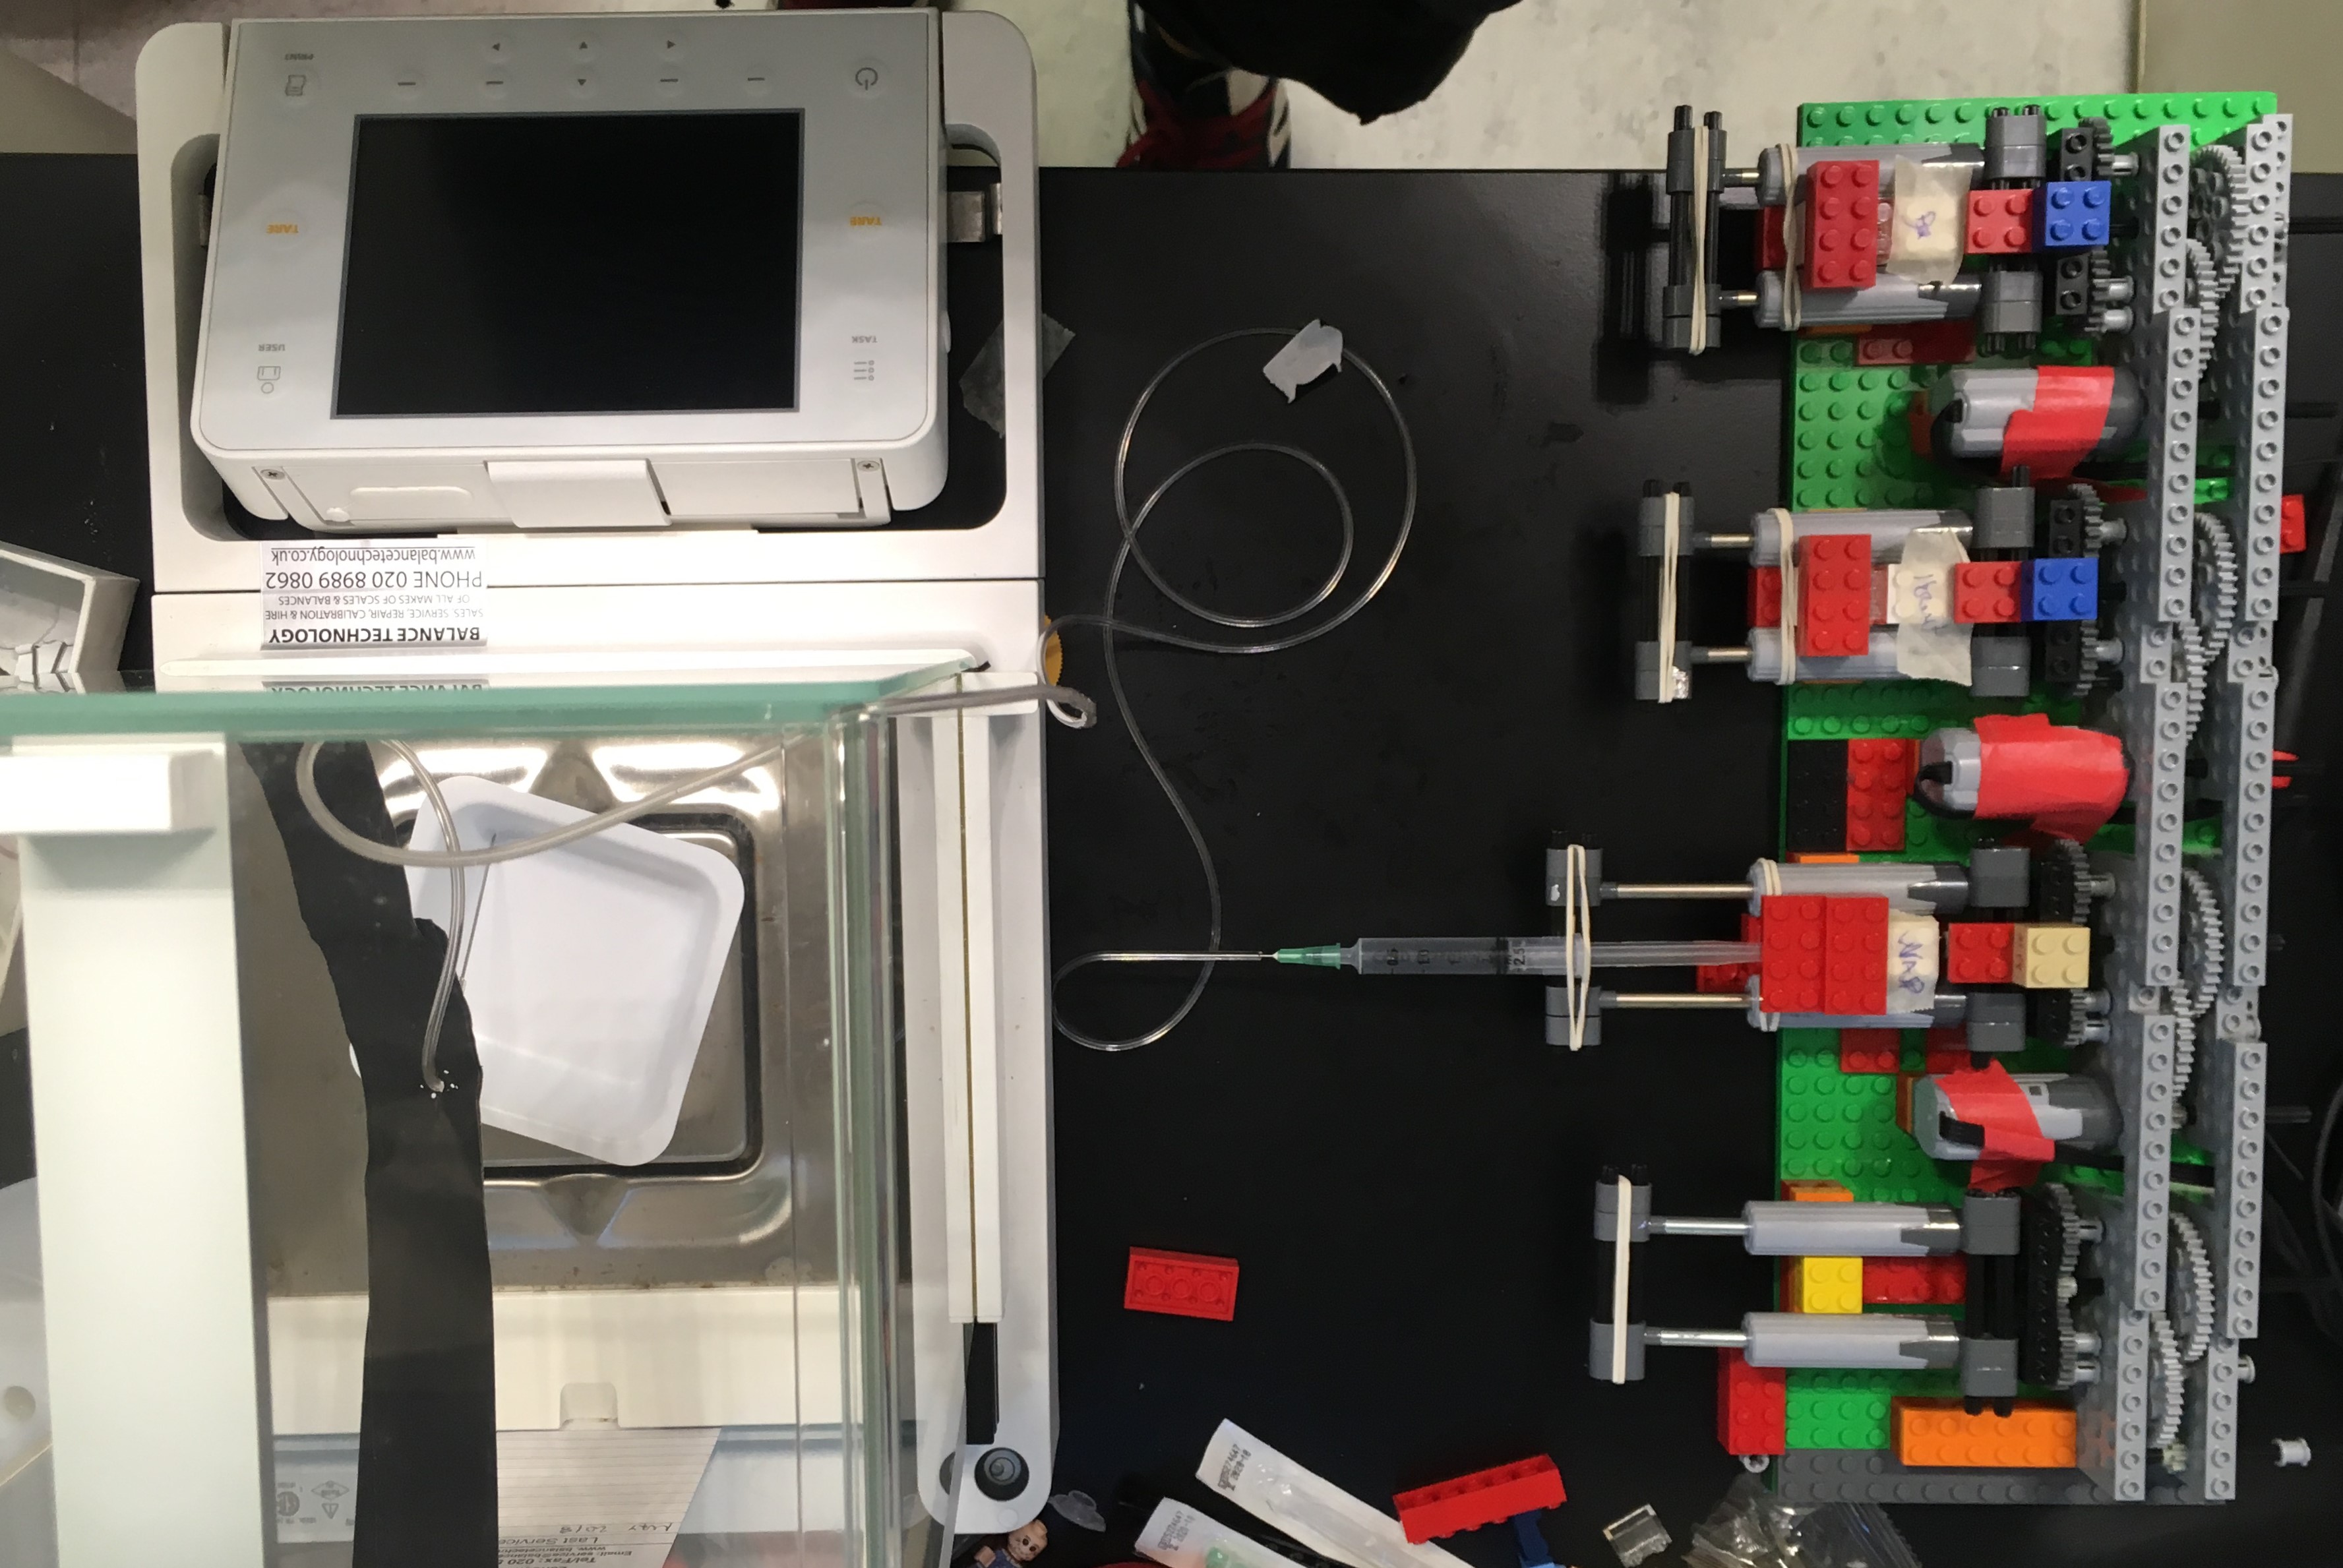
Place a light container, like a weight boat in the analytical balance.
-
Place the free end of the tubing so it is either gently touching the container or just above it. Try and secure it with tape to prevent vibrations from affecting the measurement. You can see our setup below:

-
Tare the container.
-
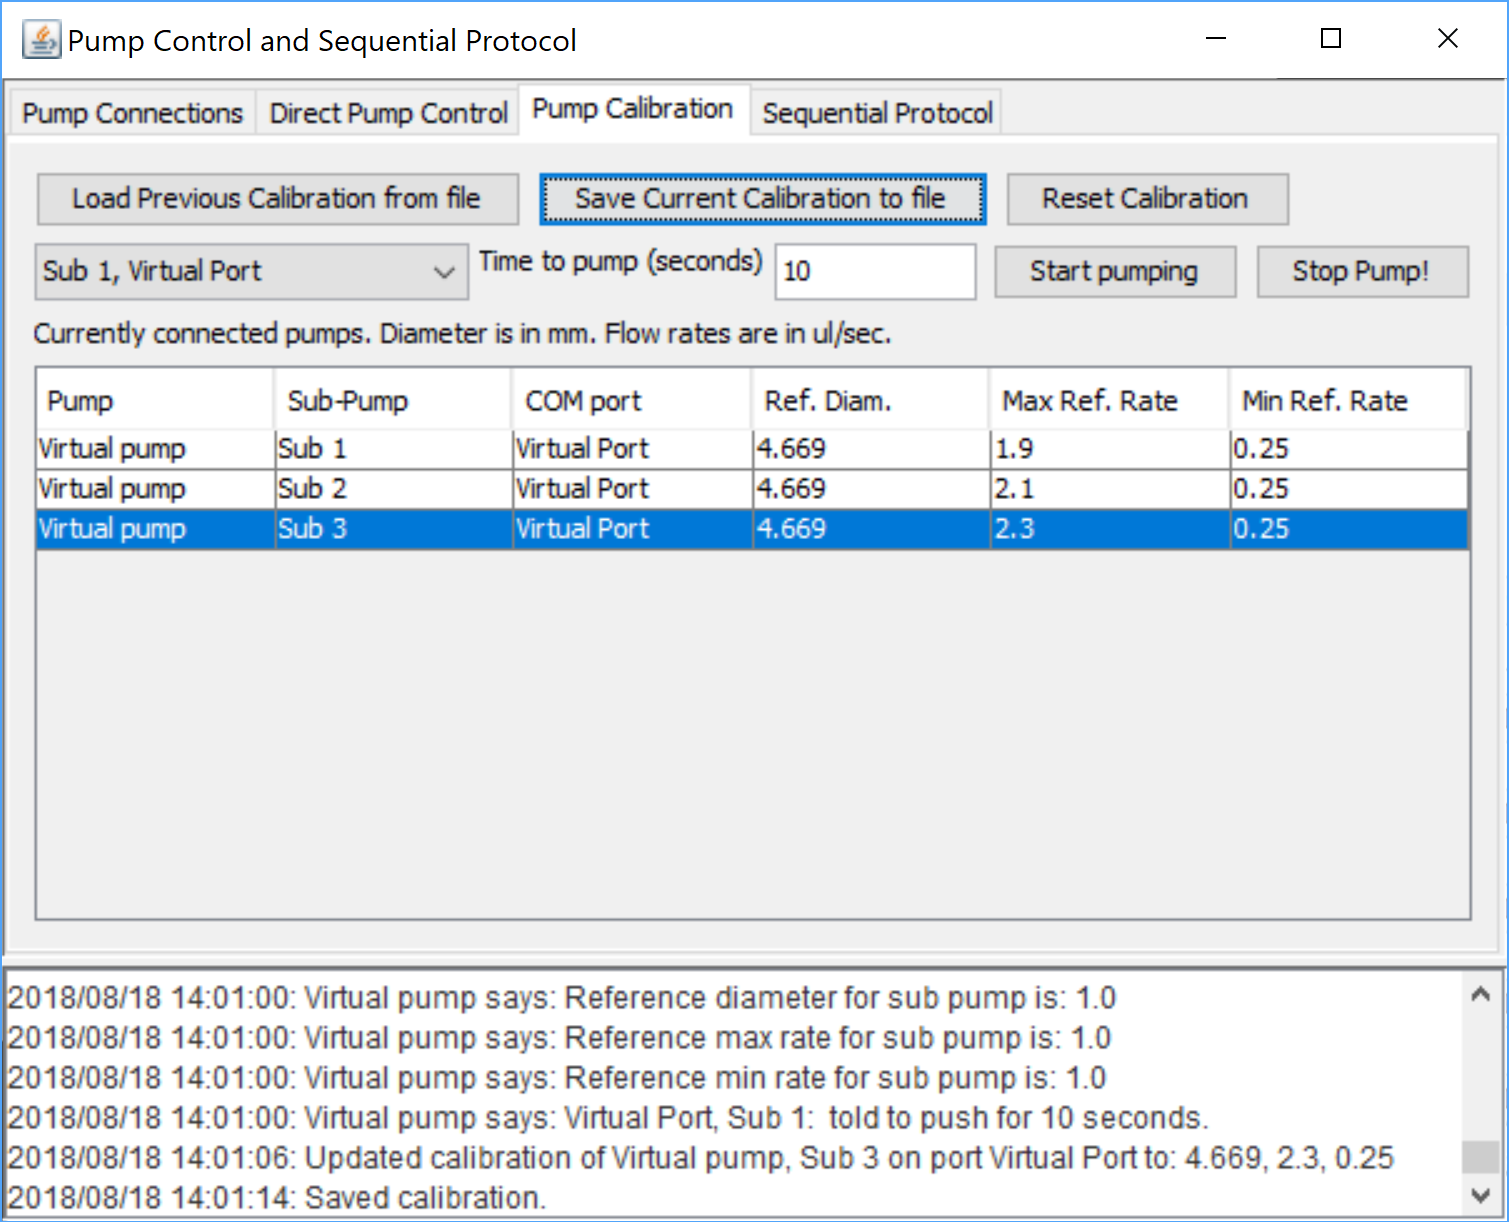
Using the calibration panel in the GUI (shown below), select the pump you wish to calibrate on the dropdown menu, at the top.
-
Type in the amount of time
tyou wish to pump for (i.e. 10 seconds). -
Check in the analytical balance by how much the weight has increased and write it down.
-
Tare the analytical balance and repeat the measurement as many times as reasonable (5-10 is suggested).
-
Once a sufficient number of measurements has been made, calculate:
- The average weight that was injected, or
w - The volume the weight corresponds to
v - The flow-rate will be
v/t, withtbeing the time the pump injected for in each measurement (i.e. 10 seconds)
- The average weight that was injected, or
-
Finally, find the corresponding pump in the GUI table and edit the diameter to match your syringe. The flow-rate you have just measured is the maximum flow-rate. The minimum flow-rate for Lego pumps is around 25% of that value.