Datalogging Part 3, RC File Transfer
This basic tutorial shows some ways to transfer datalog or other files from the FTC Robot Controller (Control Hub or RC phone) to a desktop or laptop computer.
Manually transferring datalog files from the RC device will be of most interest to Android Studio users. This isn't needed with OnBot Java, where datalogs can appear on-screen for easy Download.
Another simple way to transfer files is with a USB thumb drive, not covered here.
This article is Part 3 of a 4-part series on Datalogging. Part 1 shows how to run a sample OpMode and chart its data. Part 2 shows how to customize the sample OpMode for logging your own robot data of interest.
Part 4 describes the inner workings of a different, much simpler Datalogging class. It's strictly a Java learning exercise, showing basic steps to log robot data on the RC device. It does not require familiarity with Parts 1 and 2.
The simplest transfer method is to plug the RC device into a computer via USB cable.
-
It must be a 'data' cable, not 'charge-only'.
-
For Control Hub use the USB-C port, not the Mini USB port.
-
Connect the device for file transfer (Media Transfer Protocol or MTP mode).
- on RC phone, swipe down twice to set MTP mode
-
Use the computer's file manager to locate the RC source folder.
-
Copy-and-paste the datalog or other file to the computer.
-
Unplug the USB cable; no need to 'Eject'.
It's possible to connect the RC device wirelessly to a laptop (or desktop with Wi-Fi). The RC device must allow USB debugging, which can be turned on in Developer Options.
-
Control Hubs allow USB debugging by default.
-
For RC phones, follow these steps:
- open Settings and "About phone"
- tap 7 times on "Build number"
- now "Developer Options" will appear under Settings/System/(Advanced)
- turn on USB debugging
-
At first connection to a laptop, check the box to allow USB debugging from that computer.
Also, the laptop must have Android Debug Bridge or "adb" installed. Installing adb is described many places online, and in the FTC Wiki at this page.
After completing the above adb set-up steps, click the laptop's Windows 10 or Windows 7 icon at bottom left corner. In its search bar, type cmd to open the Windows Command Prompt window.
To verify that adb is already installed, type adb devices. An error message will appear if adb is not installed; otherwise a list of devices may appear (OK if blank, for now).
To connect a Control Hub, type adb connect 192.168.43.1:5555 at the command prompt, and wait for acknowledgement.
Connecting an RC phone via adb can be done in two ways: with Wi-Fi Direct, or with standard Wi-Fi.
-
For both methods, plug RC phone into laptop with USB cable
- optional to set file transfer (MTP) mode
- if a pop-up appears, check the box to allow USB Debugging
- at the command prompt, type
adb tcpip 5555 - wait for message "restarting in TCP mode port: 5555"
- optional to confirm wired connection with
adb devices - unplug the USB cable
-
Wi-Fi Direct method:
- open the FTC RC app
- connect the laptop's Wi-Fi to the RC phone's network, as usual for Blocks/OnBot Java programming
- at the command prompt, type
adb connect 192.168.49.1:5555 - receive confirmation
-
Standard Wi-Fi method:
- confirm laptop and phone on the same standard Wi-Fi network
- Airplane Mode off
- get (from Settings) the phone's IP address (e.g. 192.168.1.15)
- type
adb connect 192.168.1.15:5555, using the phone's actual IP address - receive confirmation
-
For both methods, optional to confirm wireless connection with
adb devices.
With adb in place, copying a file from the connected device to your laptop can be done with a single "pull" command. For example:
adb pull /sdcard/FIRST/Datalogs/myDatalog_001.csv C:\Users\Public\Documents
The 'source' field is the filename on the RC device. The 'target' field is the desired destination folder on your laptop.
And yes, it is really that easy. (There's also a "push" command.)
Some notes:
-
Uppercase/lowercase is optional, but pay attention to forward- and back-slashes.
-
Files with the same name will be overwritten in the target folder. Rename files as needed to avoid this.
-
If a folder or file name contains a space (blank character), enclose the entire pathname in double-quotes. For example, "C:\Users\Public\My Documents".
You could transfer files with Android Studio, used here for its file manager, not for programming.
These steps are not as fast as "adb pull", but the file manager allows you to see and navigate the source and target folders.
The following steps are illustrated; right-click each blue link and open a new browser tab to see its image.
-
connect via adb to the Control Hub or RC phone
-
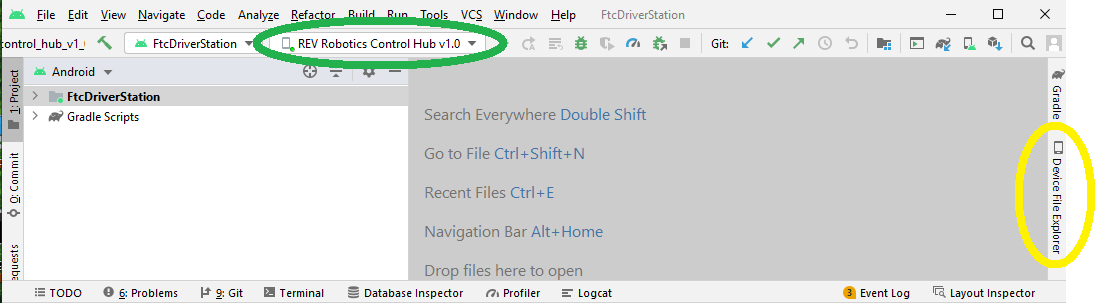
open Android Studio (any project)
-
click "Device Explorer" at right edge
-
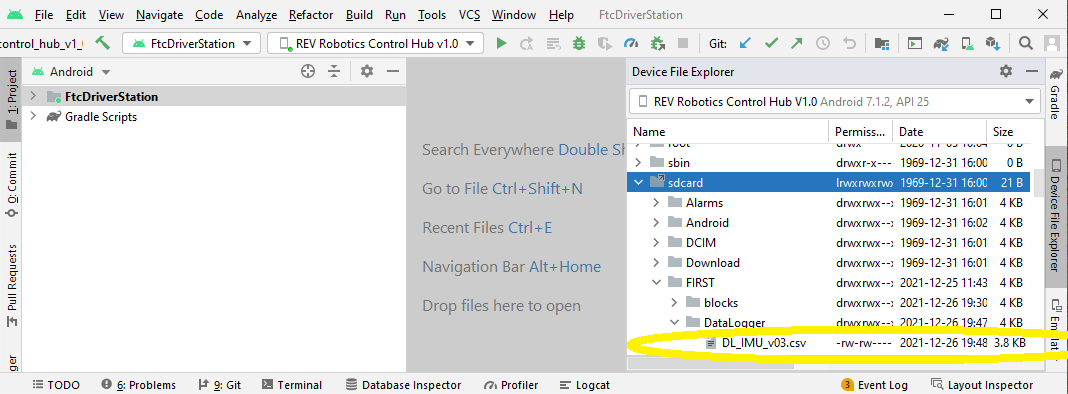
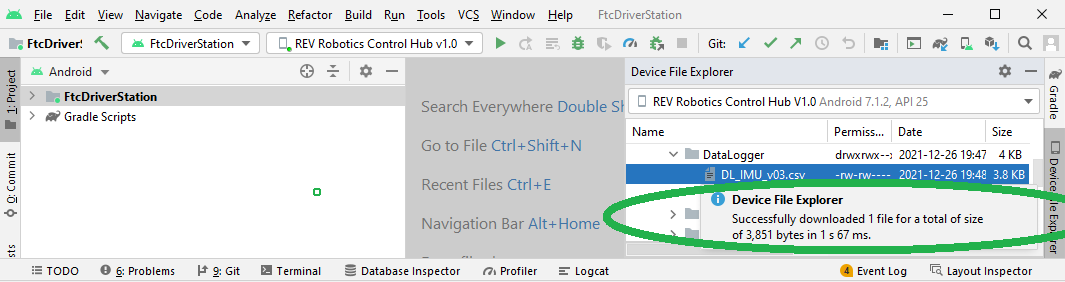
in Device Explorer, navigate to the device folder FIRST/Datalogs
-
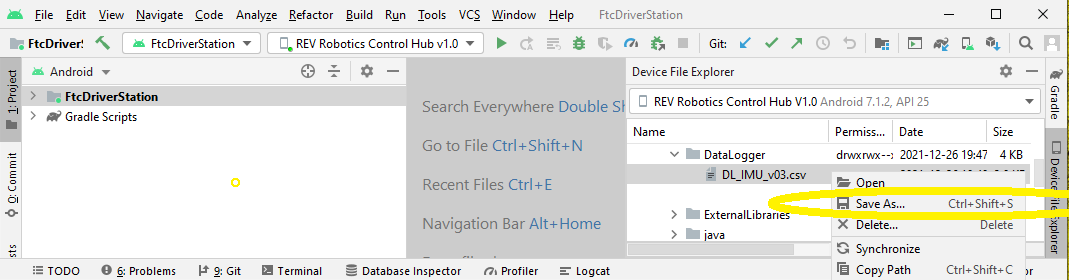
right-click the filename, choose "Save As..."
-
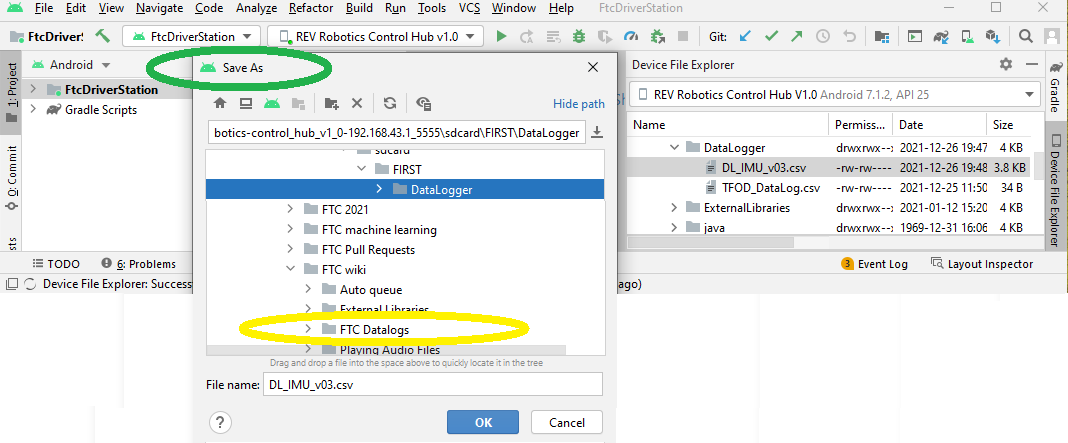
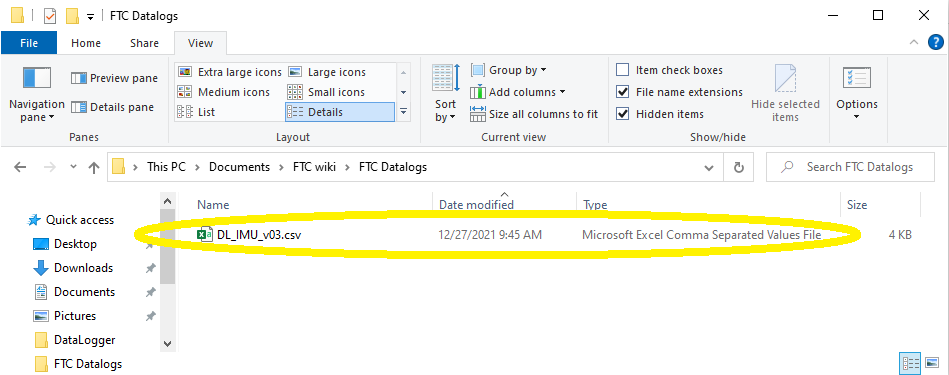
at the next window, navigate to the laptop target folder, click OK
This copies the file to the laptop target folder, confirmed with Windows Explorer.
To refresh the directory listing, re-select the RC device from the top pull-down menu, just below the heading "Device File Explorer".
This basic tutorial showed some ways to transfer datalog or other files from the FTC Robot Controller (Control Hub or RC phone) to a desktop or laptop computer.
This article did not cover:
-
portable USB flash drives (thumb drives)
-
direct download with connected software such as FTC Blocks or OnBot Java
-
methods that require installing third-party apps to the RC device, and in some cases also installing software to the laptop. Some examples are described here and here.
You are encouraged to submit and describe other file transfer methods that worked for you.
This article is Part 3 of a 4-part series on Datalogging.
Part 1 shows how to run a sample OpMode and chart its data.
Part 2 shows how to customize the sample OpMode for logging your own robot data of interest.
Part 4 describes the inner workings of a different, much simpler Datalogging class. It's strictly a Java learning exercise, showing basic steps to log robot data on the RC device. It does not require familiarity with Parts 1 and 2.
Questions, comments and corrections to westsiderobotics@verizon.net


- Control Hub
- Robot Controller (RC)
- Driver Station (DS)
- Two Expansion Hubs
- Updating FTC Software - new!
-
TensorFlow 2023-2024