Getting Started Service Integration with MicrosoftFlow - DigiBP/digibp.github.io GitHub Wiki
This getting-started illustrates how an iSaaS, in this case, MicrosoftFlow, can be used to integrate Dropbox and create a file under a path folder and inserts content into it.
This iSaaS guide is a follow-up of the Service Integration guide.
This guide relies on the previously configured settings, as part of the Workflow Getting Started guide, and knowledge gained in the Service Integration guide.
Contents:
Scenario
This guide relies on a very basic scenario where a file is created under a path folder in Dropbox and some content is inserted into the file.
1. Microsoft Flow
Got to Website: https://flow.microsoft.com
- Register as a new user
- Create a new flow, i.e. select create from blank
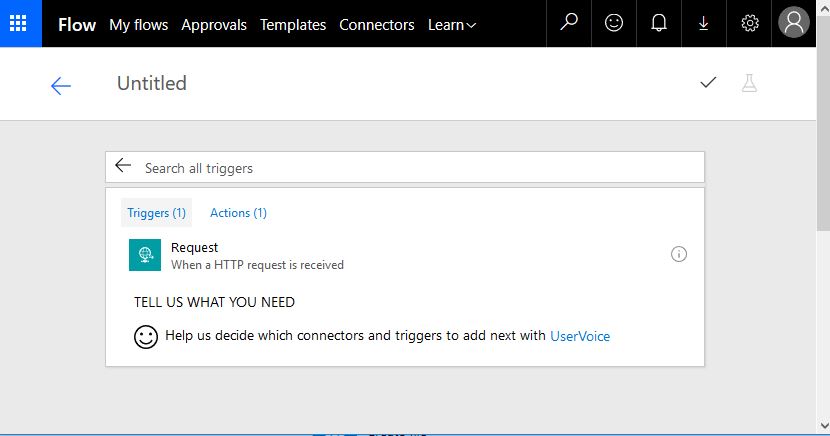
- Click on "Search hundreds of connectors and triggers" on the bottom of the page
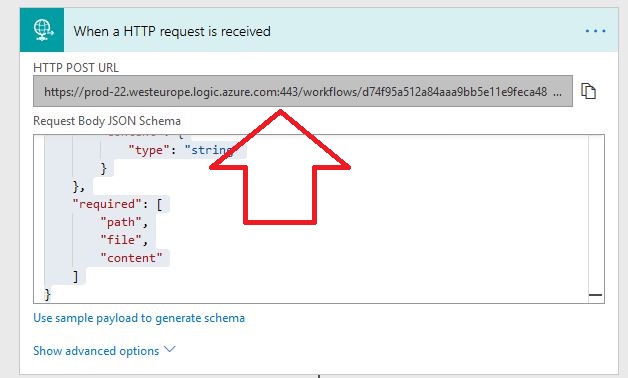
- Look for "http request" and select it (see below image)
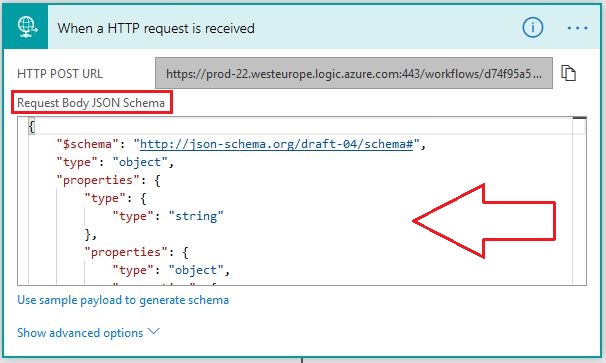
- Copy and paste the below script into Request Body JSON Schema (see image below the script)
{
    "$schema": "http://json-schema.org/draft-04/schema#",
    "type": "object",
    "properties": {
        "path": {
            "type": "string"
        },
        "file": {
            "type": "string"
        },
        "content": {
            "type": "string"
        }
    },
    "required": [
        "path",
        "file",
        "content"
    ]
}
- Select: "New Step" and then "Add an action"
- Look for "Dropbox - Create file" and select it
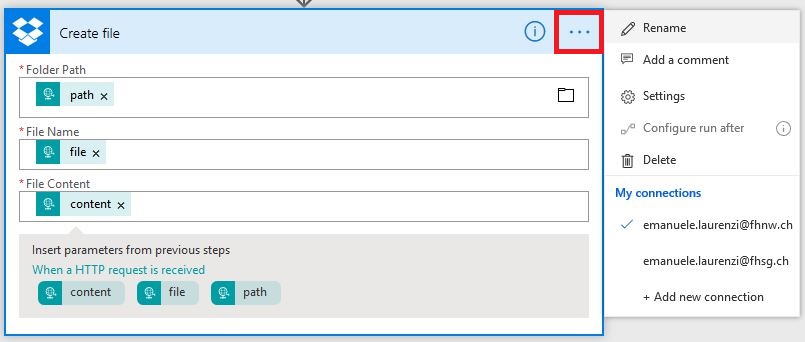
- Connect to your Dropbox account by clicking in the red rectangle shown in the below image
- Select the parameter "path" in the Folder Path, Select the parameter "file" as a File Name and select the parameter "content" as a File Content (see below image)
- Save the flow and this will create the URL from the request object. You will need to paste this URL on the client side (Camunda and Postman) in order to make the client-server interaction happening
2. Postman
Open Postman
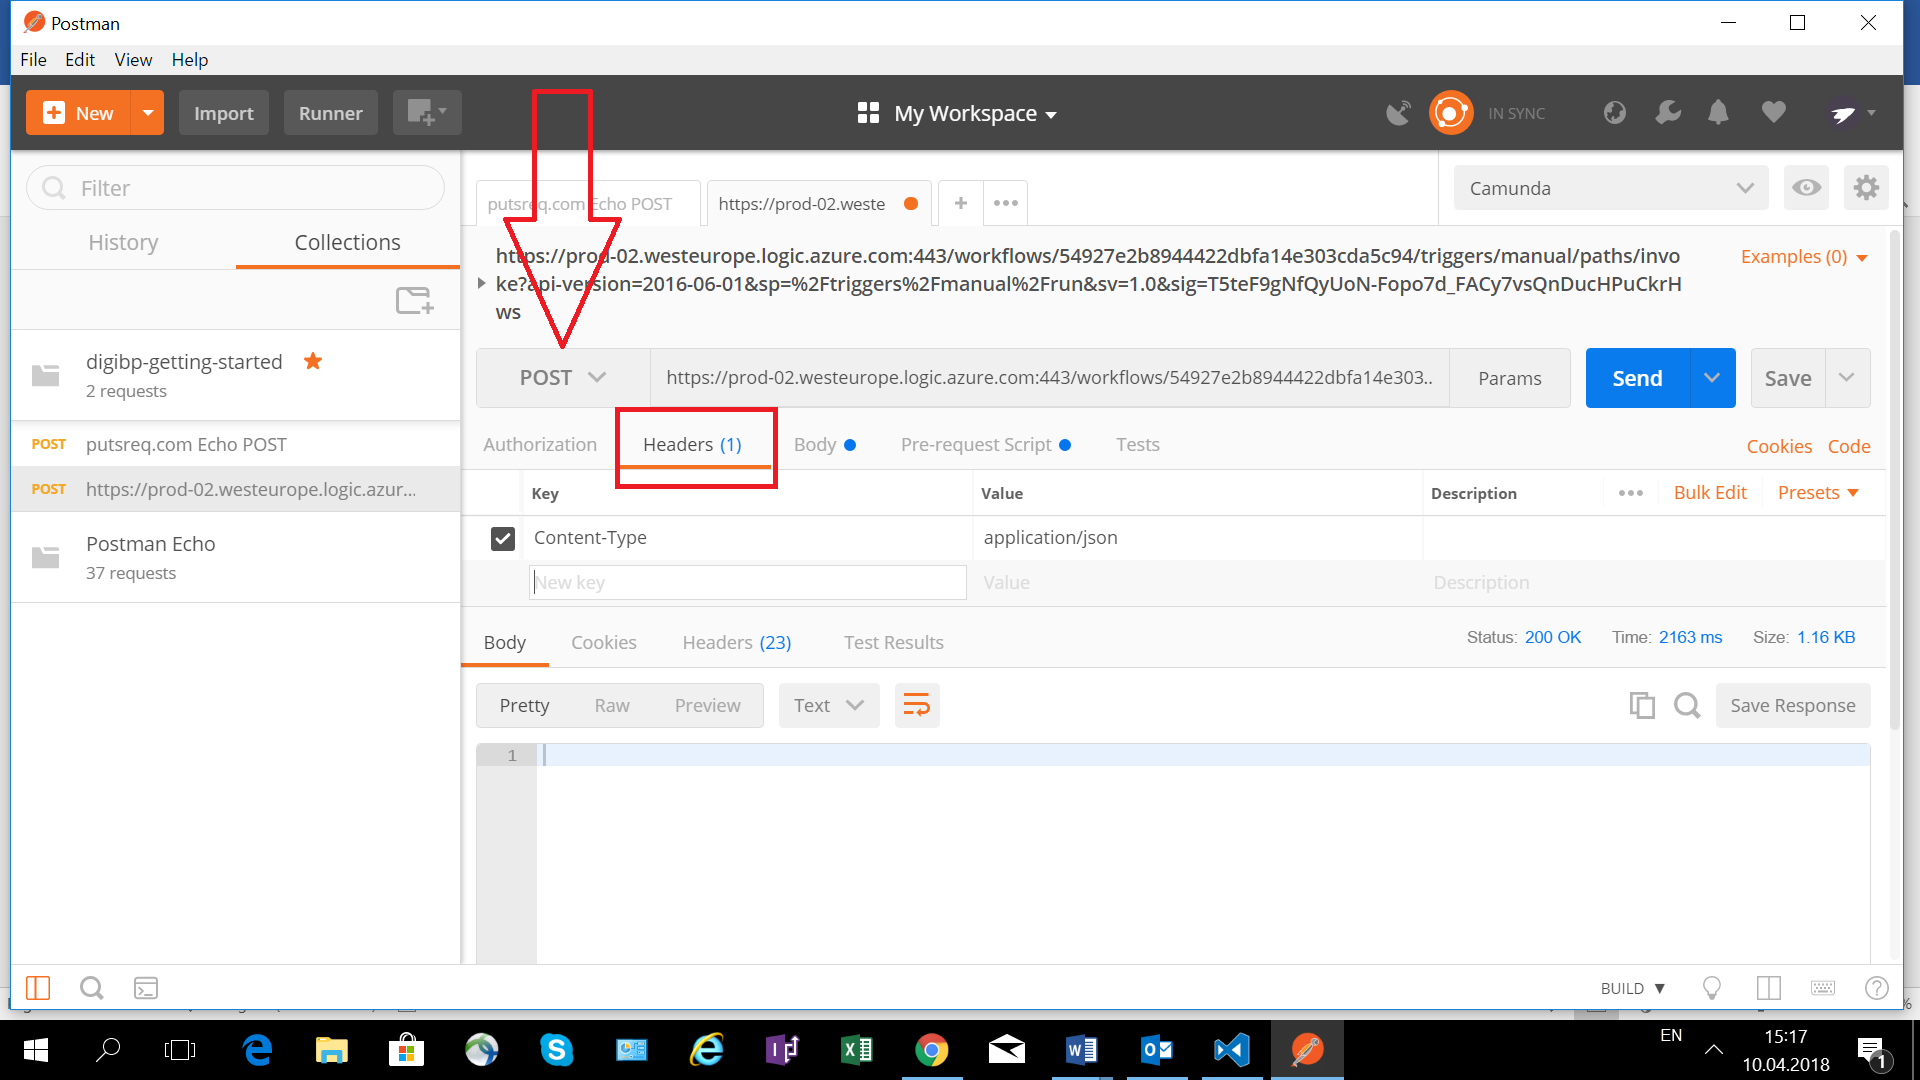
- Set the http verb to "POST" (see red arrow in the below image)
- Click on "Headers" (see red rectangle in the below image) and enter both "Content-Type" as the Key and "application/json" as the Value
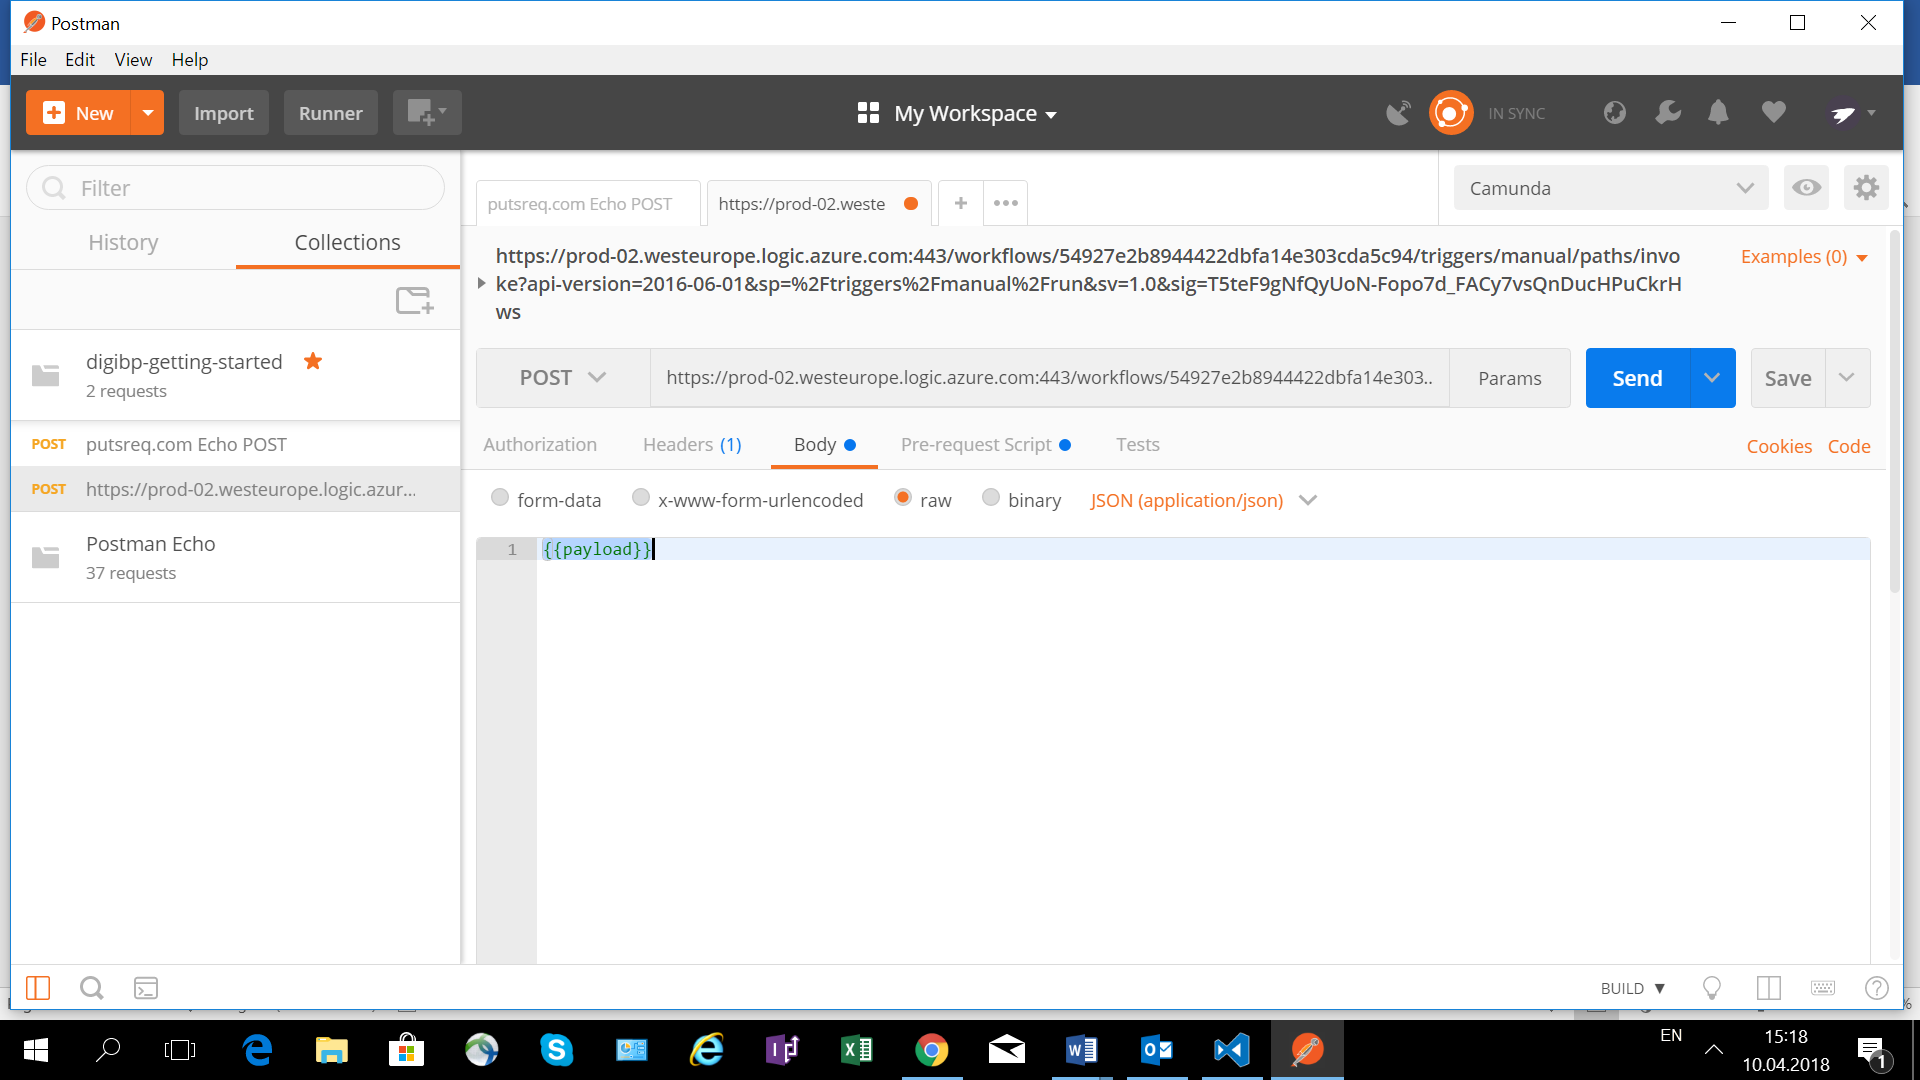
- Click on "Body" (located right next to headers), select "raw" and enter {{payload}} as it is depicted in the image below
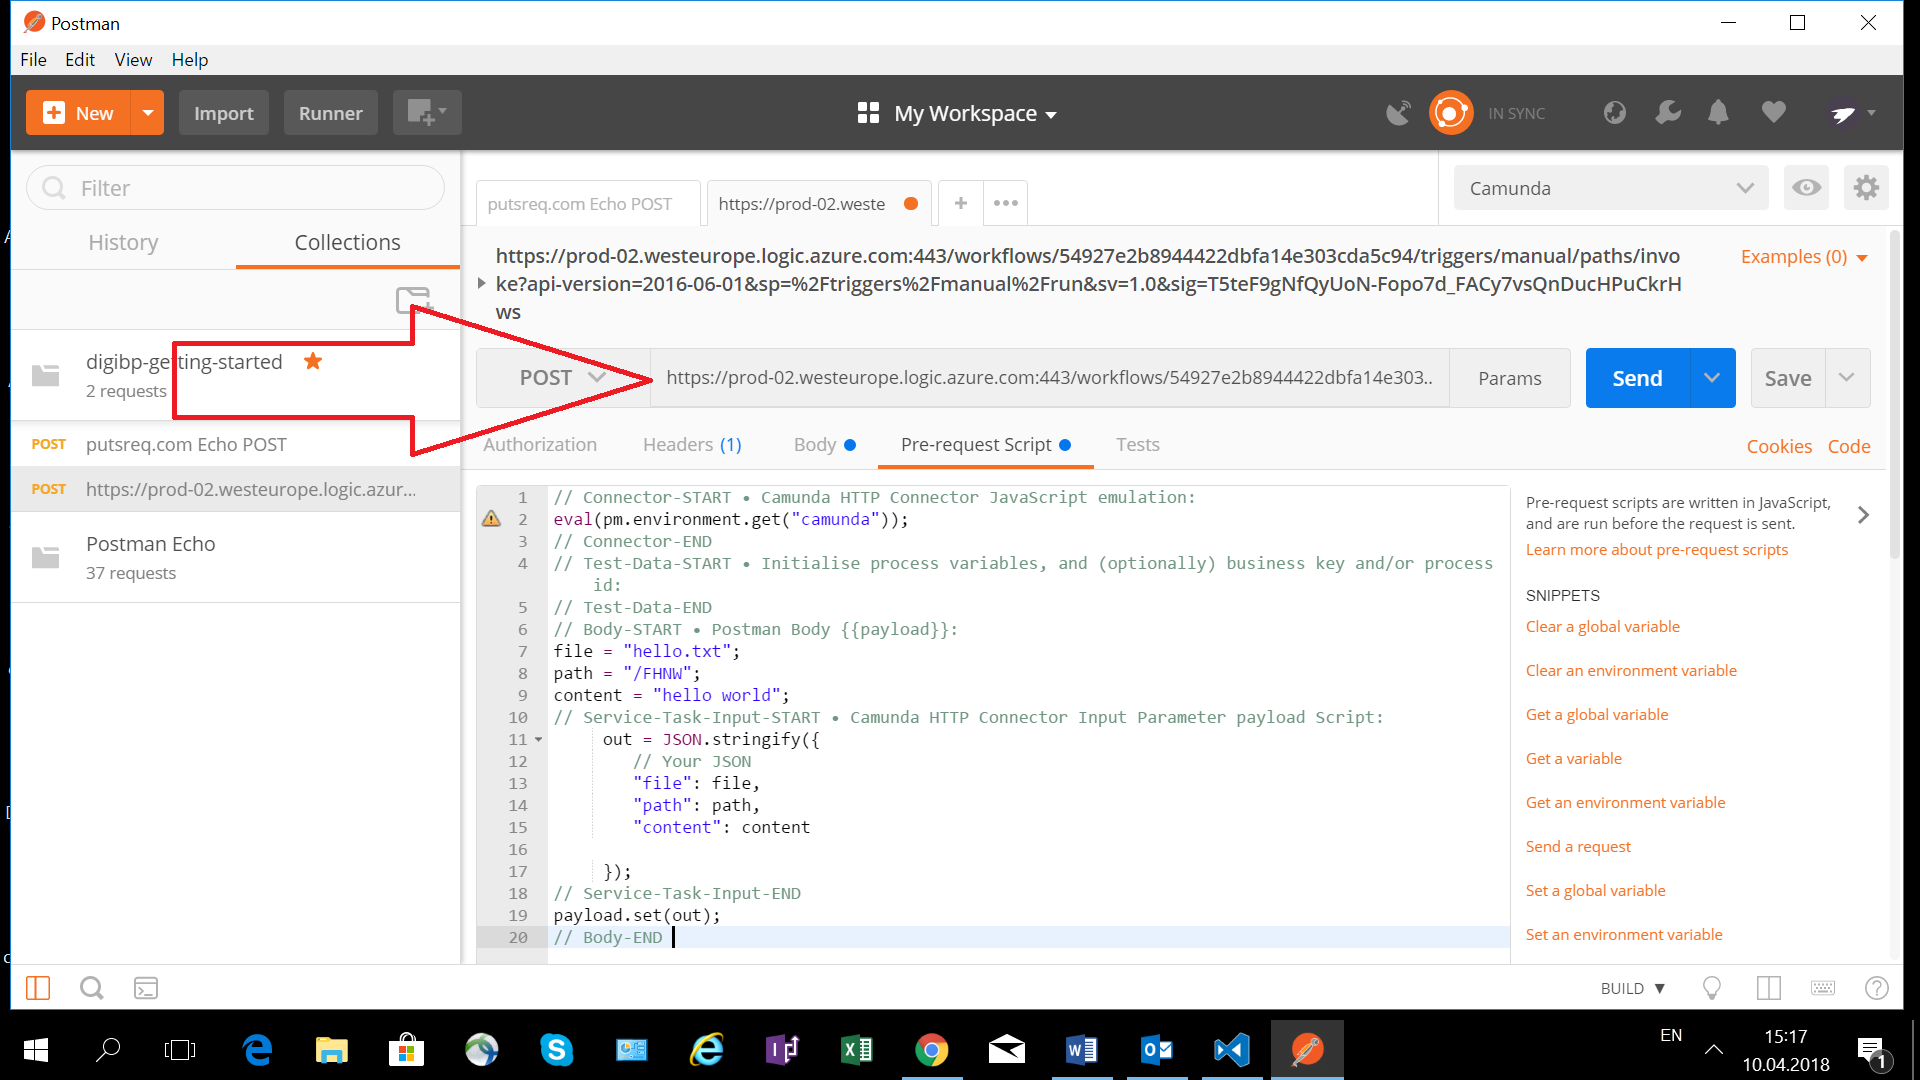
- Click on "Pre-request Script (right next to body) and enter the following script:
// Connector-START • Camunda HTTP Connector JavaScript emulation:
eval(pm.environment.get("camunda"));
// Connector-END

// Test-Data-START • Initialise process variables, and (optionally) business key and/or process id:

    // execution.setProcessBusinessKey("case-001");

// Test-Data-END
// Body-START • Postman Body {{payload}}:
file = "hello.txt";
path = "/FHNW";
content = "hello world";

// Service-Task-Input-START • Camunda HTTP Connector Input Parameter payload Script:
     out = JSON.stringify({
        // Your JSON
        "file": file,
        "path": path,
        "content": content

     });
// Service-Task-Input-END


payload.set(out);
// Body-END
- Copy the URL created at the end of the previous section and paste it into the Postman URL (see red arrow in the below image)
You are now ready to test your Flow
- Click on "Send"
- Check your Dropbox, in case the txt file containing the text "hello world!" is created in the folder FHNW, then...
CONGRATULATIONS! You a ready to implement the API consumption in Camunda. Go to the following section.
Otherwise, something went wrong. No worries, just try again until it works.
3. Modelling the Workflow in Camunda
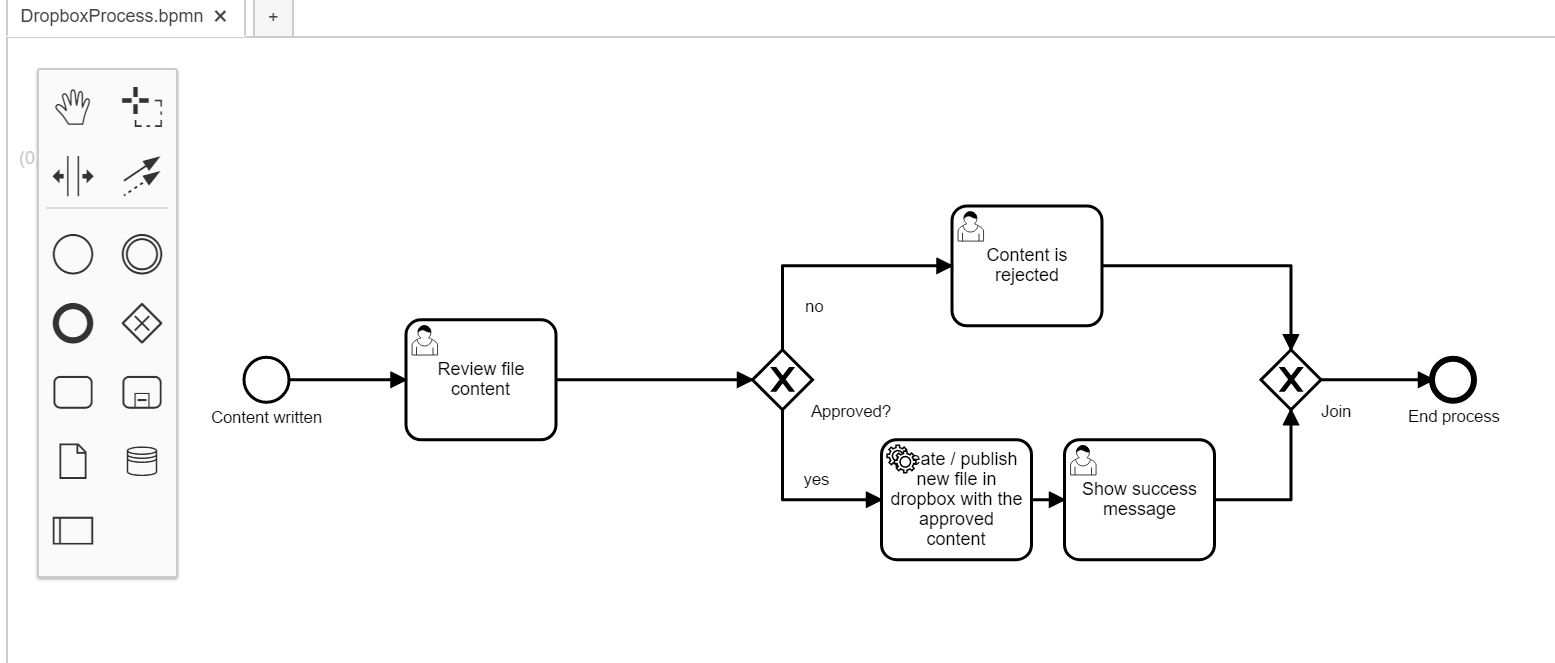
- Create a new bpmn diagram in Camunda modeler as below. Model activities and tasks as follows.
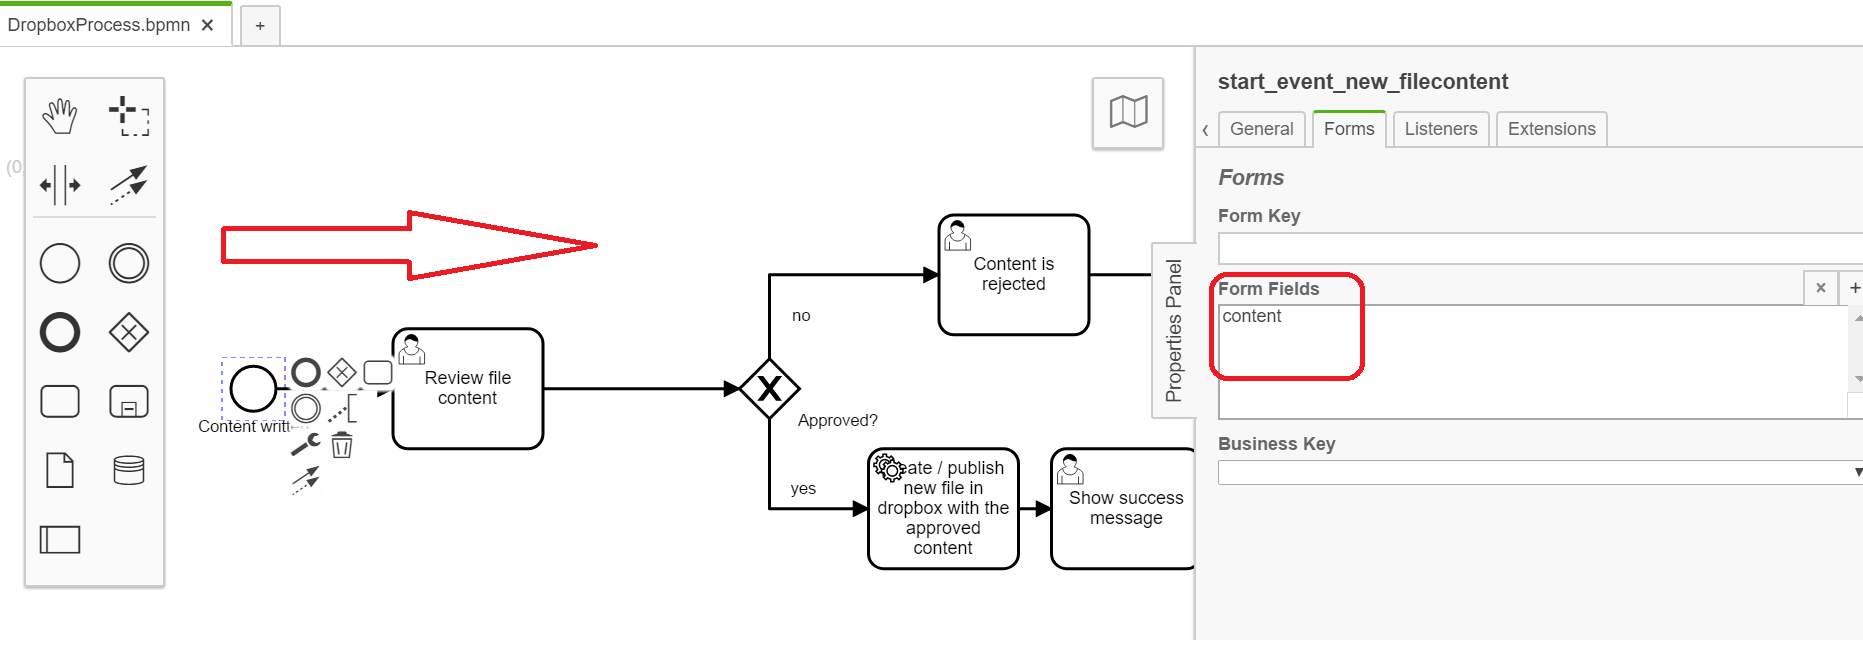
- Click on content written. Create a form with content text field in this start event. This field will hold the content that we want to publish in the file in dropbox account.
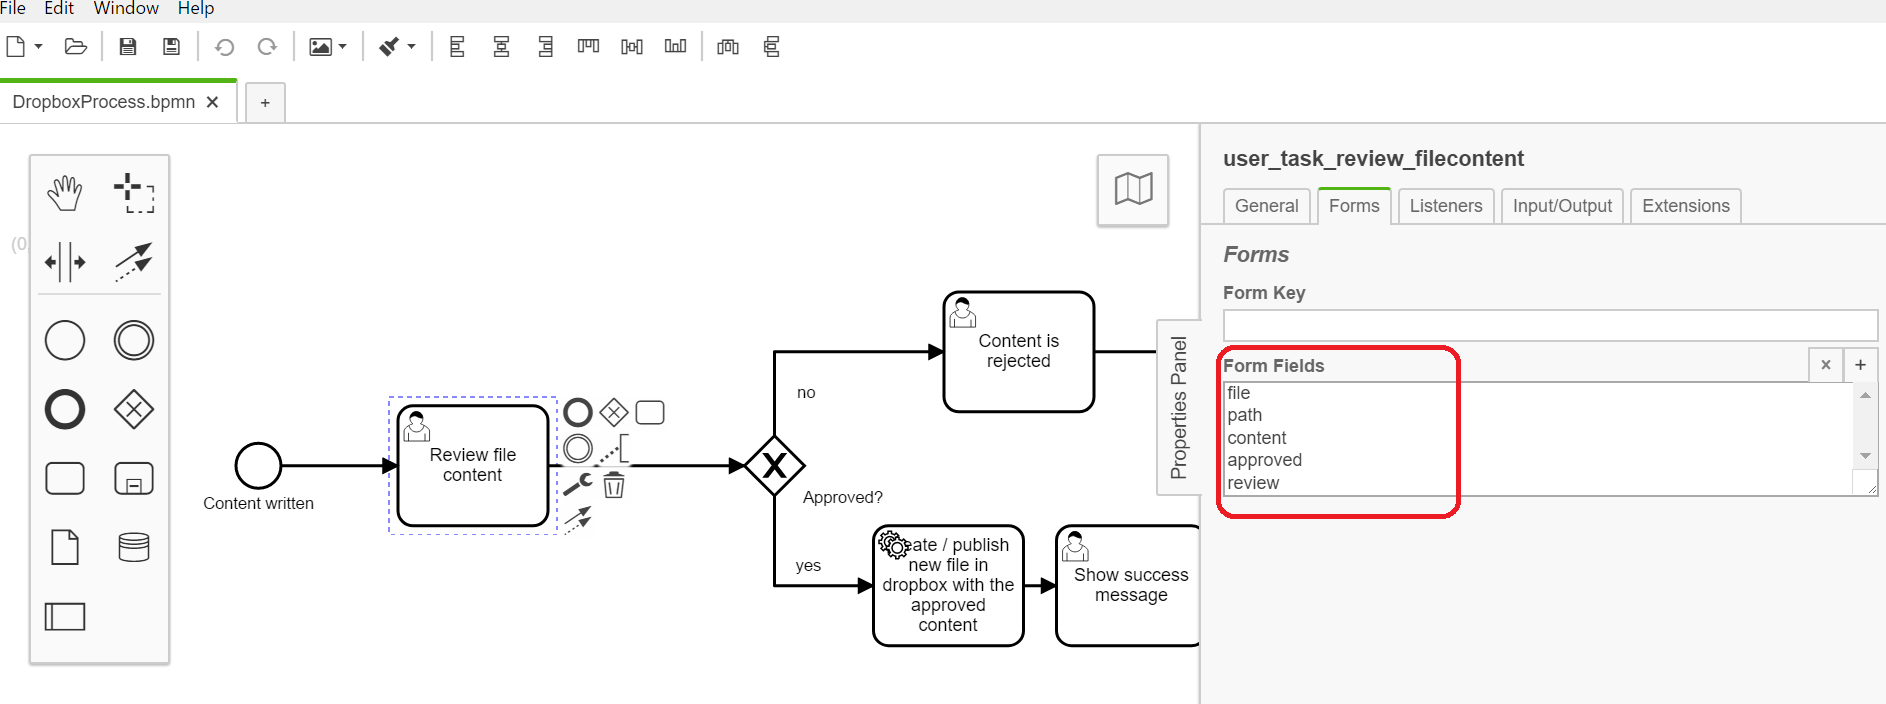
- In the review file content task go to properties and add following variables in the form fields. Variables like file,path, content, review are string while approved is boolean type.
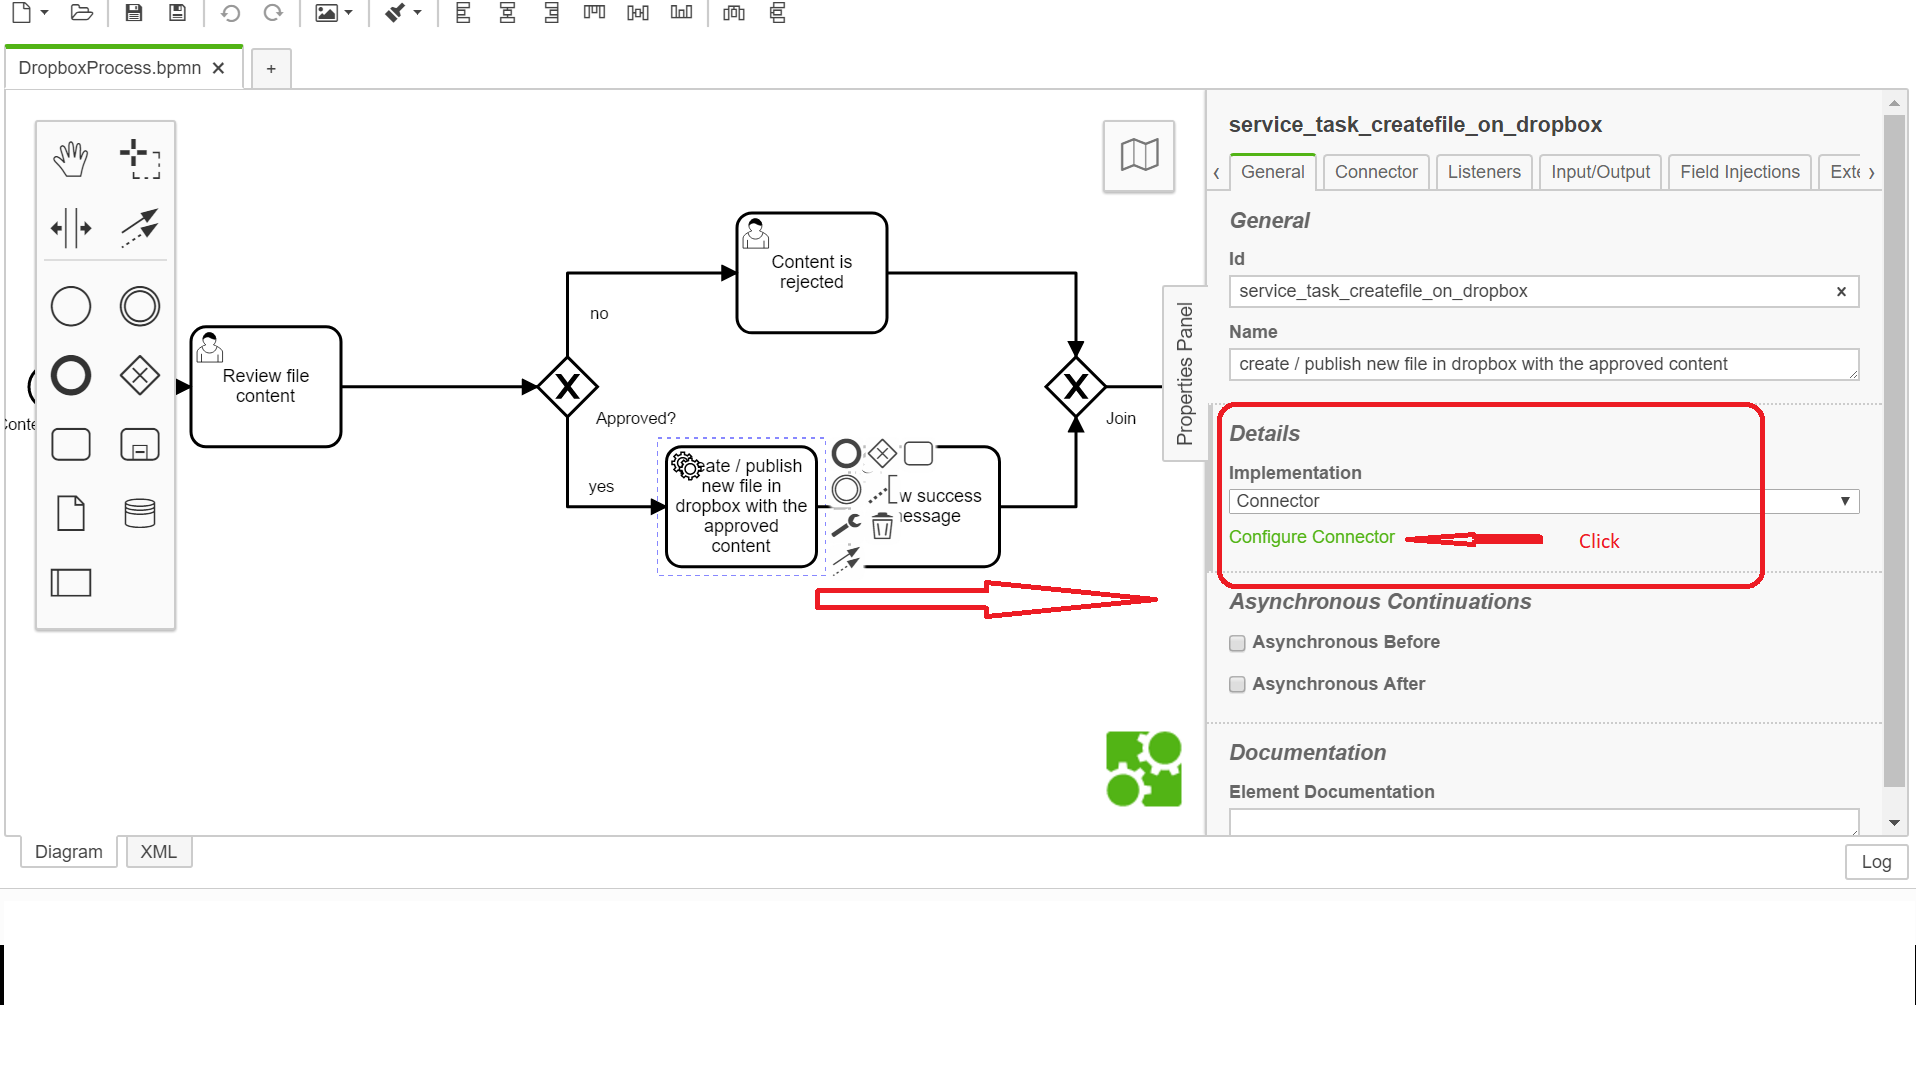
- For the service task create publish new file in dropbox go to the properties section. Click on Configure connector to add its properties.
- In this section add URL as text variable and set its value to the URL of the MSFlow service as discussed in section 2 Postman point 6 above.
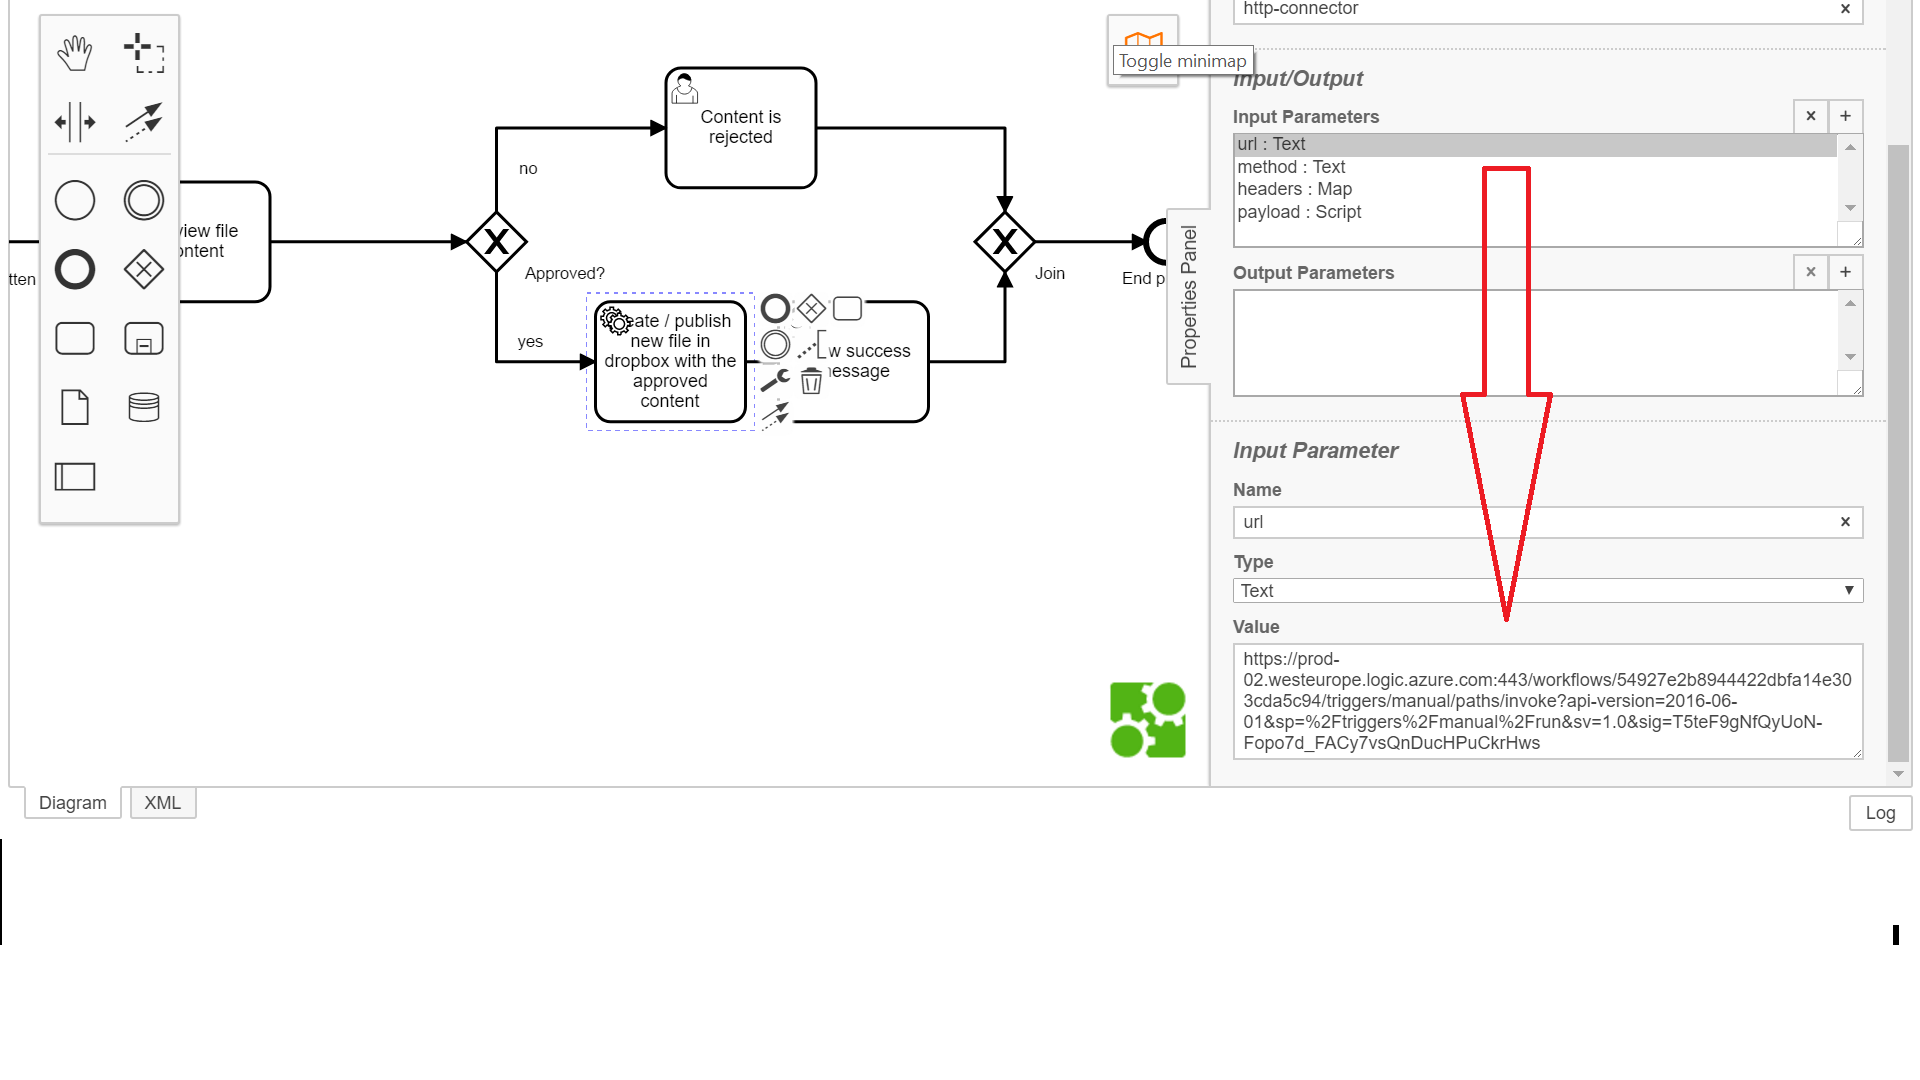
- In this same connector add variable method as type text and set its value to POST.
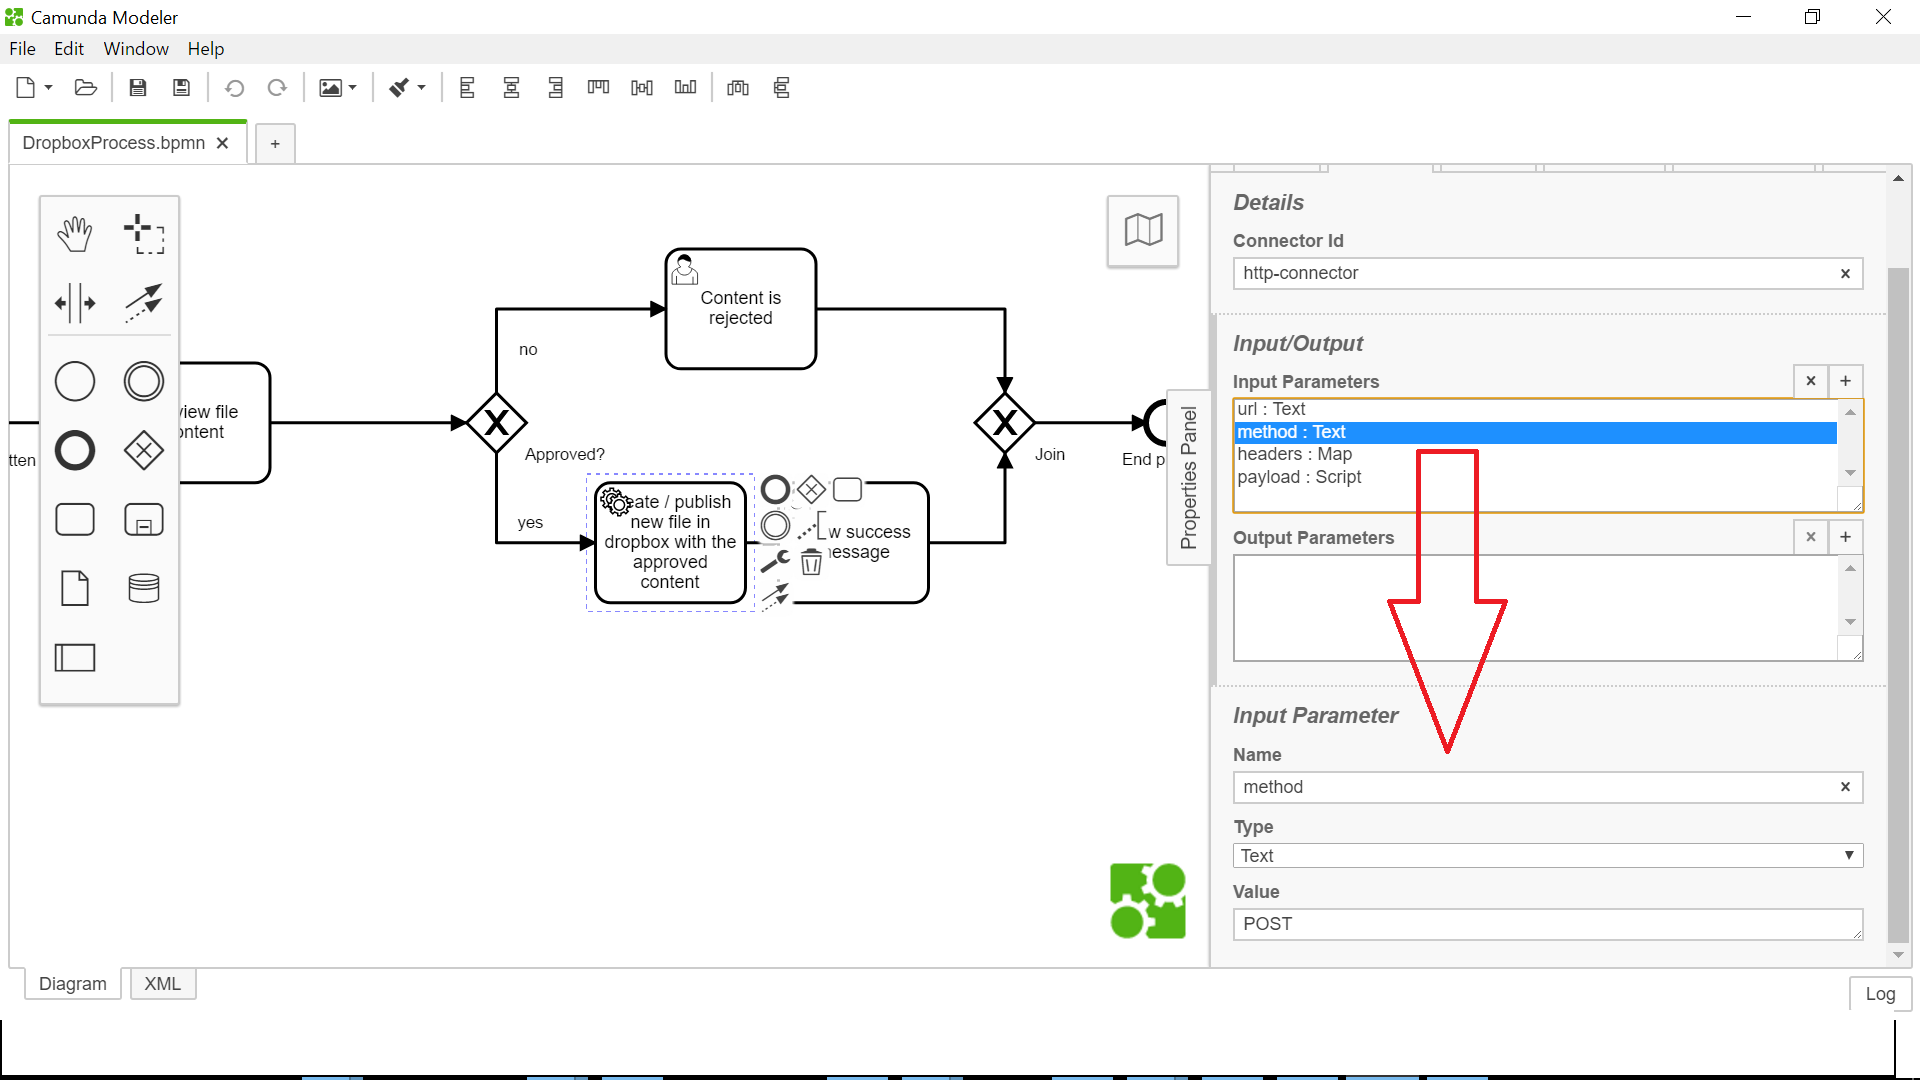
- In this connector add another variable for headers with type Map and set its value to Content-Type = application/json
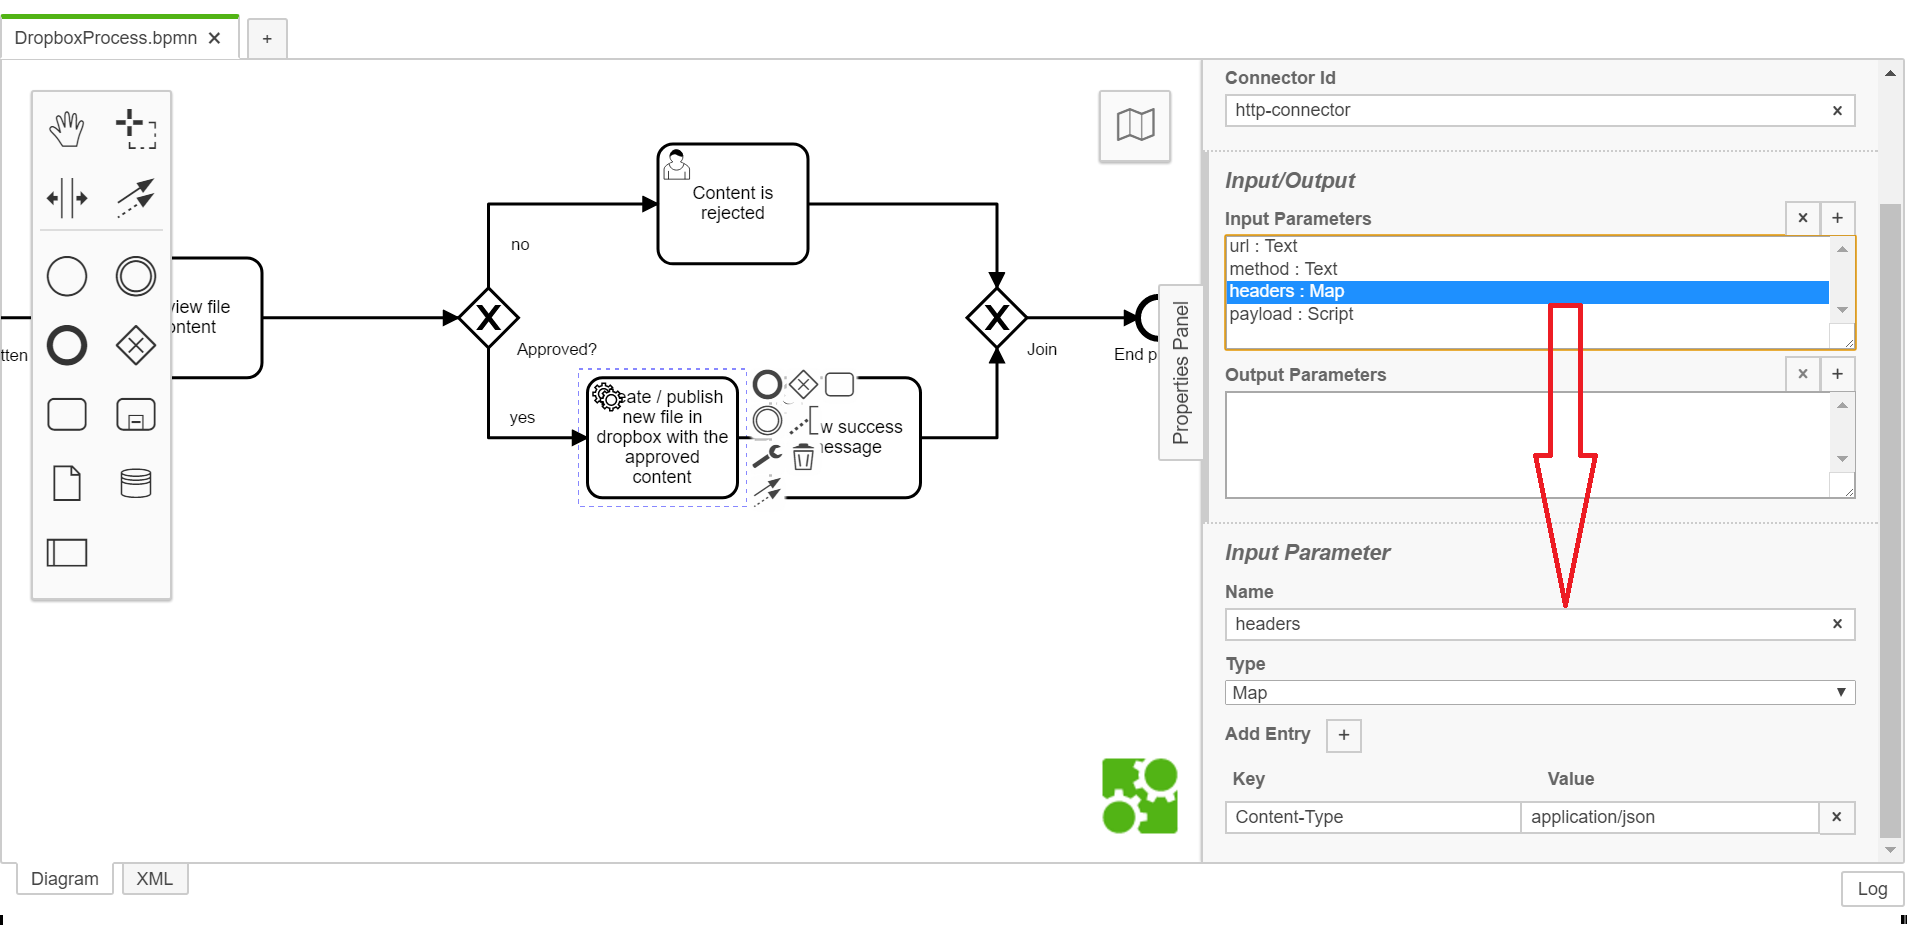
-
Add another variable payloadscript of type inline script and set its value as follows:-
var data = execution.getVariable("content");
var file = execution.getVariable("file");
var path = execution.getVariable("path");
var out = { "content":data, "file": file, "path":path};
JSON.stringify(out);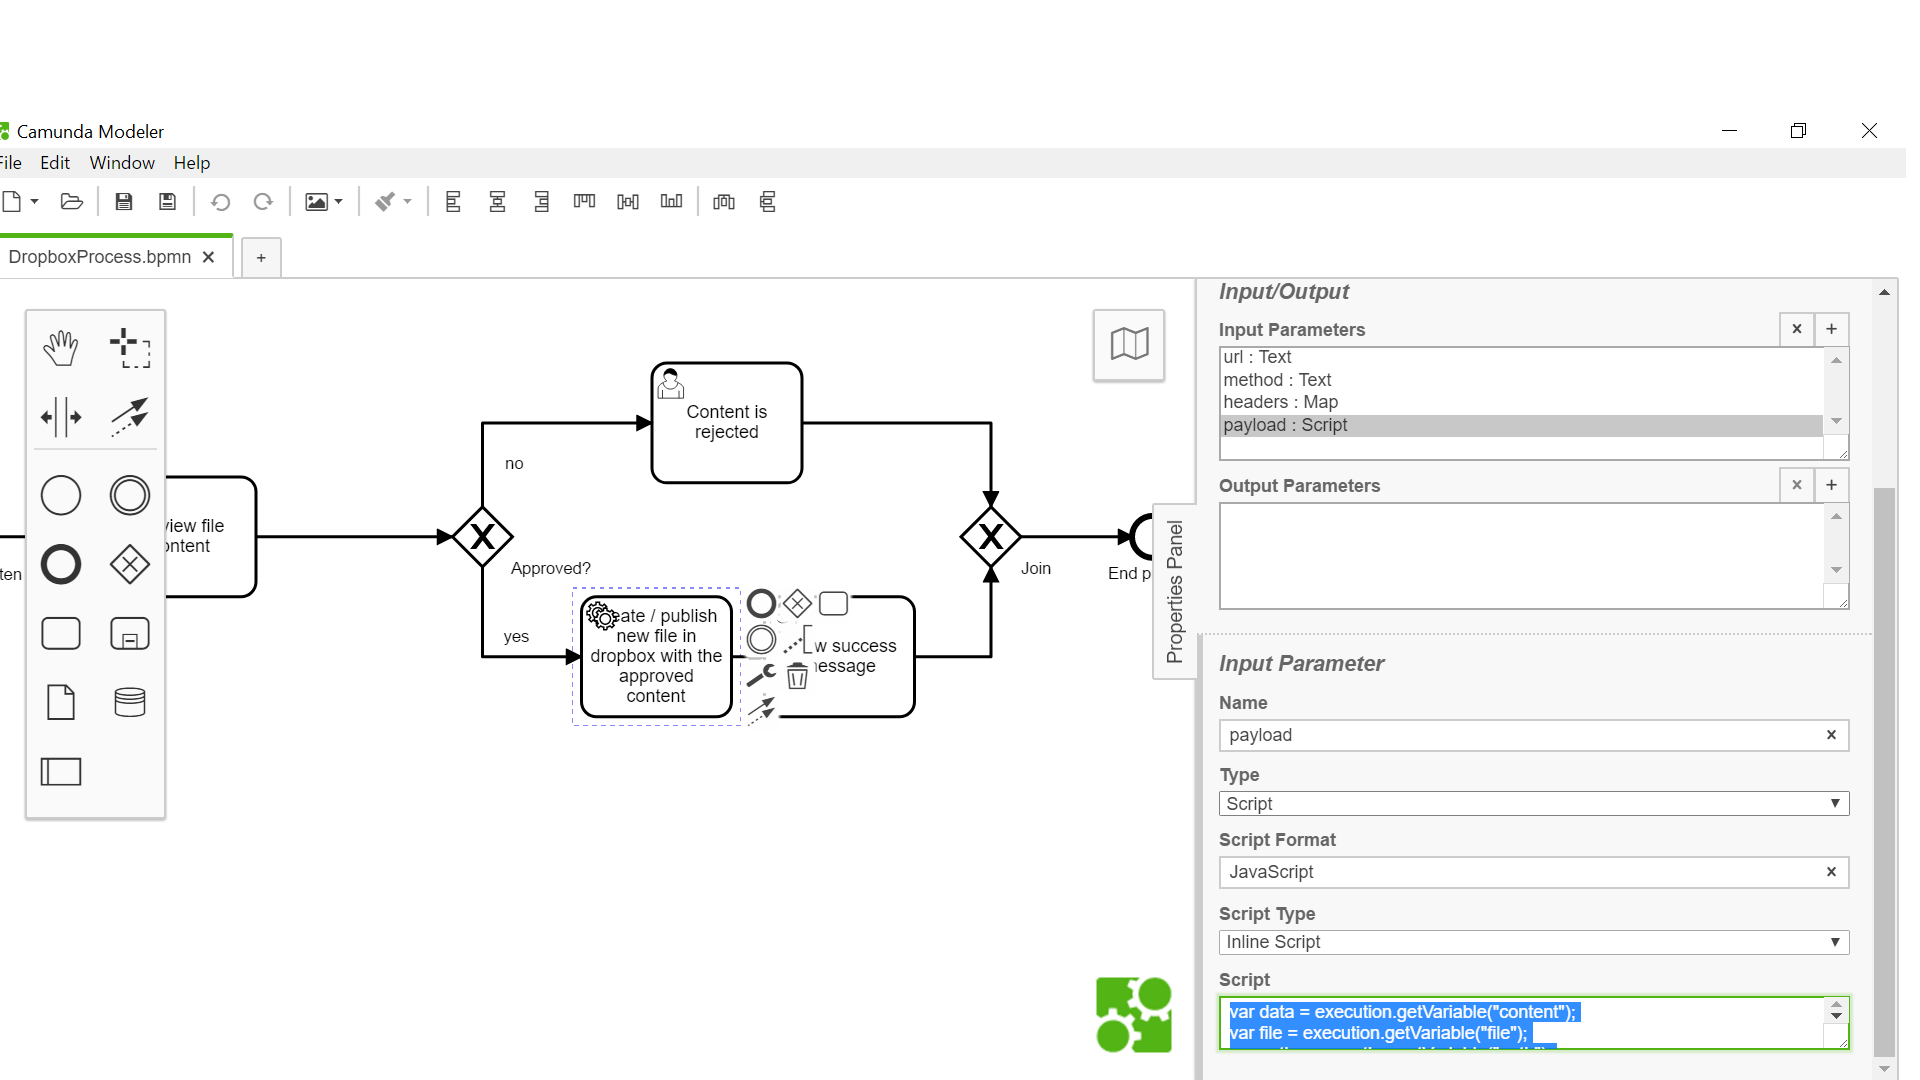
-
Configure show success message and content is rejected tasks as show in figures below. Add variables in their forms as shown below with messages.
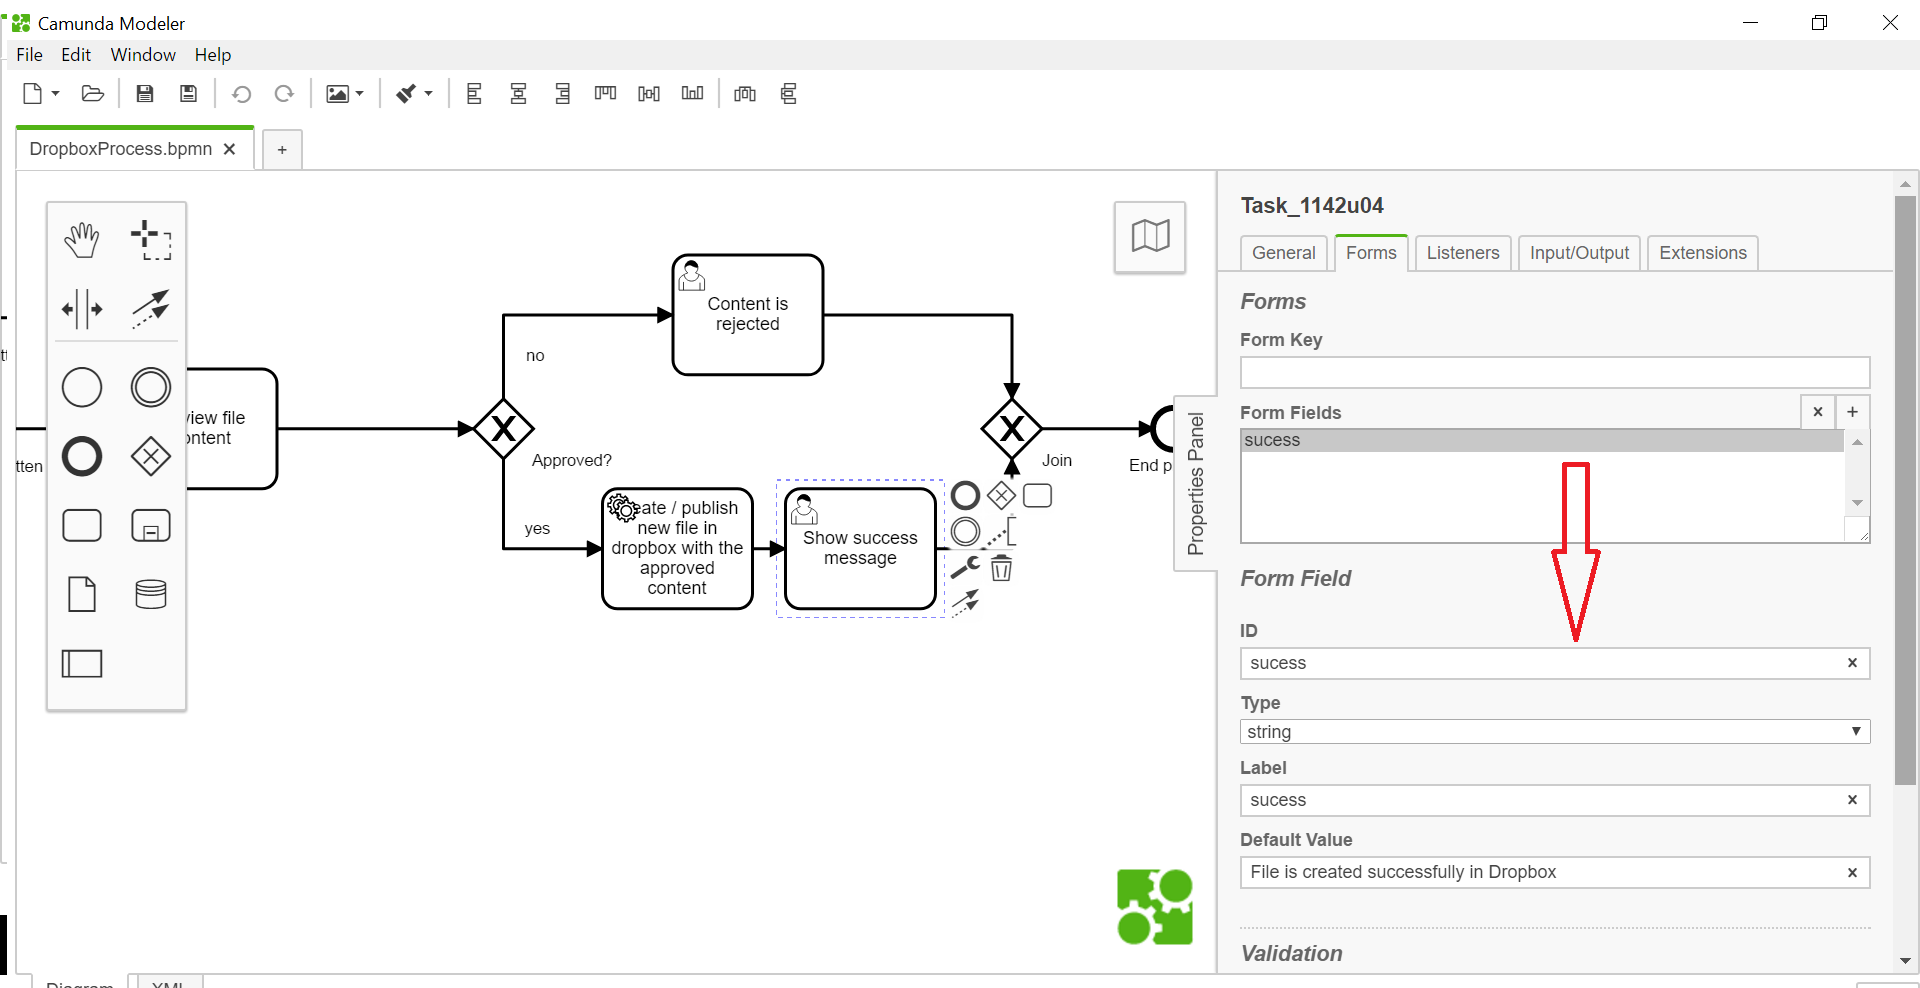
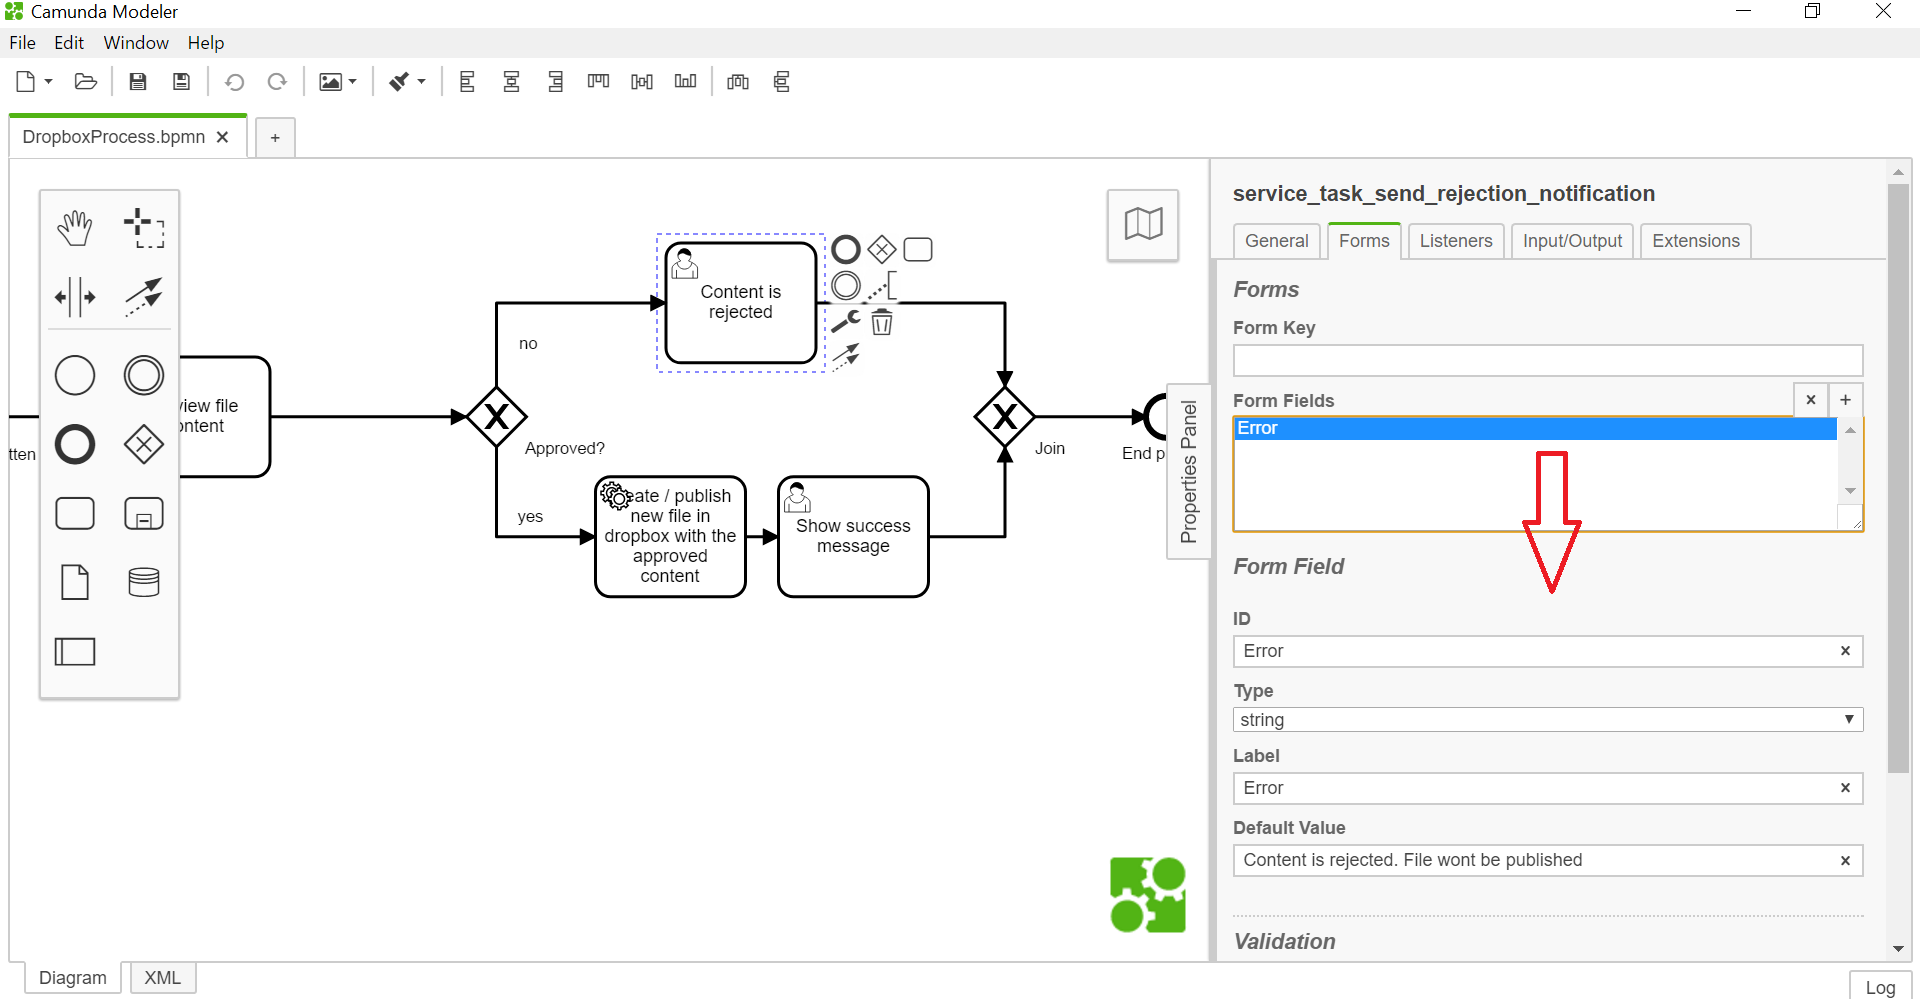
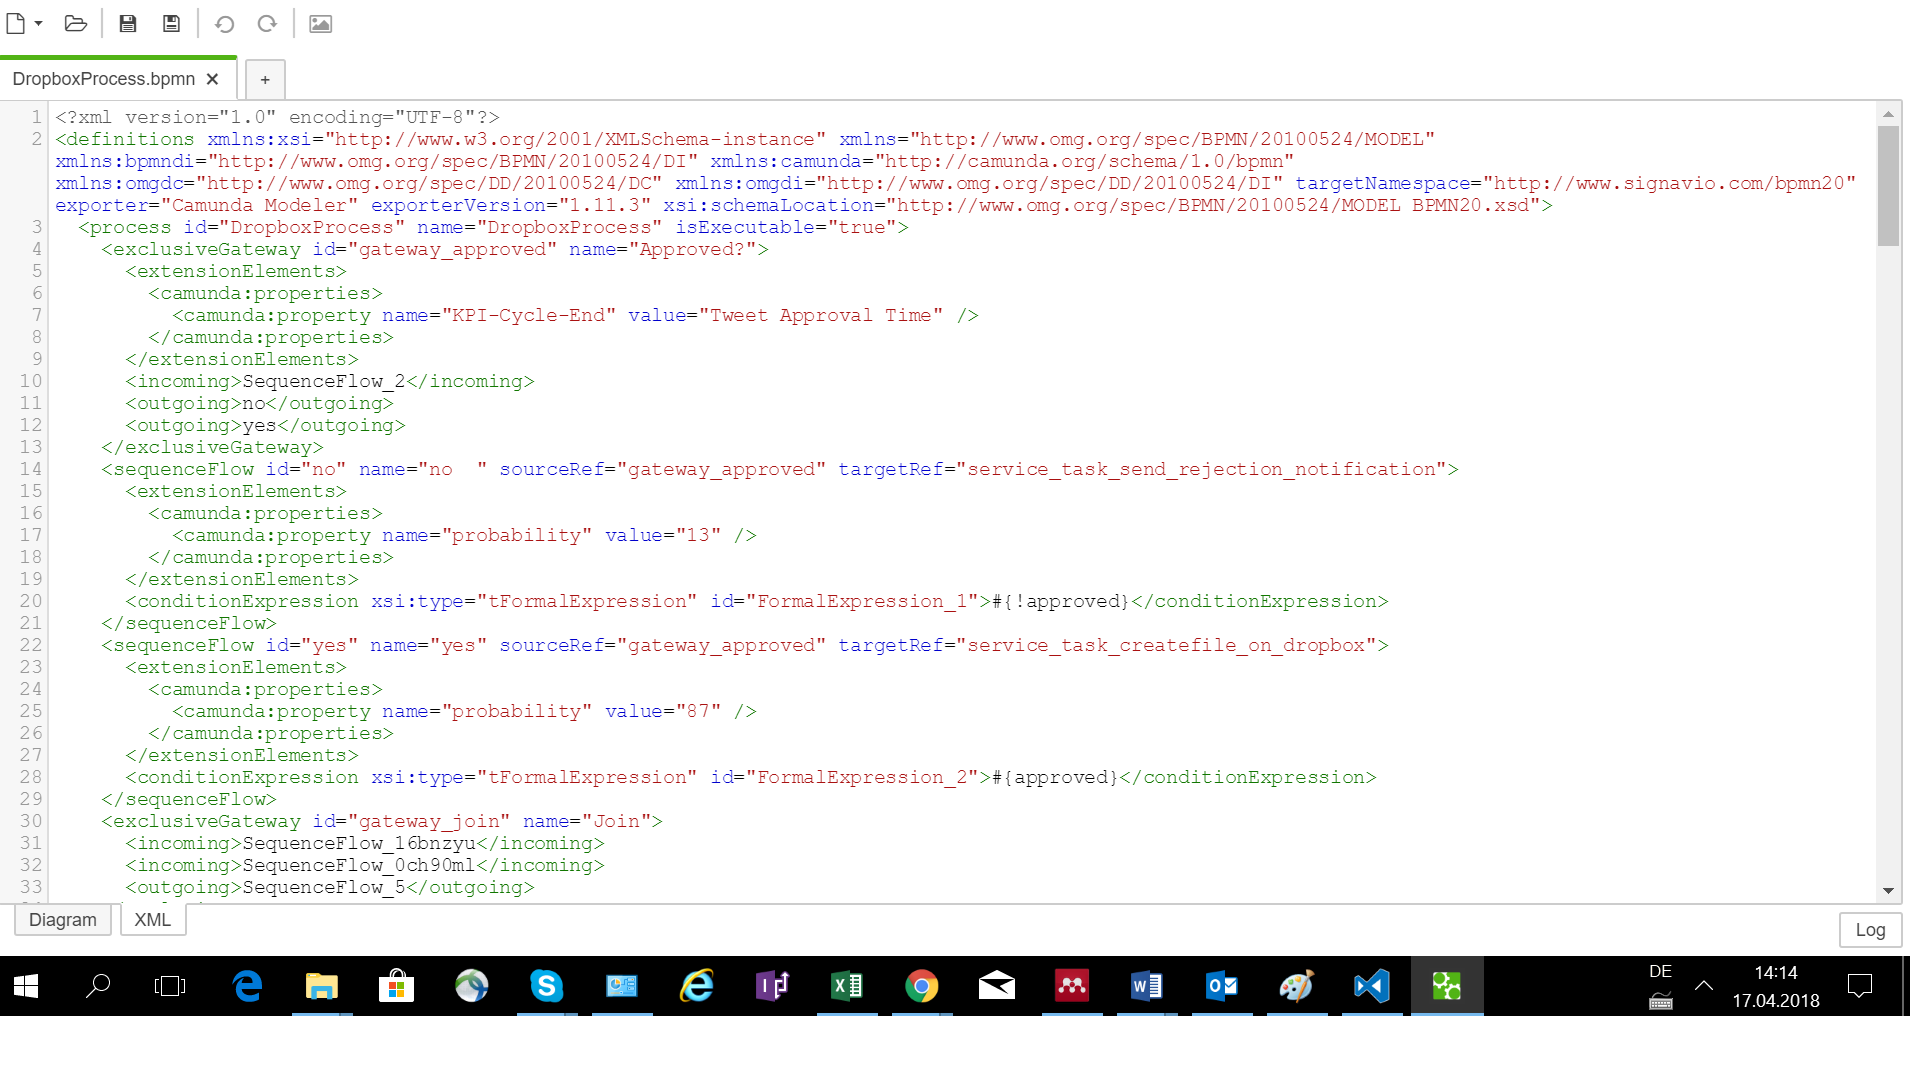
- Once the process is modeled it can be deployed and started in Camunda workflow system. The steps are given in the earlier guides. The BPMN file can be downloaded from this github location. The file data is shown in xml format. This data can be copied and pasted in the xml view of the camunda modeler. Dropbox BPMN File
