Getting Started Workflow - DigiBP/digibp.github.io GitHub Wiki
This getting-started can be used to create a fresh Camunda-based workflow including variables and form fields. Finally, the application can be executed on the Heroku PaaS platform.
- 1. Camunda Template
- 2. Heroku PaaS Deployment
- 3. Modelling the Workflow
- 4. Testing
- 5. Configuration of Users and Groups
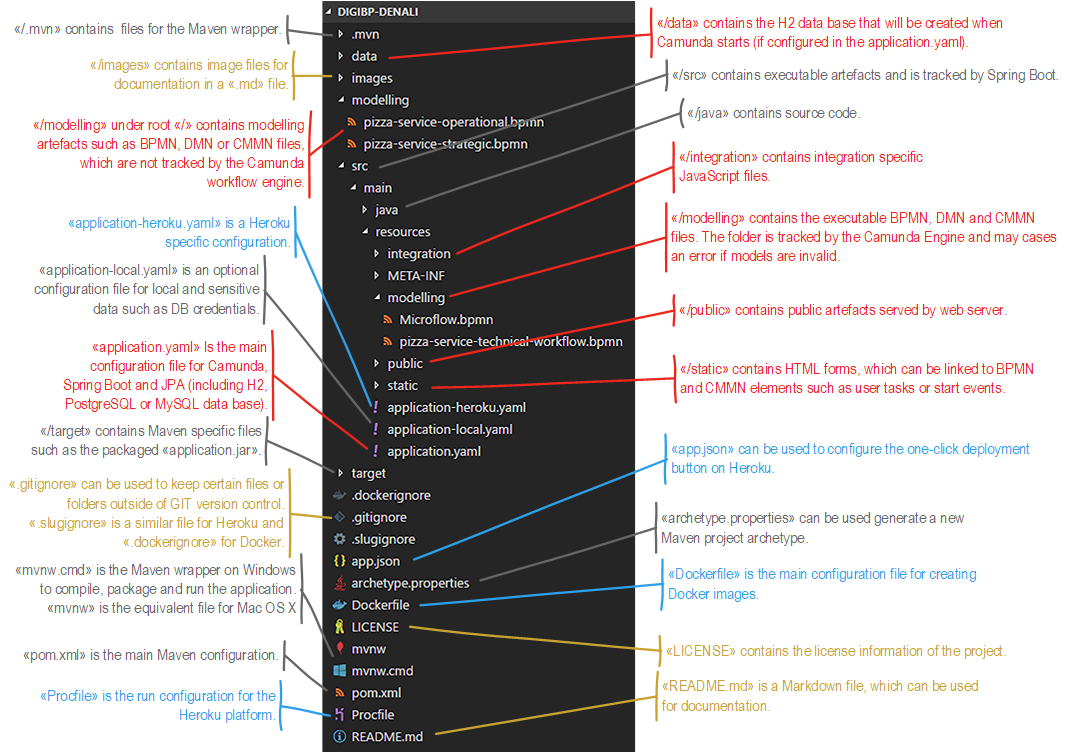
From a starting point, your repository already contains some artefacts such as strategic and human flow modelling files (BPMN), images or a README.md file:
Take care not to overwrite your existing files with the now following files from the template project.
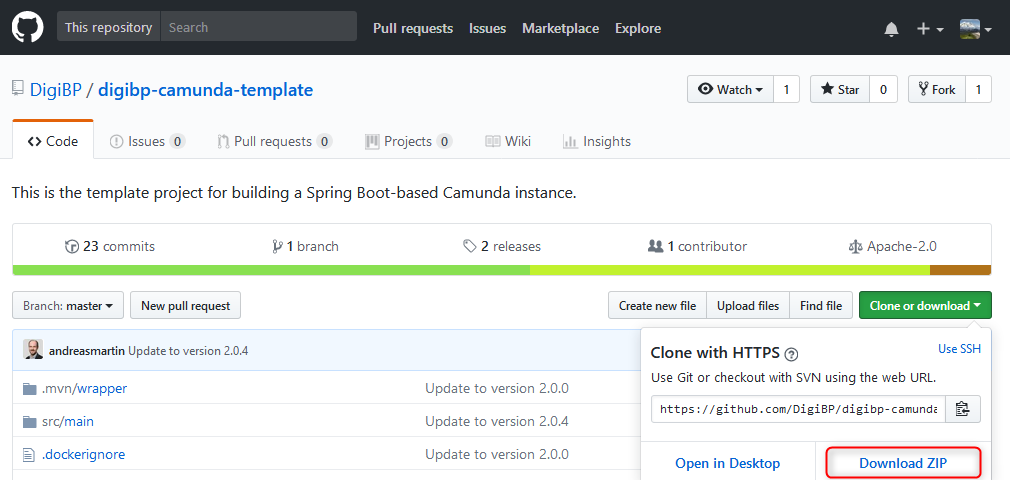
To run the Camunda Spring Boot template engine locally (later on Heroku), download the ZIP file from the digibp-camunda-template repository on GitHub:
Extract the ZIP file and copy its content to the folder of your new project:
You may want to change the Maven project and JAR name according to your project name, by changing the artefactId in the pom.xml:
<artifactId>digibp-denali</artifactId>Besides, you may want to change the Heroku app.json manifest file too:
{
  "name": "digibp-denali",
  "description": "digibp-denali",
  "repository": "https://github.com/DigiBP/digibp-denali/tree/master",
  "addons": ["heroku-postgresql:hobby-dev"],
  "logo": "https://avatars3.githubusercontent.com/u/25099178?s=200&v=4",
  "keywords": ["FHNW"]
}Copy the files, and commit and push your changes to a GitHub repository, which you have admin access.
Please make sure, if you are working in a team, that only one person is committing and pushing the changes to the repository.
In this step, we are going to the deploy our digibp-camunda-template based project to Heroku PaaS using a GitHub repository.
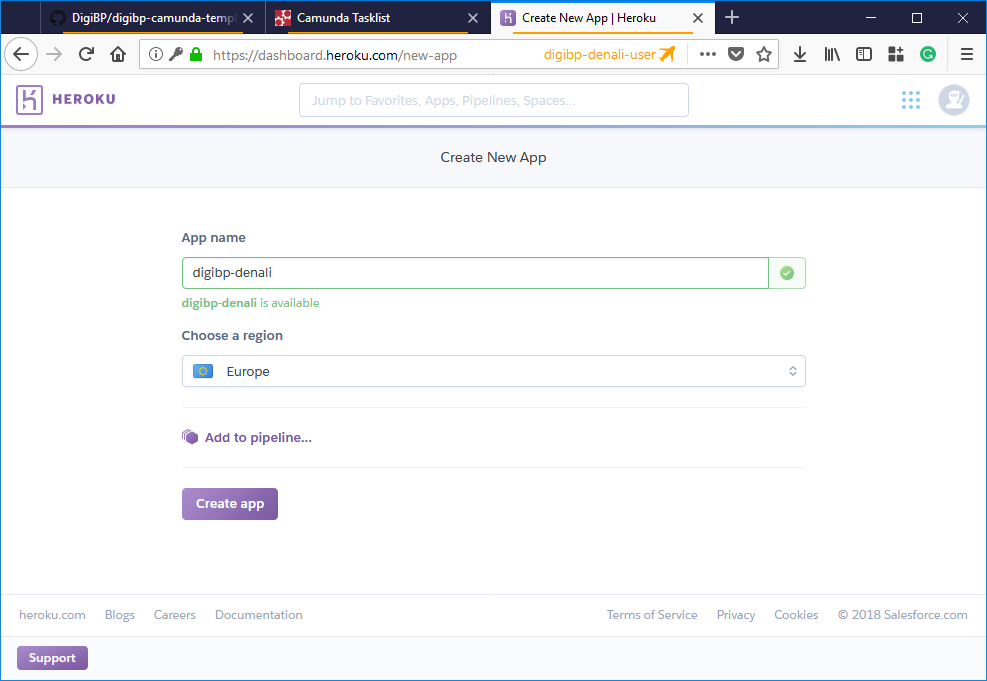
If haven't already registered to the Heroku PaaS, you have to do so first. Then you can create a new App as shown here (use a different name):
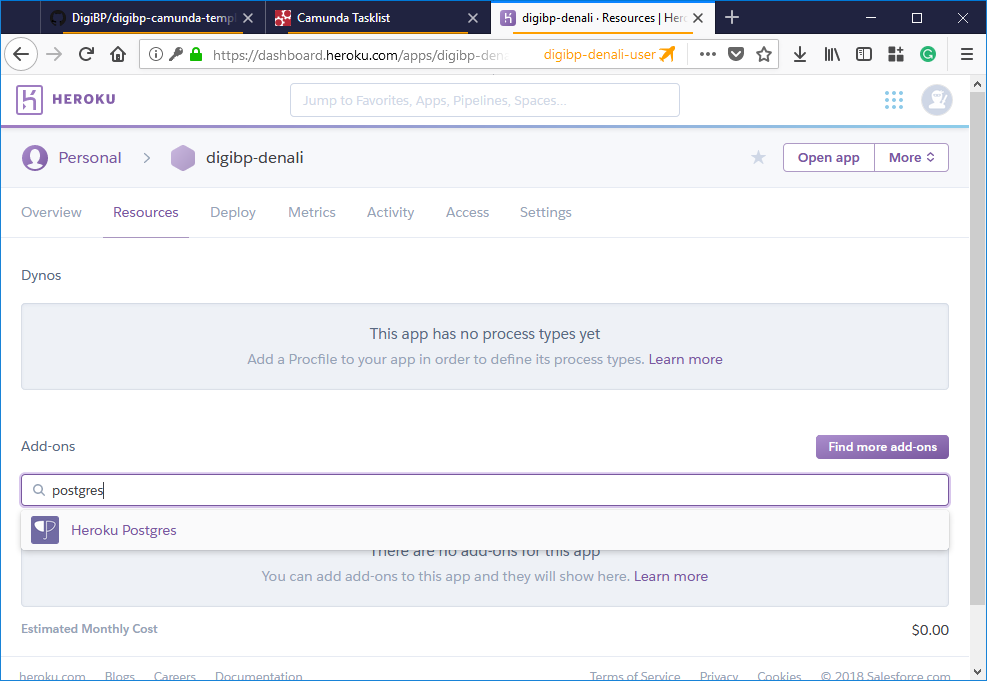
Since digibp-camunda-template is preconfigured in a way that on Heroku a Postgres database is used, you will have to add the Heroku Postgres add-on:
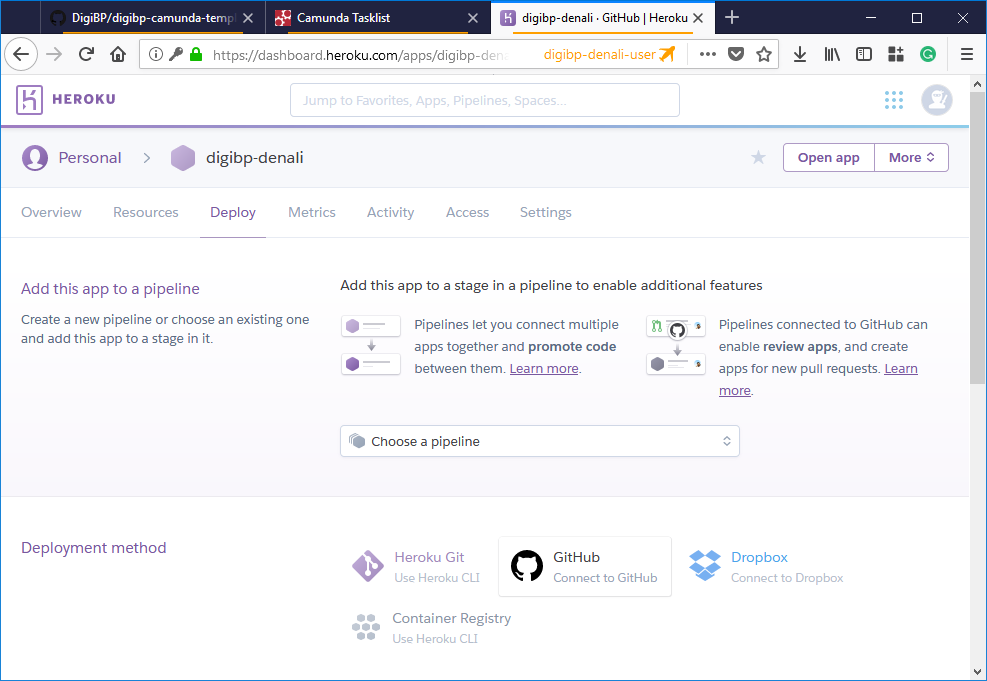
Then switch to deploy, use the GitHub deployment method, and you may have to authorise Heroku to access your GitHub account (only applies for the first time):
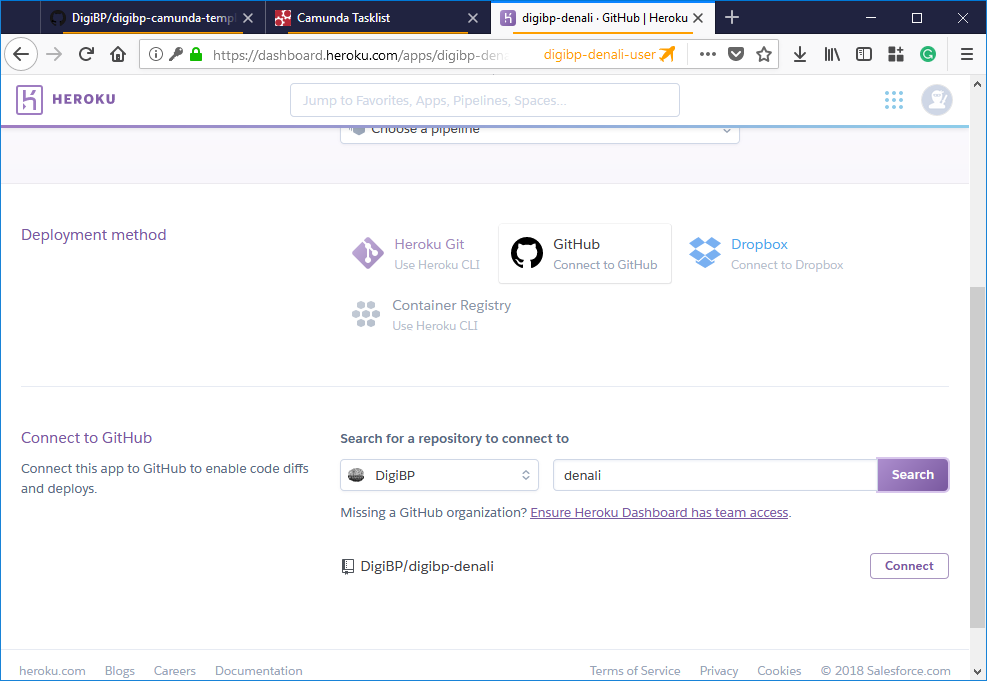
Search for your GitHub repository and connect it (only applies for the first time):
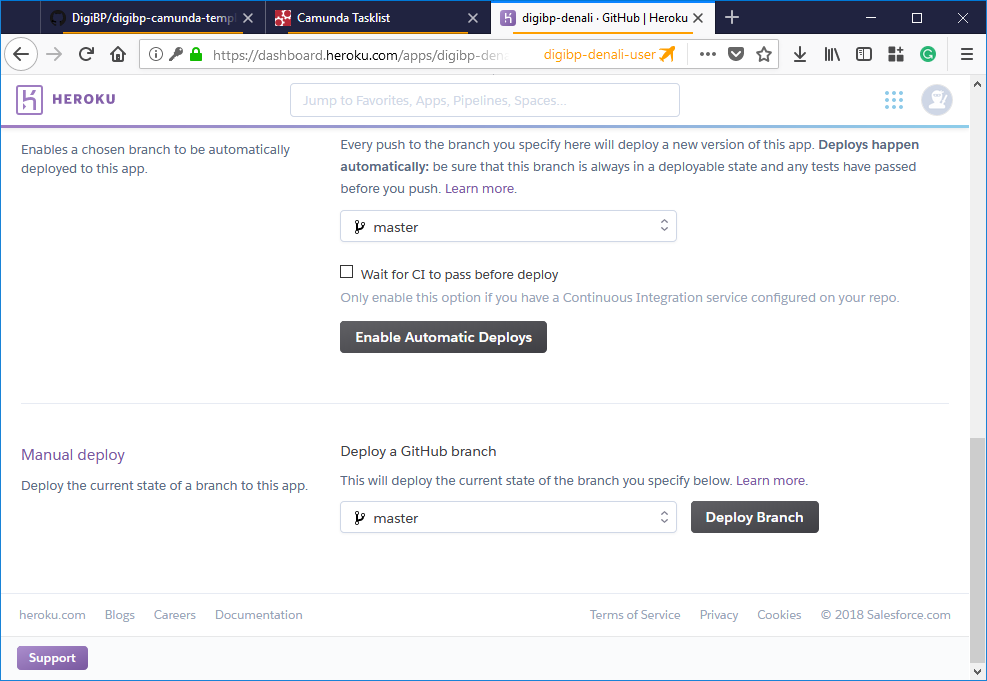
Finally, you can press the button Deploy Branch to trigger the deployment process:
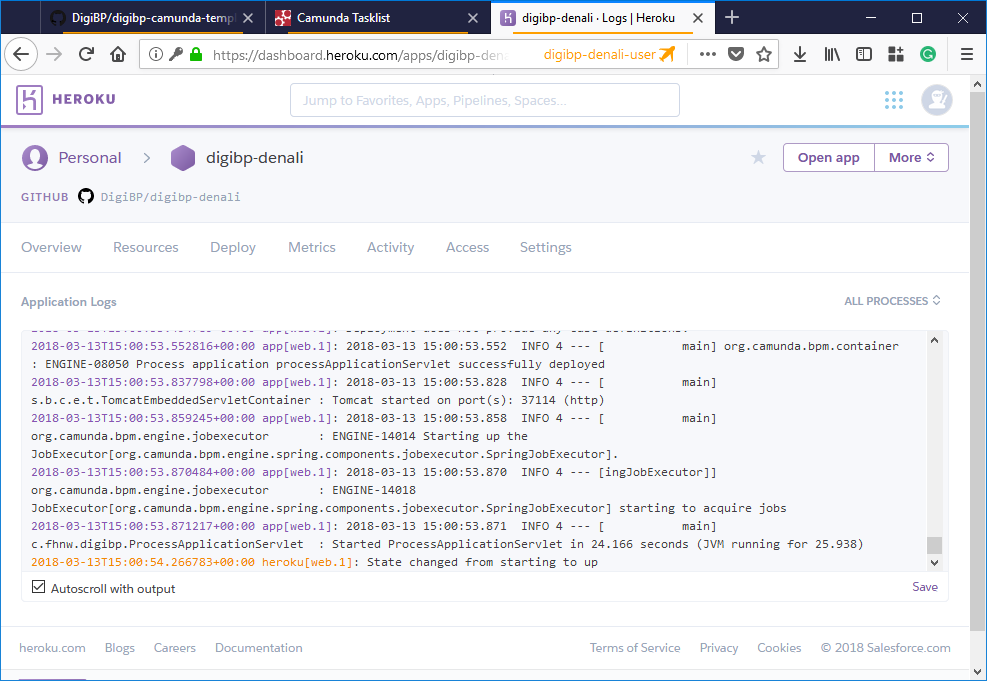
You may want to have a look at the current Logs, which you can find under more:
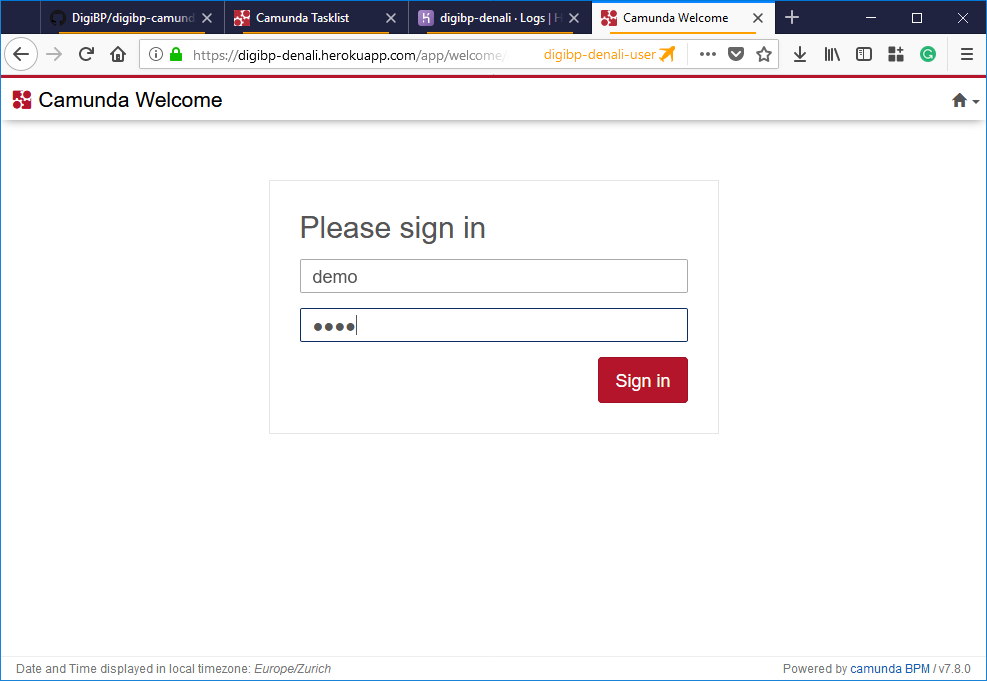
After the state changed from starting to up, you can open the app by using the button open app. You should see the Camunda login view:
Based on the default configuration in the application.yaml, the admin username is demo, and the password is as well demo.
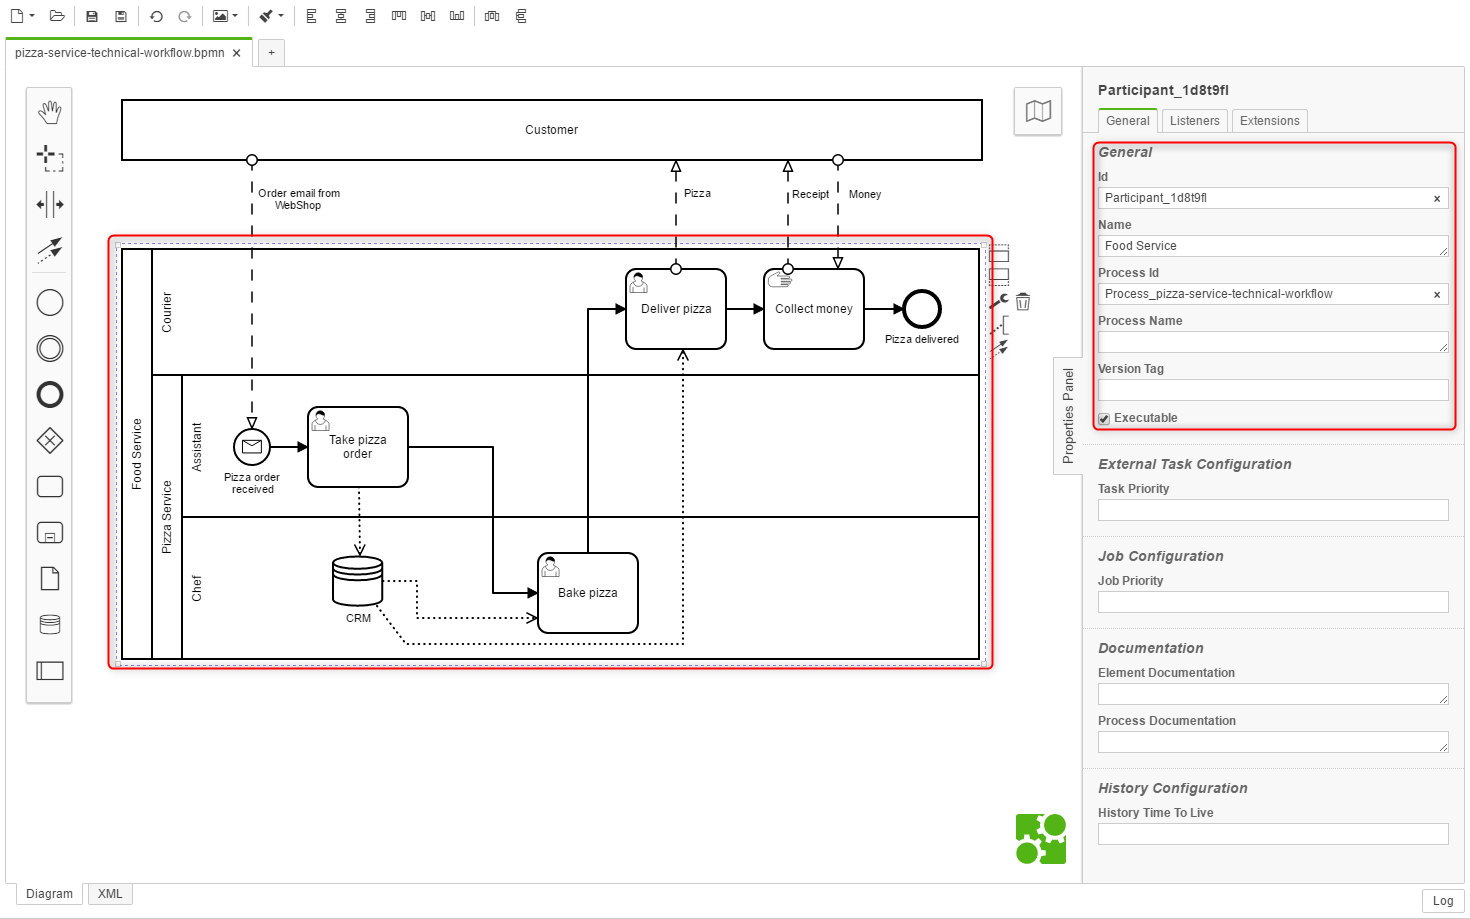
Try to model the Food Service process using the Camunda modeller.
If you just copy existing files, make sure that you create new ids for the process and the messages.
Model the process as follows and check executable:
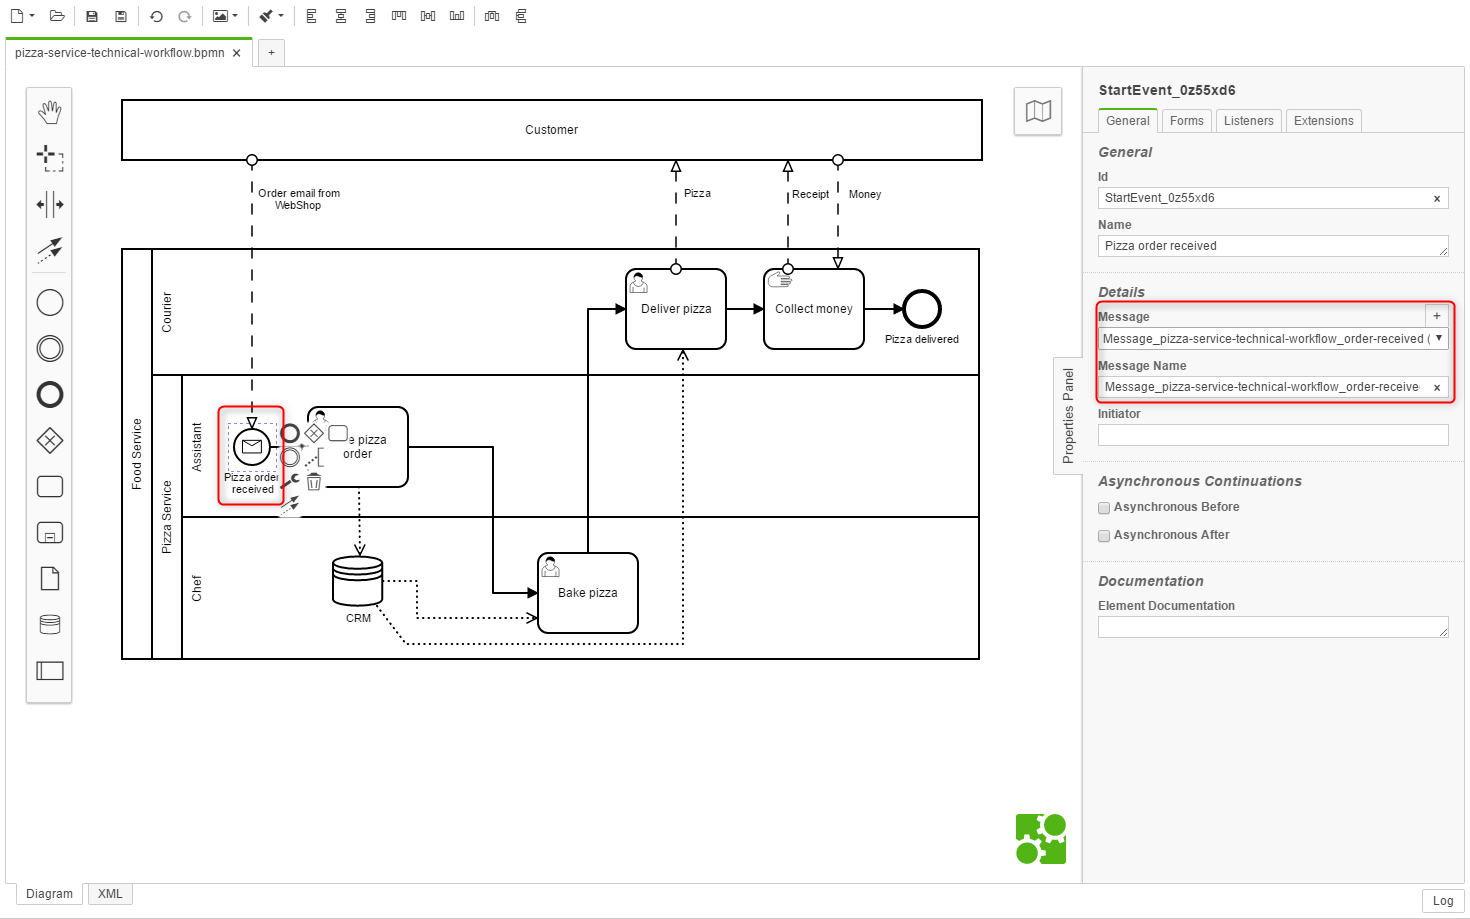
You may have to generate a new message, if you have a message start event:
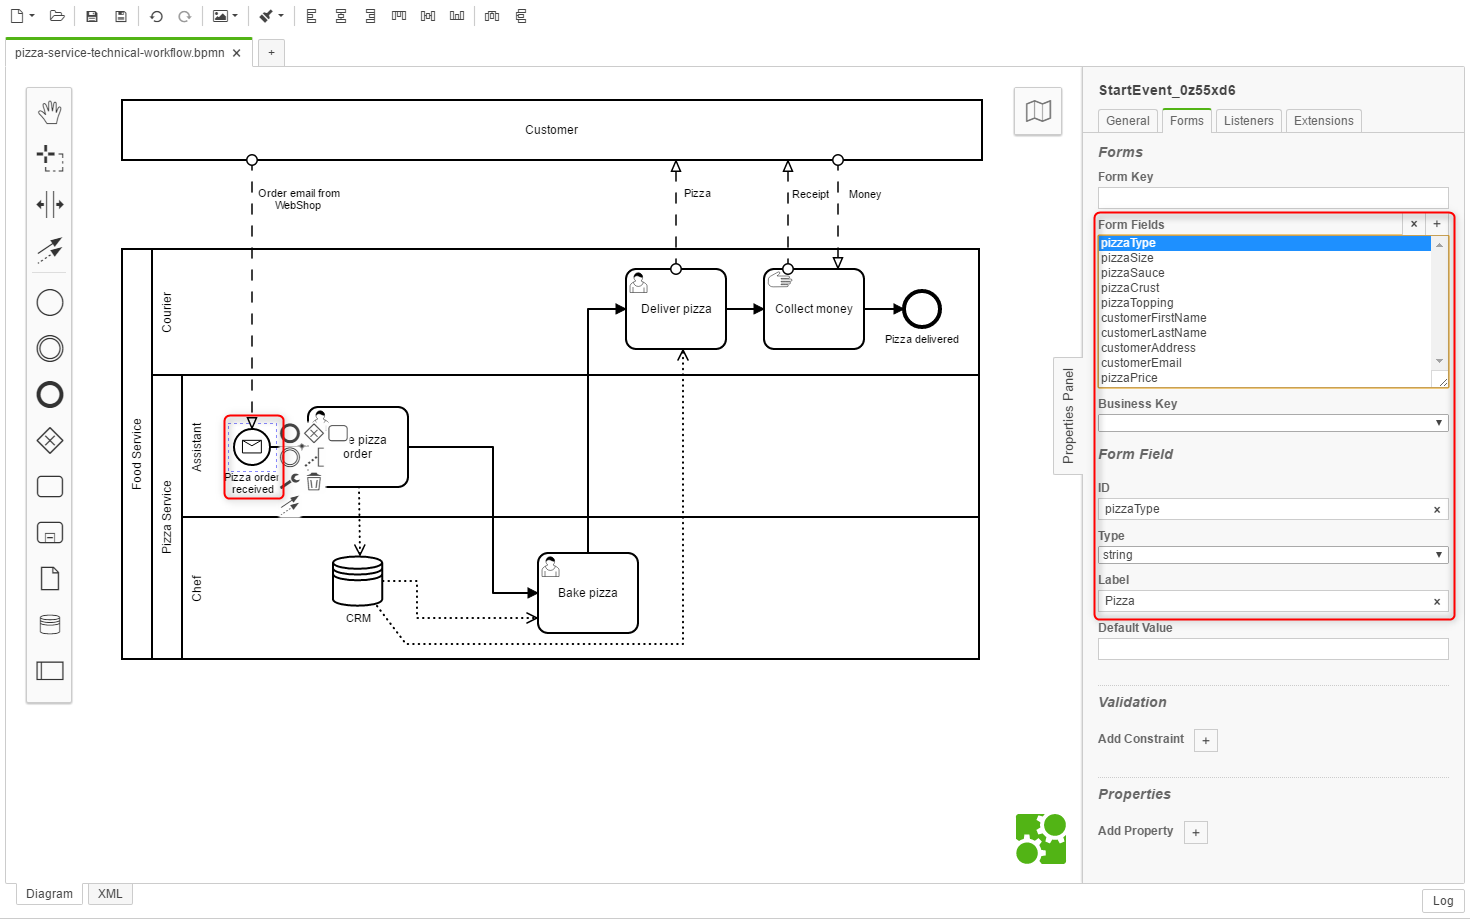
Define some form fields (workflow variables) on the start event:
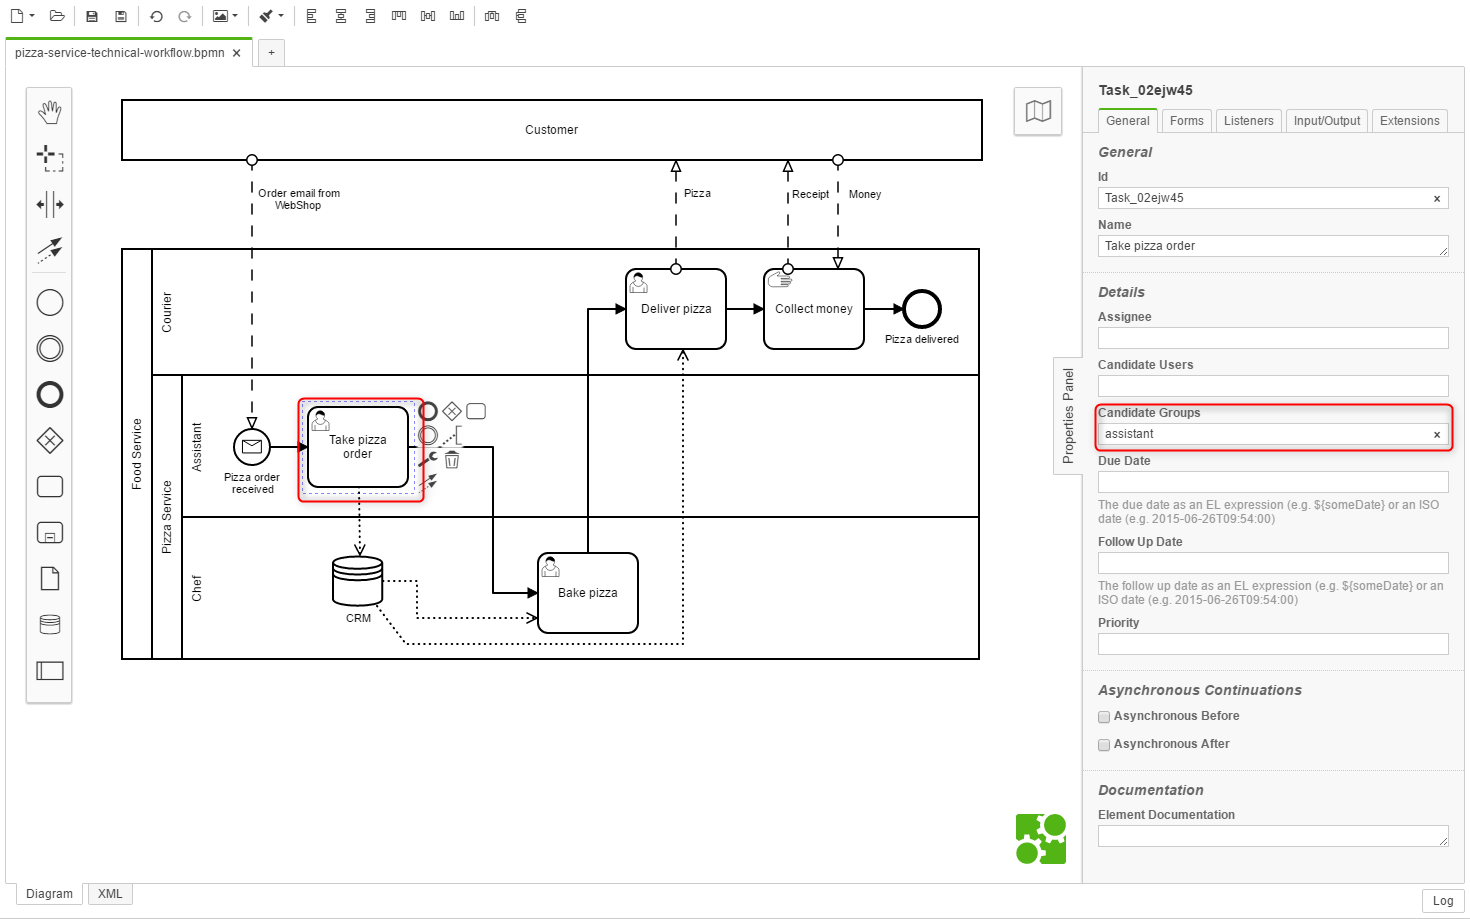
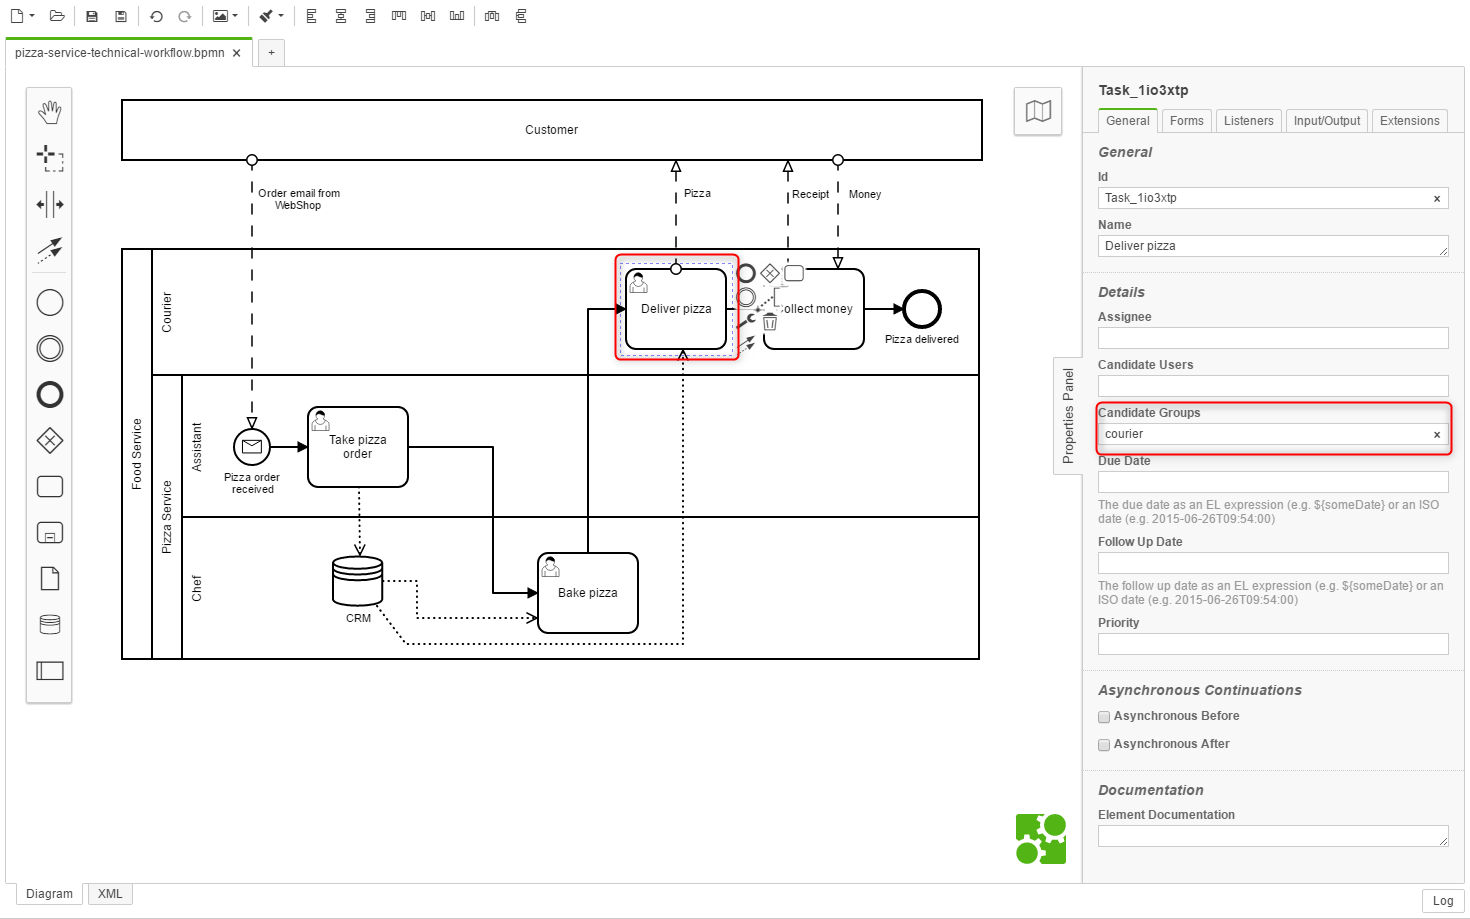
You may want to assign a user group to a user task:
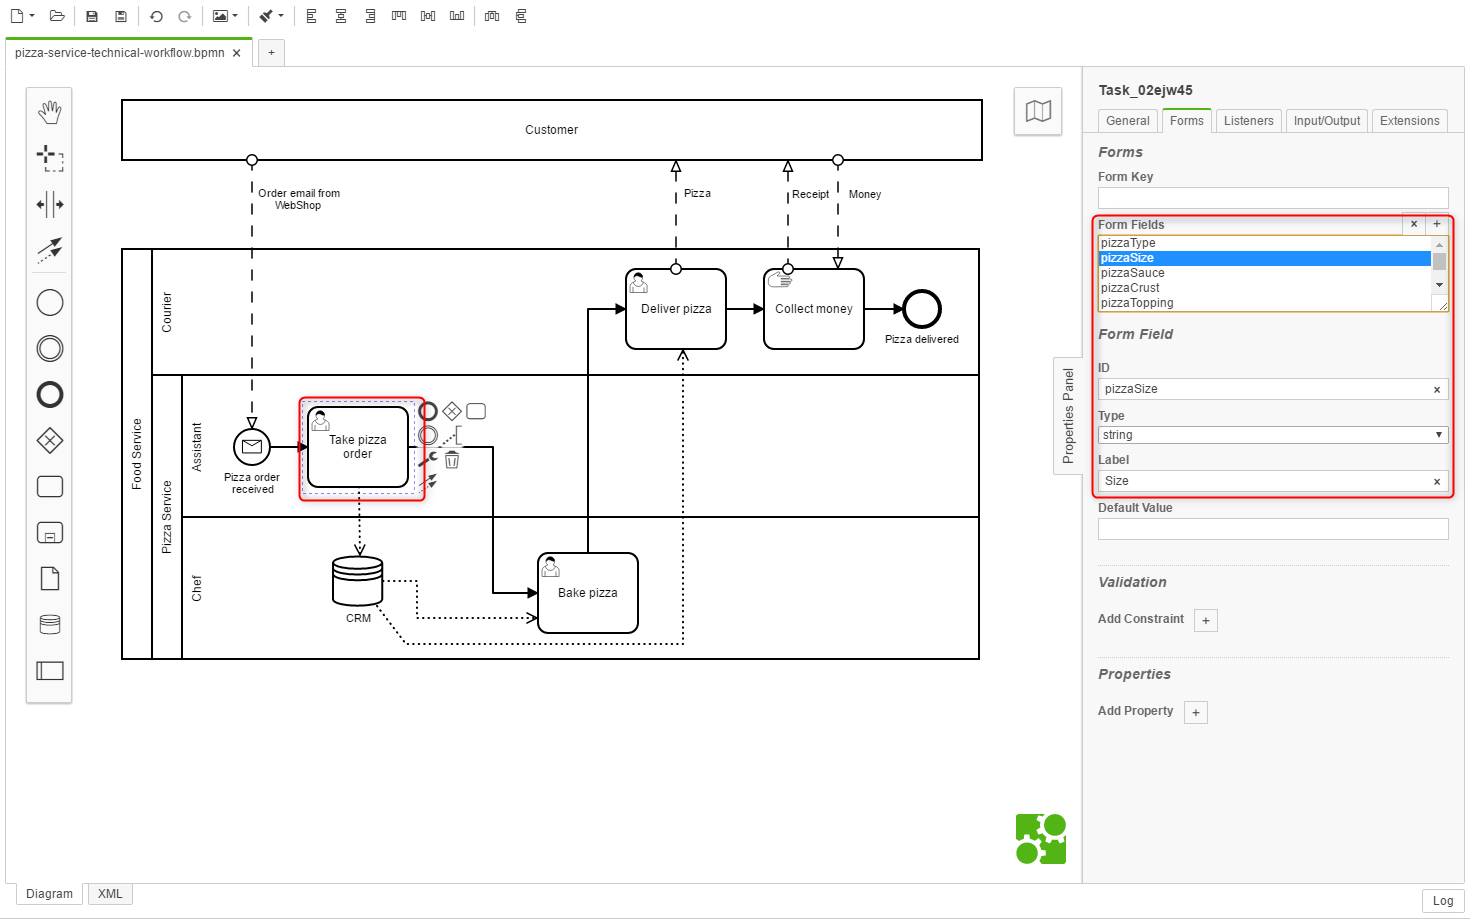
Besides, you also want to reuse the fields (workflow variables) here:
You may want to assign a user group to a user task:
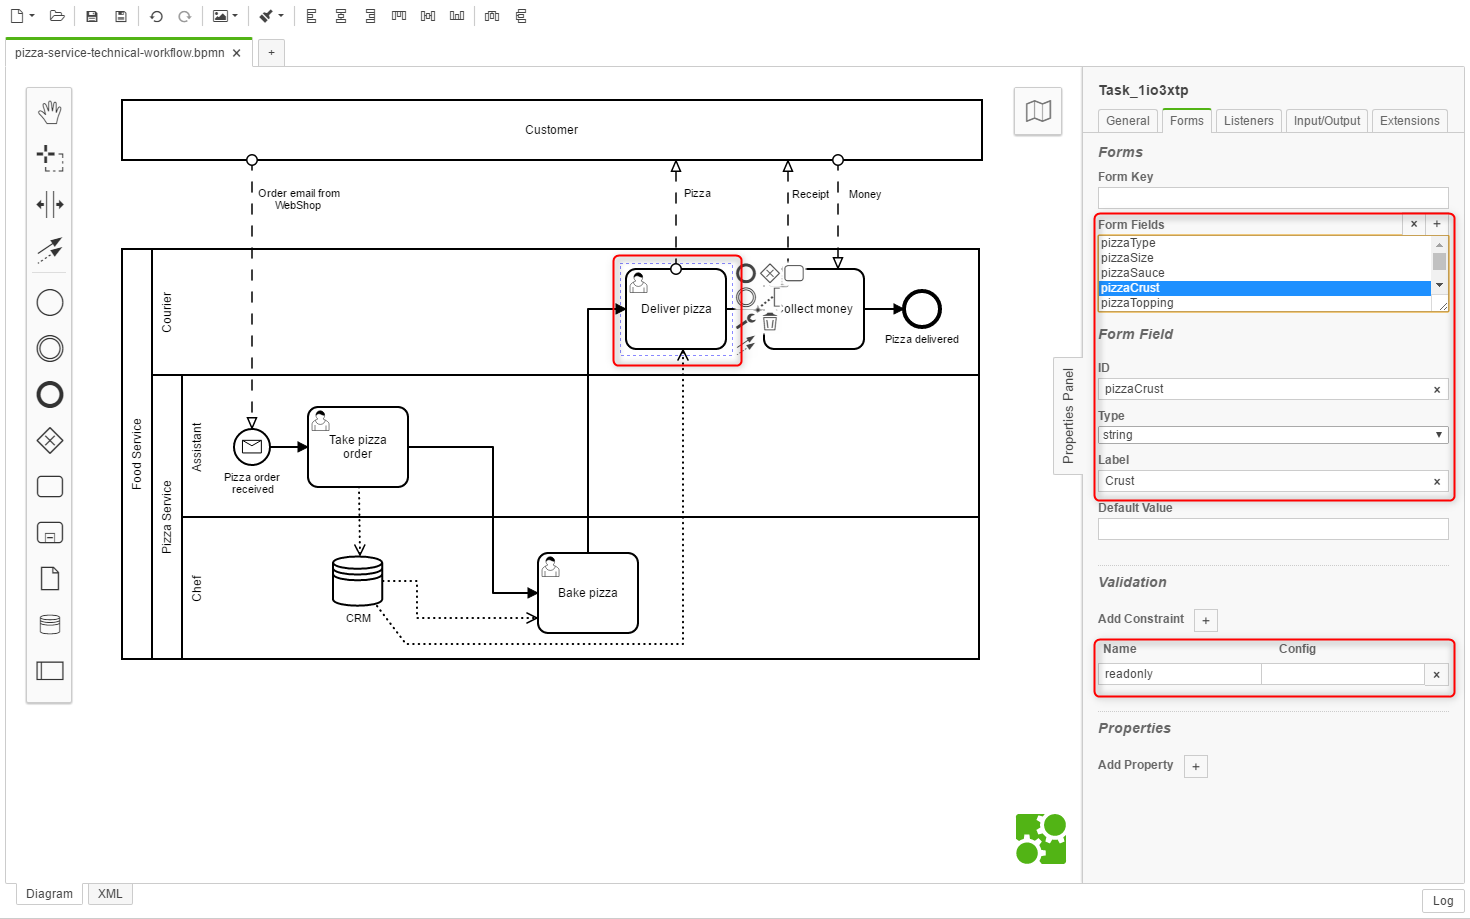
Besides, you also want to reuse the fields (workflow variables) here - form fields can also be made read-only:
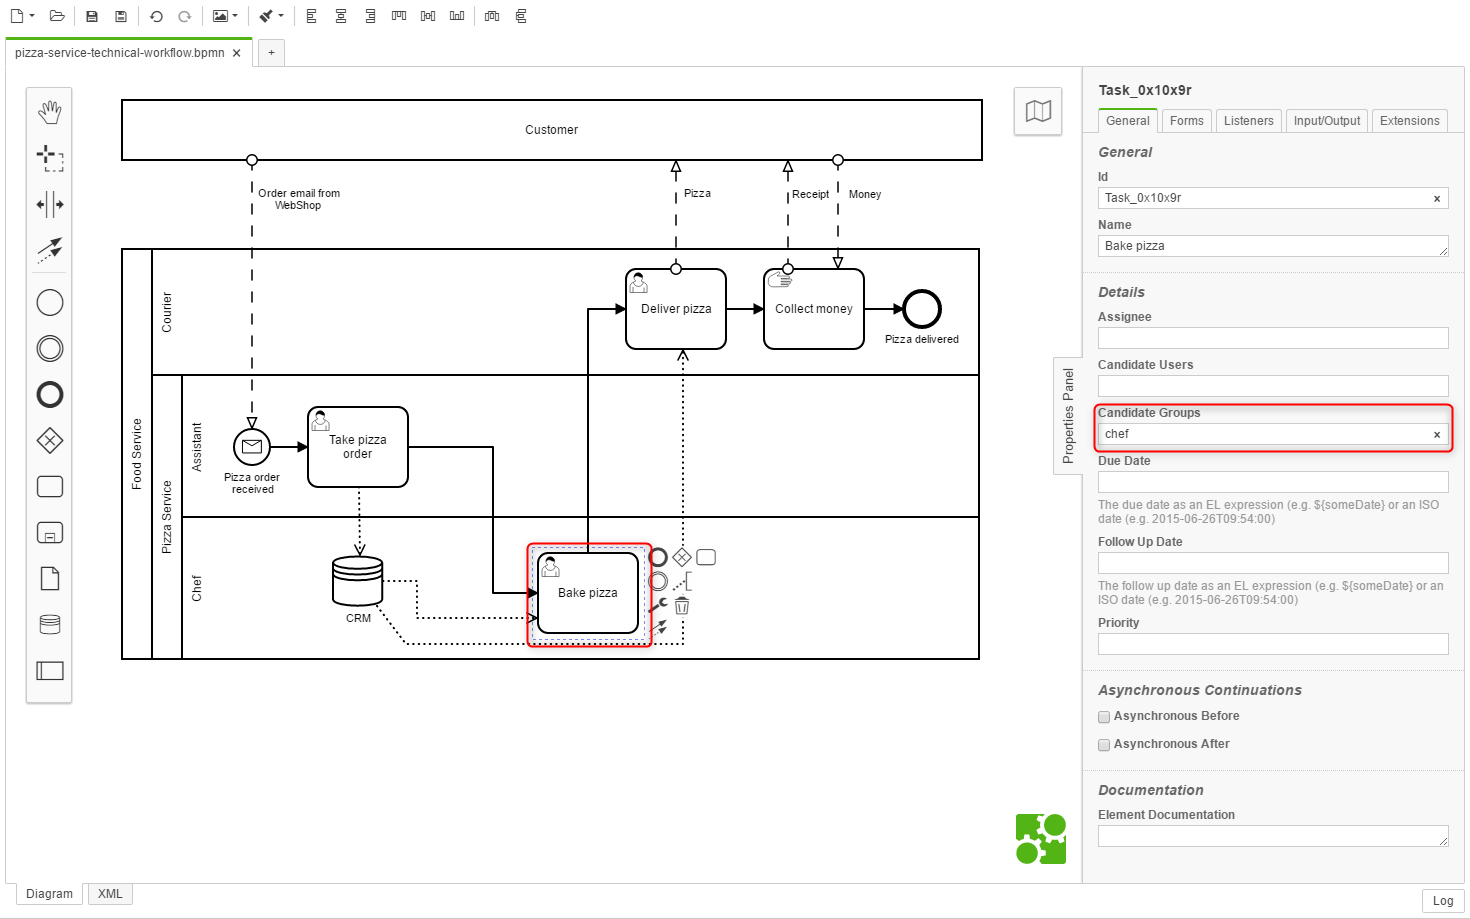
You may want to assign a user group to a user task:
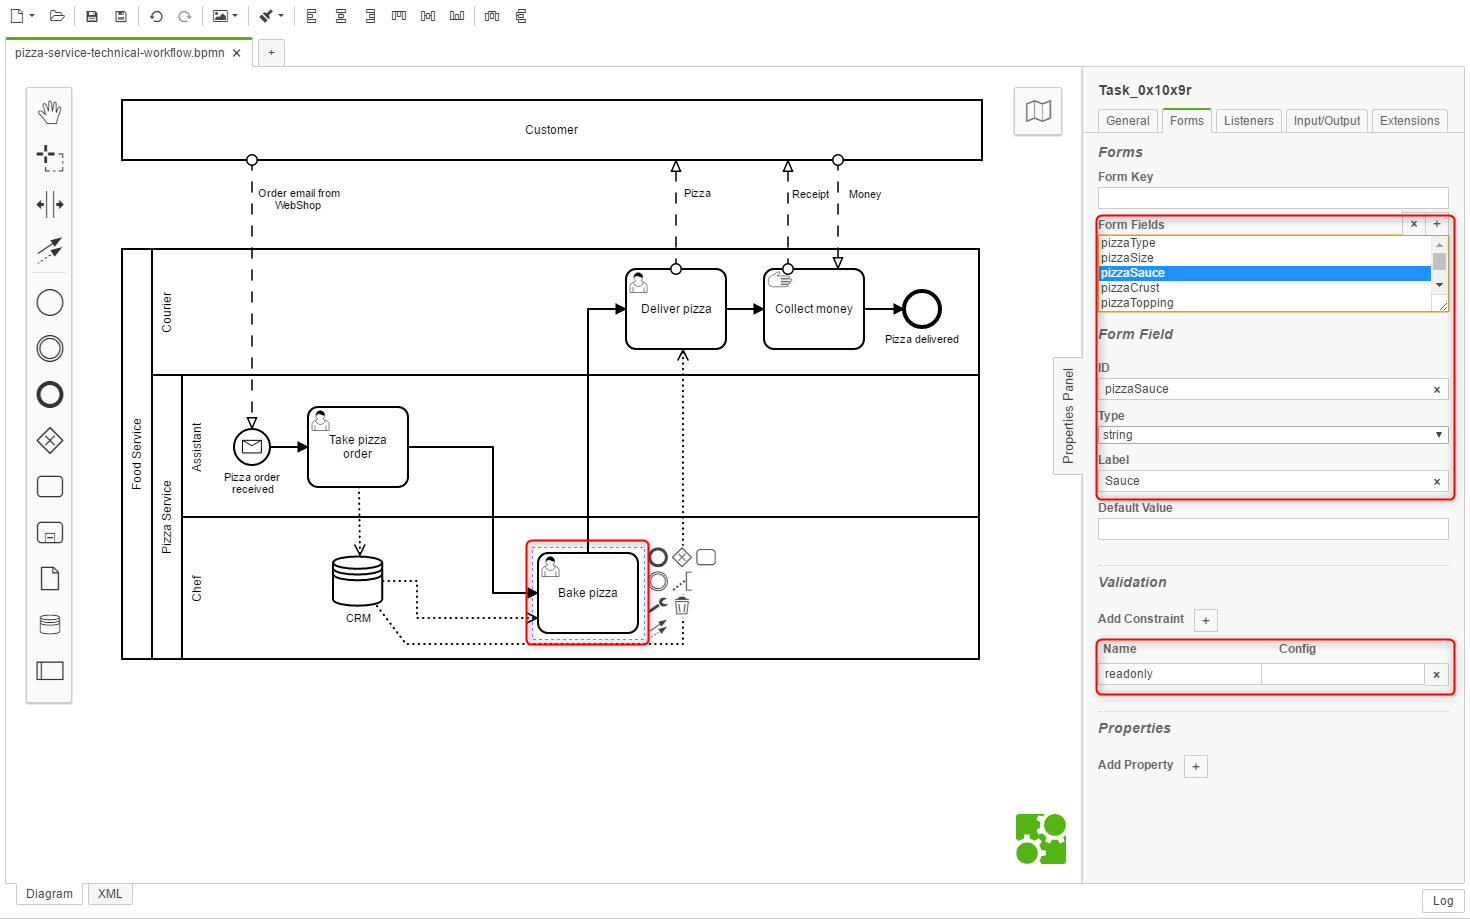
Finally, you also want to reuse the fields (workflow variables) here as well - form fields can also be made read-only:
Save your model under src\main\resources\modelling to get collected by the Camunda workflow engine.
Please make sure, if you are working in a team, that only one person is committing and pushing a model with the same name and process ID to the repository.
There are three options for testing your workflow models using the Camunda engine. You can select just one option or a combination of it.
- Option A: Local is the local testing execution of the Camunda engine, locally on your machine (computer). This option is preferred to iteratively test your process models, HTML forms or JavaScript files, without the requirement of committing un-tested artefacts to your repository.
- Option B: GitHub and Heroku is the remote testing method on the Heroku PaaS using the GitHub repository. This option is preferred test your process models, HTML forms or JavaScript files when it is not possible to start the Camunda engine on a local machine. As a drawback, you may have to commit un-tested artefacts to your repository, and you may have to consult the logs on Heroku.
- Option C: Camunda Modeler and Heroku is the remote testing method on the Heroku PaaS using the Camunda modeller. This option is preferred if you want to test BPMN, DMN and CMMN files only and it is not possible to start the Camunda engine on a local machine. As a drawback, you can prove BPMN, DMN and CMMN models only and you may have to consult the logs on Heroku.
To locally run the Camunda project template using the Maven wrapper, the Java development kit (JDK) must be installed and configured as described in the prerequisites.
Compile and run the Camunda Spring Boot microservice:
- On a Windows-based system use the
mvnw.cmdfile to run the application. - On a OS X and Linux based system use the
mvnwfile.
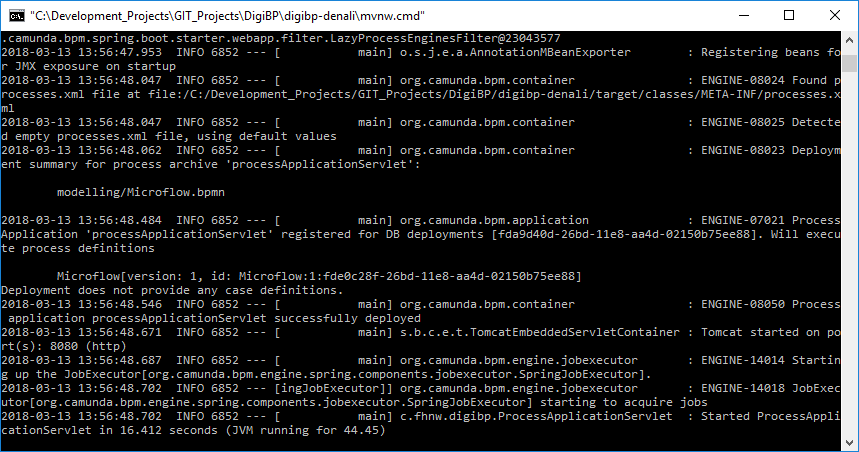
Maven now starts collecting the dependencies (which takes a moment for the first time), compiles and packages the application. Finally, the application will be stared:
Although the Camunda template has been tested carefully, there are some possibilities for error.
Some common errors are:
- JDK is not correctly installed - see prerequisites.
- Port 8080 is already in use by another application. Then try to change to port in the
application-local.yamlfile. - Maven could not download all dependencies accurately due to network errors. Then try to delete the
.m2folder in yourusersfolder.
Once the server has been started, the web-based Camunda web app (tasklist, cockpit, admin) can be requested: http://localhost:8080/
Based on the default configuration in the application.yaml, the admin username is demo, and the password is as well demo.
Commit and push your changes to a GitHub repository, which you have admin access.
Please make sure, if you are working in a team, that only one person is committing and pushing the changes of the same file(s) to the repository.
Re-deploy your application on Heroku your application on Heroku to reflect the changes.
After the state changed from starting to up, you can open the app by using the button open app. You should see the Camunda login view:
Based on the default configuration in the application.yaml, the admin username is demo, and the password is as well demo.
Please note that this Camunda Modeler feature is available from version 1.12.0+
You can deploy BPMN, DMN and CMMN diagrams directly from the modeler.
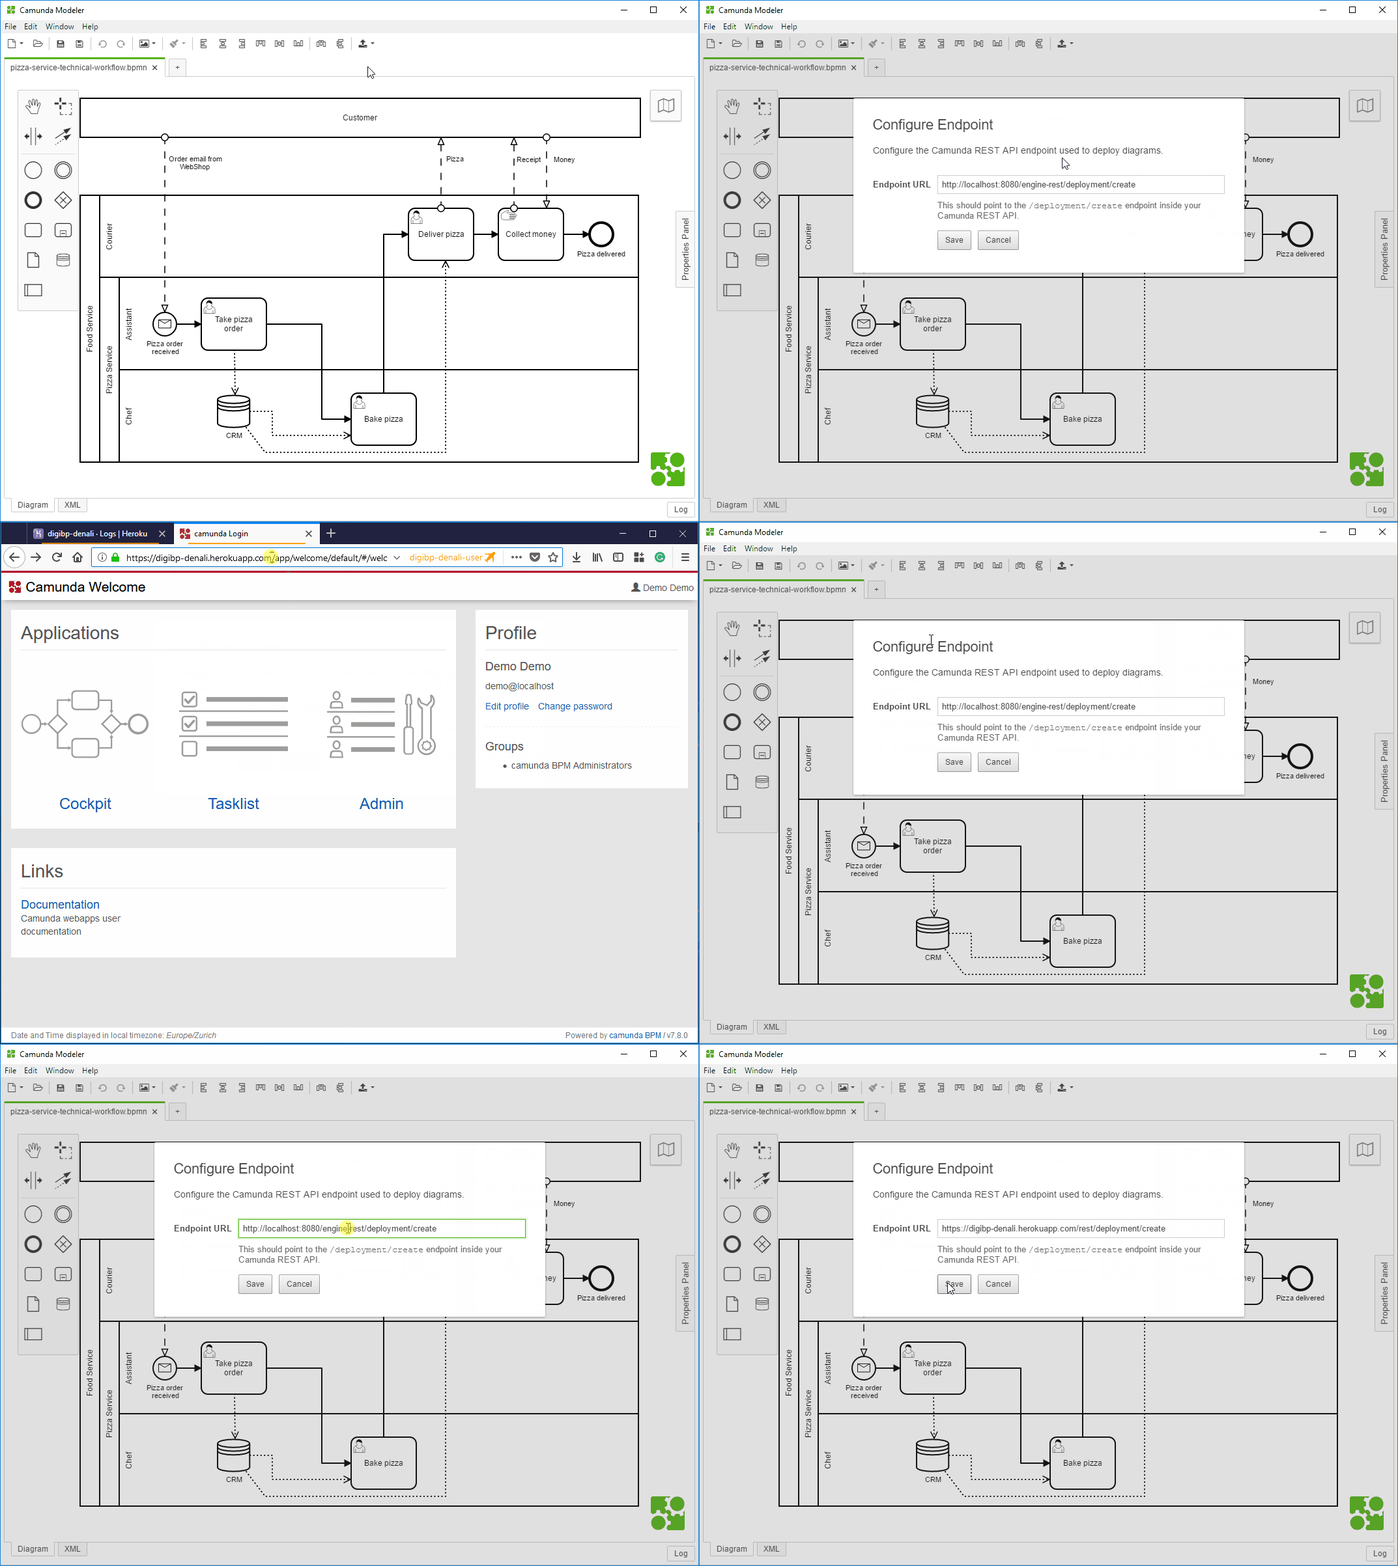
First, you must have a configured deployment endpoint - preferably to the Heroku instantiation:
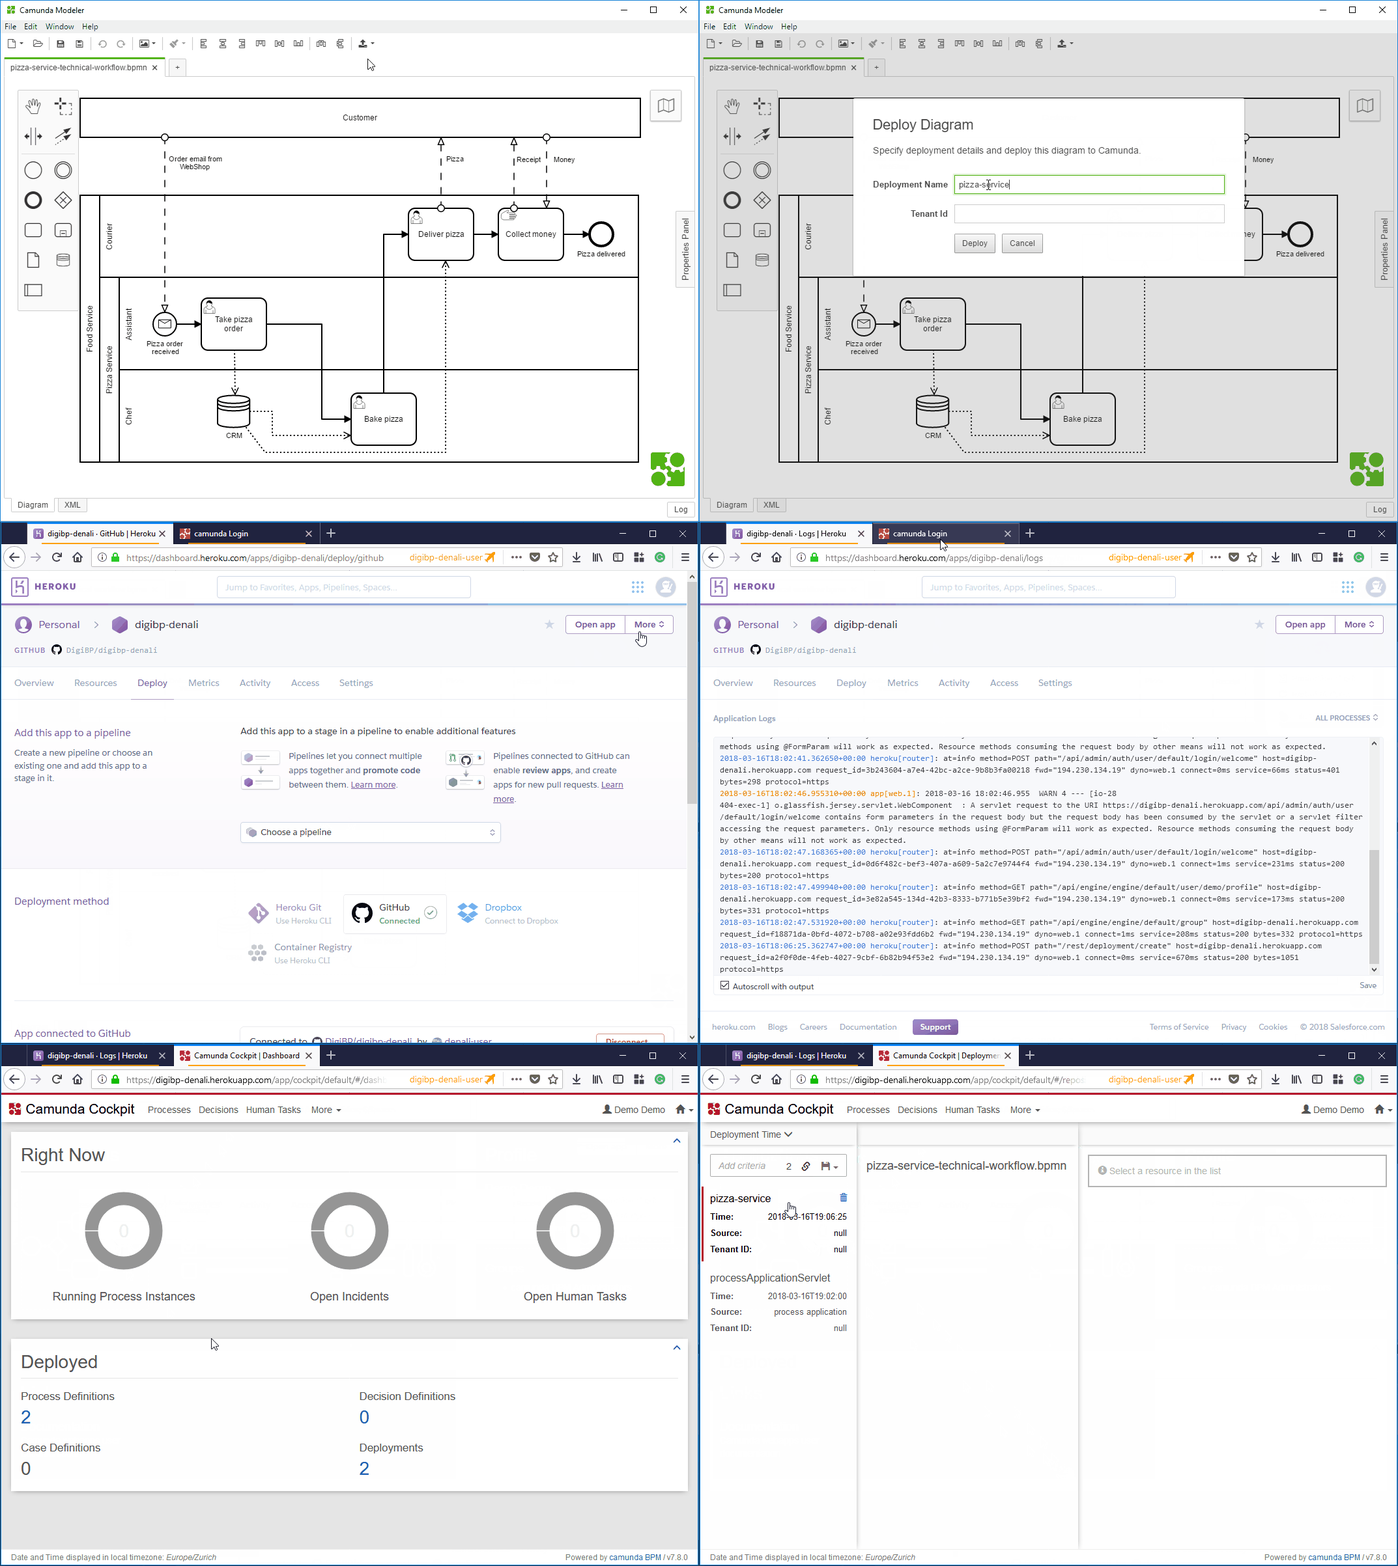
Then you can deploy the current diagram by clicking the deploy icon in the menu bar and choose Deploy Current Diagram:
If you receive a 500 error message, you may have to consult the server logs locally or on Heroku.
In the following we are going to create some users and groups in the Camunda admin, to reflect the group assignments in the previous workflow modelling stage.
Per default, the authorisation has been disabled in the Camunda template. Since we are going to use users and groups, the authorisation should be enabled in the application.yaml file:
camunda:
  bpm:
    admin-user:
      id: demo
      password: demo
    filter:
      create: All Tasks
    authorization:
      enabled: true
Depending on the preferred testing and deployment option. You may have to restart and recompile the Camunda Spring Boot microservice (option A) or re-deploy your application on Heroku your application on Heroku (option B and C) to enable the authorisation.
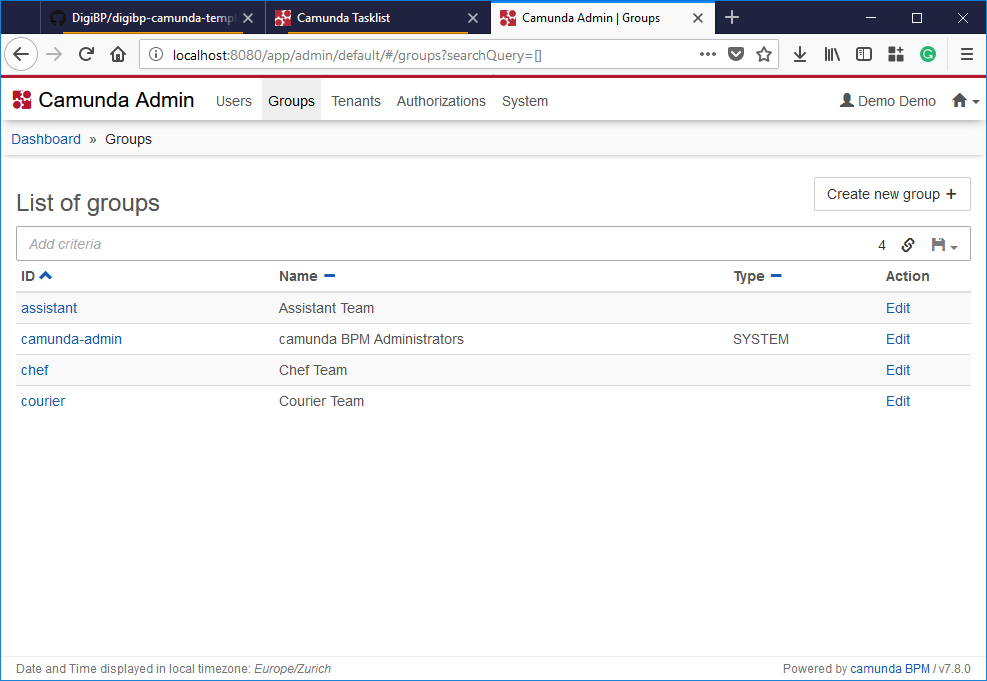
First, we are going to create three groups - assistant, chef and courier:
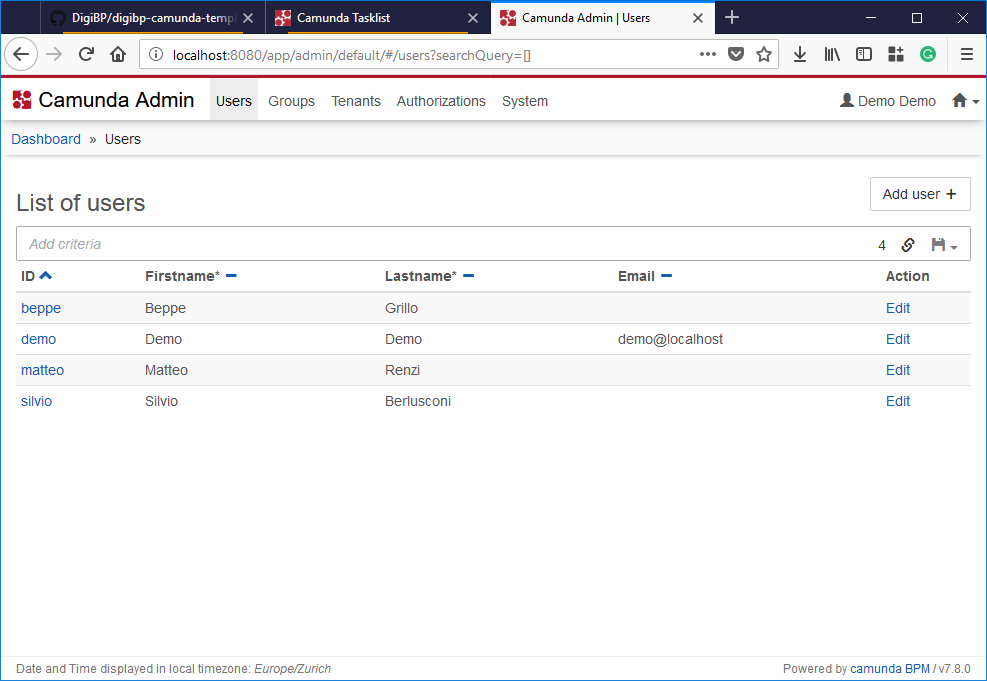
Then we create three users and assign them to the groups - Beppe (assistant), Matteo (chef) and Silvio (courier):
As a next step, we are going to give some rights (authorisations) to the groups and users.
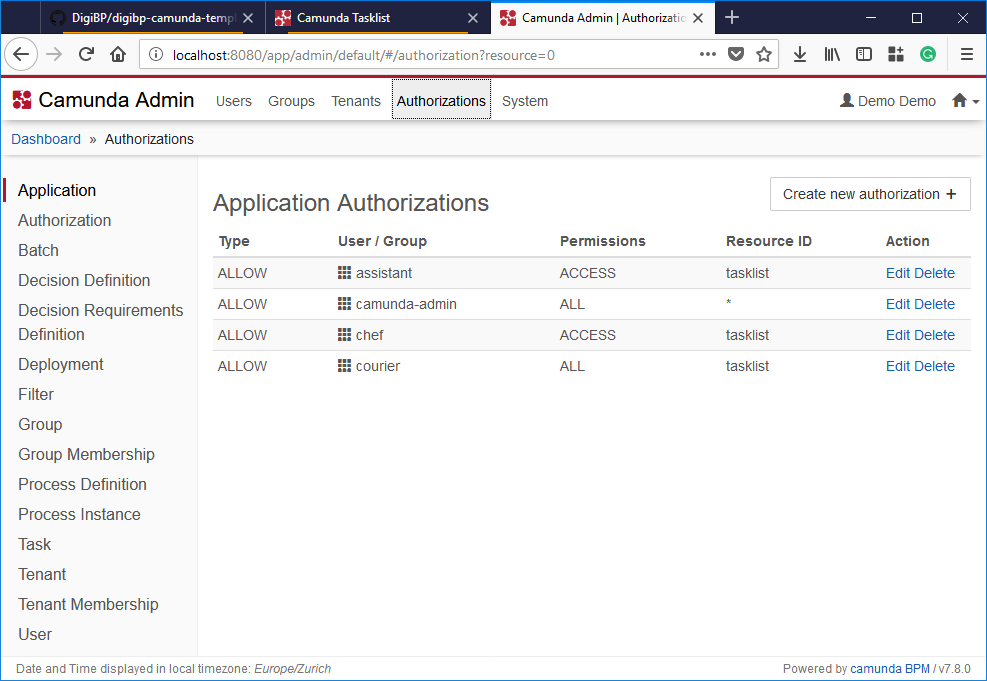
First, we define which group has access to which Camunda application (Resource ID: tasklist):
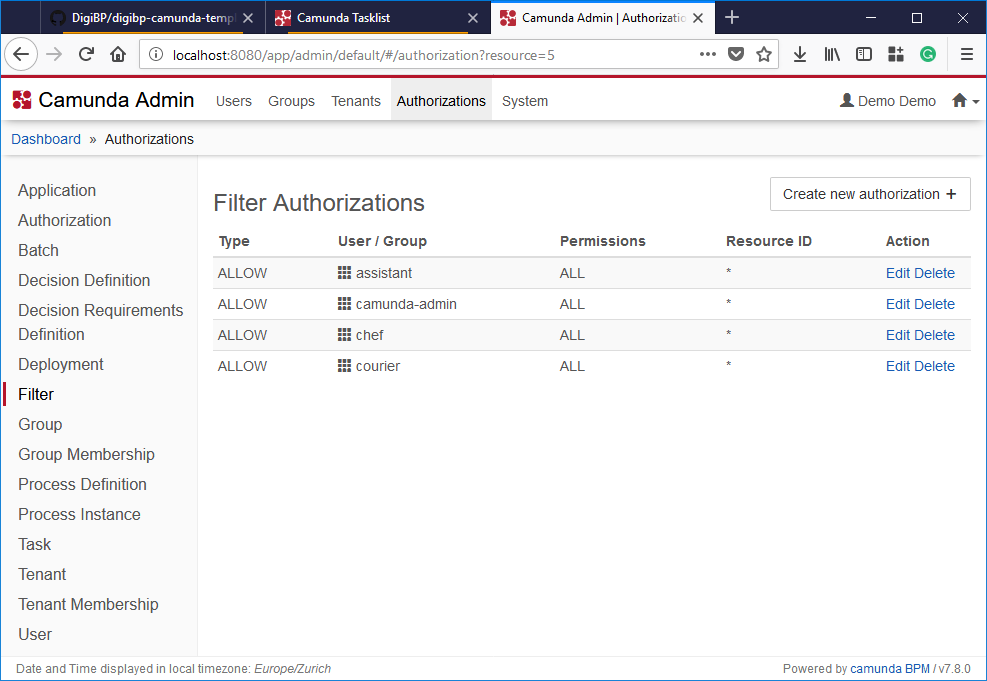
Then, we define which filter the groups can see in the tasklist:
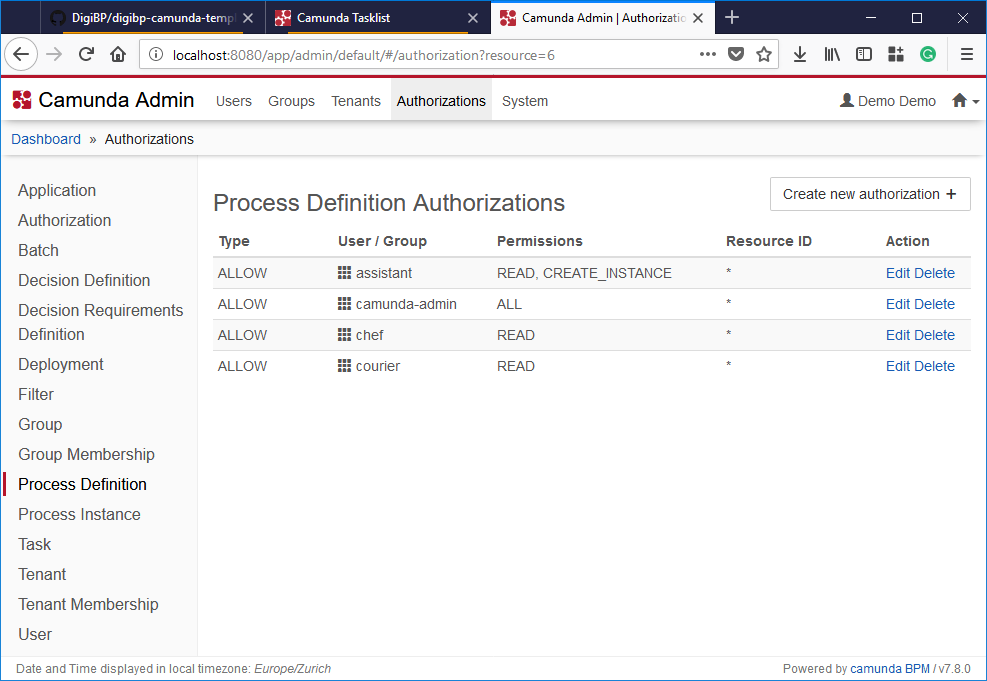
Next, we define who can do what concerning process definitions:
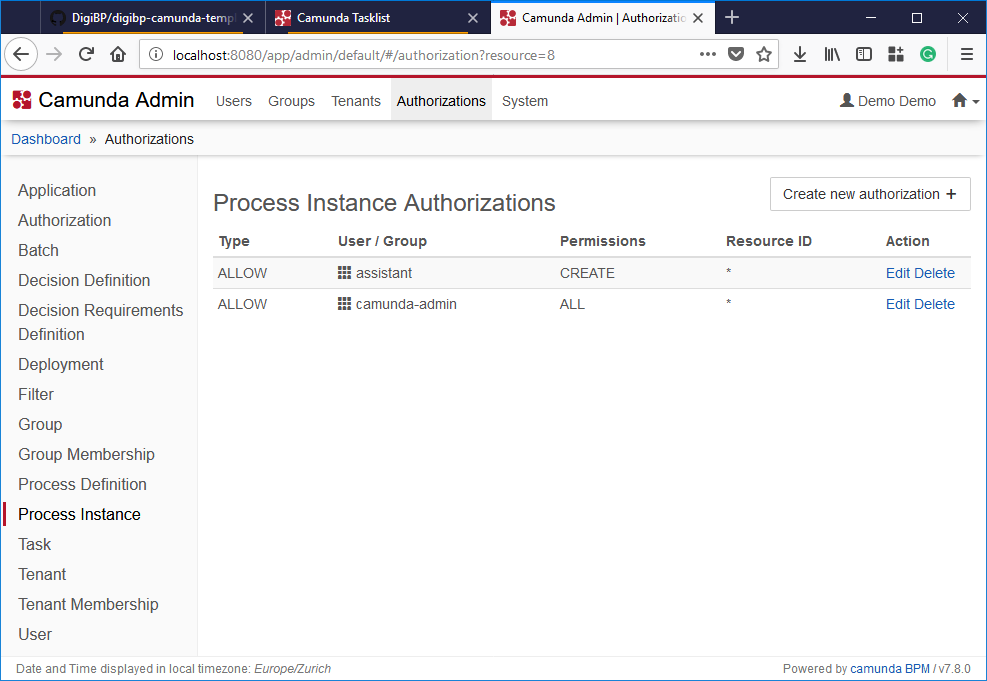
And finally, the assistant group can start a process (create an instance):

