iOS Swift InApp Documentation - yanivav/Documentation GitHub Wiki
Last SDK Version: 2.4.2
This document describes the basic procedure for integrating StartApp In-App Ads into your iOS applications written in Swift programming language.
After this simple integration process, StartApp In-App Ads enables you to reap the benefits of StartApp's In-App monetization products, which maximize the revenue generated by your application. All this profit-making is achieved with minimal effort and minimal interference with your users’ experience.

NOTES:
- The code samples in this document can be copy/pasted into your source code
- When submitting your application to the App Store,do not forget to update your "IDFA Settings"
- Please notice that steps 1-3 are mandatory
- If you have any questions, contact us via [email protected]
##Step 1, Adding the StartApp SDK to your project
####Add the StartApp SDK files to your application project directory
- Right-click on you project and choose "Add Files to…"

- Add the StartApp SDK files:
 StartApp.framework
StartApp.bundle
StartApp.framework
StartApp.bundle
####Add the StartApp.framework to the Build Phases of the desired target
- Select your application project to bring up the project editor
- Select your application target to bring up the target editor
- Select the Build Phases tab
- Disclose the "Link Binary With Libraries" phase
- Make sure "StartApp.framework" exists. if not, click the plus button in that phase, then click "Add Other…" and select the "StartApp.framework" file

####Add the Bundle to the Build Phases of the desired target
- Select your application project to bring up the project editor
- Select your application target to bring up the target editor
- Select the Build Phases tab
- Disclose the "Copy Bundle Resources" phase
- Make sure "StartApp.bundle" exists. if not, click the plus button in that phase, then click "Add Other…" and select the "StartApp.bundle" file

_CoreTelephony.framework_
_SystemConfiguration.framework_
_CoreGraphics.framework_
_StoreKit.framework_
_AdSupport.framework_
_QuartzCore.framework_
_libz.dylib_
 ##Step 3, Adding the Bridging-Header file
####Create or edit your application's Bridging-Header file
1. Right-click your project and choose “New File…”
##Step 3, Adding the Bridging-Header file
####Create or edit your application's Bridging-Header file
1. Right-click your project and choose “New File…”
 2. Choose iOS->Source->Header File->Next
 3. Name the file "\-Bridging-Header.h”
 where \ should be identical to the one being used in your build's settings
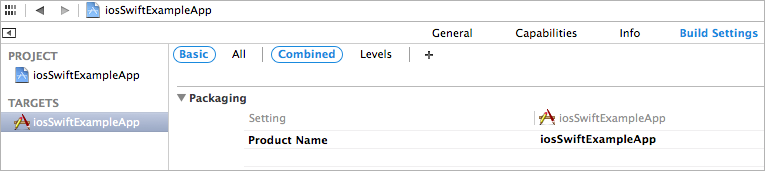 4. Make sure the *Bridging Header* is declared in "Build Settings" with the right path
 5. Import the following header file:
#import <StartApp/StartApp.h> // AppDelegate.swift
func application(application: UIApplication, didFinishLaunchingWithOptions launchOptions: [NSObject: AnyObject]?) -> Bool {
// initialize the SDK with your appID and devID
var sdk: STAStartAppSDK = STAStartAppSDK.sharedInstance()
sdk.appID = "Your App Id"
sdk.devID = "Your Account Id"
return true
}Replace "Your Account Id" and "Your App ID" with your own values provided in the developers’ portal.
After logging in, your account ID will be displayed at the top right-hand corner of the page:

To find your application ID, click on the "Apps and Sites" tab on the left pane and choose the relevant ID from your app list:

StartApp SDK provides two modes for displaying Splash screens:
| Splash Screen Mode | Description |
|---|---|
| User-Defined Mode (default) | Using your application's default splash image, with a loading animation |
| Template Mode | StartApp SDK provides a pre-defined template in which you can place your own creatives, such as application name, logo and loading animation. for more details, please refer to the "Advanced Manual" |
####Adding the Splash Screen
In your application delegate class (AppDelegate.swift), after initializing the SDK, call the sdk.showSplashAd() method:
// AppDelegate.swift

func application(application: UIApplication, didFinishLaunchingWithOptions launchOptions: [NSObject: AnyObject]?) -> Bool {
        // initialize the SDK with your appID and devID
        var sdk: STAStartAppSDK = STAStartAppSDK.sharedInstance()
        sdk.appID = "Your App Id"
        sdk.devID = "Your Developer Id"

		sdk.showSplashAd()

        return true
    }
If you wish to customize or use a different splash screen, please refer to the Advanced Usage.
##Step 5, Show Interstitial Ad ######You can choose to show the interstitial ad in several locations within your application. This could be between stages, while waiting for an action, when pressing a button and more.In your view controller declare STAStartAppAd at the begin of the class. Init STAStartAppAd within the viewDidLoad() method and load it within the viewDidAppear() method.
var startAppAd: STAStartAppAd?

override func viewDidLoad() {
        super.viewDidLoad()

        startAppAd = STAStartAppAd()
    }

override func viewDidAppear(animated: Bool) {
        super.viewDidAppear(animated)
        startAppAd!.loadAd()
    }
Finally, add the following lines where you want to show the ad
startAppAd!.showAd()##Return Ads The **Return Ad** is a new ad unit which is displayed once the user returns to your application after a certain period of time. To minimize the intrusiveness, short time periods are ignored. For example, the Return Ad won't be displayed if the user leaves your application to take a short phone call before returning.IMPORTANT
Loading an ad might take a few seconds so it's important to show the ad as late as you can. In case you callshowAd()while the ad hasn't been successfully loaded yet, nothing will be displayed. For example, if you'd like to show an ad after completing a game's level, the best practice would be to show the ad upon completing the level (for example in yourviewDidDisappear()method). On the other hand, loading and showing the ad together at the beginning of the next level might result with a failure – as the ad might not have enough time to load.
Return ads are enabled and activated by default. If you want to disable this feature, simply call sdk.disableReturnAd() as part of the initialization process, in your AppDelegate.swift file:
// AppDelegate.swift

func application(application: UIApplication, didFinishLaunchingWithOptions launchOptions: [NSObject: AnyObject]?) -> Bool {
        // initialize the SDK with your appID and devID
        var sdk: STAStartAppSDK = STAStartAppSDK.sharedInstance()
        sdk.appID = "Your App Id"
        sdk.devID = "Your Developer Id"

		sdk.disableReturnAd()

        return true
}1 In your view controller declare STABannerView at the begin of the class.
// ViewController.swift

var startAppBanner: STABannerView?
2 Create and initialize your STABannerView variable and add it as a subView to the view where you want it to be displayed.
override func viewDidAppear(animated: Bool) {
        super.viewDidAppear(animated)
        if !startAppBanner {
            startAppBanner = STABannerView(size: STA_AutoAdSize, autoOrigin: STAAdOrigin_Bottom, withView: self.view, withDelegate: nil);
            self.view.addSubview(startAppBanner)
        }
    }
The STA_AutoAdSize detects the width of the device's screen in its current orientation, and provides the optimal banner for this size.
NOTE: this example shows the banner at the bottom of the root view controller (
self.view), but you can pass any other view where you want to show the banner
3 Implement didRotateFromInterfaceOrientation in your view controller
// YourViewController.swift
override func didRotateFromInterfaceOrientation(fromInterfaceOrientation: UIInterfaceOrientation)  {
        // notify StartApp auto Banner orientation change
        startAppBanner!.didRotateFromInterfaceOrientation(fromInterfaceOrientation)
        super.didRotateFromInterfaceOrientation(fromInterfaceOrientation)
    }
4 If your app supports iOS 8, implement viewWillTransitionToSize in your view controller
// YourViewController.m
override func viewWillTransitionToSize(size: CGSize, withTransitionCoordinator coordinator: UIViewControllerTransitionCoordinator) {
        // notify StartApp auto Banner orientation change
        startAppBannerAuto!.viewWillTransitionToSize(size, withTransitionCoordinator: coordinator)
        startAppBannerFixed!.viewWillTransitionToSize(size, withTransitionCoordinator: coordinator)

        super.viewWillTransitionToSize(size, withTransitionCoordinator: coordinator)
}| Value | Position | Behavior |
|---|---|---|
STAAdOrigin_Top |
Auto Top | The banner will be centered and pinned to the top of the view. In case the view is a root view controller, the banner will be located under the status bar, if exists. |
STAAdOrigin_Bottom |
Auto Bottom | The banner will be centered and pinned to the bottom of the view. |
##Enjoy Higher eCPM with Demographic-Targeted Ads If you know your user's gender, age or location, StartApp can use it to serve better-targeted ads which can increase your eCPM and revenue significantly.NOTE
If you wish to use a fixed origin for the banner, please refer to the "Advanced Manual"
####Set Age and Gender Upon initialization, after providing your DevId and AppId, use the following line:
sdk.preferences = STASDKPreferences.prefrencesWithAge(<USER_AGE>, andGender: <USER_GENDER>)- Replace <USER_AGE> with the user's real age
- Replace <USER_GENDER> with the user's real gender, using STAGender_Male or STAGender_Female.
Example
// AppDelegate.swift

func application(application: UIApplication, didFinishLaunchingWithOptions launchOptions: [NSObject: AnyObject]?) -> Bool {
        // initialize the SDK with your appID and devID
        var sdk: STAStartAppSDK = STAStartAppSDK.sharedInstance()
        sdk.appID = "Your App Id"
        sdk.devID = "Your Developer Id"

        sdk.preferences = STASDKPreferences.prefrencesWithAge(22, andGender: STAGender_Male)

        return true
    }
####Set Location The location of the user is a dynamic property which is changed constantly. Hence, you should provide it every time you load a new Ad:
startAppAd!.loadAdWithAdPreferences(STAAdPreferences.prefrencesWithLatitude(<Real_Latitude>, andLongitude: <Real_Longitude>))Example
override func viewDidAppear(animated: Bool) {
        super.viewDidAppear(animated)
        startAppAd!.loadAdWithAdPreferences(STAAdPreferences.prefrencesWithLatitude(37.3190383911, andLongitude: -121.96269989))
}On the "Advertising Identifier" section:
1 Choose "Yes" on the right pane
2 Opt-in the "Serve advertisements within the app" checkbox
3 Opt-in the confirmation checkbox under "Limit Ad tracking setting in iOS"
