Lab 18: Map annotation from a web interface - subodh-malgonde/Robotics GitHub Wiki
This lab will also guide you through parts of your next assignment.
The goal of this lab is similar to the previous lab: we want an interface for creating poses on a map and sending the robot to them. However, we want a more user friendly interface than just a command-line interface. Additionally, it would be nice to annotate poses on the map without having to drive the robot there.
Our system will have a frontend and a backend component.
This time, however, the frontend will be a web app.
We will use <ros-rviz>, a highly experimental, web-based version of RViz developed by the University of Washington Human-Centered Robotics Lab.
Because <ros-rviz> is experimental, you can feel free to use "real" RViz instead.
Using the web-based version has the advantage of working on all operating systems and on mobile devices.
However, it may be buggy, and it doesn't support high-bandwidth visualizations like point clouds.
The app will split responsibilities between buttons displayed on the web page and interactive markers that will appear in RViz:
| Feature | Buttons | Interactive markers |
|---|---|---|
| Create pose | User clicks "Create Pose" button. | User places interactive marker. |
| List poses | List of poses displayed in interface. | |
| Delete pose | User clicks "Delete" next to pose. | |
| Send robot to pose | User clicks "Go here" next to pose. | |
| Edit pose | User drags interactive marker. | |
| Rename pose (optional) | User renames in web interface. |
"Reactive databases" like Firebase or Meteor are a hot trend in web development today. In these systems, changes made to the data are immediately propagated to all other clients viewing the same data and updated in real time, without having to refresh the page or periodically poll the server. Under the hood, these interfaces are implemented using publish/subscribe systems. Fortunately, we can implement some of the features of reactive databases using ROS.
One way to simulate a reactive database is to publish/subscribe to a "latched" topic.
You can read in the rospy Publisher documentation that with a "latched" topic, the last message sent will be saved and sent to any nodes that subscribe to that topic, even if they started subscribing after the message was published.
In this way, subscribing to this topic is like reading a particular value from a database and subscribing to future updates to that value.
To create a latched topic, add latch=True when you create the Publisher.
We will publish the list of poses to a latched topic.
You will need to create a msg called PoseNames, which is just a list of strings.
Then, your server needs to publish the list of pose names whenever a pose is added, deleted, or renamed.
Finally, your website should subscribe to this topic, and re-render the list of poses whenever it changes.
Note that whenever you create a new message type, you will need to shut down rosbridge_websocket.launch and re-source your environment before restarting it:
# ... Create new message ...
catkin build
# ... Shut down rosbridge_websocket.launch ...
source ~/.bashrc
roslaunch rosbridge_server rosbridge_websocket.launch
One technique for a web interface to communicate with the server is to treat the user's interaction with the interface as a stream of actions.
In order words, you can publish a message to a topic (e.g., /map_annotator/user_actions) whenever the user takes some action in the interface (clicks the "Create" button, clicks a "Delete" button, etc.)
In this way, you can test your backend by just publishing messages to the /map_annotator/user_actions topic, even if the frontend isn't finished yet.
This topic can also be recorded, analyzed, and played back for testing purposes.
In this interface, all of the user actions can be specified with a command parameter that acts on a pose name.
If you want to support renaming a pose from the web interface, you may also want to add an additional parameter, updated_name.
Your UserAction.msg can look like this:
string CREATE=create
string DELETE=delete
string GOTO=goto
# (optional) string RENAME=rename
string command
string name # The name of the pose the command applies to
string updated_name # If command is RENAME, this is the new name of the pose
At this point, your team should theoretically be able to work in two groups: one group that focuses on developing the web interface and another that focuses on developing the backend.
The frontend team will build a web app that works like so:
- The app subscribes to
/map_annotator/pose_names, of type PoseNames and shows a list of poses - When the user presses "Create," they enter the name of a new pose and send the UserAction to the server
- The user drags the interactive marker to the desired location
- Next to each pose name is a "Go to" and "Delete" button. Clicking on either sends the appropriate UserAction to the server
The backend team will build a server, based on the previous lab's command-line interface, that works like so:
- The server publishes the list of saved poses to
/map_annotator/pose_namesas a PoseNames message. - Whenever a pose is added or deleted, the list gets republished (remember to set
latch=Truewhen creating the publisher) - The server subscribes to
map_annotator/user_actions, and executes the commands as they come in - The server manages the interactive markers for all the poses.
- The interactive marker server name will be
/map_annotator/map_poses - The server saves the poses to a file (using pickle or a database system of your choice) and loads them on startup
Here is a video showing how your interface might look when done. Note that changes are synchronized between different browsers.

Below, we give a few tips for the backend team. The rest of the lab is dedicated to building the frontend.
Before splitting into two groups, you should decide on the exact message formats for UserAction and PoseNames.
You should then create and build your messages.
Once you have done so, you are ready to work concurrently.
Install some packages:
sudo apt-get install ros-indigo-rosbridge-server ros-indigo-tf2-web-republisher ros-indigo-interactive-marker-proxy
The course repo has a new package: collada_web_server.
Copy it into your repository and build your code.
When you add a new repository to your workspace, you also need to re-source your .bashrc files in other terminal windows:
# Run in every terminal window after adding a new package and building it successfully
source ~/.bashrc
Create a launch file for your team:
cd ~/catkin_ws/src/cse481c/map_annotator
mkdir launch
vim launch/map_annotator.launch
map_annotator.launch
<launch>
  <!-- Map annotator server -->
  <!-- You can pass command-line args to your server using the args attribute below. -->
  <node pkg="map_annotator" type="server.py" name="map_annotator_server" args="$(env HOME)/our_pose_db_name.db"/>

  <!-- Web prereqs -->
  <include file="$(find rosbridge_server)/launch/rosbridge_websocket.launch" />
  <node pkg="tf2_web_republisher" type="tf2_web_republisher" name="tf2_web_republisher" />
  <node pkg="interactive_marker_proxy" type="proxy" name="interactive_marker_proxy_basic_controls">
    <remap from="target_frame" to="/map" />
    <remap from="topic_ns" to="/map_annotator/map_poses" />
    <param name="update_rate" value="10.0" />
  </node>
  <node pkg="collada_web_server" type="run_caddy.bash" name="collada_caddy" cwd="node" />
</launch>- Once a user creates a marker and gives it a name in the web interface, a new interactive marker should appear in (web) RViz at the ground level at the (0, 0, 0) position and unit orientation.
- The marker should be an arrow, so that the user can tell which way the Fetch will be facing in this pose.
- The user should be able to change the marker's position and orientation.
- As the pose of the marker is changed, the database (or whatever data structure you are using to store the poses) should be updated.
- If a pose is deleted from the web interface, the marker for that pose should disappear from the visualization as well.
- The name of the pose should be displayed above the interactive marker. To do this, simply add an extra InteractiveMarkerControl and text Marker to your interactive marker.
Hint: Look at the Chess Piece marker in the Interactive Markers Basic Controls tutorial to get an idea of how to create a marker that can be dragged in the XY plane. To get it to rotate, you will need to add another control to the interactive marker, see the InteractiveMarkerControl definition and figure out what that is. This control will not need any markers, because a rotation control renders a draggable ring by default.
Hint 2: Your markers will be easier to click if you make the controls slightly off the ground. That way, the map visualization doesn't interfere with it.
Here is an example of what your interactive marker might look like:

The easiest way to do this is by simply using pickle to save your data structure of poses to disk. You can register a function to run when the node is shutdown as described in rospy: Initialization and Shutdown. Remember to reinitialize everything (web interface pose list, interactive markers) when the server starts up.
Create the frontend:
cd ~/catkin_ws/src/cse481c/map_annotator
mkdir frontend
cd frontend
polymer init
In the menu:
- Pick
polymer-2-applicationin the menu that appears. - Name your application
map-annotator - Accept the remaining defaults
Now add the ROS web components as dependencies:
bower install --save jstnhuang/ros-websocket
bower install --save jstnhuang/ros-topic
bower install --save jstnhuang/ros-rviz
bower_components/ now contains a ton of files, which should be downloaded via bower and not stored in Git.
echo "bower_components/" >> .gitignore
As a reminder, you can find documentation for these three elements on https://webcomponents.org:
Run your web app and the map_annotator launch file:
roslaunch map_annotator map_annotator.launch # Remember to re-launch whenever you add/edit messages
polymer serve -H 0.0.0.0
As in Lab 10, the web application template puts elements in src/element-one/element-one.html, src/element-two/element-two.html, etc.
We recommend moving all the elements into the src folder.
The rest of the lab will assume you have done so.
cd frontend
mv src/map-annotator-app/map-annotator-app.html src/map-annotator-app.html
rm -r src/map-annotator-app
In index.html:
- <link rel="import" href="/src/map-annotator-app/map-annotator-app.html">
+ <link rel="import" href="/src/map-annotator-app.html">
In src/map-annotator-app.html:
- <link rel="import" href="../../bower_components/polymer/polymer-element.html">
+ <link rel="import" href="../bower_components/polymer/polymer-element.html">
Connect to the websocket server similar to how you did in Lab 10.
- Import the
<ros-websocket>element at the top of the file - Add the
<ros-websocket>element to DOM - You may want to add console logs or a status message to show the connection status
-
Import
<ros-topic> -
Add
<ros-topic>to your page and subscribe tomap_annotator/pose_names. Use thelast-messageattribute to bind the topic to the most recently published message:<ros-topic auto ros="{{ros}}" topic="map_annotator/pose_names" msg-type="map_annotator/PoseNames" last-message="{{poseNames}}" on-message="_handlePoseNames" ></ros-topic>
Add a handler for the pose names, which can be useful for debugging:
_handlePoseNames(evt) {
  var msg = evt.detail;
  console.log('Pose list: ', msg);
}
Open the JavaScript console (Ctrl+Shift+K in Firefox or Ctrl+Shift+J in Chrome) and try publishing some latched messages to the pose_names topic:
rostopic pub /map_annotator/pose_names map_annotator/PoseNames "names:
- 'Test 1'
- 'Test 2'"
You should see the poses you published in the console.
Now, let's render the pose list in the DOM using a <dom-repeat> element.
Any JavaScript Array can be passed in to items, and each element is named item in the loop.
You can also change the name from item to something else and get the numerical index in the loop, see the documentation for details.
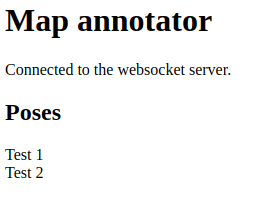
<h2>Poses</h2>
<template is="dom-repeat" items="[[poseNames.names]]">
  <div>[[item]]</div>
</template>
Refresh the page and you will see "Test 1" and "Test 2" appear in your app.
Now, we will split our application into two components: one for the main app, and a new component that represents a pose.
Create a file, frontend/src/map-annotator-pose.html:
<link rel="import" href="../bower_components/polymer/polymer-element.html">

<dom-module id="map-annotator-pose">
  <template>
    <style>
      :host {
        display: block;
      }
    </style>
    [[poseName]]
  </template>

  <script>
    class MapAnnotatorPose extends Polymer.Element {
      static get is() { return 'map-annotator-pose'; }
      static get properties() {
        return {
          poseName: String,
          ros: Object
        };
      }
    }
    window.customElements.define(MapAnnotatorPose.is, MapAnnotatorPose);
  </script>
</dom-module>
This element has two properties: poseName and ros.
To use this element, you must specify these properties.
First, import the new element into your main element:
map-annotator-app.html:
+ <link rel="import" href="map-annotator-pose.html">Now use your element instead of the <div> we created earlier:
<h2>Poses</h2>
<template is="dom-repeat" items="[[poseNames.names]]">
  <map-annotator-pose ros="[[ros]]" pose-name="[[item]]"></map-annotator-pose>
</template>
Note that when passing in the poseName property, we actually spell it as pose-name.
This is a quirk of the system, which converts lowercase-with-dash names into camelCase.
- Import
<ros-topic>inmap-annotator-pose.html - Add a
<ros-topic>to the DOM of<map-annotator-pose>:<ros-topic auto id="userActions" topic="map_annotator/user_actions" ros="{{ros}}" msg-type="map_annotator/UserAction" ></ros-topic>
Now, add a <paper-button> to <map-annotator-pose>:
<link rel="import" href="../bower_components/paper-button/paper-button.html">
<paper-button on-tap="_handleDelete">Delete</paper-button>
And add a handler:
_handleDelete(evt) {
  console.log('Deleting', this.poseName);
}
To publish a message using <ros-websocket>:
_handleDelete(evt) {
  console.log('Deleting', this.poseName);
  var msg = {
    command: 'delete',
    name: this.poseName
  };
  this.$.userActions.publish(msg);
}
Now, look at the output of rostopic echo /map_annotator/user_actions while clicking on the "Delete" button.
You should be publishing the UserAction message.
As a frontend developer, just knowing that the message got published correctly is technically enough. It is the backend's responsibility to subscribe to the user actions and respond appropriately.
Now, you will want to add another <ros-topic> element, this time to your main element, map-annotator-app.html.
Here, you can add a "Create pose" button that instructs the backend to insert a new pose into the database.
You can use the prompt function in JavaScript to get the name of the pose from the user.
Also, add a "Go to" button next to each pose, which will instruct the backend to trigger navigation to that pose.
Polymer HTML elements operate in an "include what you use" way, so be sure to import <paper-button> and <ros-topic> in both HTML files.
Now, we will add an RViz display in the web browser, using the experimental <ros-rviz> element.
Import <ros-rviz>:
<link rel="import" href="../bower_components/ros-rviz/ros-rviz.html">Now, we will add it to the body of the app. To get a nicer-looking layout, you will need to make several changes to your code.
First, in index.html:
+ <style>
+   html, body {
+     height: 100%;
+     margin: 0;
+     padding: 0;
+   }
+ </style>
<link rel="import" href="/src/map-annotator-app.html">
Next, import the iron-flex-layout-classes in map-annotator-app.html:
<link rel="import" href="../bower_components/iron-flex-layout/iron-flex-layout-classes.html">Then replace your styles with the two tags below:
<style is="custom-style" include="iron-flex"></style>
<style>
:host {
display: block;
box-sizing: border-box;
padding: 8px;
font-family: sans-serif;
height: 100%;
}
#main {
height: 100%;
}
#content {
height: 100%;
}
#controls {
min-width: 300px;
}
map-annotator-pose + map-annotator-pose {
margin-top: 8px;
}
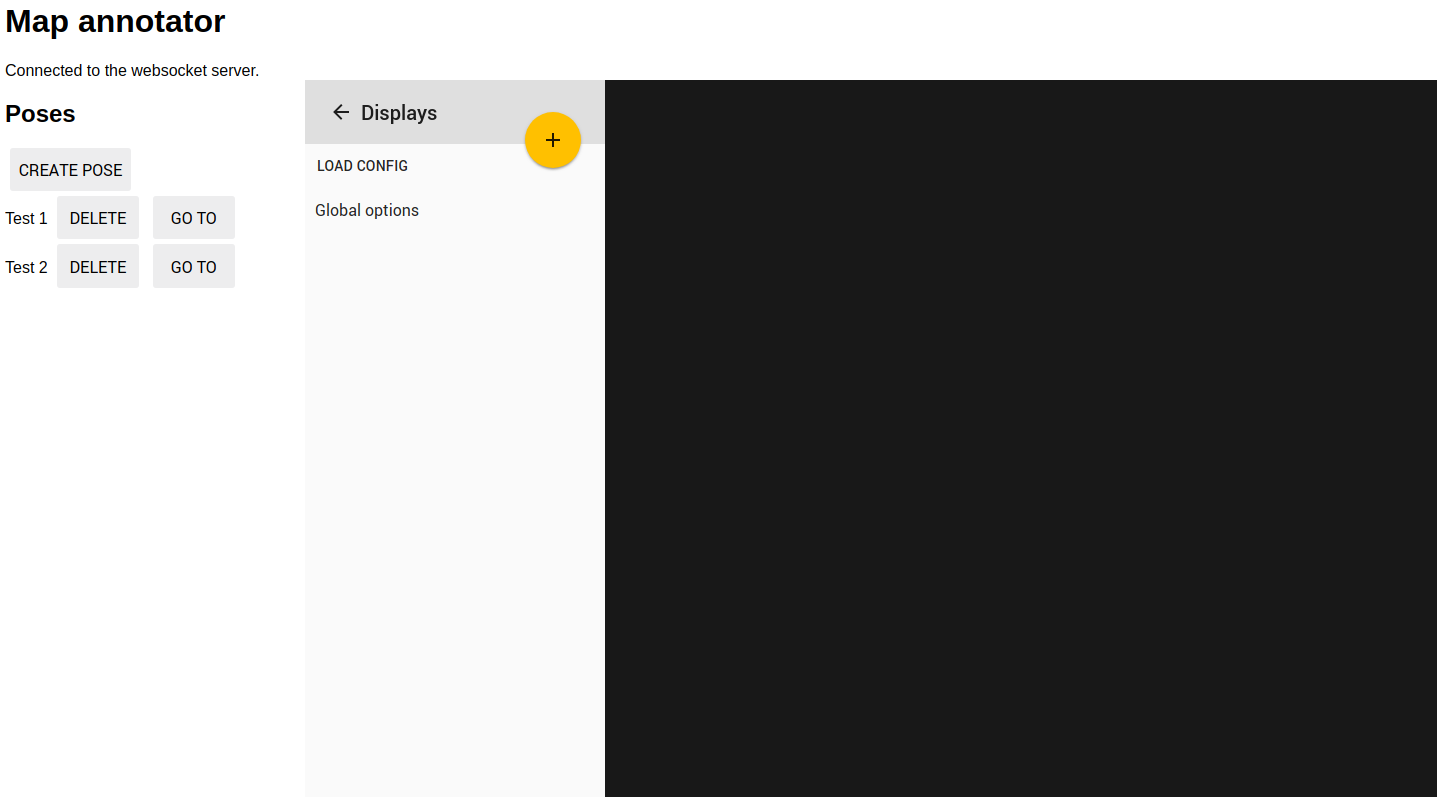
</style>Now, reformat your HTML code as shown:
<div id="main" class="layout vertical">
  <h1>Map annotator</h1>
  <div>{{status}}</div>
  <div id="content" class="layout horizontal">
    <div id="controls">
      <h2>Poses</h2>
      <template is="dom-repeat" items="[[poseNames.names]]">
        <map-annotator-pose ros="[[ros]]" pose-name="[[item]]"></map-annotator-pose>
      </template>
    </div>
    <ros-rviz id="rviz" ros="[[ros]]" class="flex"></ros-rviz>
  </div>
</div>
This is more or less what your app should look like, with a few extra styles added:
Finally, you must configure RViz to show the displays that you want.
When your backend is ready (e.g., the server is done and Fetch navigation is running), you can set up <ros-rviz>:
Add a ready function to the JavaScript part of your app:
ready() {
  super.ready();
  var config = {
    "globalOptions": {
      "background": "#111111",
      "colladaLoader": "collada2",
      "colladaServer": "http://localhost:8001/",
      "fixedFrame": "/map",
      "url": "ws://localhost:9090",
      "videoServer": "http://localhost:9999"
    },
    "sidebarOpened": false,
    "displays": [
      {
        "isShown": true,
        "name": "Grid",
        "options": {
          "cellSize": "1",
          "color": "#cccccc",
          "numCells": "10"
        },
        "type": "grid"
      },
      {
        "isShown": true,
        "name": "Map",
        "options": {
          "color": {
            "r": 255,
            "g": 255,
            "b": 255
          },
          "continuous": true,
          "opacity": "1",
          "topic": "/map"
        },
        "type": "occupancyGrid"
      },
      {
        "isShown": true,
        "name": "Robot model",
        "options": {
          "param": "robot_description"
        },
        "type": "urdf"
      },
      {
        "isShown": true,
        "name": "Interactive Markers",
        "options": {
          "topic": "/map_annotator/map_poses"
        },
        "type": "interactiveMarkers"
      }
    ]
  };
  this.$.rviz.config = config;
}
Now, your app should look like this:
