Lab 10: Robot web interfaces - subodh-malgonde/Robotics GitHub Wiki
In this lab, we will see how to make web interfaces for controlling your robot. For your projects, you may use whatever web programming framework you like. But, these labs will use Polymer.
Go to the Robot Web Tools website. Notice that each of the three libraries, roslibjs, ros2djs, and ros3djs, have tutorials. Tutorial 1 (Writing an actionlib client) and Tutorial 3 (Basic ROS functionality) of the roslibjs tutorials will be especially helpful.
The idea of Polymer is to create custom HTML elements that can be built in a modular way and reused elsewhere.
In this lab, we will help you use Polymer, but you may find Polymer's own tutorials useful:
You can store the code for your web frontend anywhere, but we recommend placing it in the frontend folder of the relevant ROS package:
cd web_teleop
mkdir frontend
cd frontend
polymer init
Select polymer-2-application.
Type web-teleop as the application name and accept the defaults for the other two options:
Application name web-teleop
Main element name (web-teleop-app)
Brief description of the application
Look at the contents of the frontend folder.
The bower_components folder contains the other elements (aka components) that you are using in your application.
You should add this folder to a .gitignore file in the frontend folder:
cd frontend
echo bower_components/ > .gitignore
You can use web components developed by anyone in the world by adding it to your bower.json file.
You can also run bower install --save GITHUB_ID/REPO_NAME in your frontend folder.
You can find web components to use at https://webcomponents.org. The ROS web components are located at: https://www.webcomponents.org/collection/jstnhuang/ros-element-collection
For this project, you will need ros-websocket, ros-topic, and ros-action-client.
Clicking on one of those will show you the documentation for that element.
To import them into your project:
cd frontend
bower install --save jstnhuang/ros-websocket
bower install --save jstnhuang/ros-topic
bower install --save jstnhuang/ros-service
-
index.html: Sets up the webpage to use web components. It is a simple webpage that imports your "main" web component,
web-teleop-app. - src/: Here are where you place your elements.
-
bower.json: Lists the elements you will want to import into your project. When other developers clone your code, they can run
bower updateto makebowerdownload all the needed elements and save them into thebower_components/folder. -
bower_components/: All the elements you are using, not written by you, are saved here. This should not be checked into source control. Instead, developers will run
bower update.
We recommend flattening the structure of the src folder:
cd frontend
mv src/web-teleop-app/web-teleop-app.html src/web-teleop-app.html
rm -r src/web-teleop-app
Next, edit index.html and change the import path:
- <link rel="import" href="/src/web-teleop-app/web-teleop-app.html">
+ <link rel="import" href="/src/web-teleop-app.html">
Edit src/web-teleop-app.html to change the import path:
- <link rel="import" href="../../bower_components/polymer/polymer-element.html">
+ <link rel="import" href="../bower_components/polymer/polymer-element.html">To see your website, run polymer serve from the frontend folder.
Then, visit the URL given back to you in a web browser.
By default, this serves the website on localhost, meaning that you have to view the webpage on the same computer.
If you are developing remotely (such as via SSH), then specify the hostname of the computer you are developing on:
polymer serve --hostname HOSTNAME
Now, on your own web browser, visit HOSTNAME:8080 (or whatever port your webpage is being served on).
After making edits, you can simply refresh the web browser to see your updated site.
Look at src/web-teleop-app.html.
This is the main element of the teleoperation app.
In the future, we will show how to break down a complex app into multiple elements.
For now, we will develop the entire application within this one element.
This file contains a combination of HTML, CSS, and JavaScript. Below, we provide a diagram of an element:
<!-- IMPORTS
     Here is where you import the elements used in this file, similar to imports in other programming languages.
-->
<link rel="import" href="../bower_components/polymer/polymer-element.html">
<link rel="import" href="../bower_components/ros-websocket/ros-websocket.html">
...

<dom-module id="web-teleop-app">
  <template>
    <style>
      <!-- CSS STYLE RULES
           CSS style rules you add here only affect the HTML defined in this file.
           If you are interested in more advanced techniques like sharing styles across elements, ask the course staff.
      -->
      :host {
        display: block;
      }
    </style>
    <!-- HTML TEMPLATE
         Here is where you add the HTML for your element.
         There is special syntax for binding JavaScript variables in your template.
    -->
    <h1>Fetch teleop</h1>
  </template>
  <script>
    /*
      JAVASCRIPT SECTION
      Here is where you add the code that controls the behavior of the element.
    */

    class WebTeleopApp extends Polymer.Element {
      static get is() { return 'web-teleop-app'; }
      // List properties here, which we will not use in this lab.
      static get properties() {
        return {
        };
      }

      doSomething() {
        console.log('Doing something');
      }
    }
    window.customElements.define(WebTeleopApp.is, WebTeleopApp);
  </script>
</dom-module>Edit src/web-teleop-app.html.
First, import the <ros-websocket> element :
<link rel="import" href="../bower_components/polymer/polymer-element.html">
+ <link rel="import" href="../bower_components/ros-websocket/ros-websocket.html">
Add the <ros-websocket> element and a title to your app:
<ros-websocket auto ros="{{ros}}"
  url="{{url}}"
  on-connection="_handleConnection"
  on-close="_handleClose"
  on-error="_handleError"></ros-websocket>

<h1>Fetch teleop</h1>
Look at the documentation for <ros-websocket> to learn more about the element and its API.
- auto: Adding this boolean property means that the element will try to establish the websocket connection immediately.
-
ros: After the connection is made, the element will store a data structure representing the connection to a variable. We store this in a variable called
rosusing the double curly-brace notation. -
url: This property gives the URL of the websocket server. The websocket server's URL is inferred from the URL of the webpage and saved into the
urlvariable using the double curly-brace notation. You can override it with a different URL by assigning a new URL to theurlvariable. -
on-EVENT: When elements fire events, you can handle the events by adding
on-EVENTNAMEattributes and supplying the function names of the handlers.
Now, add the handlers:
static get properties() {
  return {};
}

_handleConnection() {
  this.status = 'Connected to the websocket server.';
  console.log(this.status);
}
_handleClose() {
  this.status = 'Closed connection to the websocket server.';
  console.log(this.status);
}
_handleError() {
  this.status = 'Error connecting to the websocket server.';
  console.log(this.status);
}
And display the status in the HTML section of your element:
<h1>Fetch teleop</h1>
[[status]]If your backend is running, then when you refresh the page, you should see "Connected to the websocket server." If your backend is not running, it should say "Closed connection to the websocket server." If you or your backend team has not reached the end of Lab 9 yet, then you can run:
roslaunch rosbridge_server rosbridge_websocket.launch
Now, the app should connect to the websocket server after you reload the page. You should see "Connected to the websocket server" on the webpage, and the same message in the JavaScript console (Ctrl+Shift+K in Firefox or Ctrl+Shift+J in Chrome).

Both the square bracket [[status]] and the curly bracket {{url}} are used in Polymer to add JavaScript variables to HTML templates.
The square bracket means "read-only," while the curly bracket means the variable could be changed.
If you are unsure what to use, just use the curly brackets.
To display the torso height, your app will subscribe to the topic being published by the joint_state_republisher from Lab 9, using the <ros-topic> element.
It will then display the torso height on the page.
First, import the <ros-topic> element:
<link rel="import" href="../bower_components/ros-websocket/ros-websocket.html">
+ <link rel="import" href="../bower_components/ros-topic/ros-topic.html">
Next, add the <ros-topic> element to the DOM:
<ros-topic auto
  ros="{{ros}}"
  topic="joint_state_republisher/torso_lift_joint"
  msg-type="std_msgs/Float64"
  last-message="{{torsoHeight}}"
  on-message="_handleTorsoHeight"
></ros-topic>
<h1>Fetch teleop</h1>
Let's take a look at all of the properties of this element. You can read more in <ros-topic>s online documentation.
- auto: This specifies that we should subscribe to the topic immediately.
-
ros: This passes in the WebSocket connection handle from
<ros-websocket>to<ros-topic>. - topic: The name of the topic to subscribe to.
- msg-type: The message type for this topic, given as `package_name/MessageName"
-
last-message: This assigns the most recently published message to the
torsoHeightvariable -
on-message: (Optional in this case). This assigns a callback,
_handleTorsoHeight, to be called whenever a message is received on the topic. In this case, we only care about the most recent message, and we already assign that message to thetorsoHeightvariable, so we don't need.
Now, add the torso height to the DOM:
<div>
  Torso height: [[torsoHeight.data]] meters
</div>
You should now see the torso height being rendered on the page:
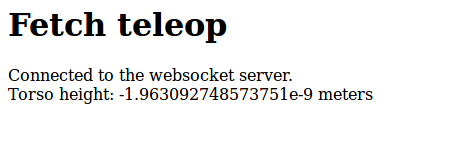
It is easy for frontend and backend teams to work concurrently. If the backend is not ready yet, publish some simulated data:
rostopic pub /joint_state_republisher/torso_lift_joint std_msgs/Float64 "data: 0.123"
Why do we use torsoHeight.data instead of torsoHeight directly?
If you try using torsoHeight, you will see it rendered as [object Object].
If you try to render a JavaScript object as text, this is what you will see.
Instead, you must render specific fields in the JavaScript object.
We know that this topic is of type std_msgs/Float64.
Run rosmsg show std_msgs/Float64, and you will see that it contains a single field, data.
So, we must render the data field specifically.
Another way to examine the message type is to use the callback method, _handleTorsoHeight.
Add this to the JavaScript section of your element:
_handleTorsoHeight(evt) {
  var msg = evt.detail;
  console.log(msg);
}
Refresh the page and open the JavaScript console, and you should see the message being printed in the console.
You should see the torso height apparently fluctuating quite a bit. However, it is fluctuating in a very small range near zero. To make the display cleaner, we will add a function that rounds the data:
// Rounds val to a given precision, where the precision is given as the
// step size between numbers in the output range.
// E.g., _round(0.053, 0.1) = 0.1
// E.g., _round(0.053, 0.01) = 0.05
// E.g., _round(0.053, 0.001) = 0.053
_round(val, precision) {
  return Math.round(val/precision) * precision;
}
You can apply functions to values using the double bracket syntax.
<div>
  Torso height: [[_round(torsoHeight.data, 0.001)]] meters
</div>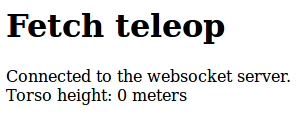
To set a new torso height, the backend from Lab 9 exposes a service, web_teleop/set_torso.
The frontend can call this service using the <ros-service> element.
You can use a standard HTML input to make a slider, but for fun, let's try using a Material Design slider. You can browse various Material Design UI elements on webcomponents.org.
We will use a slider to set the desired torso height, and a button to issue the command.
On webcomponents.org, look at the top left where it says "Licensed under BSD" etc.
Click on the "+" sign to see the installation commands.
Run the commands in the frontend folder:
bower install --save PolymerElements/paper-button
bower install --save PolymerElements/paper-slider
Now, import those elements in web-teleop-app.html:
<link rel="import" href="../bower_components/paper-button/paper-button.html">
<link rel="import" href="../bower_components/paper-slider/paper-slider.html">
Now, add the elements to the DOM:
<div>
Torso height: [[_round(torsoHeight.data, 0.001)]] meters
</div>
<div class="layout horizontal center">
<paper-slider min="0" max="0.4" step="0.01" editable
value="{{desiredTorsoHeight}}"></paper-slider>
<paper-button>Set torso</paper-button>
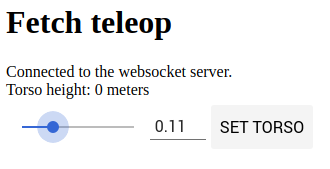
</div>We will add a bit of styling to improve how it looks:
Import the <iron-flex-layout> classes, a powerful tool for CSS box layouts:
<link rel="import" href="../bower_components/iron-flex-layout/iron-flex-layout-classes.html">
Include the styles:
<style is="custom-style" include="iron-flex"></style>
<style>
  :host {
    ...
Add the following styles to the second <style> tag:
:host {
  display: block;
}
paper-slider {
  --paper-slider-input: {
    width: 100px;
  }
}
paper-button {
  background-color: #eee;
}
The interface should now look like this:
You can call services using the <ros-service> element.
Import the element:
<link rel="import" href="../bower_components/ros-topic/ros-topic.html">
+ <link rel="import" href="../bower_components/ros-service/ros-service.html">
Click "Documentation" on the <ros-service> documentation page to see example uses and its API.
Based on this, you should be able to come up with the right usage of <ros-service>:
<ros-service
  id="torsoService"
  on-response="_handleTorsoSuccess"
  on-fail="_handleTorsoError"
  name="/web_teleop/set_torso"
  ros="{{ros}}"
  service-type="web_teleop/SetTorso"
></ros-service>
Let's look at the properties we have set:
-
id: This is a standard HTML attribute. Anything with an
idcan be accessed in our JavaScript code usingthis.$.MYID -
on-response: Callback to call once the service call succeeds. The service's
Responseis given asevt.detail - on-fail: Callback if the service call fails.
- name: The name of the service to call.
-
ros: A handle to the WebSocket connection from
<ros-websocket> - service-type: The type of the service.
We also need to create a handler for pushing the "Set Torso" button:
<paper-button on-tap="_setTorso">Set torso</paper-button>Finally, let's add all the necessary callback functions:
_setTorso() {
  this.status = 'Setting torso to ' + this.desiredTorsoHeight + ' meters...';
  this.$.torsoService.call({height: this.desiredTorsoHeight});
}
_handleTorsoSuccess() {
  this.status = 'Set torso to ' + this.desiredTorsoHeight + ' meters.';
}
_handleTorsoError(evt) {
  this.status = 'Error: ' + evt.detail;
}
You should now be able to set the torso height of the robot from the web!
Let's add a button to drive the robot forward (implementing left/right turns and backward movement is up to you).
To publish to a topic, we will again use the <ros-topic> element.
This time, setting up the topic is relatively simple:
<ros-topic
  id="baseTopic"
  ros="{{ros}}"
  topic="cmd_vel"
  msg-type="geometry_msgs/Twist"
></ros-topic>
Note that we do not use the auto property, which causes the element to automatically subscribe to the topic.
However, we do need to add an id so that we can access this element in our JavaScript code.
In this section, we will show how to create a grid of buttons for moving forward/backward and turning.
First, add this to the DOM:
<div id="driving" class="layout vertical">
  <div class="layout horizontal">
    <div class="flex"></div>
    <paper-button
      on-down="_startForward"
      on-up="_endBaseCommand"
    >Forward</paper-button>
    <div class="flex"></div>
  </div>
  <div class="layout horizontal">
    <paper-button>Left</paper-button>
    <paper-button>Back</paper-button>
    <paper-button>Right</paper-button>
  </div>
</div>
This creates a vertical layout consisting of two horizontal layouts.
Within each horizontal layout, we place a row of buttons.
Empty <div class="flex"></div> tags are automatically sized to fill space equally on either side of the button.
Looking at the page, the first row will look a bit odd: it will be centered on the page while the bottom row is not.
This is because the flex divs are expanding to fill the entire width of the web page.
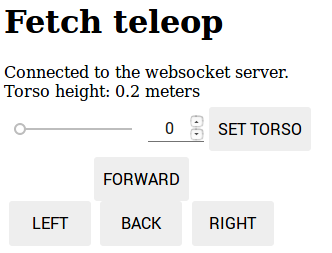
To fix this, add this CSS rule to the <style> section.
This causes the <div id="driving"> to only be as wide as necessary.
#driving {
  display: inline-block;
}
The page should now look like this:
One tricky aspect of this feature is that we would like to continuously send velocity commands to the base while the user holds down a button. Once the user lets go, we want to stop sending velocity commands, which will cause the robot to stop driving. In our JavaScript frontend, we cannot spawn a thread to do this. Instead, we must register a function that sends the velocity commands at regular intervals. When the user lets go of a button, we then unregister that callback. In other words, we will use setInterval and clearInterval.
We have already added the on-down and on-up event handlers to paper-button.
All of the driving buttons can use the same _endBaseCommand function, but they will need slightly different _startDIRECTION functions:
_startForward(evt) {
  evt.preventDefault(); // Prevent right-click menu from showing up after long press on mobile
  this.status = 'Driving forward...';
  var baseTopic = this.$.baseTopic; // Get <ros-topic>
  if (this.baseCommand) {
    // The timer should not be set at this point, but clear it just in case
    clearInterval(this.baseCommand);
  }
  this.baseCommand = setInterval(function() {
    baseTopic.publish({
      linear: {
        x: 0.1, // Set positive or negative meters/s to drive
        y: 0,
        z: 0
      },
      angular: {
        x: 0,
        y: 0,
        z: 0 // Set rads/s to turn
      }
    });
  }, 10); // Run this function every 10ms, or approximately 100 times per second.
}

_endBaseCommand(evt) {
  this.status = 'Stopped driving.';
  clearInterval(this.baseCommand);
}
On mobile devices, long-pressing on a button may be interpreted as a text selection action. This can cause the mouse up event to not be called, which is a safety risk. To ensure this doesn't happen, add the following CSS:
paper-button {
  background-color: #eee;
+  user-select: none;
}
Also, be sure to add evt.preventDefault() to the beginning of all your driving button callbacks.
If your robot drives uncontrollably, a last-ditch effort you can do is to refresh the browser page, which should destroy your timer.
Smartphone interfaces are, by now, a necessity for consumer products. Luckily, your website can be developed in such a way that it works on both desktop and mobile browsers.
To test your website on mobile, you must serve your website to the public internet.
Close the Polymer development server (where you ran polymer serve) and re-run it with an extra option:
polymer serve -H 0.0.0.0
Find out the IP address of your desktop computer by typing ifconfig.
Then, on your phone, access your webpage at IPADRESS:8081/.
You should be able to drive the robot around on your phone.
Finally, let's add the image from the robot's camera to the webpage.
To do this, install the Web Video Server (also from Robot Web Tools):
sudo apt-get install ros-indigo-web-video-server
Then, add it to your backend.launch:
<node pkg="web_video_server" type="web_video_server" name="web_video_server">
  <param name="port" value="8000" />
</node>
Here we tell the web video server to run on port 8000.
Run your backend again and visit http://localhost:8000/stream_viewer?topic=/head_camera/rgb/image_raw. You should see the view from the robot's head-mounted camera.
Now, add an image to the DOM:
{{status}}
<div id="camera">
  <img src="//[[hostname]]:8000/stream?topic=/head_camera/rgb/image_raw"></img>
</div>
Here, we are going to compute what the URL should be.
While developing on your desktop, the hostname of the webpage is typically localhost.
However, this is not true for your phone.
From your phone's perspective, localhost refers to the phone.
We only need to figure out what the hostname is once, when the page is loaded.
We can do one-time initialization in a special ready() method in the JavaScript section of your element:
ready() {
  super.ready();
  this.hostname = window.location.hostname;
}
If you test this on mobile, you will see that the image extends past the width of your screen.
As a final refinement, add CSS rules to the <style> tag to automatically resize the image to fit:
#camera img {
width: 100%
height: auto;
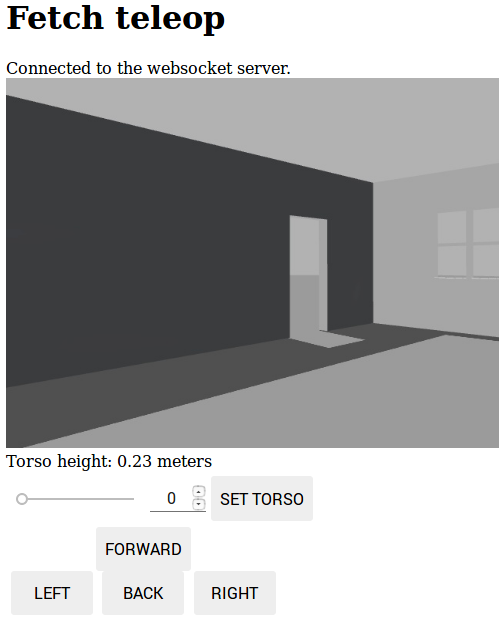
}This is what your teleop interface should look like:
In this lab, we have shown how to use Polymer to build robot web interfaces.
If you prefer to program with other web programming frameworks, you should refer to the Robot Web Tools.
The ROS elements (<ros-websocket>, <ros-topic>, etc.) are simple wrappers for the Robot Web Tools library.
As of Winter 2018, the Robot Web Tools project has had issues with its CDN not working, so please contact the course staff if you have problems.