Home Assistant - seurat-atreides/Sonoff-Tasmota GitHub Wiki
Home Assistant (Hass) is an open-source home automation platform running on Python 3.
Important: The information on this page is related to:
- Sonoff-Tasmota release 6.4.1
- Home Assistant 0.84.2 or later
Binary sonoff-basic.bin (which comes packaged with Tuya Convert) does not support autodiscovery. Please upgrade to sonoff.bin or similar release that supports this feature.
Hass configuration - General
This page describes configuring Hass and Tasmota for MQTT device discovery.
If you don't want to use this option, please refer to:
- Home Assistant - Manual Config - For Home Assistant 0.84.2 or later together with Sonoff-Tasmota developement version built 2018-12-13 or later
- Home Assistant - Manual Config (Legacy) - For older versions of Home Assistant or Sonoff-Tasmota
Hass configuration not exposed in the UI is done by editing the file configuration.yaml which is found in folder .homeassistant after installation and first start of Hass. (Or in the /config folder, if you’re using Hass.io.)
Note: After every change to the configuration file you'll need to restart Hass to make it aware of the changes. This can be done either:
- Through the UI: Configuration -> General -> Server Management -> Restart
- From command line: On a Debian Linux based system, use the command
sudo systemctl restart home-assistant.
Hass configuration - MQTT broker
As Sonoff-Tasmota is MQTT based you will need to configure Home Assistant to connect to an MQTT broker.
Home Assistant comes with an embedded MQTT broker which is easy to set up but you may want to opt for a separate MQTT broker instead for better stability. A popular choice for this is the open-source Eclipse Mosquitto.
The Hass.io implementation of Home Assistant also has Mosquitto available as a standard add-on, which makes for easy installation and almost no configuration. Authentication, for example, is done using the normal Home Assistant user database, so MQTT credentials can be created there.
Configure an external broker
To connect Hass to an external MQTT server, use Hass web UI:
Configuration -> Integrations -> Set up a new Integration -> MQTT
Note: Make sure to tick the "Enable discovery" option to enable MQTT device discovery.
Configure the embedded broker (deprecated since 0.92 but still working)
# Example configuration.yaml entry
mqtt:
  password: hello
  discovery: true
Default username for the embedded broker is homeassistant while port defaults to 1883.
:warning: Warning:
As of release 0.92, the embedded broker has been marked as deprecated. This means bugs may not be fixed, and the functionality may be removed in a future release.
Add Tasmota devices to Home Assistant
To ease Home Assistant configuration a feature called MQTT discovery is available. (warning: this feature is not included in sonoff-basic.bin and sonoff-classic.bin)
With MQTT discovery, no user interaction or configuration file edit is needed to add new devices to Hass.
Automatic discovery is currently supported for:
- Relay - Announced as Home Assistant
switch - Light (LED dimmer) - Announced as Home Assistant
light- To show a relay as a Home Assistant "light" instead of as a "switch" either:
- In Tasmota console type the following command:
SetOption30 1 - Use Hass light.switch component
- In Tasmota console type the following command:
- To show a relay as a Home Assistant "light" instead of as a "switch" either:
- Sensor - Announced as Home Assistant
sensor - Button - Announced as Home Assistant
binary sensor - Switch - Announced as Home Assistant
binary sensor
For other type of devices, e.g iFan02, example entries for configuration.yaml is available in Home Assistant - Manual Config
On each Tasmota device which should be automatically discovered by Hass, enter the following commands in the web console:
SetOption19 1 - Enables MQTT discovery\
By executing command SetOption19 1 the automatic discovery feature is enabled and a retained MQTT message starting with topic "homeassistant/..", as defined in user_config.h HOME_ASSISTANT_DISCOVERY_PREFIX, is sent containing parameters used by Home Assistant to automatically configure a device.
To disable the automatic discovery feature and remove the retained message, execute command SetOption19 0 and the homeassistant topic is removed from Home Assistant and MQTT broker.\ Device topic will not revert to defaults, you have to manually change back the topic structure to %prefix%/%topic%/ in MQTT Configuration.
:warning: Important:
This feature will change the default Tasmota topic %prefix%/%topic%/COMMAND, e.g. cmnd/sonoff/POWER to %topic%/%prefix%/COMMAND, e.g. sonoff/cmnd/POWER.
You cannot use custom defined topics while Setoption19 is on since it will always revert it to %topic%/%prefix% due to Home Assistant requirements.
Setup Tasmota devices through Home Assistant
All automatically discovered entities will show up under:
Configuration -> Integrations -> Configured -> MQTT
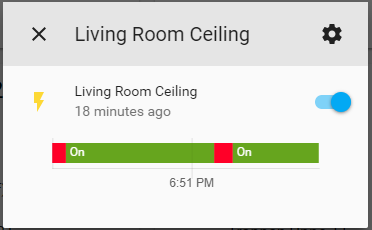
The entities are grouped by hardware, example for a Sonoff T1 2CH:

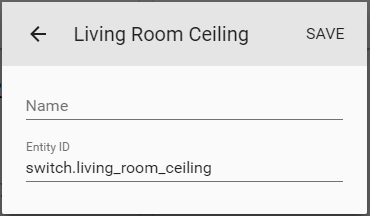
By clicking on one of the entities, and then on the cog wheel, name in Hass and entity_id can be customized:


Note1: Lights currently show up under "Entities without devices", this will be fixed in Hass 0.85 #19013
Note2: After changing entity_id Hass must be restarted, this will be fixed in Hass 0.85 #19414
Tips
Tip: Sync power state
If the MQTT broker or Hass is restarted, or there is a WiFi outage, Tasmota device state may not be synced with Home Assistant. Use this automation to get all your (auto discovered) devices in sync, including power state, immediately after Home Assistant is (re)started.
# Example automations.yaml entry
- alias: "Power state on HA start-up"
  trigger:
    platform: homeassistant
    event: start
  action:
    - service: mqtt.publish
      data:
        topic: "sonoffs/cmnd/state"
        payload: ""
Tip: Make all Tasmota devices be automatically discovered
If you want all your devices to be found by Home Assistant, add an automation which will enable SetOption19 for all devices.
The automation will be triggered each time Home Assistant is (re)started although it is necessary to run it only if you have a device that doesn't have SetOption19 enabled. After all your devices are setup with autodiscovery its advisable to turn off or delete this automation.
Note: This must use the default Tasmota topic format %prefix%/%topic%/COMMAND. After enabling SetOption19, the format will change to %topic%/%prefix%/COMMAND and those devices won't see this message.
This can also be done manually in Home Assistant UI through Developer tools -  (MQTT) by posting to topic
 cmnd/sonoffs/SetOption19 with payload 1
# Example automations.yaml entry
- alias: "Enable MQTT discovery for all devices"
  trigger:
    platform: homeassistant
    event: start
  action:
    - service: mqtt.publish
      data:
        topic: "cmnd/sonoffs/SetOption19"
        payload: "1"
Note: For disabling the Discovery, the automation is:
# Example automations.yaml entry
- alias: "Disable MQTT discovery for all devices"
  trigger:
    platform: homeassistant
    event: start
  action:
    - service: mqtt.publish
      data:
        topic: "sonoffs/cmnd/SetOption19"
        payload: "0"
Tip: Make all Tasmota devices report their firmware version
# Example automations.yaml entry
- id: 'sonoff_firmware_installed'
  alias: Sonoff Firmware Installed
  trigger:
  - event: start
    platform: homeassistant
  action:
  - data:
      payload: '2'
      topic: sonoffs/cmnd/status
    service: mqtt.publish
  initial_state: 'true'
Then you can make a sensor that detects the latest version of Tasmota and alerts you if there is an update. From my configuration.yaml
# Tasmota Firmware
# Getting Firmware from JSON for Tasmota
  - platform: rest
    resource: https://api.github.com/repos/arendst/Sonoff-Tasmota/releases/latest
    name: Sonoff Firmware Version Available
    username: !secret githubuser
    password: !secret githubpass
    authentication: basic
    value_template: '{{ value_json.tag_name }}'
    headers:
      Accept: application/vnd.github.v3+json
      Content-Type: application/json
      User-Agent: Home Assistant REST sensor
  - platform: mqtt
    name: "Coffee Maker Firmware"
    state_topic: "sonoff1/stat/STATUS2"
    value_template: 'v{{ value_json.StatusFWR.Version }}'
  - platform: mqtt
    name: "Garage Door Firmware"
    state_topic: "sonoff5/stat/STATUS2"
    value_template: 'v{{ value_json.StatusFWR.Version }}'
binary_sensor:
  - platform: template
    sensors:
      sonoff_update_available:
        value_template: >-
          {{ (states.sensor.sonoff_firmware_version_available.state > states.sensor.coffee_maker_firmware.state) or (states.sensor.sonoff_firmware_version_available.state > states.sensor.garage_door_firmware.state)
              }}
Note the above is for 2 switches.
In customize.yaml
binary_sensor.sonoff_update_available:
  friendly_name: Update Available Sonoff
  device_class: problem
Then it will show as an alert icon that you can show in Lovelace.