Instructions for swapping the control board - sci-bots/dropbot-v3 GitHub Wiki
Warning! Make sure that you unplug the USB and power cables from the DropBot before opening the case.
- Remove the 4 screws in the corners of the lid and detach the lid from the case.
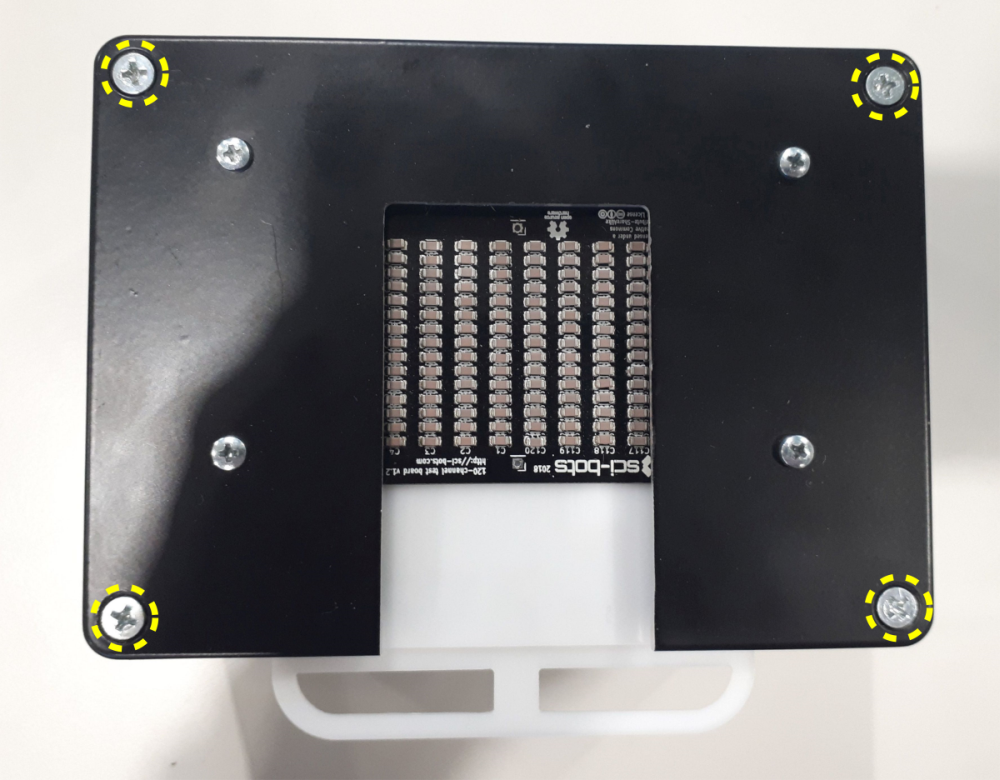
- Remove the 2 screws holding the control board in place.

- Remove the control board and swap in the replacement. Note that you will need to swap the USB jumper cable to the new control board.
- Replace the 2 screws from Step 2.
- Re-attach the case lid and replace the 4 screws from Step 1.
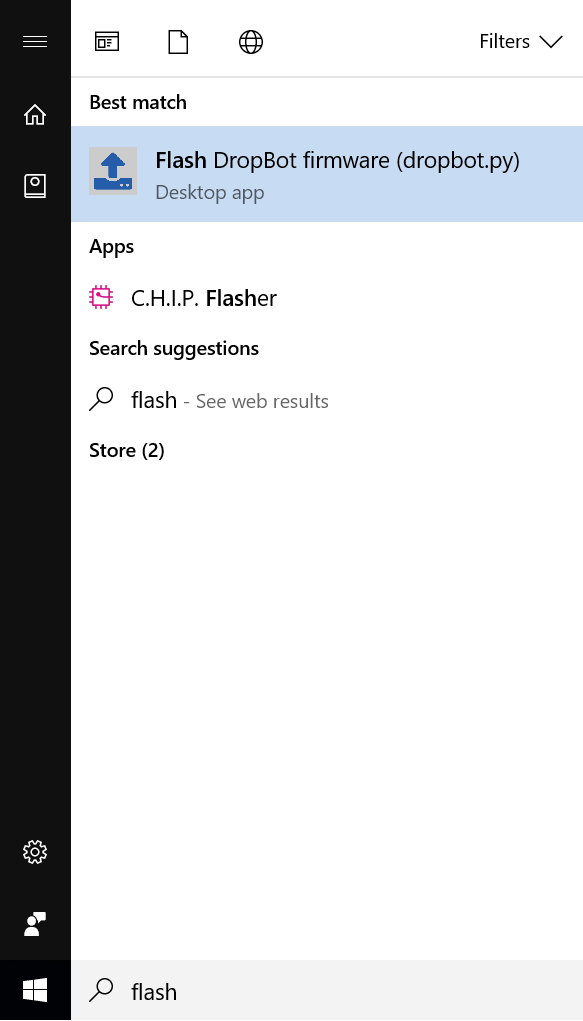
- (optional) Connect the DropBot and manually flash firmware compatible with installed version of MicroDrop from the Windows Start menu:
- Try running the on-board hardware diagnostics.