Setting up 2020 RoboRio tools - quasics/quasics-frc-sw-2015 GitHub Wiki
There's a series of things that need to be done in order to be able to get, modify, build, and deploy the code for the team's robot:
- Get an account set up on GitHub (this site).
- Install Visual Studio Code and the FRC development tools that are used to edit/build/deploy code for the robot.
- Install Subversion tools, which are used to access the team's source code repository.
- Install the Visual Studio Code extensions to allow Subversion to be used within the GUI.
- Check out an initial copy of the code for the project.
- Open up the project in Visual Studio Code.
- Build the code for the robot (e.g., after making changes).
- Deploy the code to the robot.
Some of these you should only need to do once (e.g., getting an account set up); others need to be done once per computer that you're going to use (e.g., installing various programs).
Instructions are here.
Note: This doesn't actually need to be finished until you're ready to make changes to the code, but it can take time (and people sometimes run into problems), so it's worth starting early. You can continue on with the rest of what's outlined below while you're waiting to get an "invitation to collaborate" with the team on GitHub.
To install the FRC development tools, follow the instructions here as appropriate for your platform (Windows, macOS, or Linux).
Important notes to supplement the directions from FIRST:
- Depending on the parts being used on the robot, additional software components may be required and can be obtained from here. As of mid-February, it looks like you'll need to install at least:
- the C++ API for the Spark controllers (can be done via "online install" process)
- the C++ API for the Rev Robotics Color Sensor V3 (can be done via "online install" process)
- the CTRE Phoenix Framework for the Victor SPX controllers (documented in Phase 2.1, below)
- If you already have Visual Studio Code installed, you may need to upgrade to the current version of Visual Studio Code in order for the install to work properly. (If you're installing for Windows, this can be done from the WPI installer by selecting the checkbox for "Visual Studio Code" in the list of components; if you're installing for Mac or Linux, you'll need to do this separately, following the directions provided by FIRST.)
- For Windows machines that will be set up as driver's stations, you should install the software for "programming-only" machines and also follow the directions under "All Teams".
- Go to CTRE's resource page here.
- In the installer section, click "CTRE Phoenix Framework (No Installer) package 5.17.6 (.zip)"
- When it is done downloading, drag the file to your desktop.
- Right click it, then click Open With, then Windows Explorer.
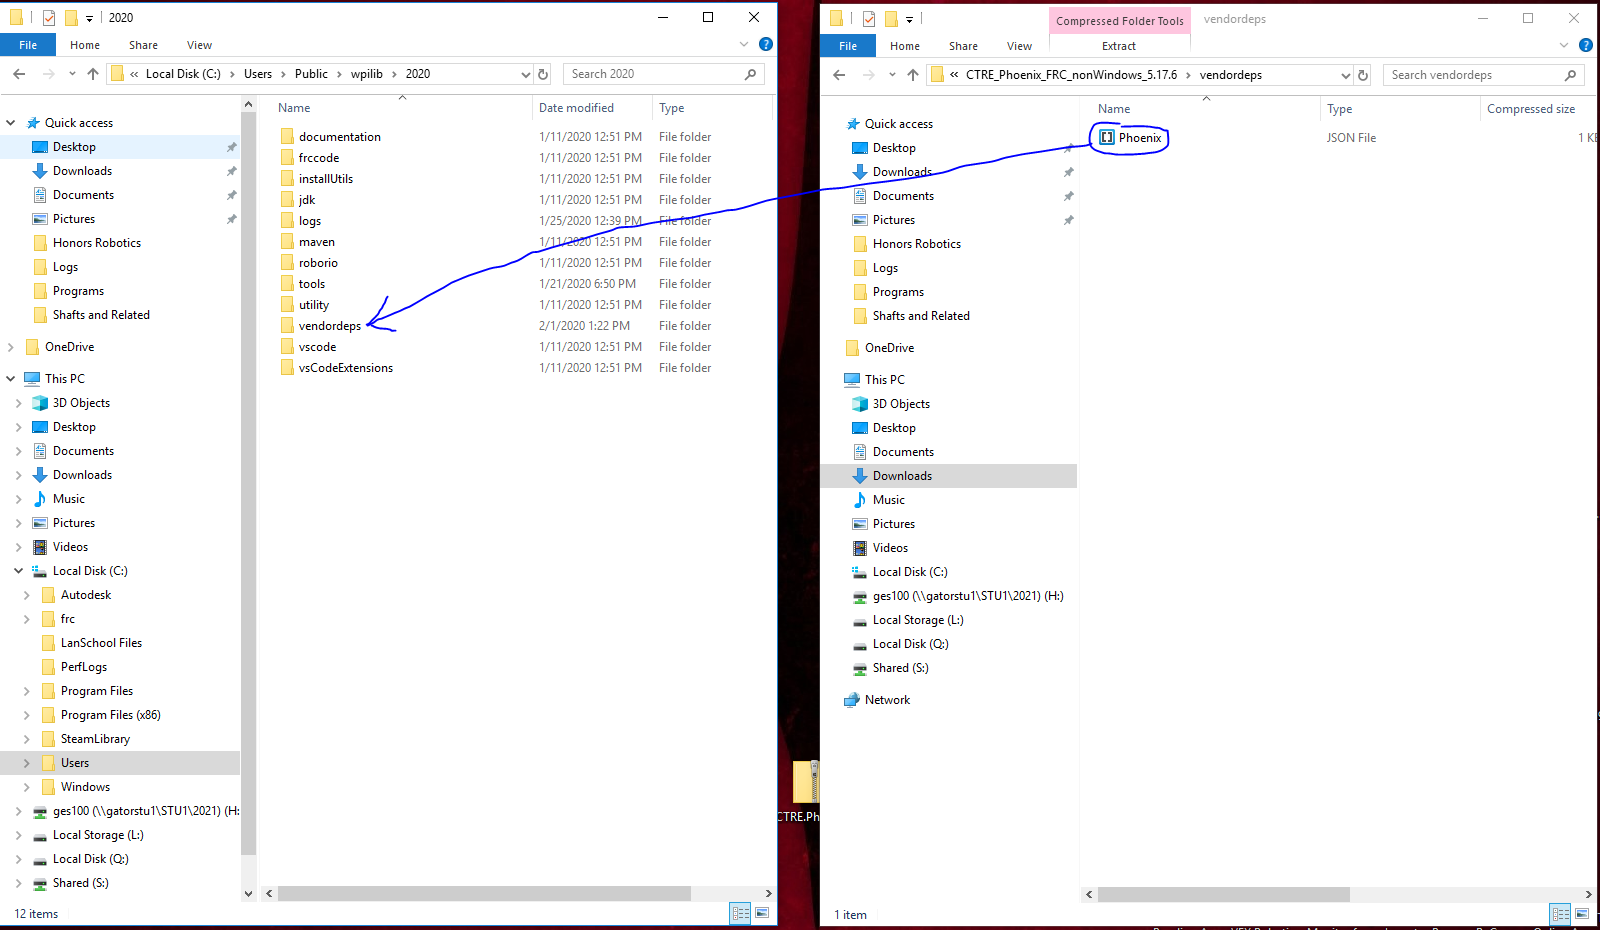
- Open up a new windows explorer tab and go to Local Disk (C:), Users, Public, wpilib, 2020.
- In the CTRE tab, open the vendordeps folder.
- With the two tabs side by side, drag the Phoenix file into the vendordeps folder. (Screenshot)
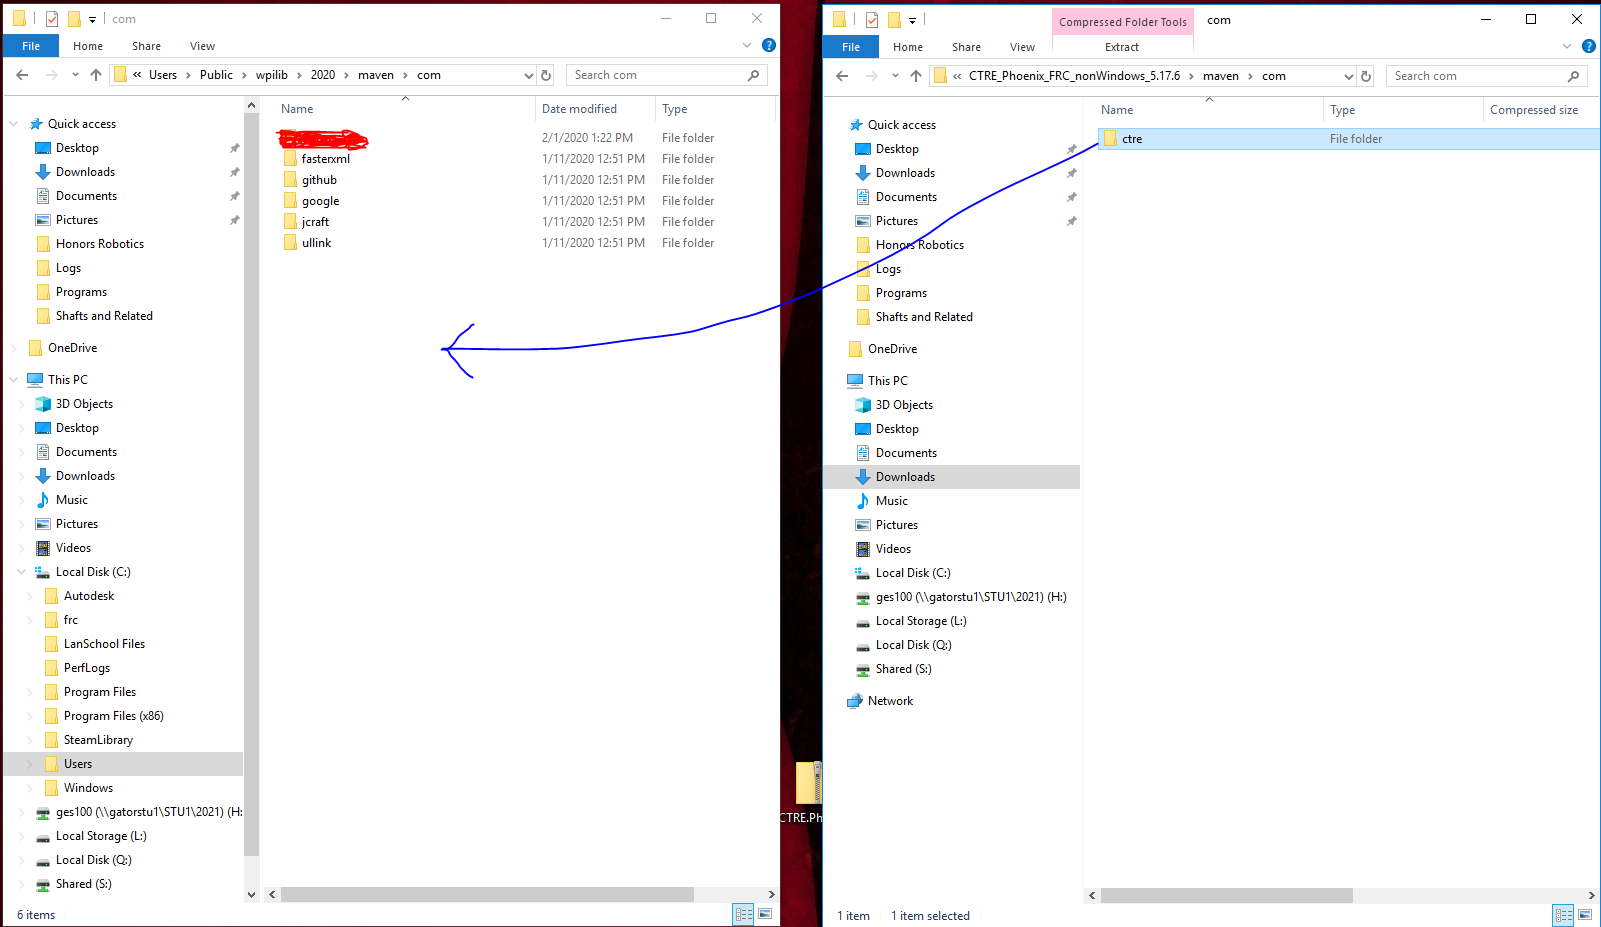
- In the CTRE tab, go back to the CTRE_Phoenix_FRC_nonWindows_5.17.6 folder. Go to maven, then com.
- In the 2020 folder, go to maven, then com.
- Drag the ctre folder into the com folder. (Screenshot)
- Open VS Code, open the WPILib Command Palette
- Use the Manage Vendor Libraries option
- Click "Install new libraries (offline)," then check the box next to Phoenix or CTRE, whichever shows up
There's a couple of different options here, depending on the operating system you're using.
- If you're working on Microsoft Windows, the easiest tool set to use is probably TortoiseSVN; see directions here.
- If you're working on a Mac or Linux machine, it may be simplest to install the command-line tools for these environments. (They're also available for Windows.) You can largely use them from within the Visual Studio Code via some extensions (covered below).
- Mac tools installs are covered in a lot of places, including here. If you need help with the part that talks about "edit[ing] your .profile", please talk to Mr. Healy.
- Linux tools installs are covered in a lot of places, including here. (We assume that if you're using Linux, you'll know the basics of using a terminal window; if not, please talk to Mr. Healy.)
Instructions are here.
- Using TortoiseSVN on Windows
- TBD: Using command-line tools on Mac/Linux
- Start Visual Studio Code (VSC).
- If you're on Windows, the installer will typically have put a shortcut to this on your desktop, and you can just double-click that.
- Select "Open Folder..." from the "File" menu, browse into the project folder that you checked out and want to work in (e.g., the "Quasics2019Code/HedyLamarr" folder), and click on the "Select Folder" button.
- VSC will update the UI to show the folder's contents, and will building its idea of how everything works. Be patient, as this can take a little while.
- Among other things, a panel will open up, showing that it's "Executing task: gradlew generateVsCodeConfig" and other stuff (such as "Starting Daemon").
- Keep being patient.
- A number of warnings and other indications may pop up periodically, such as "Intellisense configurations might have been updated. Refresh them now?" Feel free to say "Yes" when these appear. (You may then be prompted to restart something: feel free to say "Yes" to this, too.)
- Eventually, you should see a "BUILD SUCCESSFUL" message in green letters. This isn't actually telling you that it's built the code to be deployed on the robot, it's just finished building the configuration files that VSC uses to do that. But it's a good sign.
- If you see an error message that you don't understand, come find Mr. Healy or a more experienced coder, and they'll help you out.
- Start Visual Studio Code (VSC) and open the desired project for the robot.
- Open the "command window" by either hitting <Ctrl+Shift+P>, or by clicking on the WPILib icon (looks like a "W" in a red hexagon) on the top of the window.
- Pick the "WPILib: Build Robot Code" command to compile the robot code.
- Be patient while the code builds.
- When the build finishes, you should see a "BUILD SUCCESSFUL" message in green letters.
Instructions are here