nodeGame Prolific v7 - nodeGame/nodegame GitHub Wiki
- status: complete
- version: 7.x
Prolific.co is an online platform for recruiting experimental participants. If you use this referral link you will get $150 USD to run your first study if you top up within 30 days.
After you created your Prolific account, follow these steps:
-
Create a "New Study" using the web interface and start fill in the forms as needed by your study.
-
When you reach the "Study Link" section, select the "URL parameters" option and enter the address of the nodeGame server using the format as in the picture below:
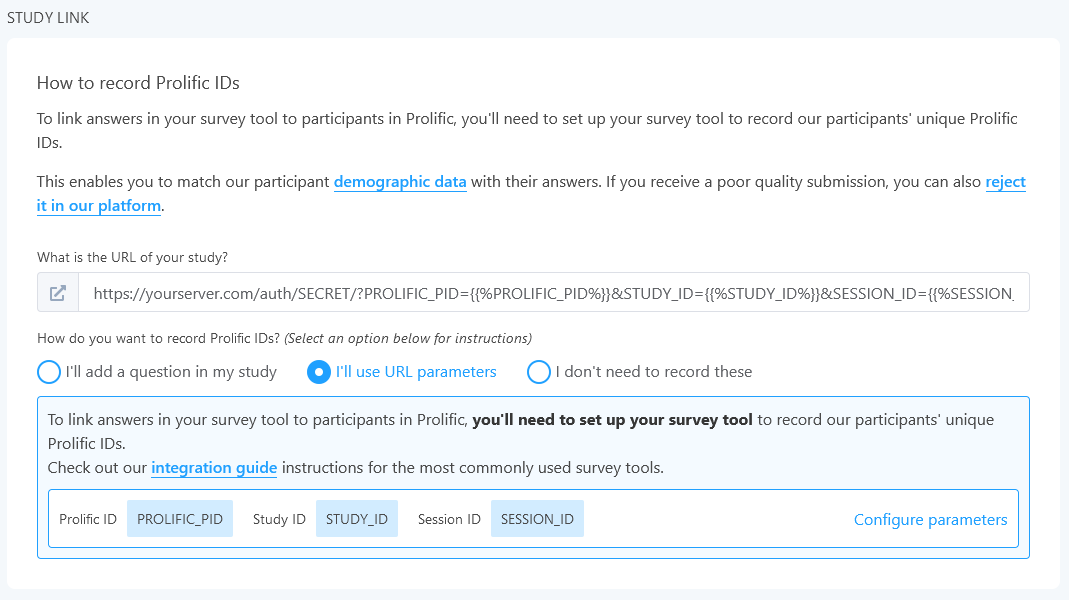
More extensively, in the link:
https://yourserver.com/auth/SECRET/?PROLIFIC_PID={{%PROLIFIC_PID%}}&STUDY_ID={{%STUDY_ID%}}&SESSION_ID={{%SESSION_ID%}}
-
SECRETis a valid local ID that prevents unauthorized access to the server, and that we will setup in the next steps. - what follows
?is added automatically by Prolific.
Note: the link above assumes you are running your game as "default."
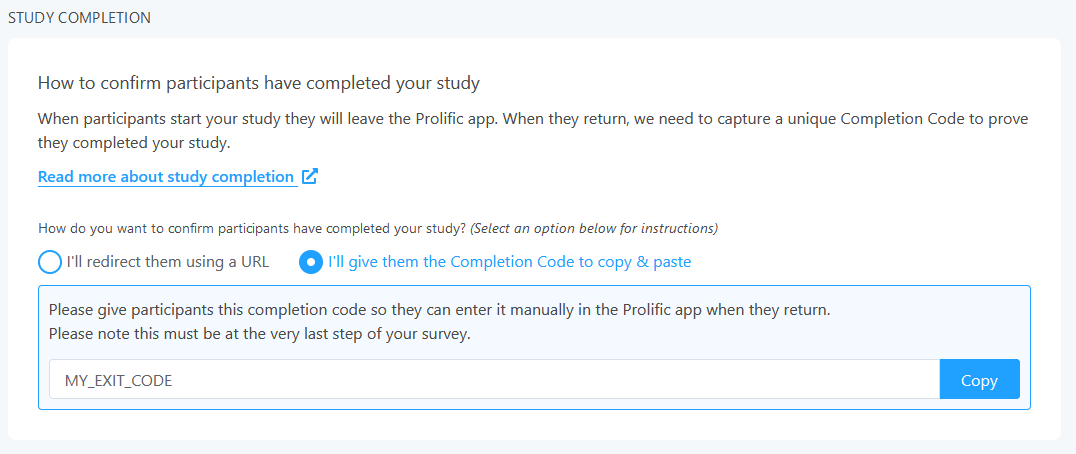
- In the "Study Completion" section, select the "copy and paste" option and note down the "Exit Code" provided by Prolific (in this example
MY_EXIT_CODE).
- Fill in all the remaining forms and save your study.
- In the
auth/folder of your game, setup theauth.jsas follows:
module.exports = function(auth) {

    // Reject connections without the PROLIFIC_ID field.
    function authPlayers(channel, info) {
        if (!info.query.PROLIFIC_PID) return false;
        return true;
    }

    // Use the Prolific player Id in nodeGame.
    function idGen(channel, info) {
        return info.query.PROLIFIC_PID;
    }

    // Add information to the client object.
    function decorateClientObj(clientObj, info) {
        // PROLIFIC Exit code, same for all participants, as provided by
        // Prolific. Make sure you show this code at the end of the experiment.
        clientObj.ExitCode = 'MY_EXIT_CODE';
        // Information about player ID and session (as provided by Prolific).
        clientObj.PROLIFIC_STUDY = info.query.STUDY_ID;
        clientObj.PROLIFIC_SESSION = info.query.SESSION_ID;
    }

    // Enable the three callbacks for the player server.
    auth.authorization('player', authPlayers);
    auth.clientIdGenerator('player', idGen);
    auth.clientObjDecorator('player', decorateClientObj);

};- Enable authorization in file
auth.settings.jsin folderauth/, and setmodeequals tolocal.
module.exports = {

    enabled: true,

    mode: 'local',

    // You may pick a different name.
    inFile: 'prolific.codes.csv',

    // More options below not shown.
};- Open the local authorization codes file (in this example
prolific.codes.csv) and add an entry with theSECRETandMY_EXIT_CODEstrings that you have previously setup on the Prolific interface.
"id","ExitCode"
"SECRET","MY_EXIT_CODE"
Note: id is the only mandatory field here, ExitCode is already set in auth.js.
You may review the authorization settings wiki page for further information.
Make sure that your nodeGame server is up and running and properly configured.
Use the "Preview" button on Prolific to test if your game can be reached properly from Prolific. If everything is in order, you are good to launch your study!