Bot Continuous Delivery - microsoft-campus-community/workshop-shopping-list-bot GitHub Wiki
Prerequisite: If you do not have the Azure resources, you should go to the Deploy Bot page first. It also assumes that you have forked this repository and have the bot working locally. If you do not have a working bot, go back to Test Bot locally.
Continuous delivery boils down to defining a script to automate the steps of building the bot and publishing it to Azure.
The Action
You can find the .github/workflows folder where all continuous delivery pipelines for this workshop are defined in the root of the repository. The pipeline to continuously deliver the bot is defined in the main_shopping-list-bot-web-app.yml file.
The on part of the yml file tells GitHub when to run this action.
on:
  push:
    branches:
      - main
    paths:
      - 'shopping-list-bot/**'
You can see that it will only run when you push changes on your main branch from your local git repository to your forked repository of this repository on GitHub. Because this is a mono-repository, meaning that there are different projects (i.e. one for the bot and one for the Azure Funtions) in this repository, the paths option in the push trigger is defined. As a result, only changes in the folder shopping-list-bot where the bot is located will trigger this action. If the bot does not change then GitHub should not redeploy it.
Next in the main_shopping-list-bot-web-app.yml file some environment variables for when running the action are defined.
env:
  AZURE_WEBAPP_NAME: <shopping-list-bot-web-app> # set this to your application's name
  AZURE_WEBAPP_PACKAGE_PATH: 'shopping-list-bot' # set this to the path to your web app project, defaults to the repository root
  NODE_VERSION: '14.x' # set this to the node version to use
Here you need to replace with the name of your web app you defined when creating the resources for the bot in the previous bot deployment step. You can push your updated webapp name to your forked repository and will not have to change it unless you change the name of the app service.
Below the environment variables different steps are defined to run when this action is triggered.
- GitHub's action runner will configure NodeJS on GitHub's server executing your pipeline.
- NPM will install the dependencies for the bot, build it and test the bot.
- GitHub's action runner will publish the output from building the bot to your Azure App Service. Note that in this step
publish-profile: ${{ secrets.AzureAppService_PublishProfile_bcee5b88aa5b4ee2aa4c3c4a525cbcfe }}use one last piece of configuration. A secret that allows GitHub to connect with your Azure. The following steps explain how to set up this secret.
Set GitHub Secrets for Azure
GitHub needs to communicate with your Azure when running the pipeline. You need to configure this connection using GitHub secret you get from Azure.
- Go to the Azure portal and navigate to your
App Servicein the resource group you created for this workshop.
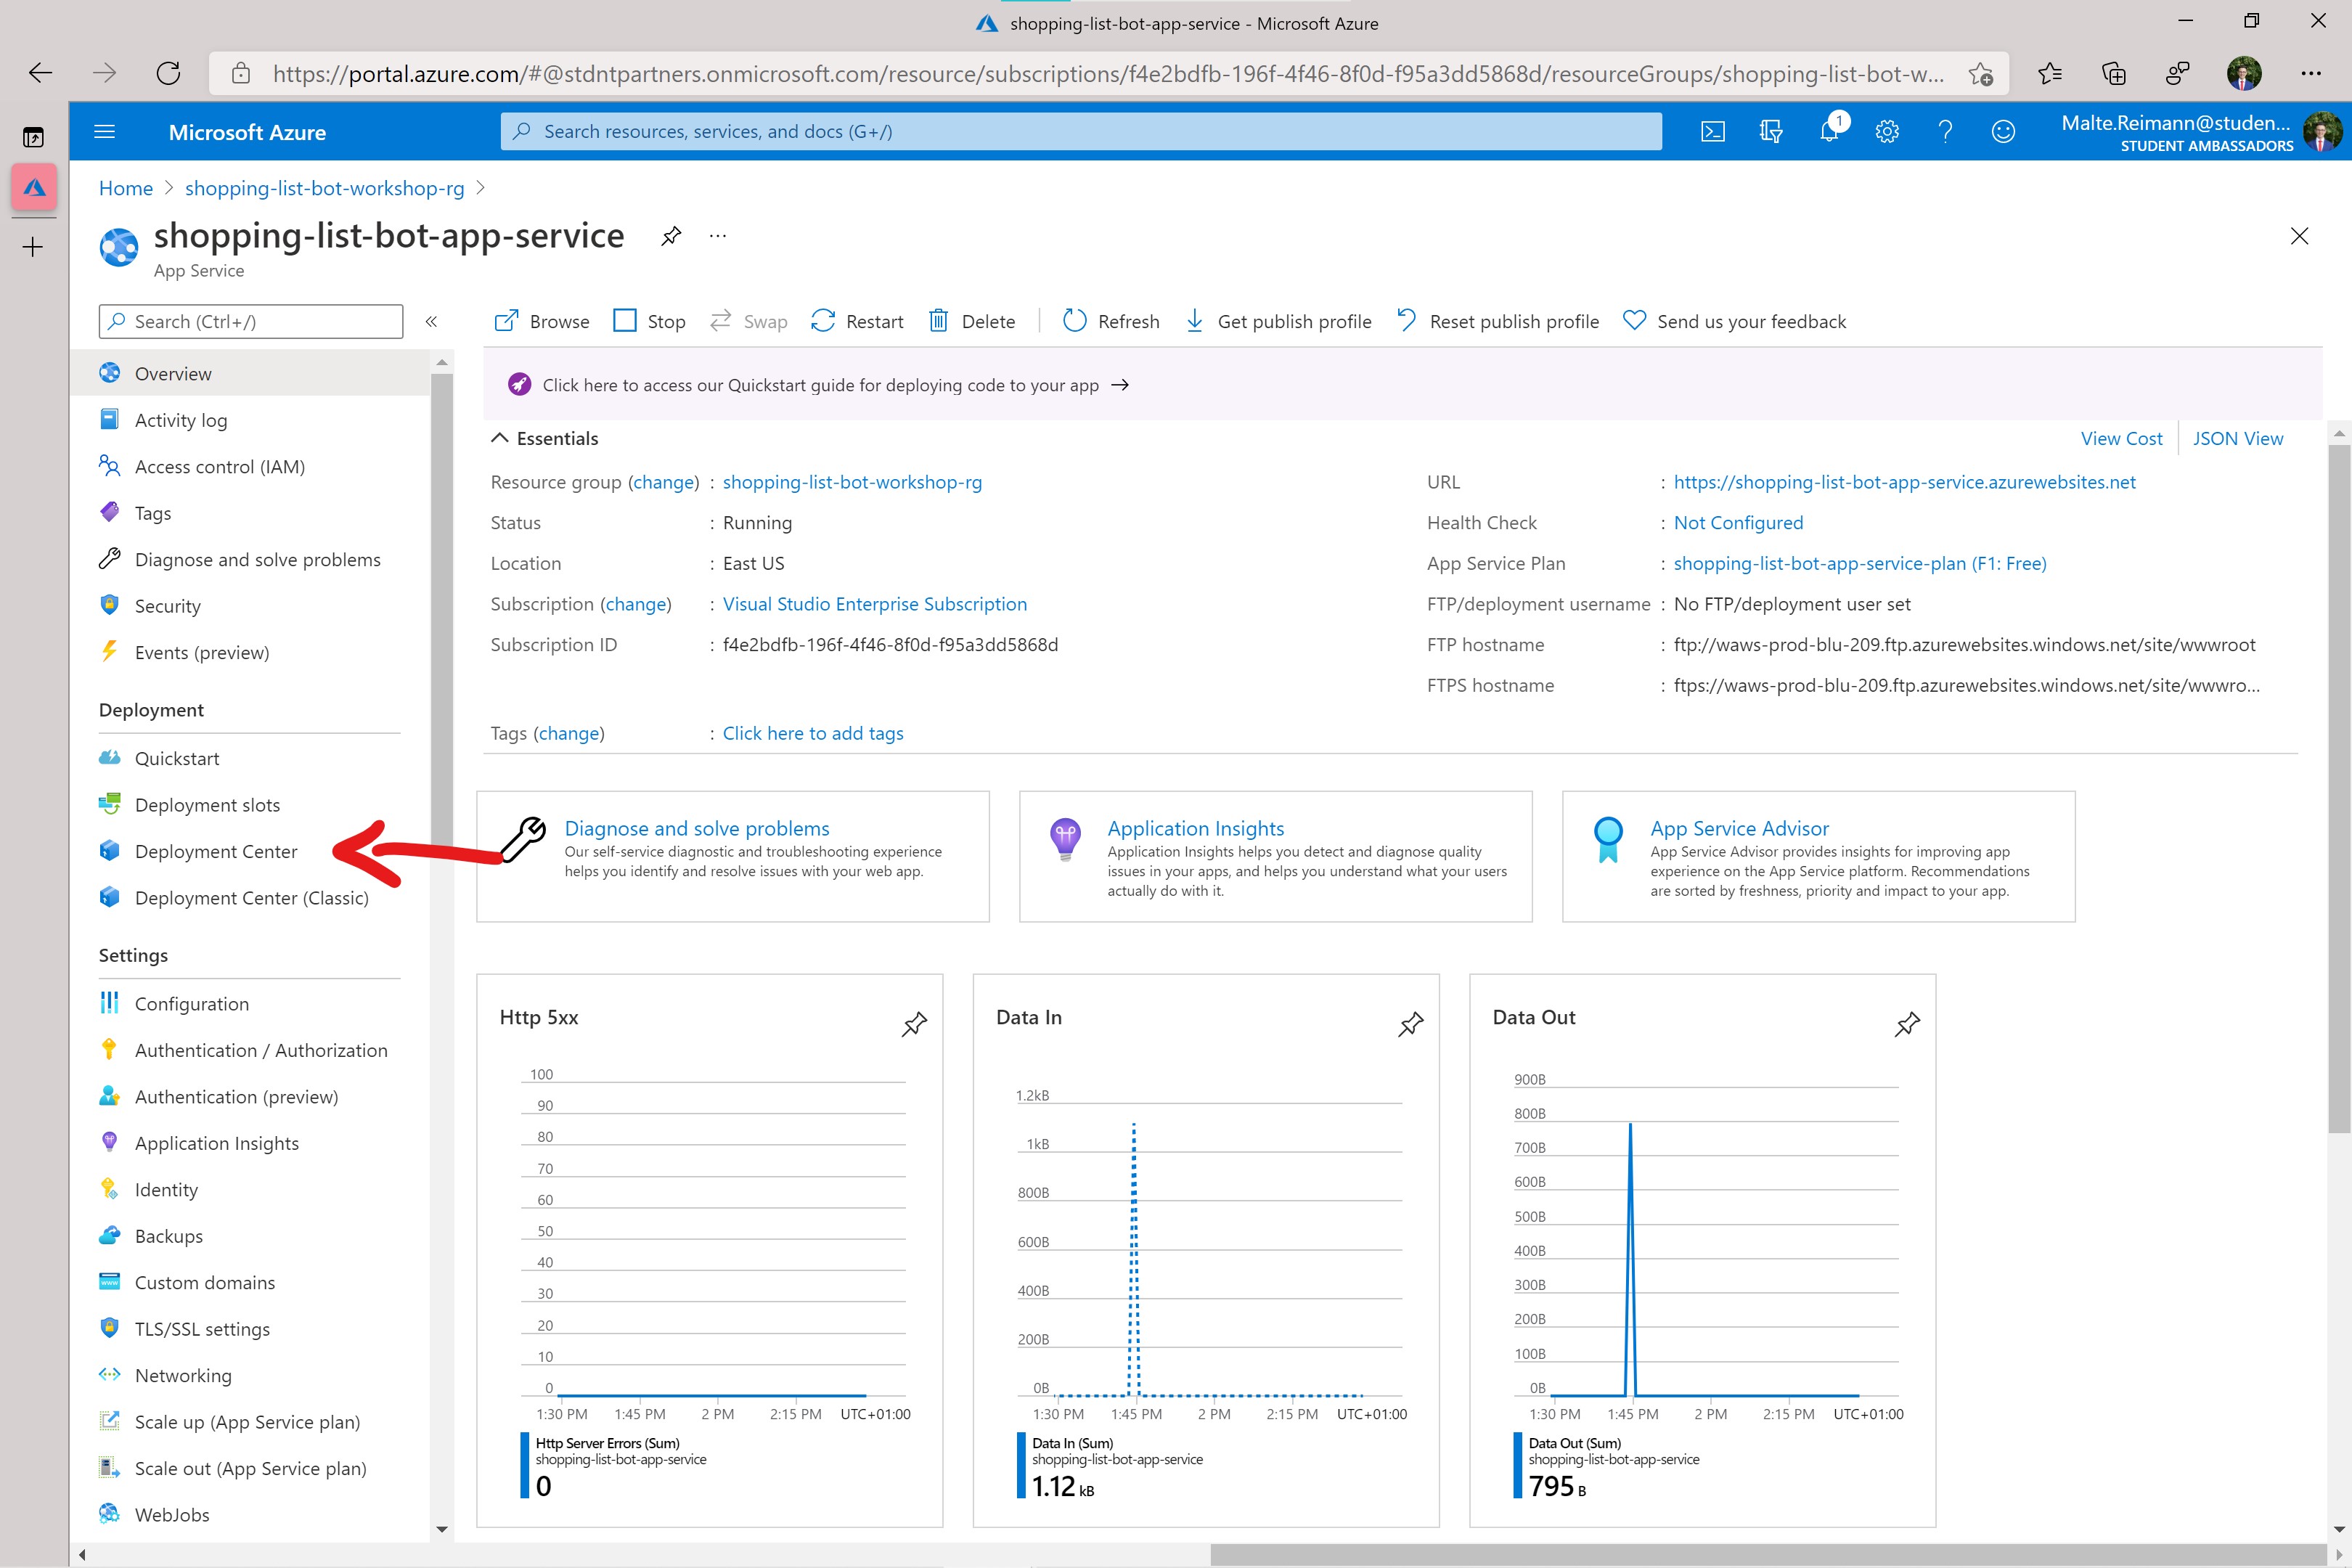
- With the App Service resource open you should click on the
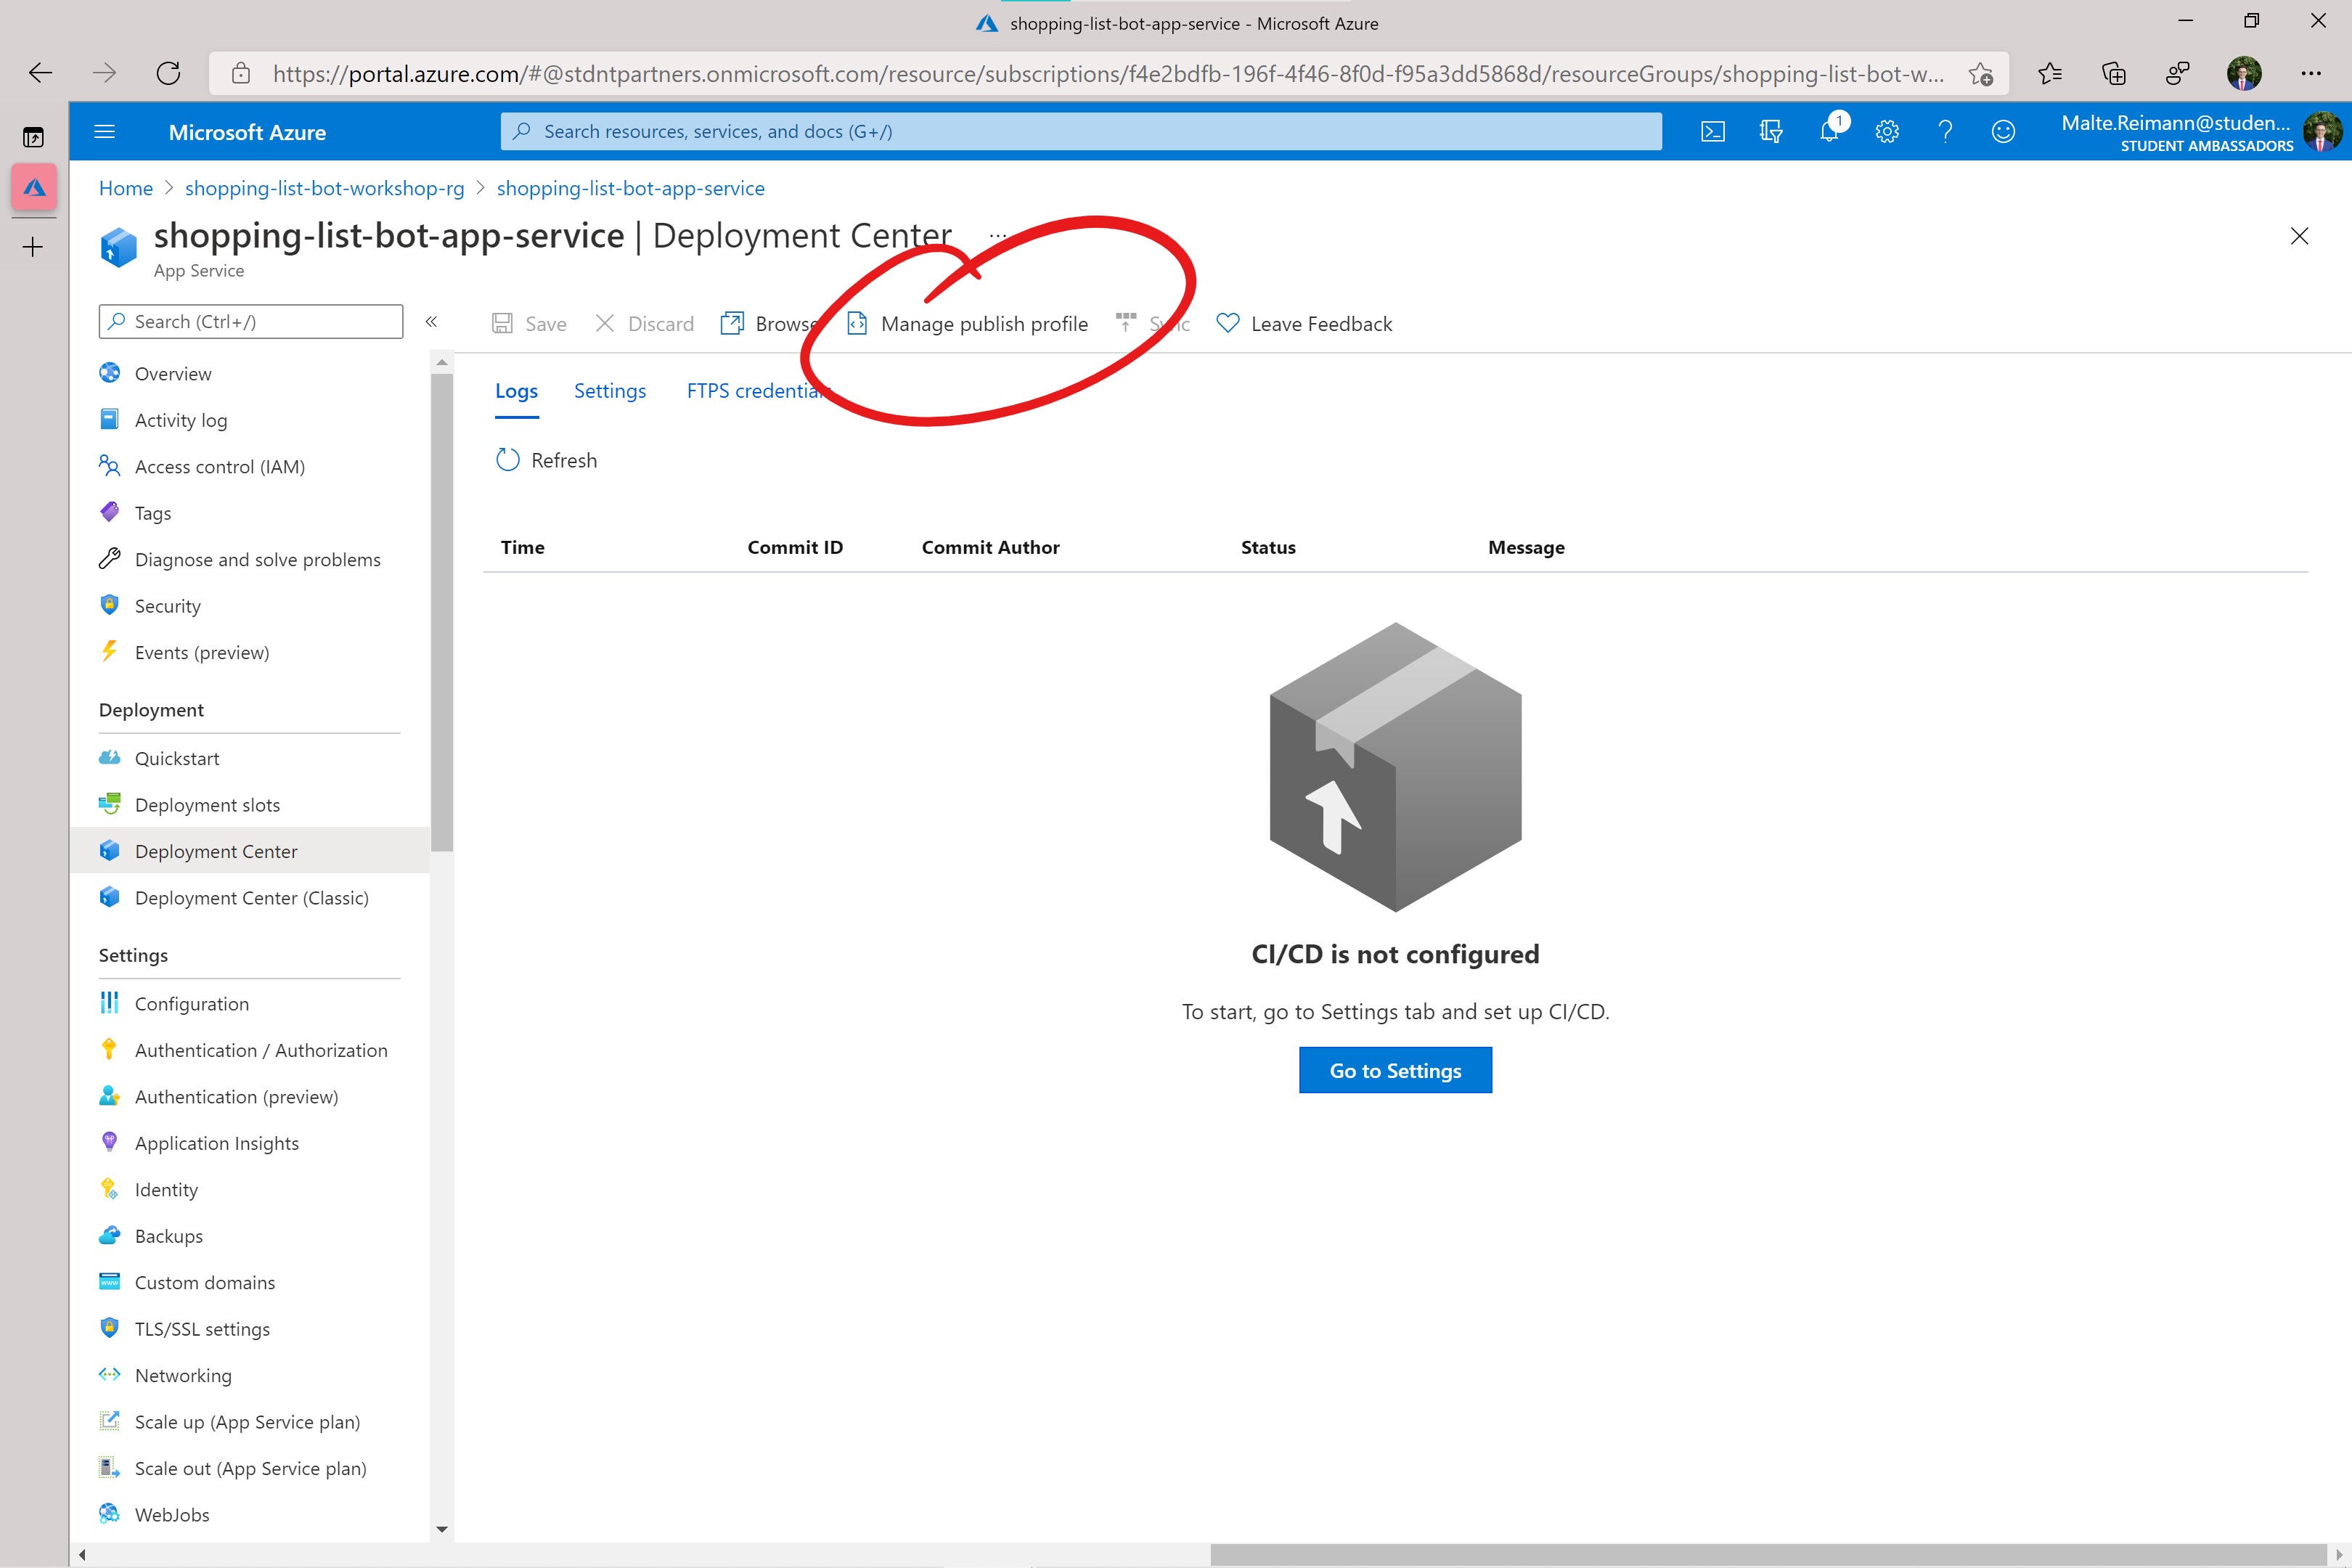
Deployment CenterunderDeploymentin the left navigation list. - In the deployment center, click on the
Manage publish profilebutton in the top row.
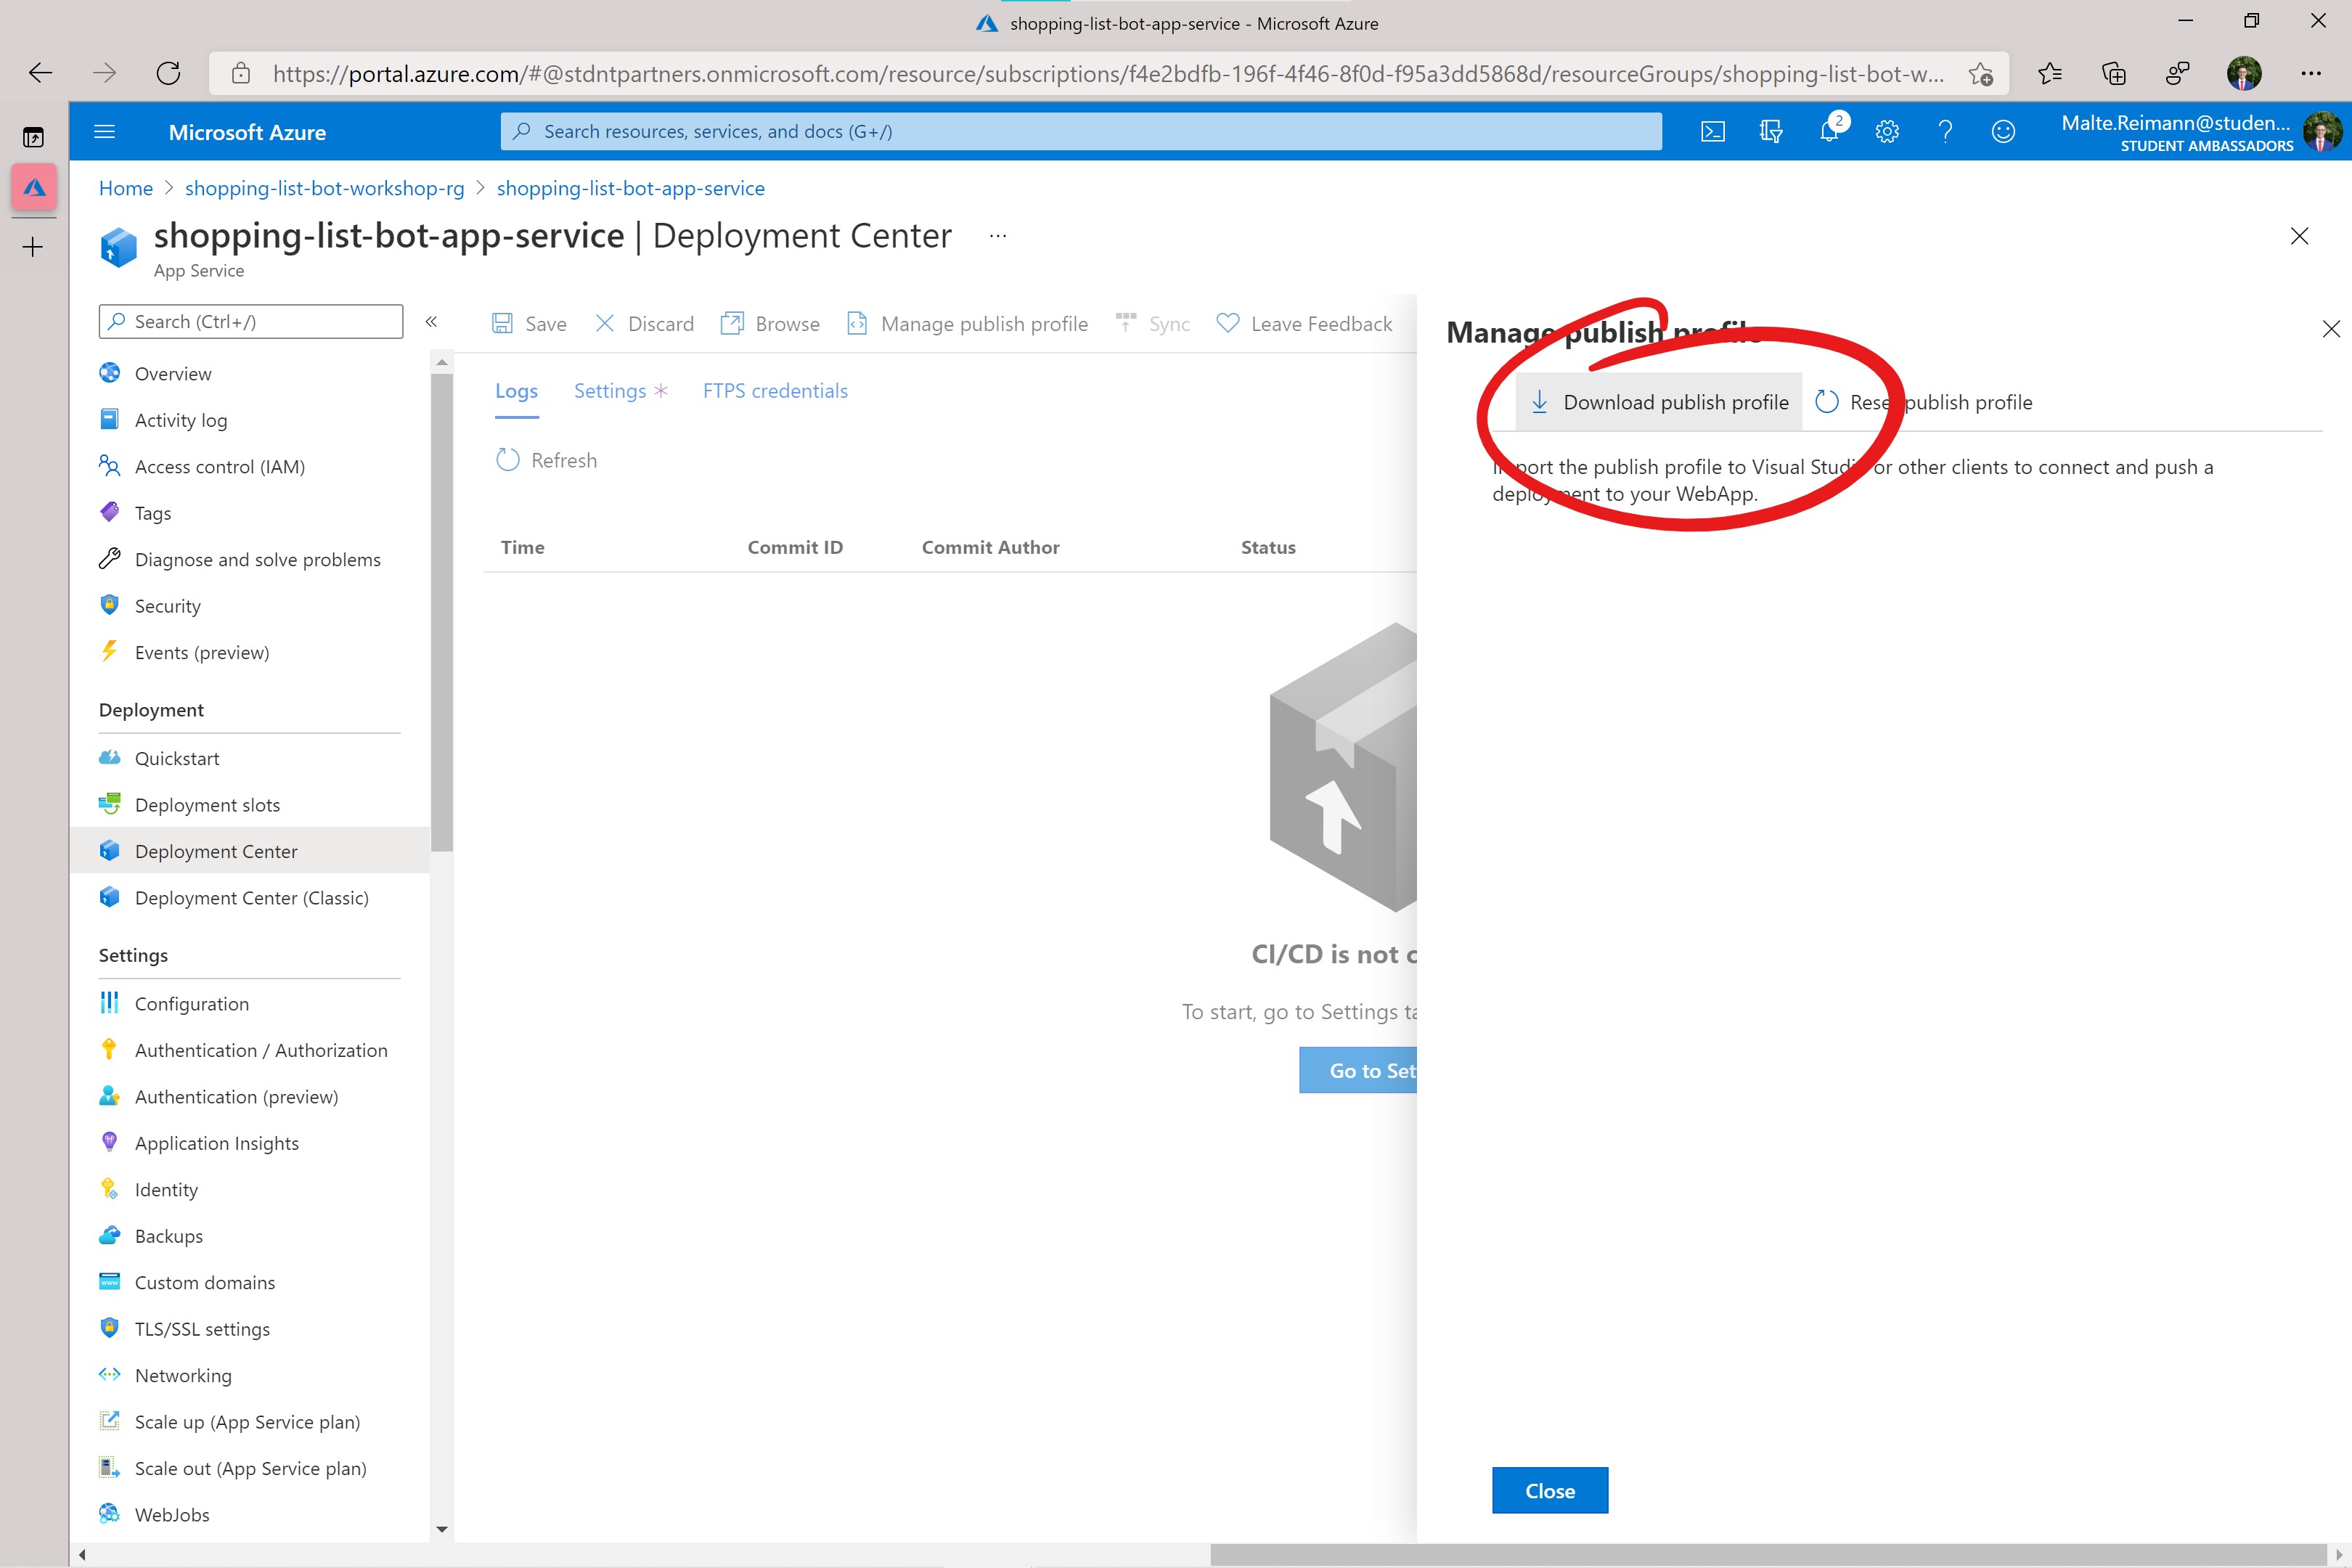
- In the 'Manage Publish Profile' panel click on the
Download publish profilebutton. This will download aprofile.ymlfile.
- When the
profile.ymlfile is downloaded you need to open it in an editor and copy its entire content. - In your browser navigate to your fork of this repository on GitHub.
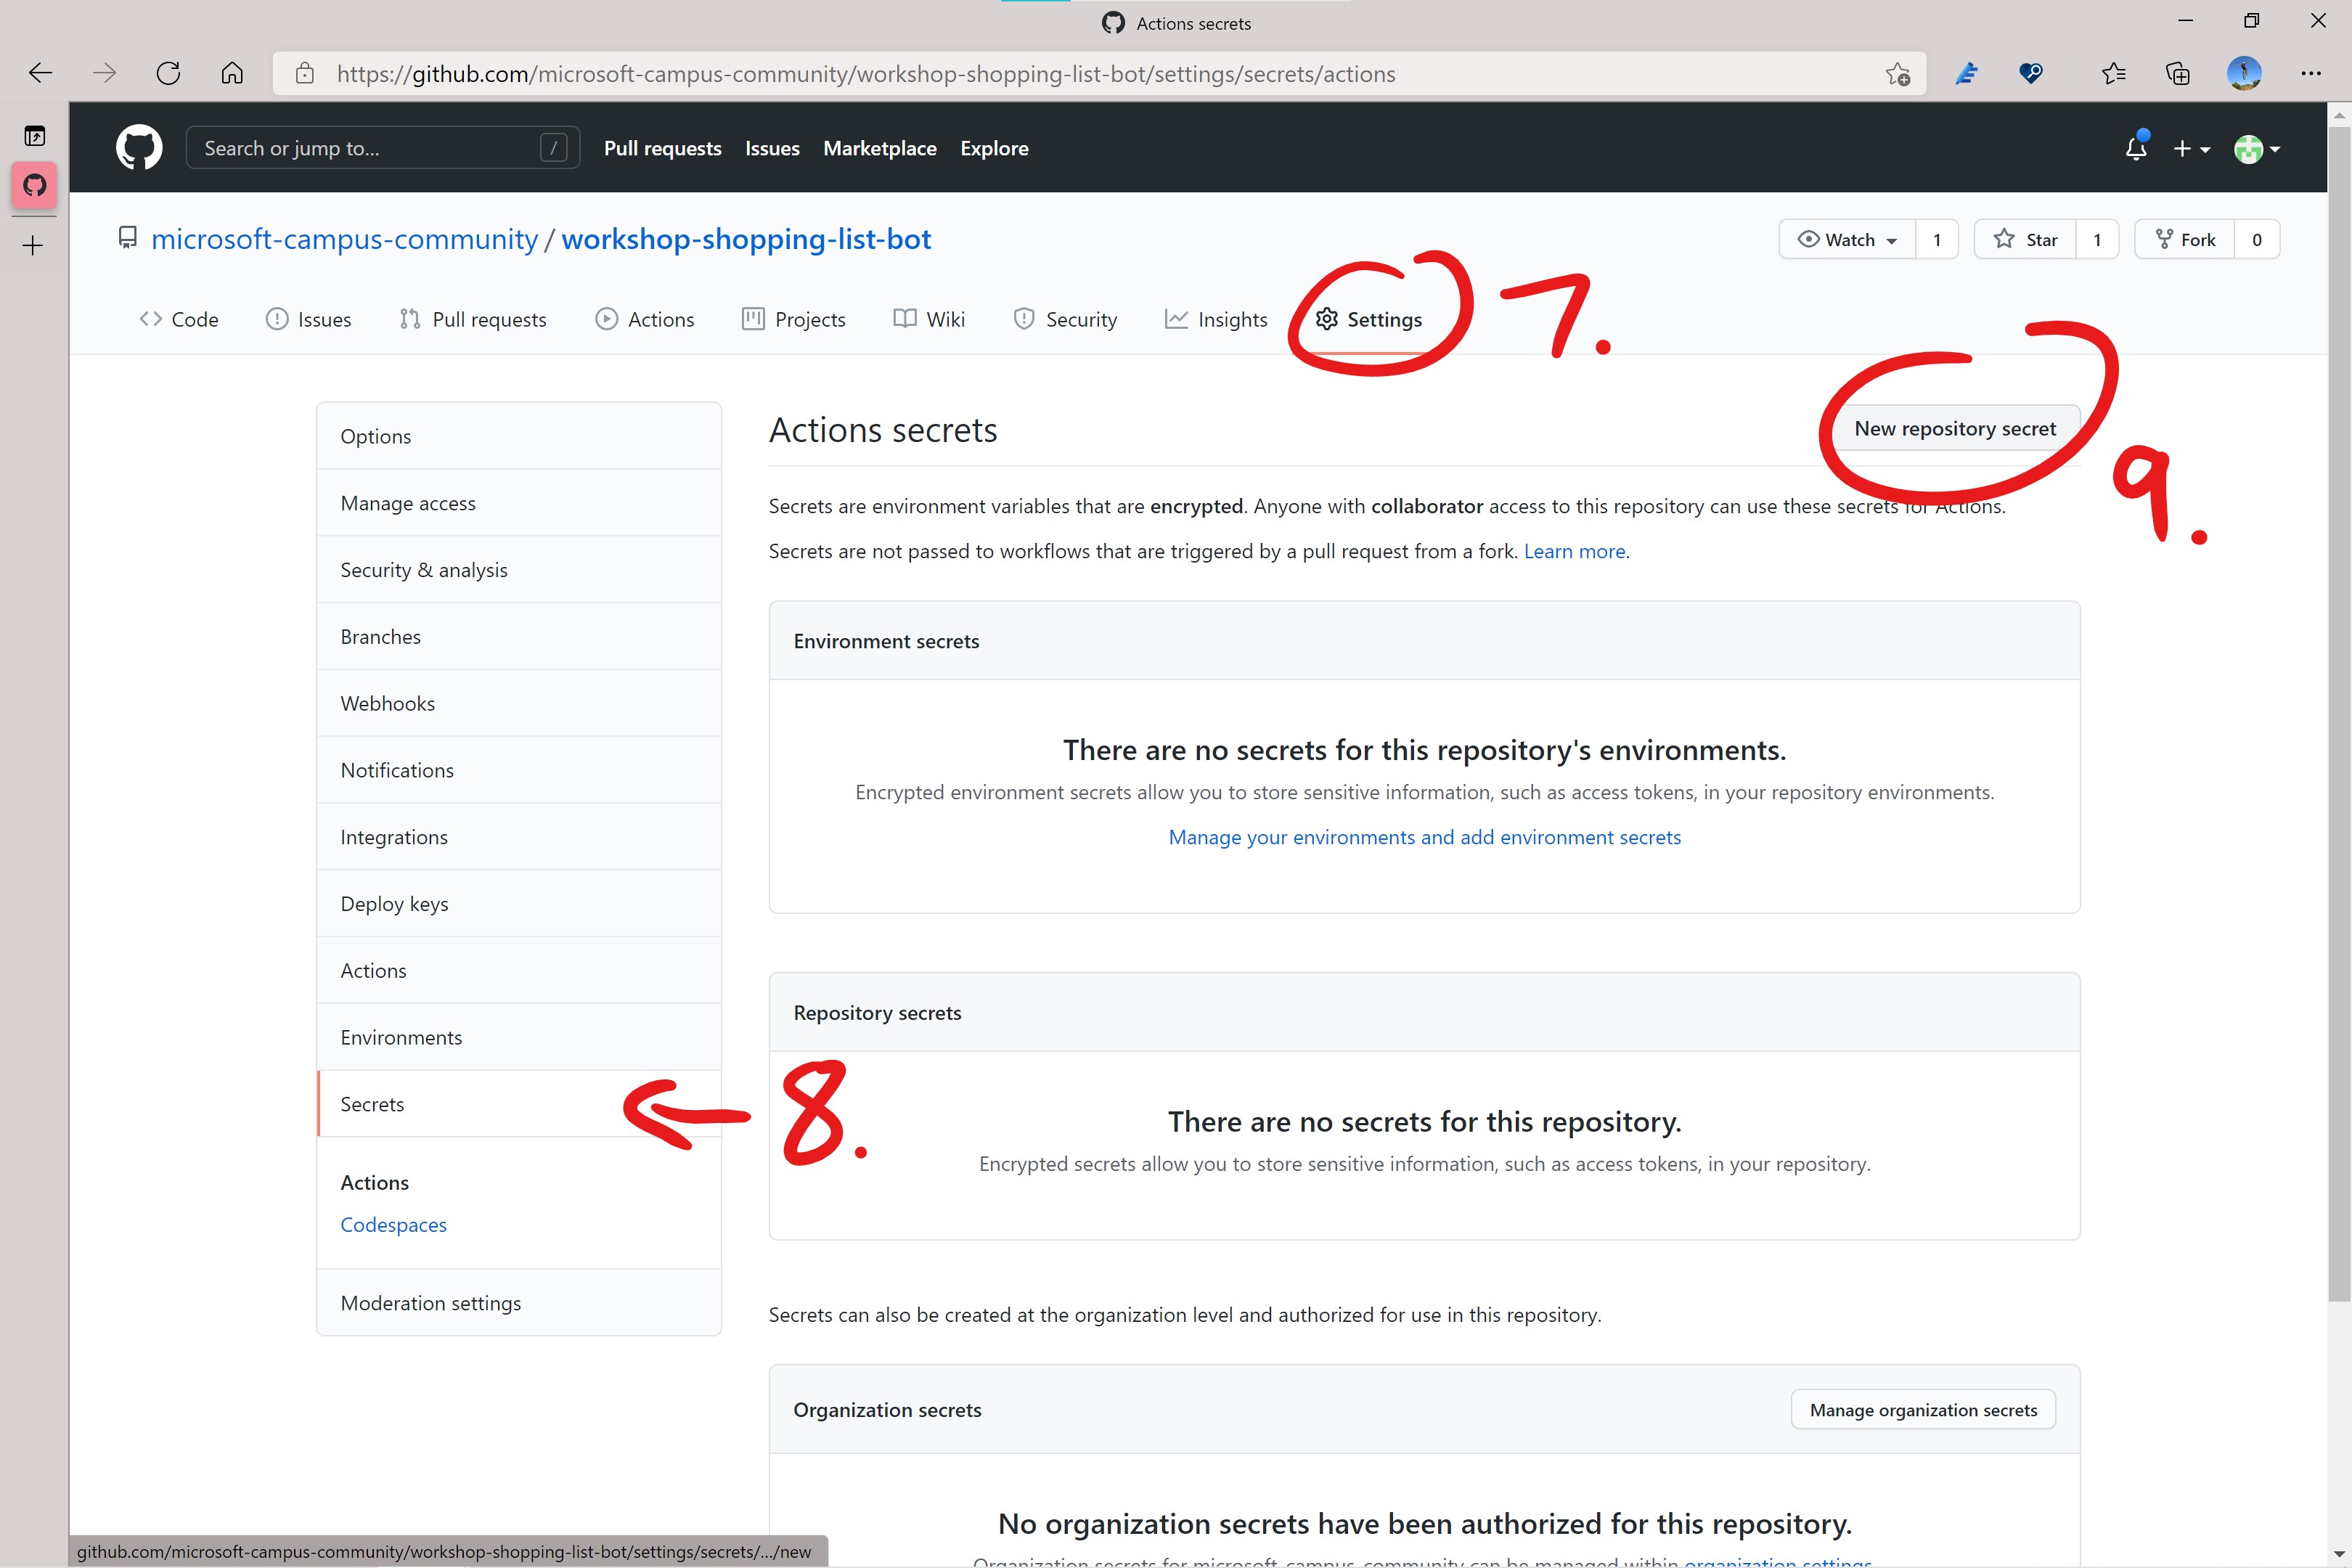
- Click on the
Settingstab. - In the list of settings click on
Secrets. - On the secrets page click on the
New repository secretbutton.
- In the
Valuetextbox paste the entire content of thepublish.ymlfile you downloaded from Azure. - In the
Namefield for the secret pasteAzureAppService_PublishProfile_bcee5b88aa5b4ee2aa4c3c4a525cbcfewhich is how the GitHub Action references the secret. - Click
Add secret.
The next time you push changes to you bot project on the main branch of your forked repository to GitHub it will trigger the GitHub Action and deploy the changes to your bot running in the cloud.
You can try it out now by doing any change in the shopping-list-bot folder of your forked repository.