Bot Configuration in Azure - microsoft-campus-community/workshop-shopping-list-bot GitHub Wiki
Prerequisite: This page assumes that you have the Azure Function running and configured in Azure. If you have not done that, follow the steps to configure Function App in Azure first. It also assumes that you have the LUIS endpoint published (page how to publish LUIS). It also assumes that you have an Azure resource for the bot and the bot deployed through the GitHub Actions (page how GitHub Actions for bot work).
The bot calls the LUIS endpoint when it receives a message so LUIS can predict the message's intent and entities. The bot can then use the information to act smart by understanding human language. Also, the bot uses a shopping list API built with Azure Functions to persist and modify items in the shopping list belonging to the chat. Because these are all decoupled resources, they need to be configured in the Web App that is the bot. The bot expects environment variables in the Web App that tell it how to connect to LUIS and the Azure Function. On this page, you will configure these environment variables in Azure. First, you will learn how to find the values for the environment variables, and then in the last paragraph, you will learn where to configure these environment variables.
Get URL of Azure Functions
The bot needs to know the URL where it can find the shopping list API.
- Open the Azure Portal.
- Navigate to the resource group you use for this workshop and open the resource of type
Function Appin it. - On the 'Overview' page of the Function App, there is a
URLproperty on the right. You will need the URL from there later. Copy it now or leave your browser tab open.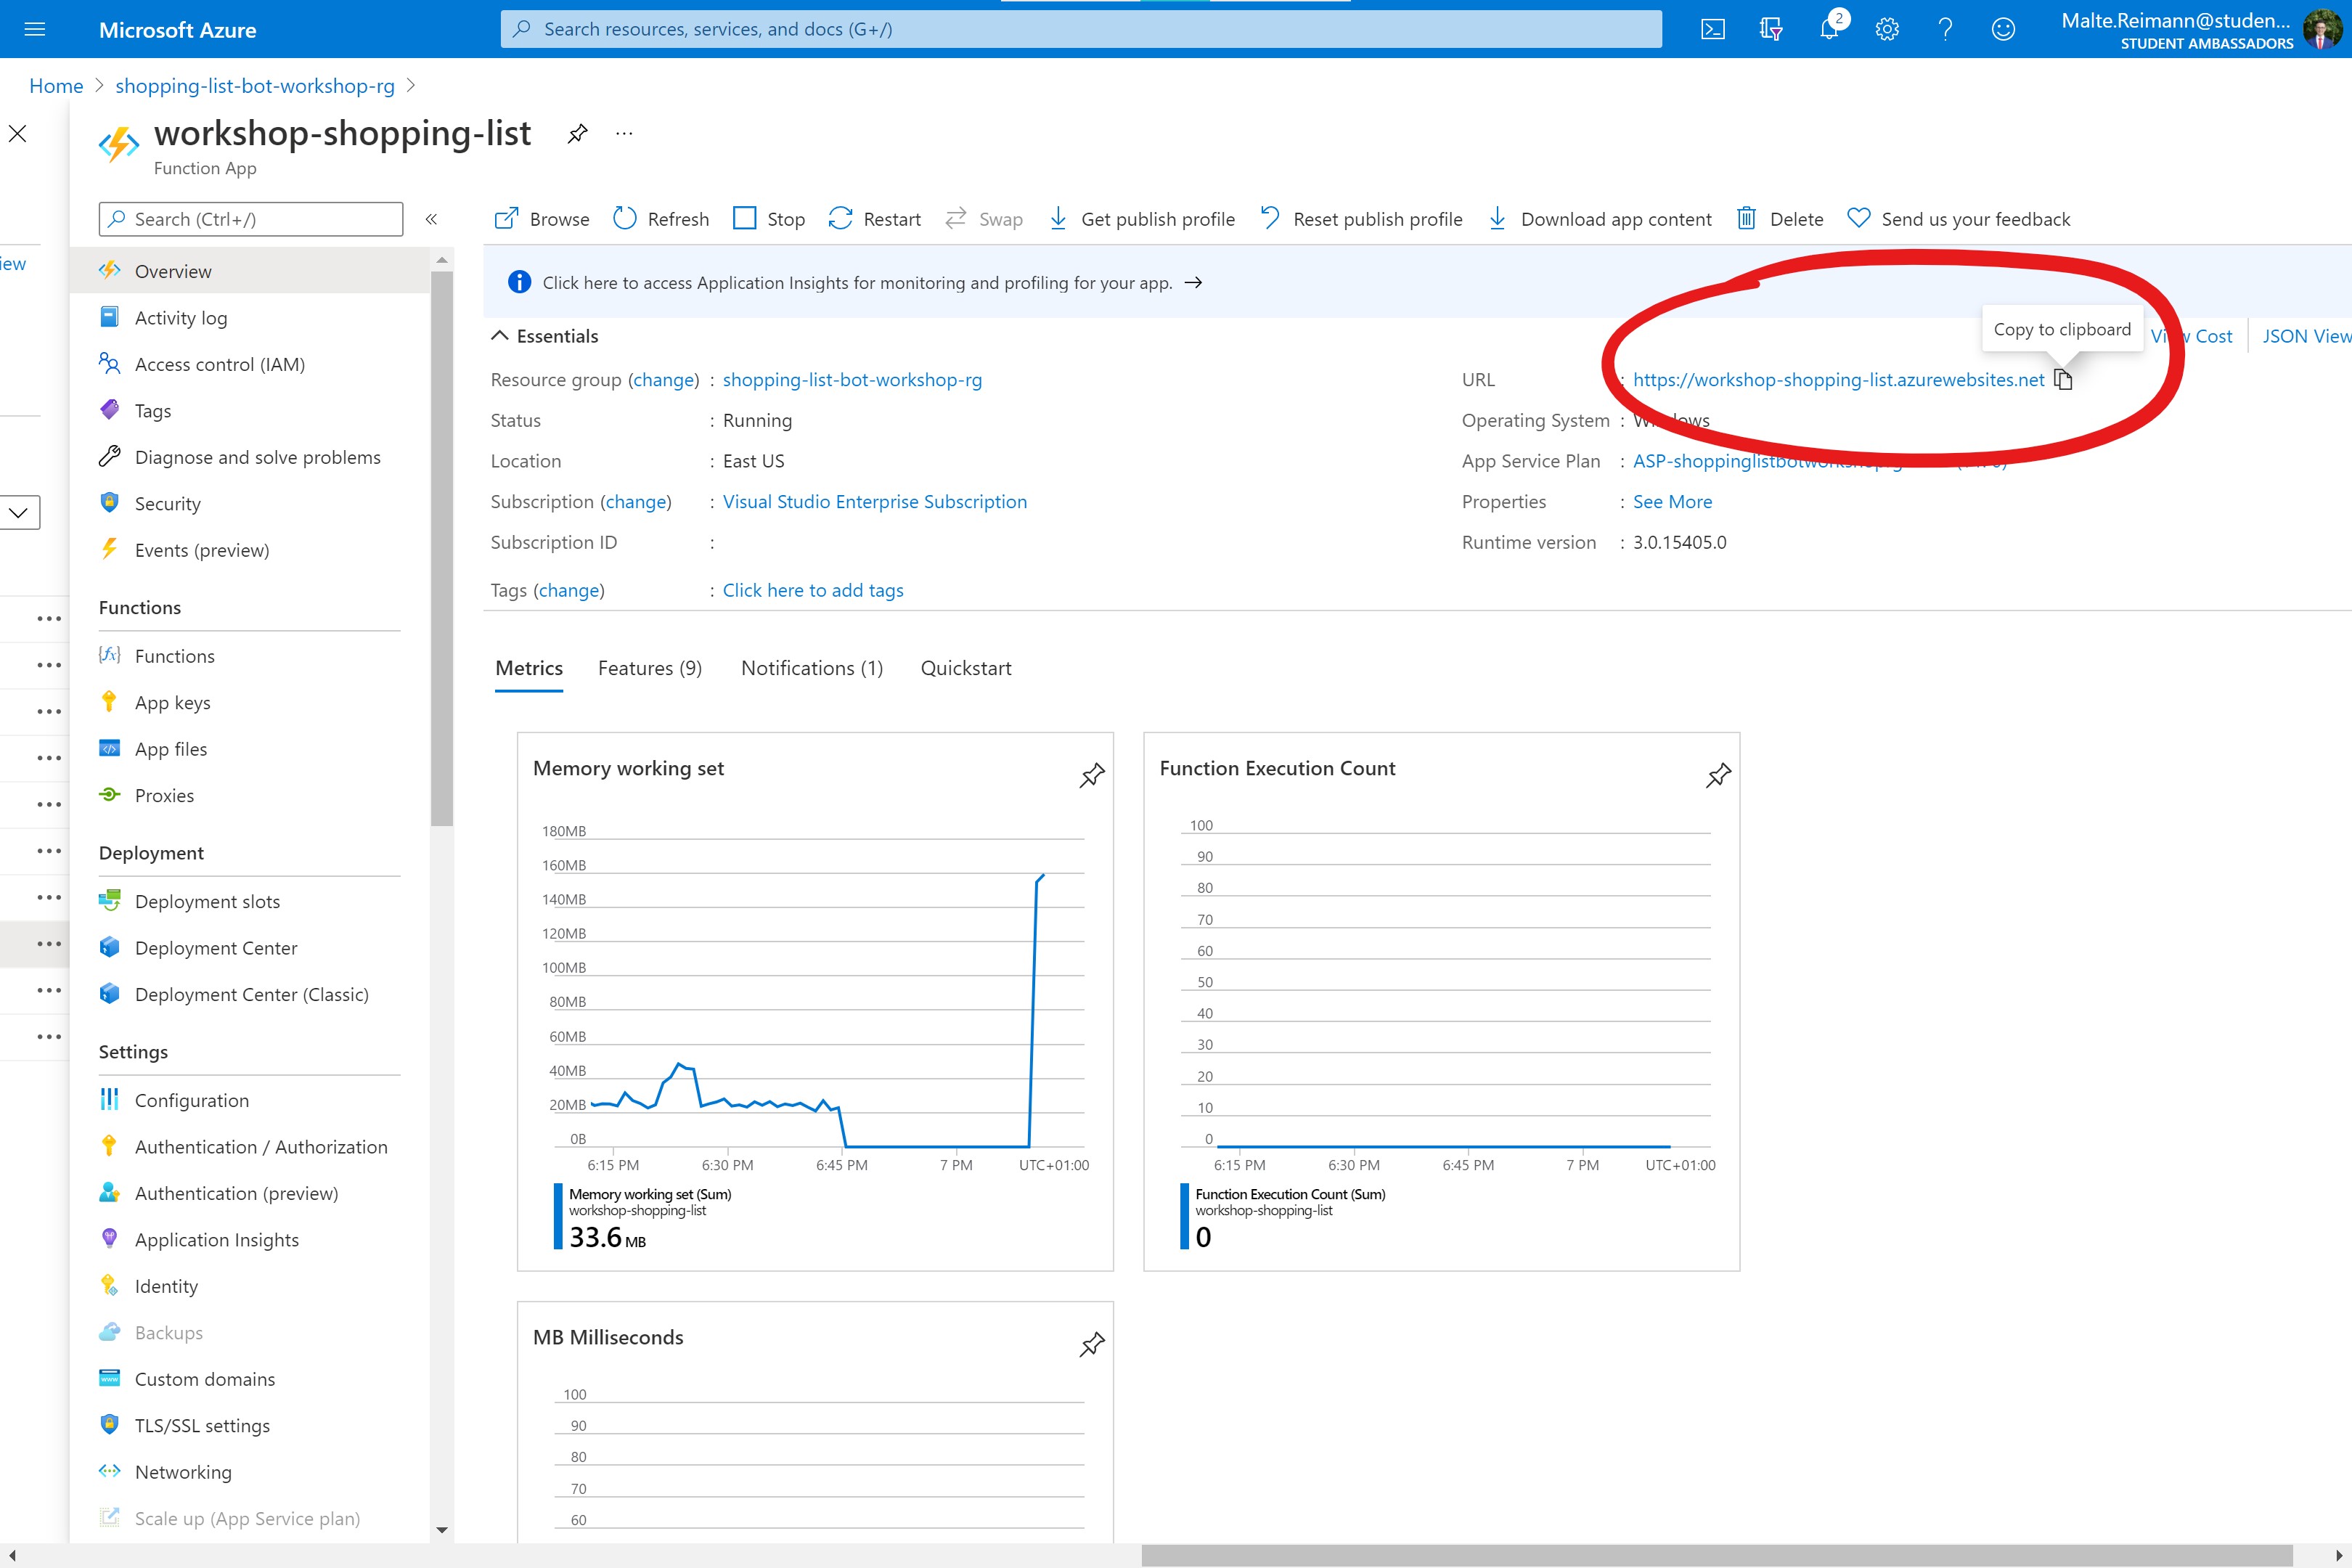
Get information for the bot to connect to LUIS
The bot uses LUIS to predict what a chat participant wants. This paragraph explains where to find the connection information for your deployed LUIS endpoint.
- Go to Luis.ai and log in.
- Once you are logged in, you should see a list of your LUIS applications. Click on the one you deployed for this workshop.
- In the top row, click on the
Managetab.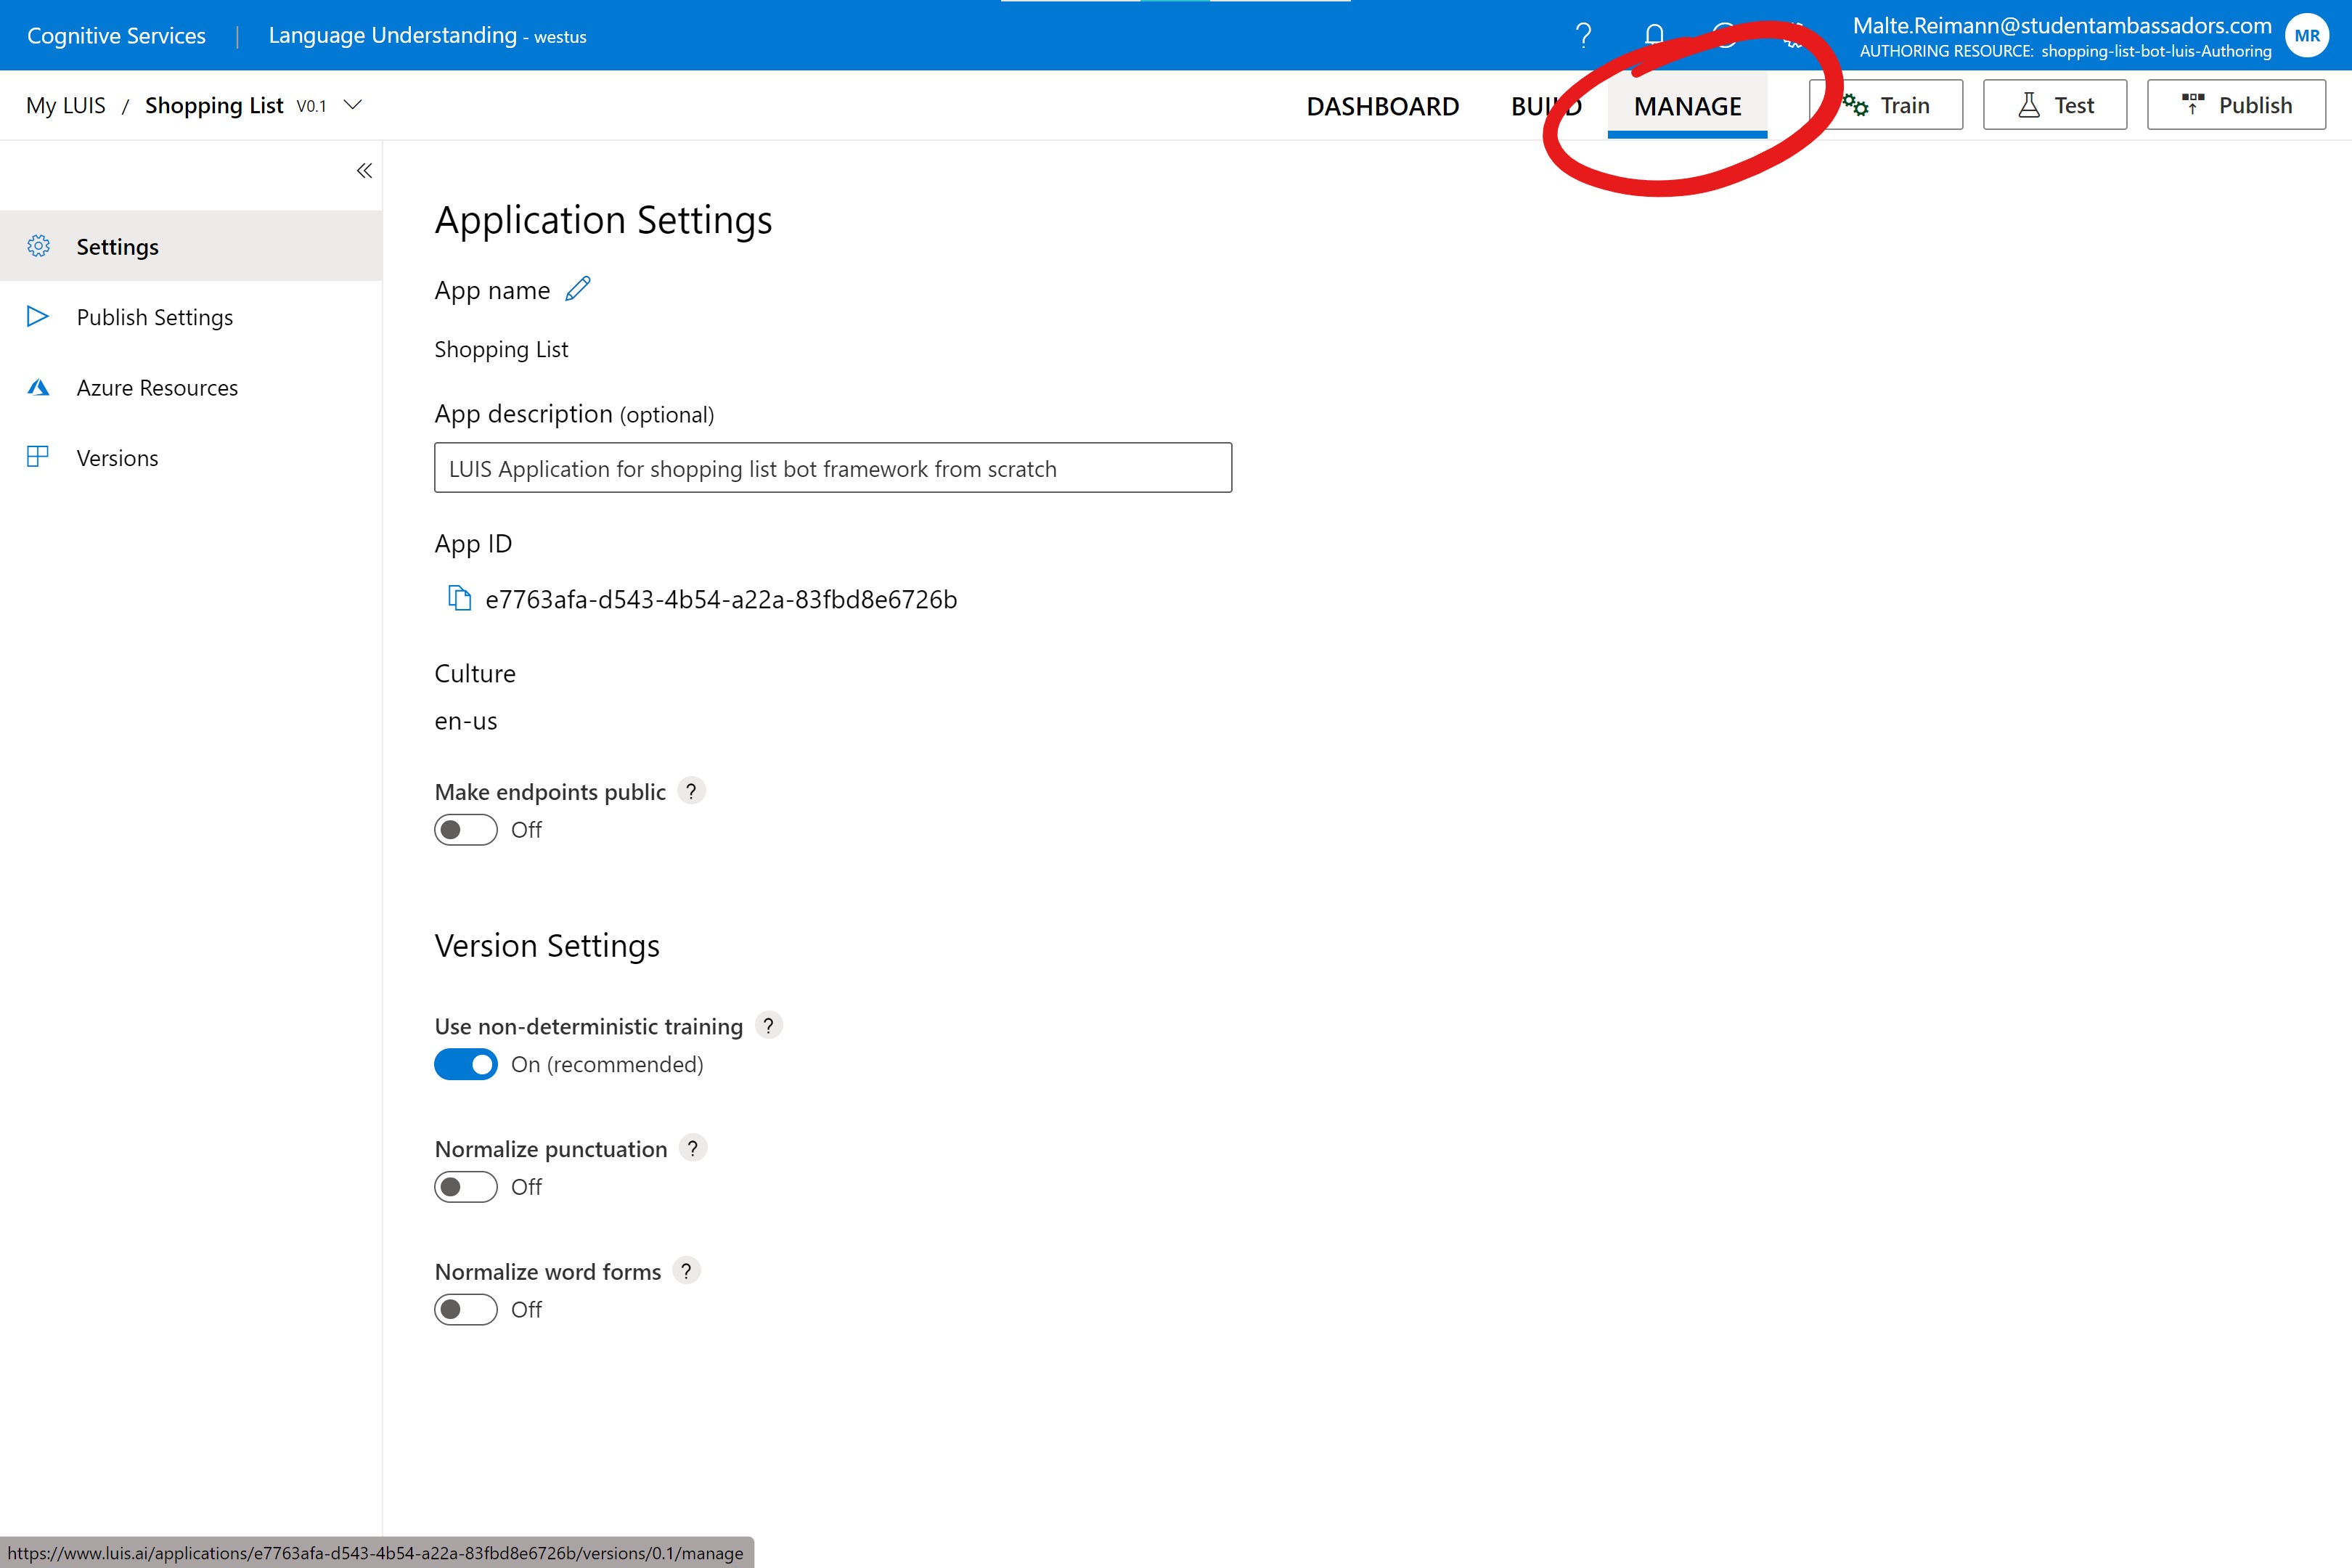
- If you are not sure whether you have already published LUIS, you can go to 'Publish Settings' and check if there is a date for the 'Last Published' property of the 'Production Slot'.
- Under 'Settings', you find the LUIS
App IDthat you will need.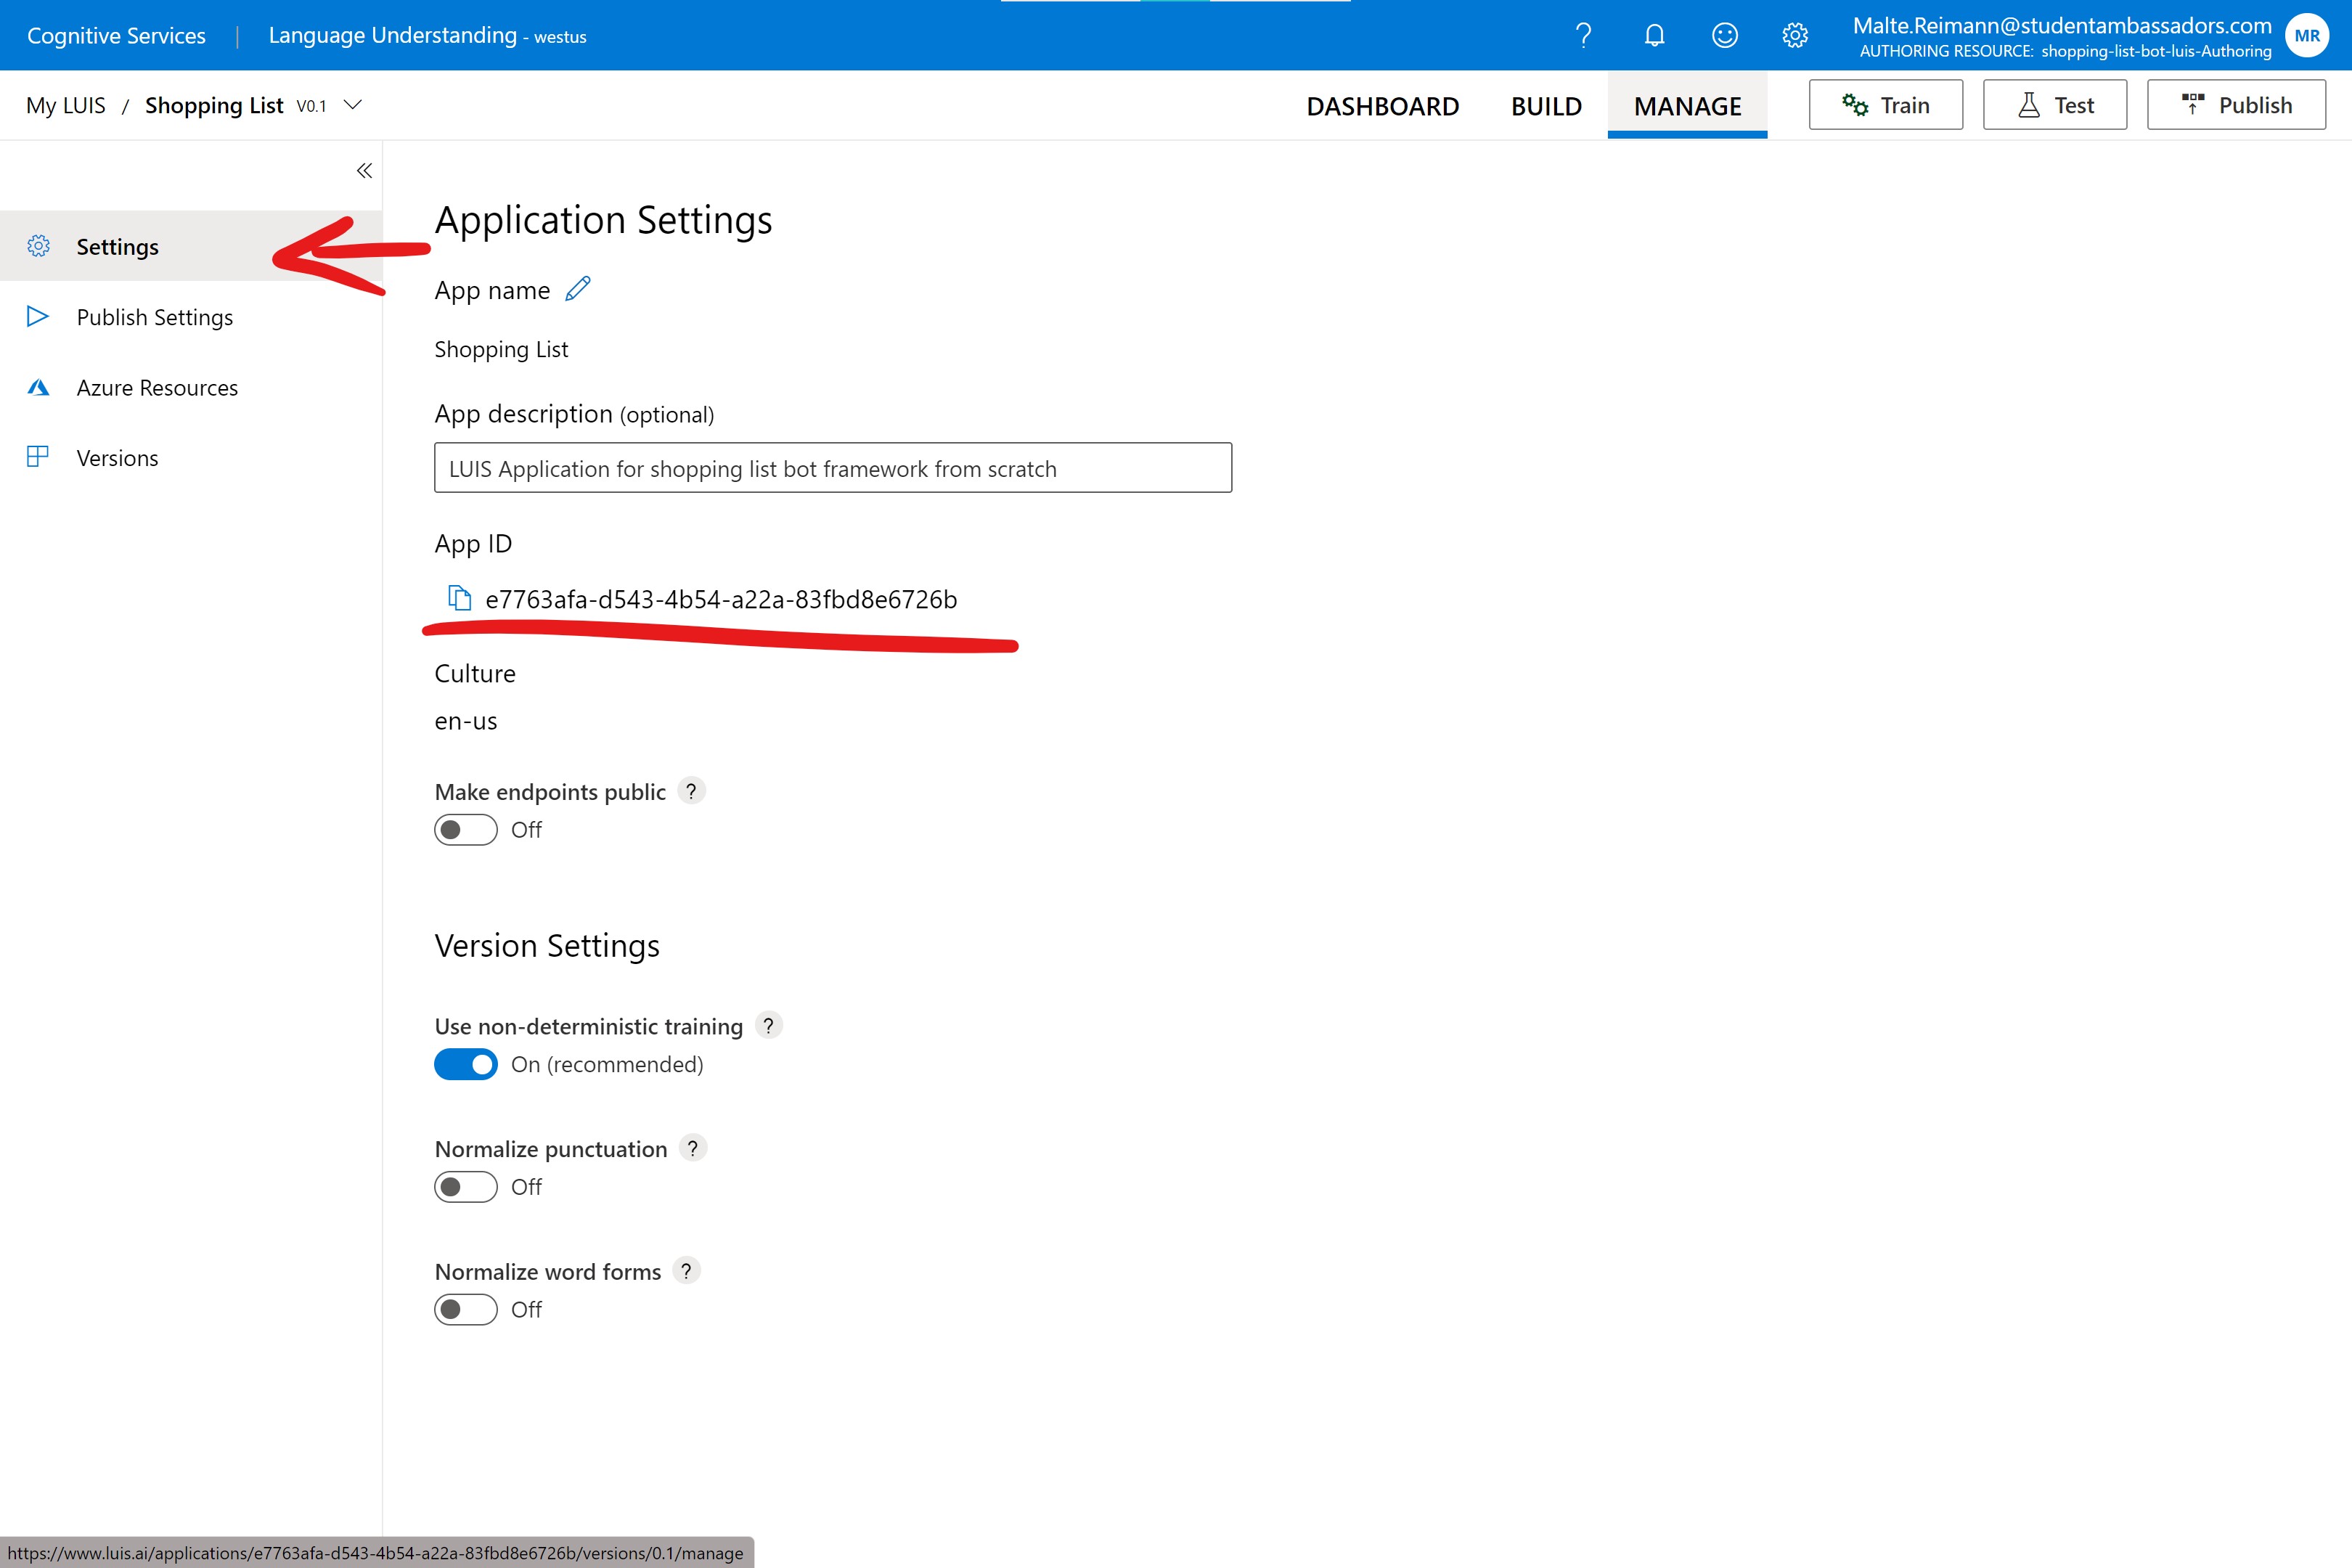
- Under 'Azure Resources', you find the
LocationandPrimary Key, which you also need to configure the bot.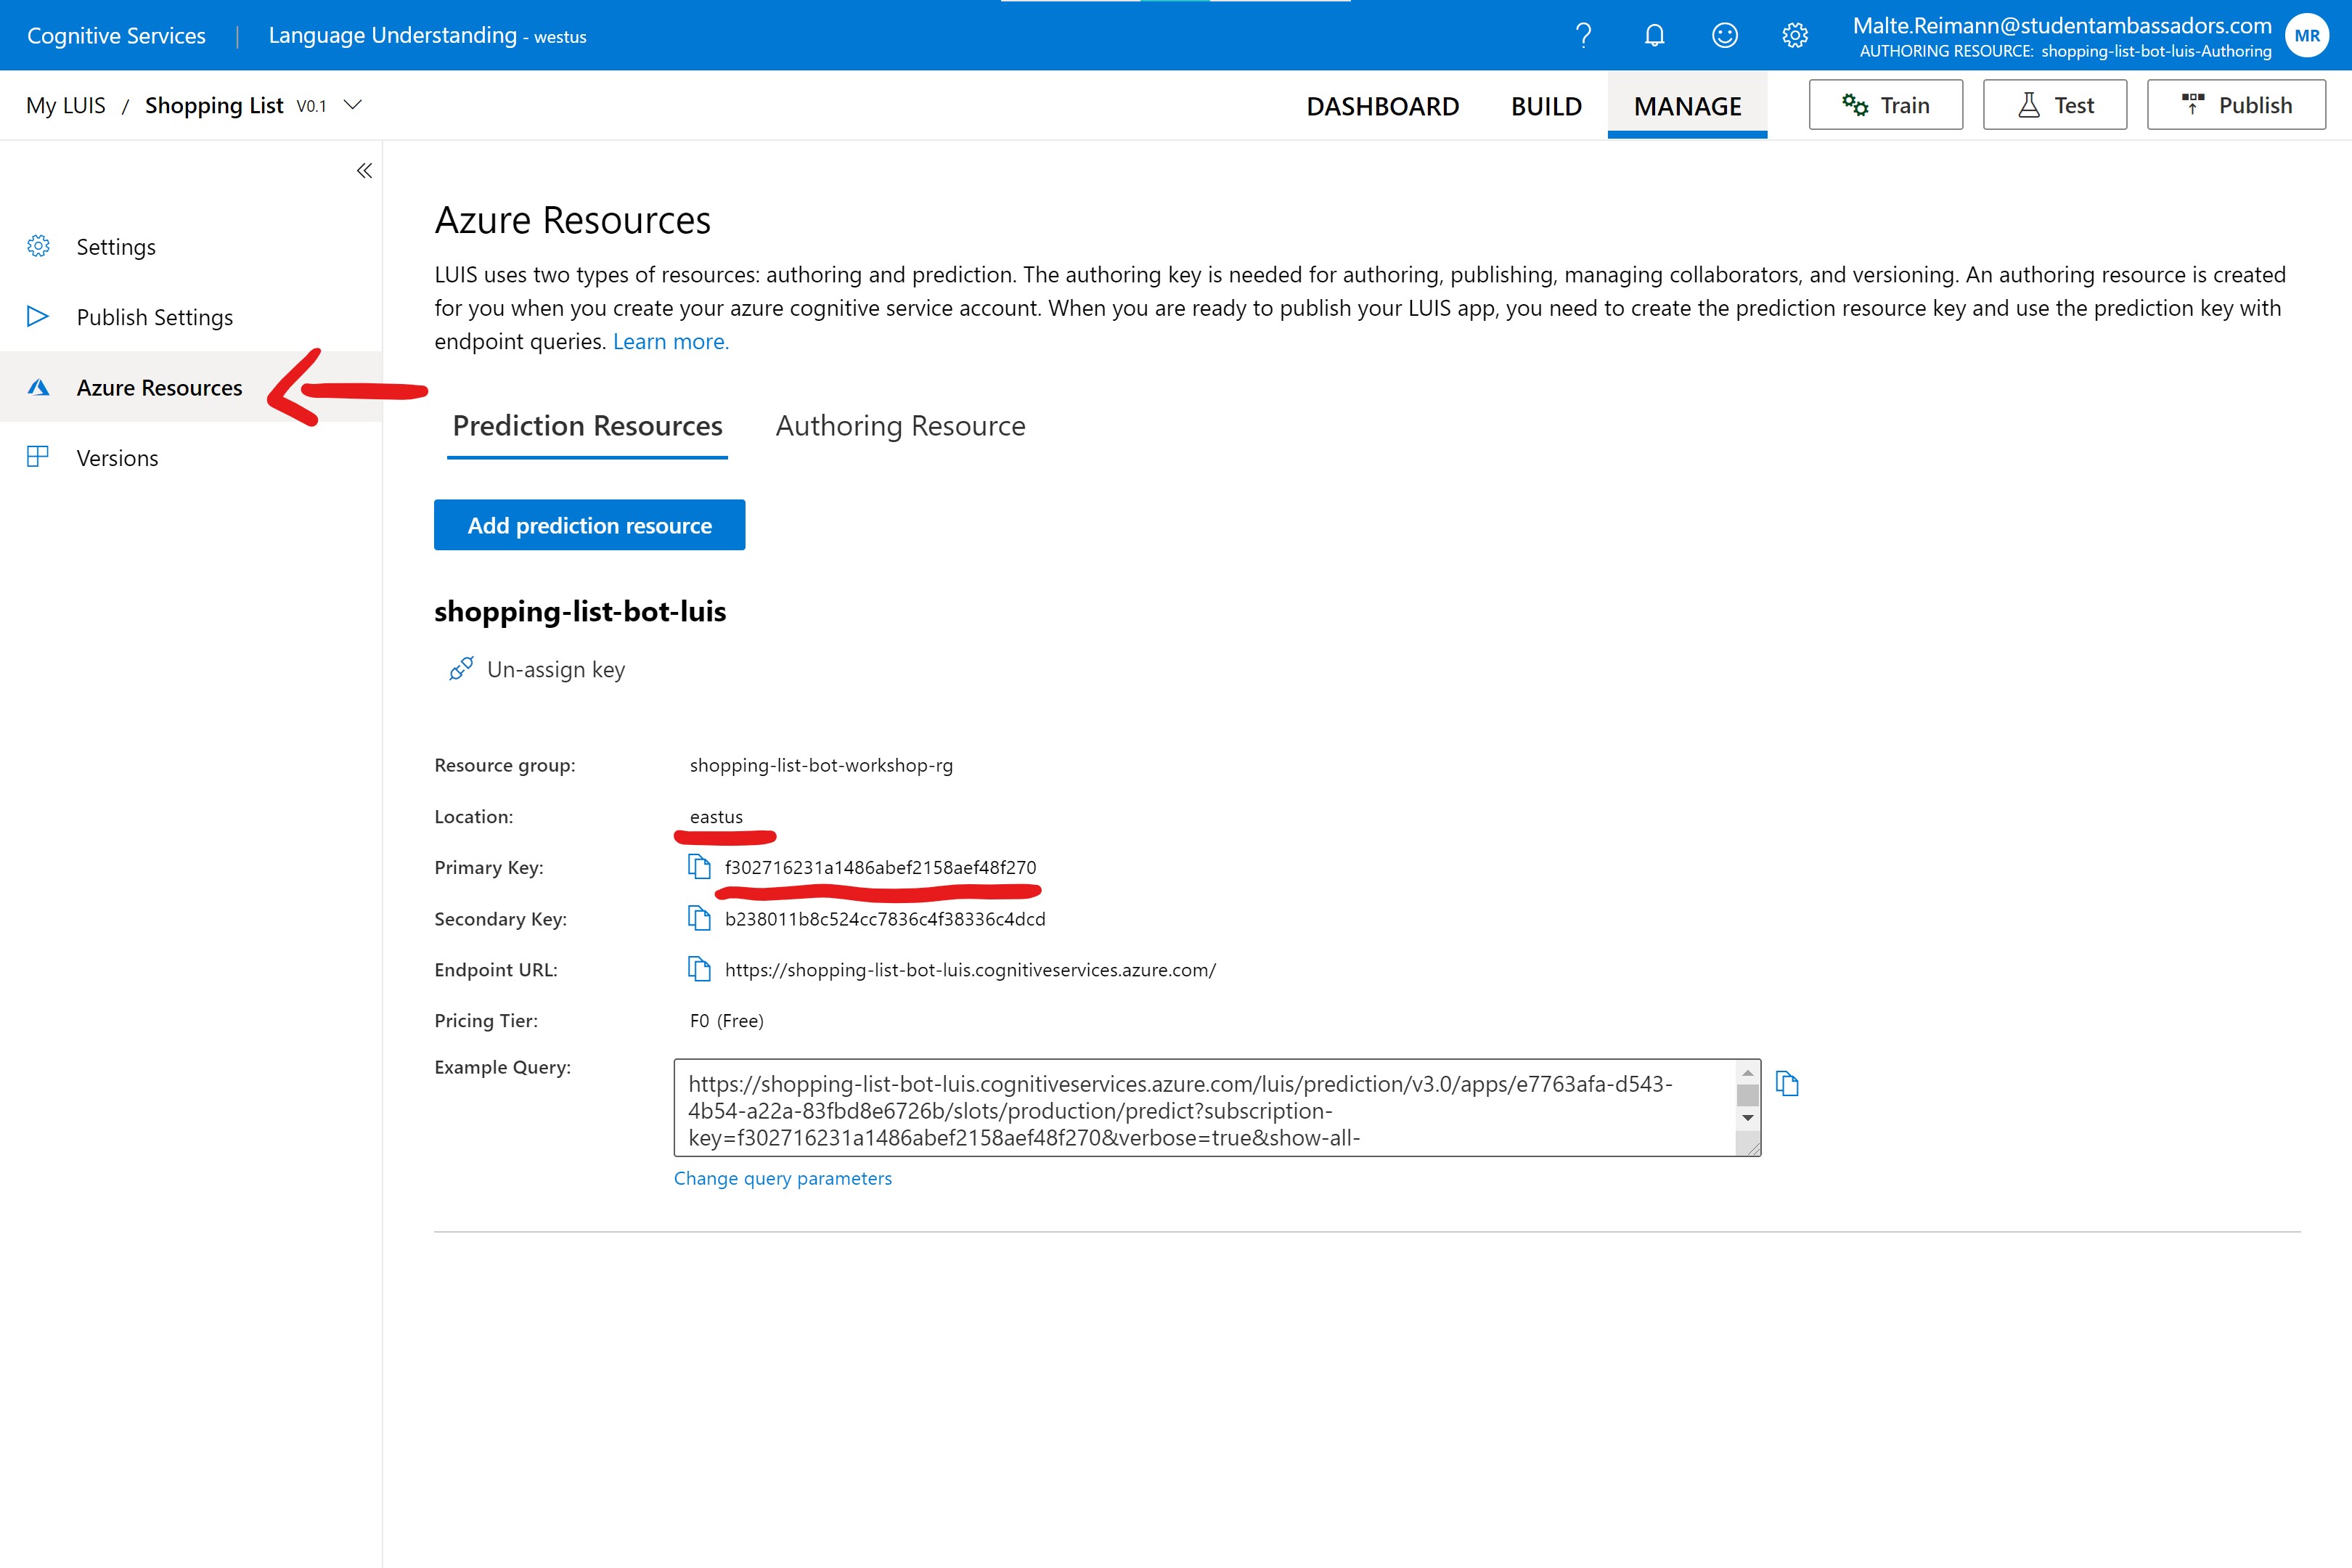
You will need to get this information next, so keep the browser tab open.
Configure Bot Web App in Azure
Now that you know where to get the Azure Function and LUIS configuration information, you will see where you need to enter the information to configure the bot.
- Open the resource of type 'App Service' for the bot in Azure.
- With the bot App Service open, go to the
Configurationin the left navigation list. Under 'Application settings', you will need to add four new environment variables. The process on how to do this is described in detail for the URL of the Azure Function. The other three are the same process. You will only need to use different values as described below.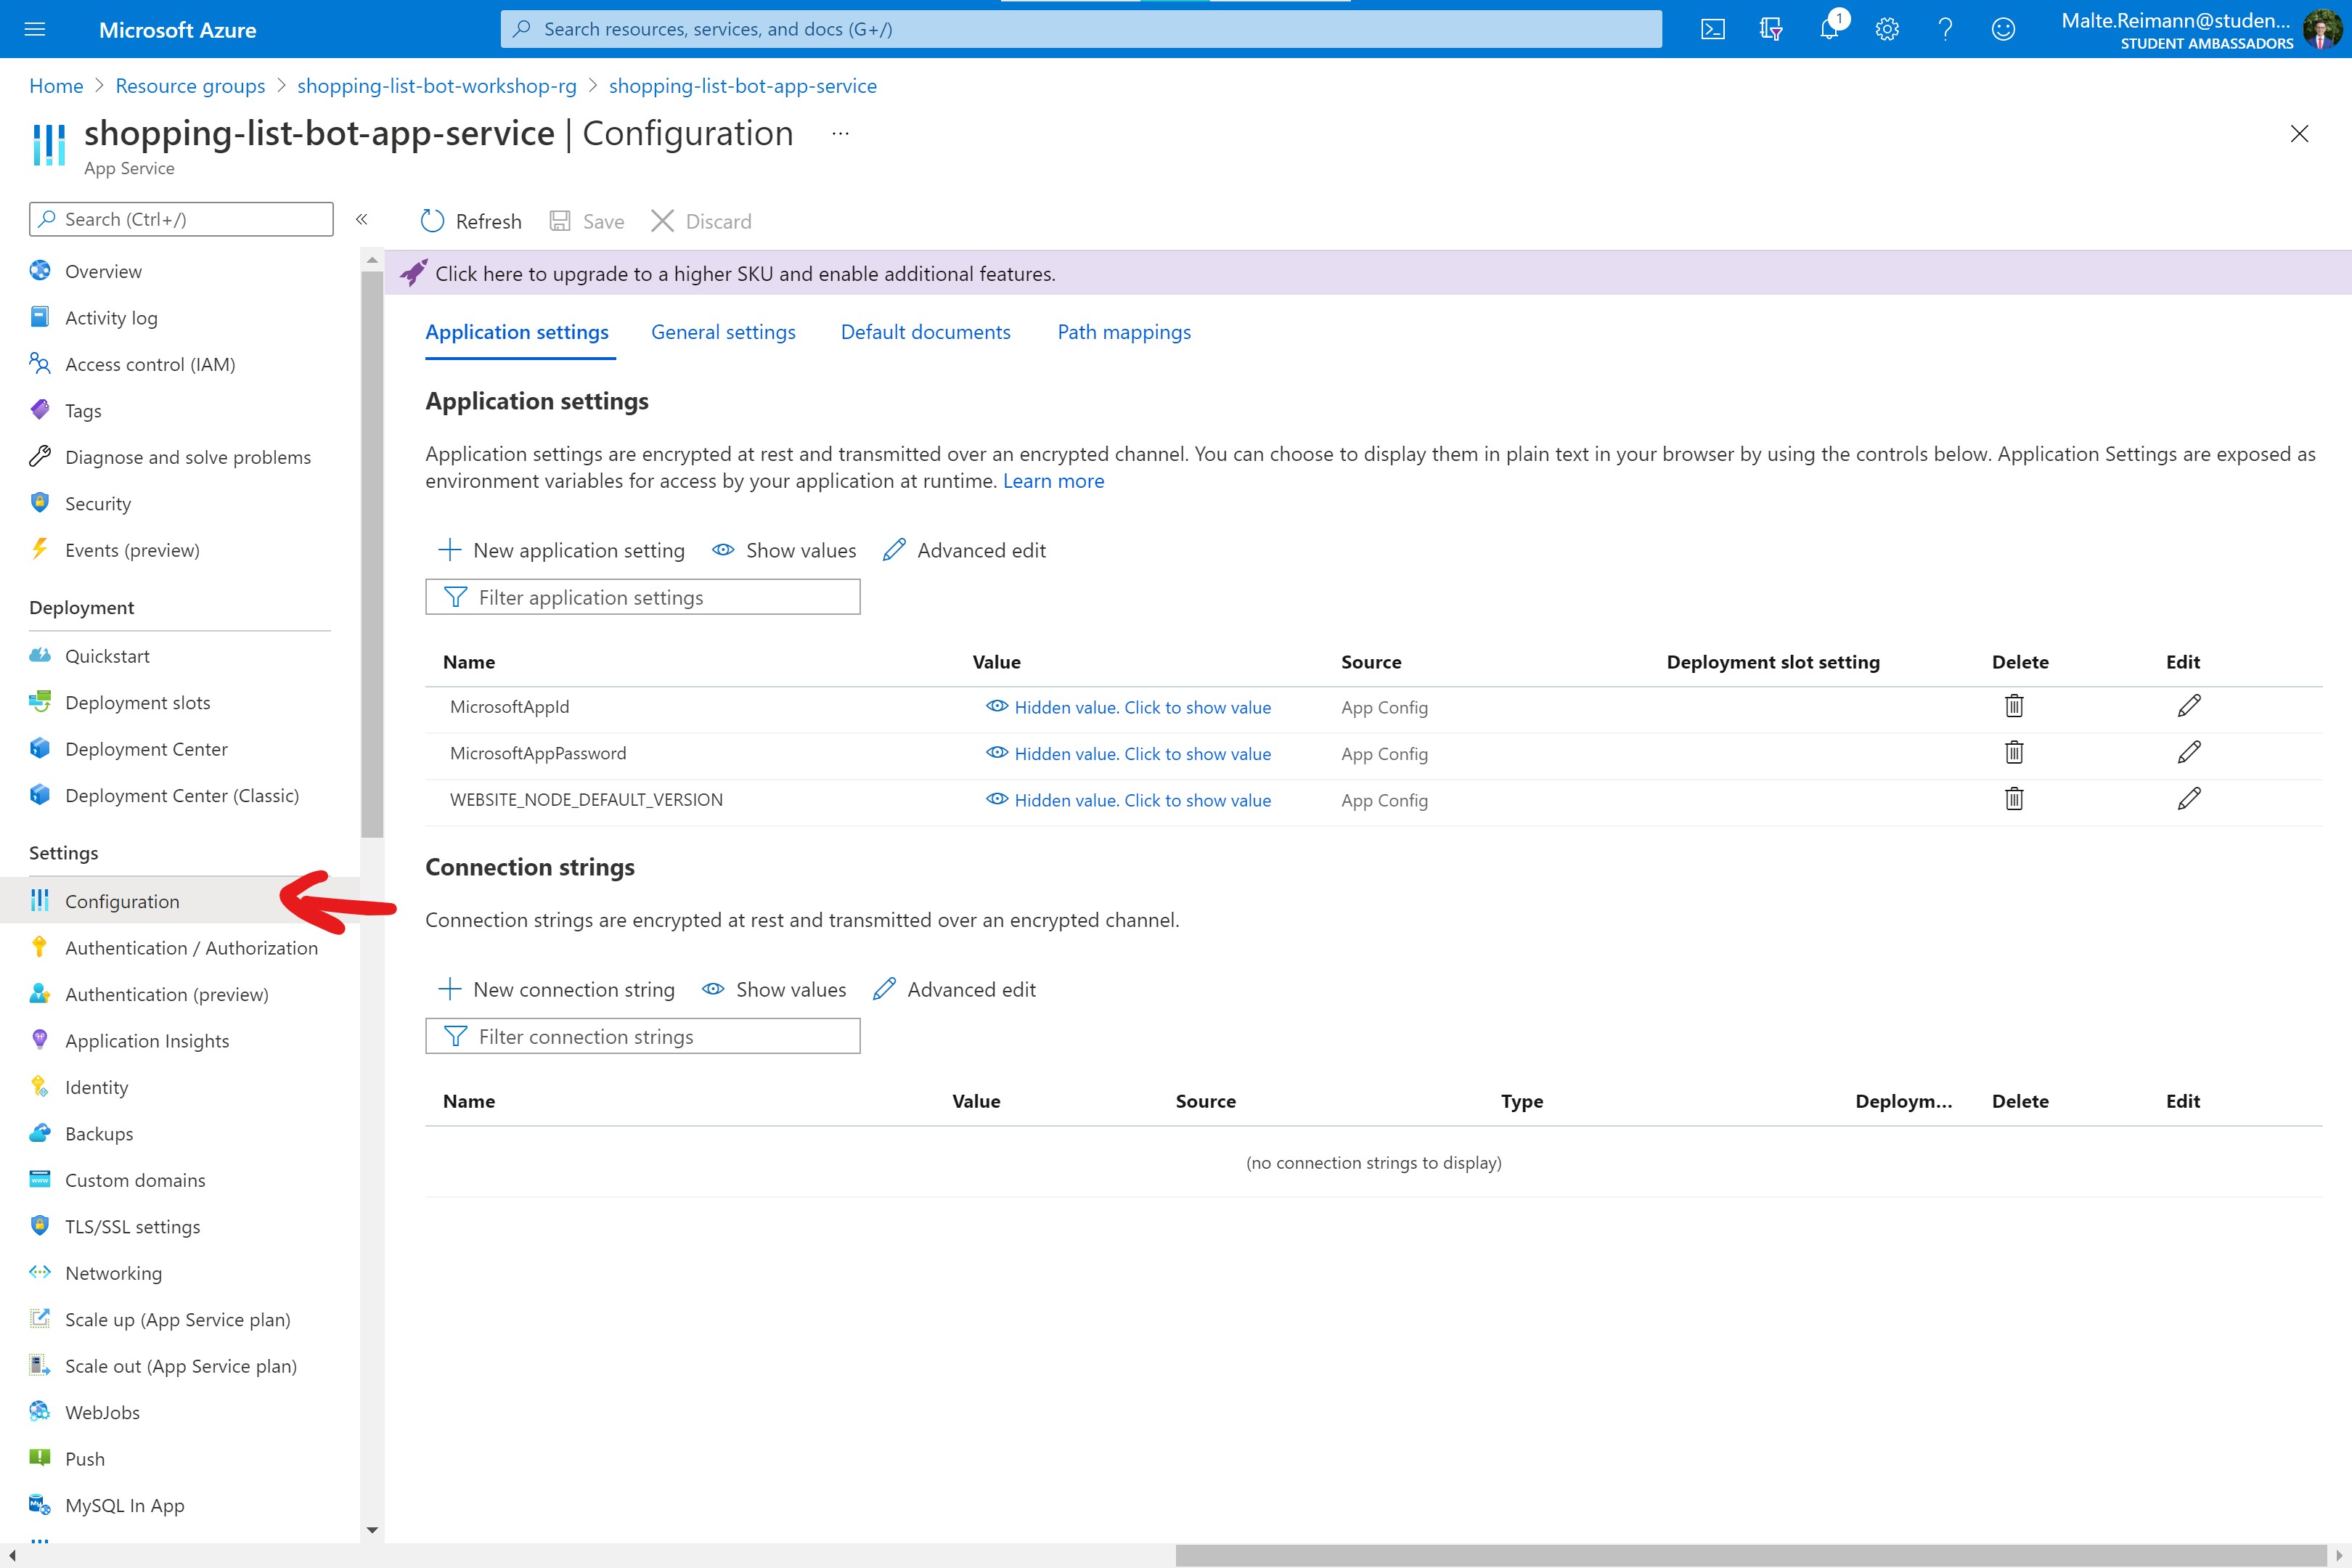
- Create a new application setting with Azure Function URL
- Click on '+ New application setting' below the 'Application settings' section.
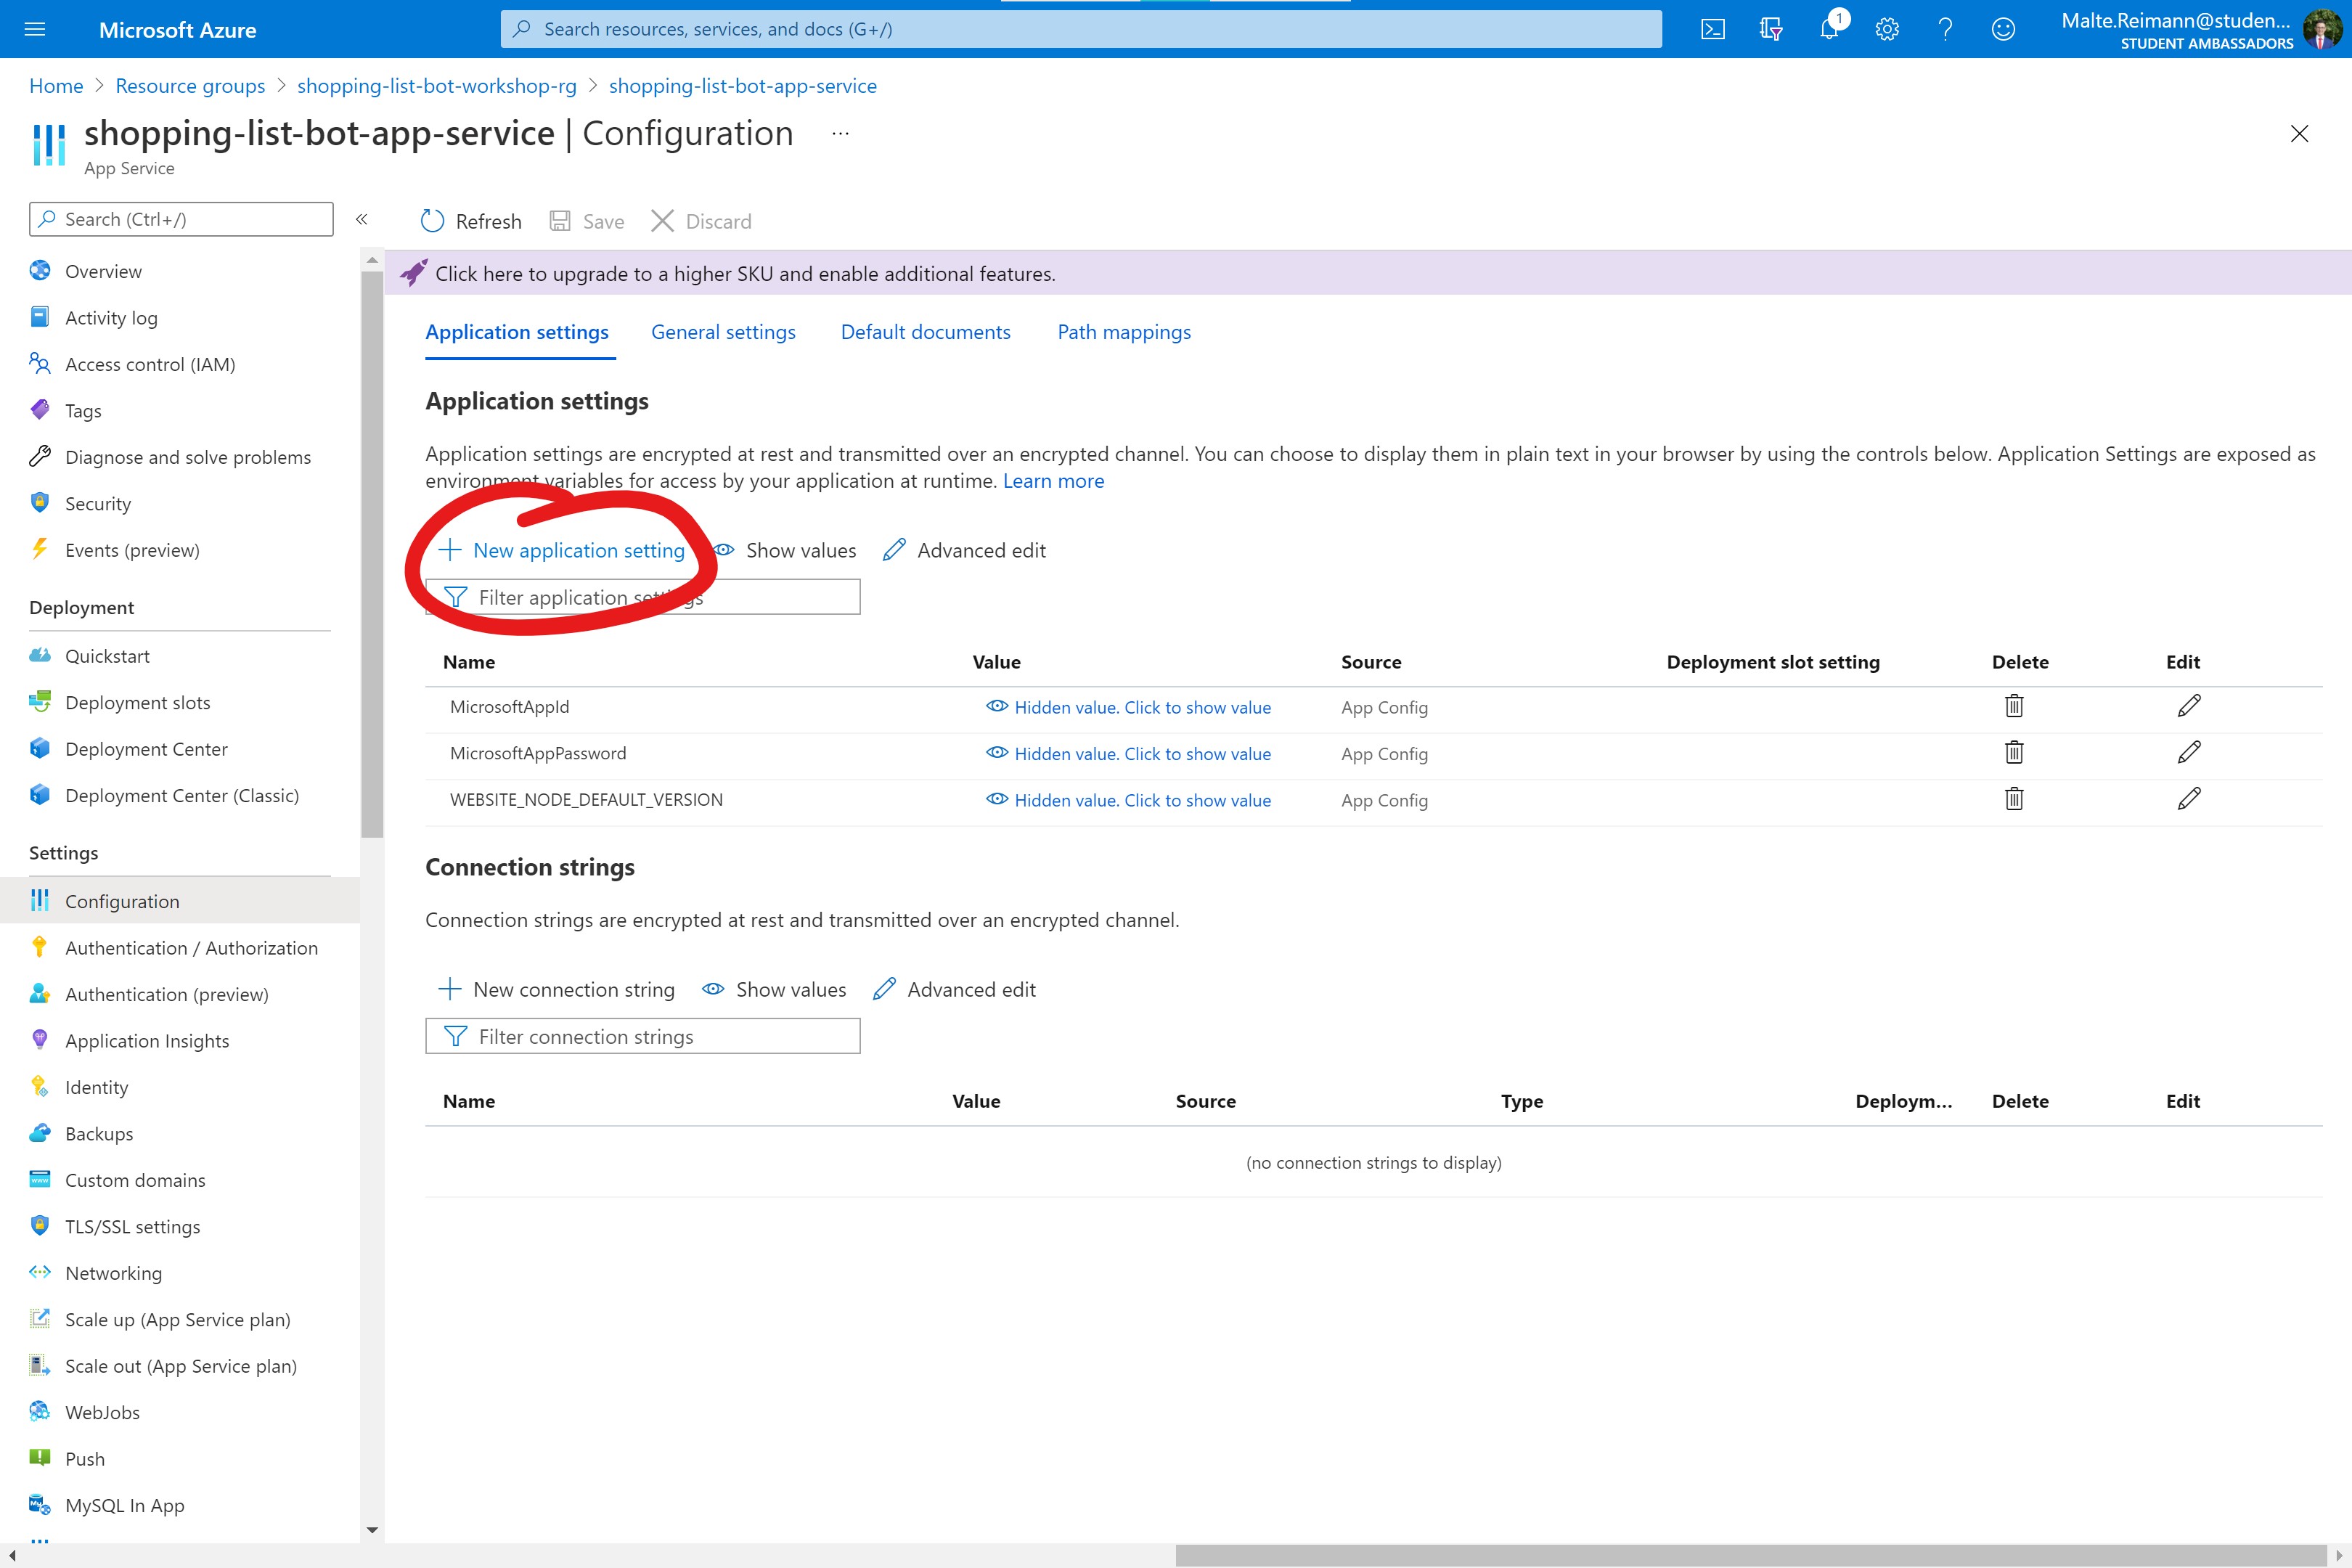
- In the 'Name' text box type in
FunctionsBaseURLwhich is the name of the environment variable the bot expects the URL of the Function (const functionService = new FunctionService(process.env.FunctionsBaseURL);). In the 'Value' text box, paste the URL for your Azure Functions and append/apito it so that the value is something likehttps://workshop-shopping-list.azurewebsites.net/api. Remember, an explanation on where to find the URL of your Function is above. Click the 'OK' button to add the application setting.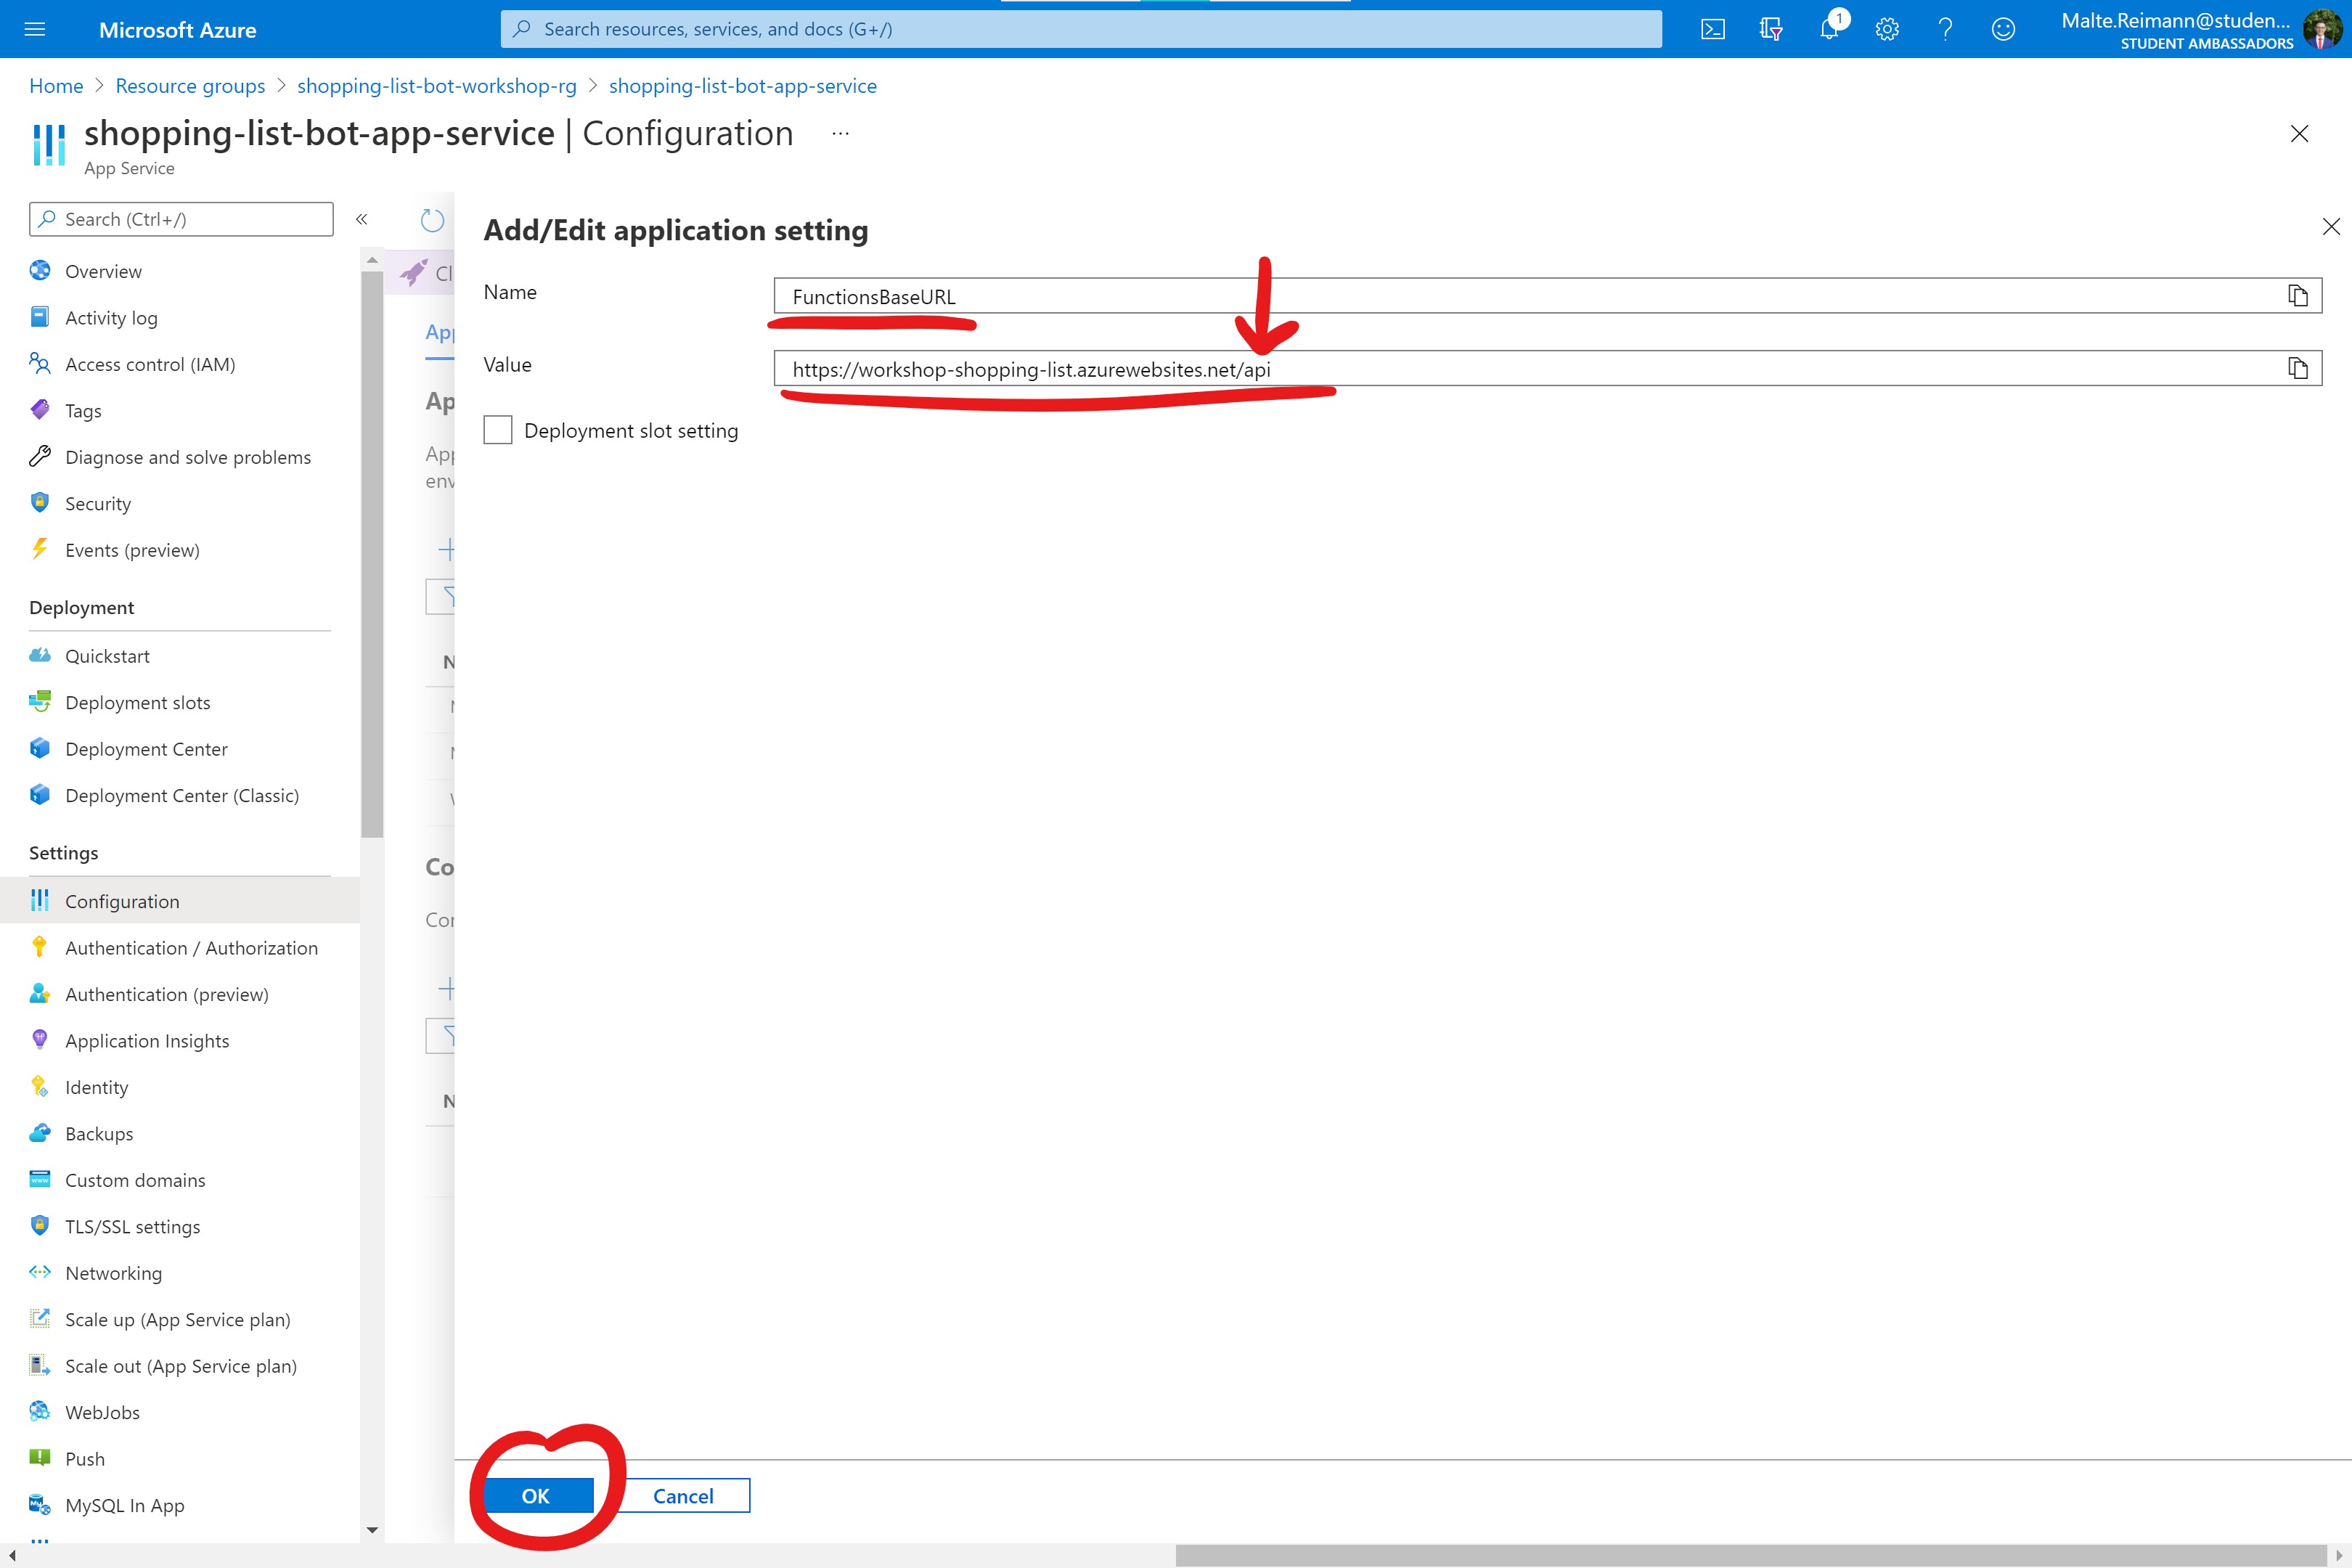
- Click on '+ New application setting' below the 'Application settings' section.
- Repeat the above steps. This time enter
LuisAppIdinto the 'Name' text box and the 'App Id' for your LUIS application which you can get from the 'Settings' page in Luis.ai as described in the Get information for a bot to connect to LUIS paragraph. - Repeat creating a new application setting with the name
LuisAPIHostName. The LUIS hostname depends on the region your Azure LUIS resource is in. Therefore you need to know the 'Location' for LUIS from the 'Azure Resources' section on Luis.ai described in the Get information for the bot to connect to LUIS paragraph. In the 'Value' text box, type in<YOUR_LOCATION>.api.cognitive.microsoft.comwhere you replace<YOUR_LOCATION>with the Location of your Azure LUIS Resource, for example, 'eastus'. - The last application setting you need to create is a key the bot needs to access your LUIS endpoint. Write
LuisAPIKeyinto the 'Name' text box when creating a new application setting. For the 'Value', you will need to copy the 'Primary Key' from the 'Azure Resources' section on Luis.ai as described in the Get information for the bot to connect to LUIS paragraph.
- Create a new application setting with Azure Function URL
Once you have all four application settings created, you should click the 'Save' button on the 'Configuration' page.
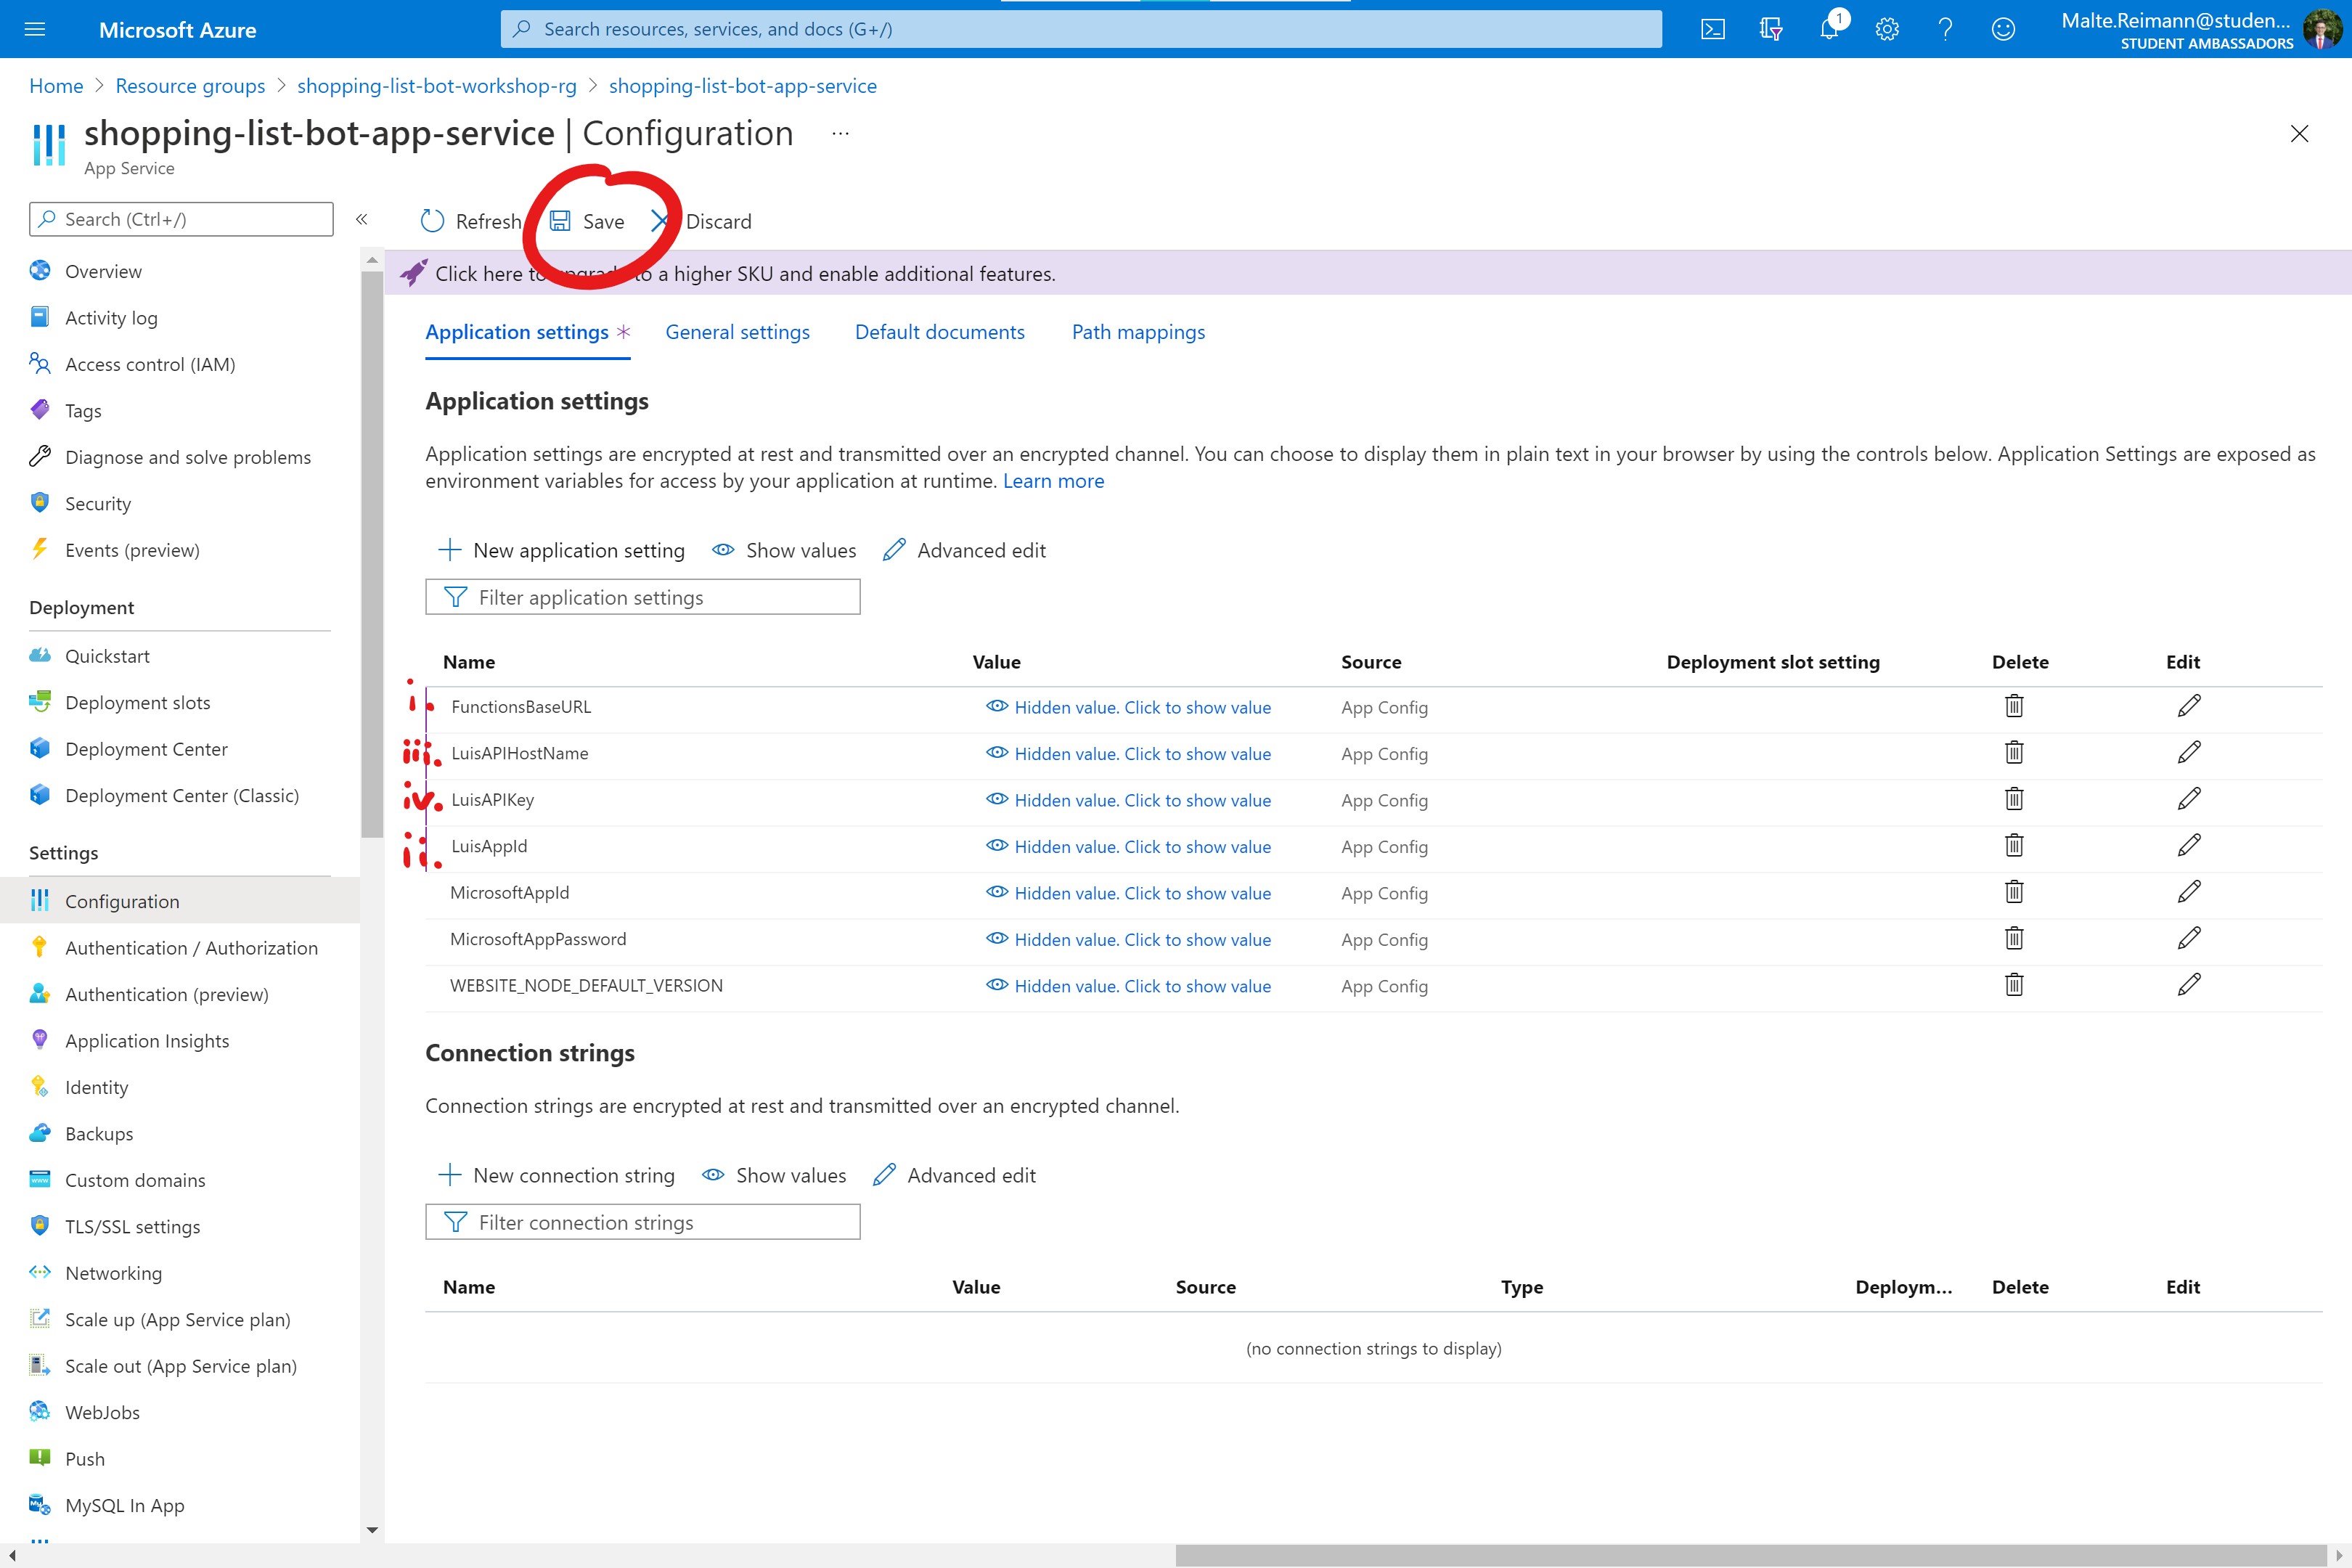
This will restart the Web App of your bot. Your bot is now able to access all the endpoints it needs.