Bot Channels Add Teams - microsoft-campus-community/workshop-shopping-list-bot GitHub Wiki
Prerequisite: This page assumes that you have the bot up and running in Azure. If you do not have the bot in Azure, you should consider deploying it through the continuous delivery pipeline for the bot.
You will learn how you can write with your shopping list bot on Microsoft Teams on this page.
- Log in to your Azure Portal.
- In the resource group you are using for this workshop, you should open the
Bot Channels Registrationresource. - Your bot itself runs as a regular web app in an Azure App Service. All the bot-specific configurations that a regular web app does not have can be found in the
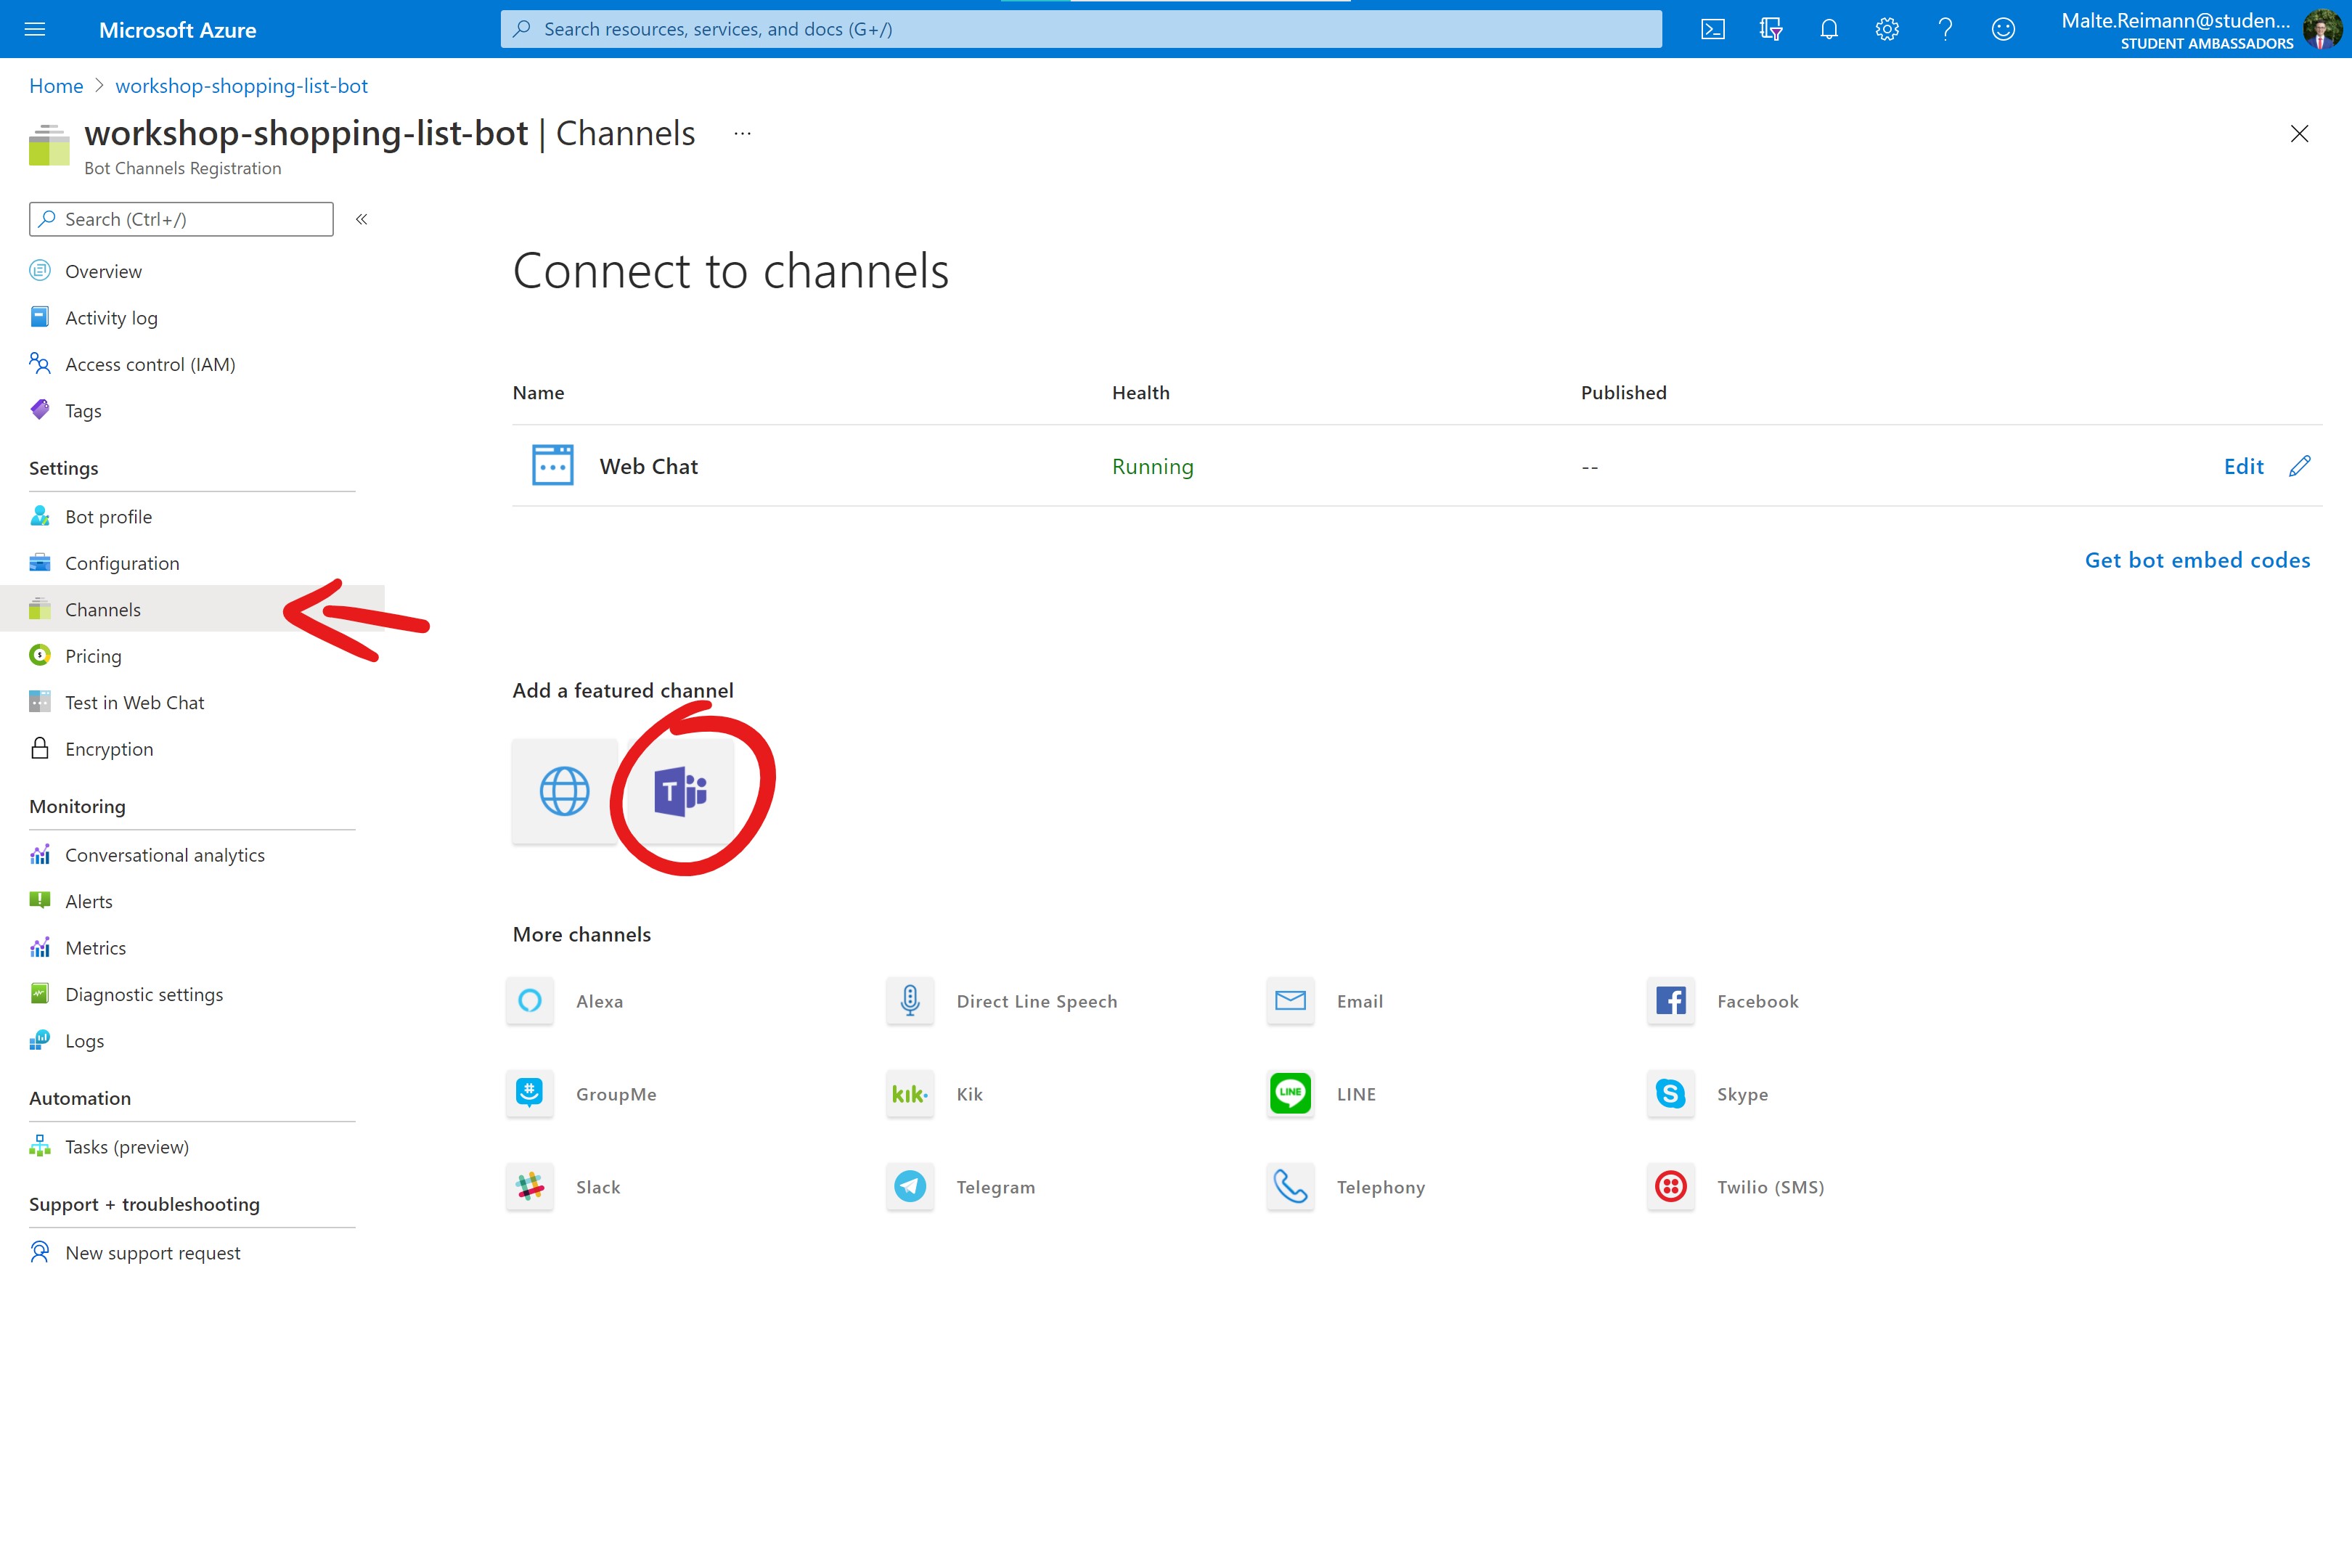
Bot Channels Registrationresource. - In the left navigation list, open the
Channelspage. Here you can manage all the channels the Microsoft Bot Framework works with. By default, only the 'Web Chat' is enabled. Let's change that by clicking on theMicrosoft Teamschannel icon.
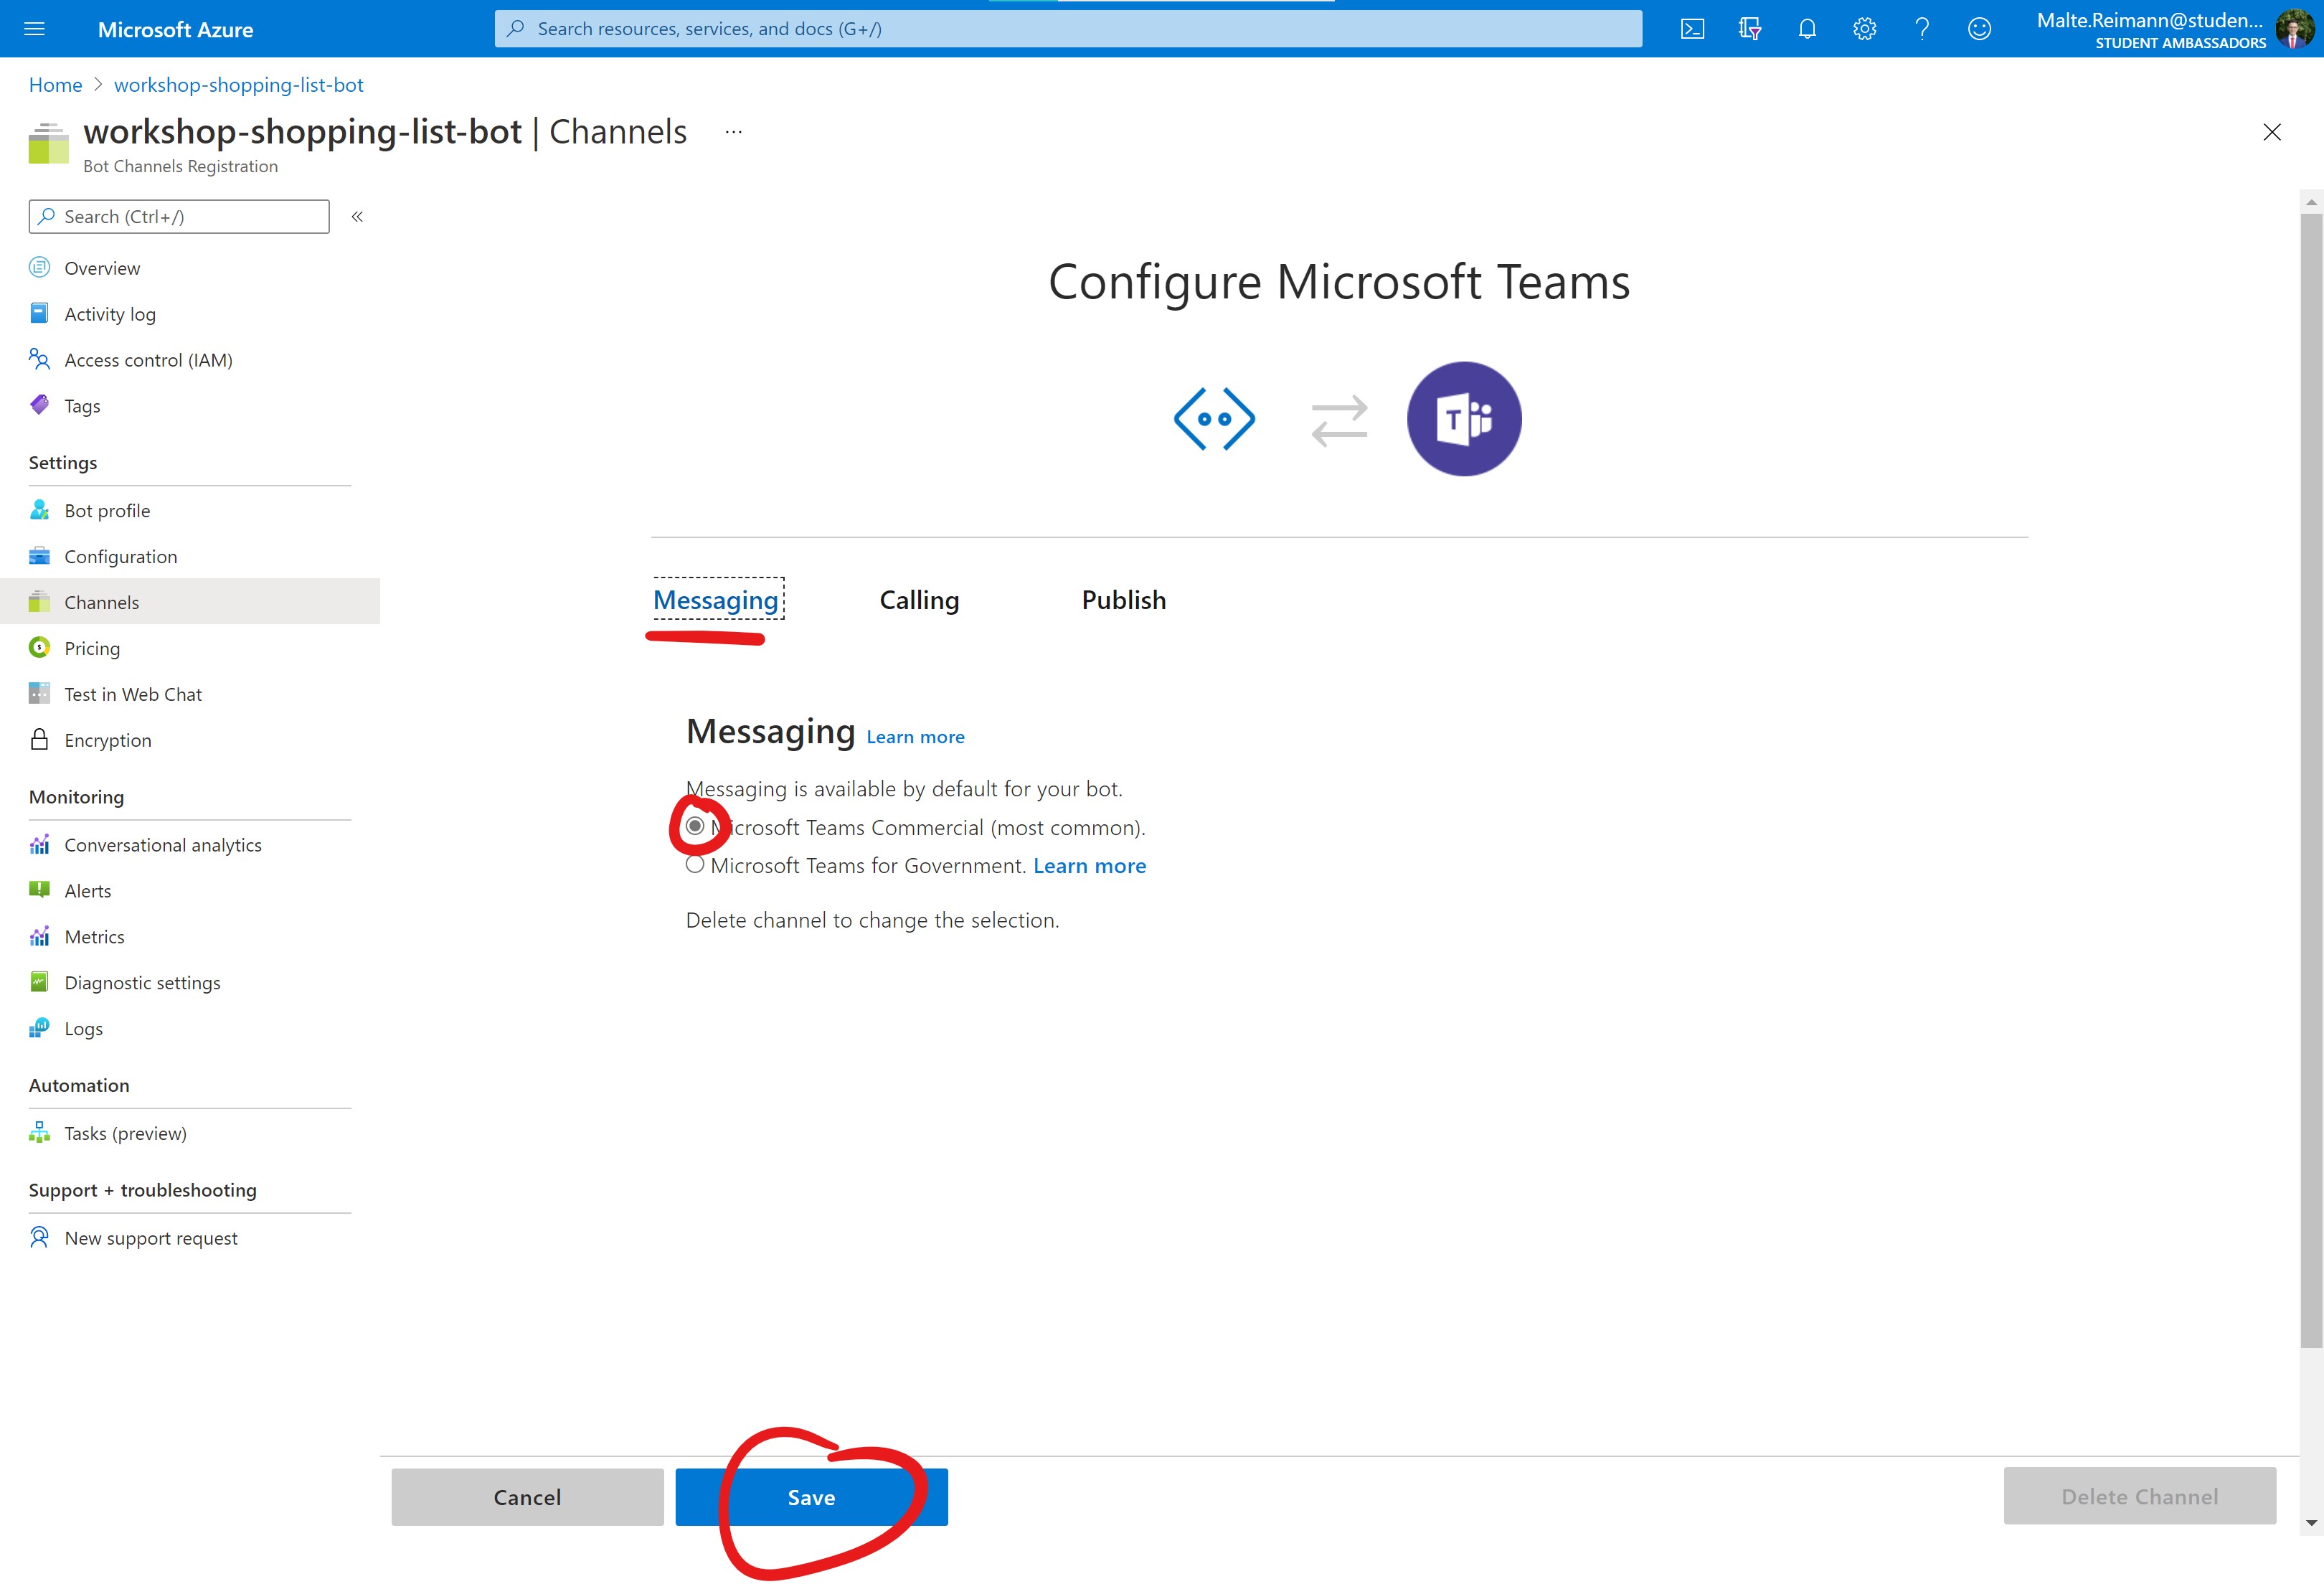
- On the 'Configure Microsoft Teams' page, you have three tabs.
- 'Messaging' allows you to connect your bot to Teams for simple messaging. This is the easiest way to use your bot with Teams.
- 'Calling' would allow a person to call your bot from Microsoft Teams, like a phone call. However, this would need more work on the bot itself. As of now, the shopping list bot cannot handle calls.
- 'Publish' lists your bot in the Microsoft Teams app store or your organization's store. This is an advancement of 'messaging' configuration because it allows others to discover your bot easily. However, you will need to go through the Microsoft Teams store submission process.
Messaging
On the 'Configure Microsoft Teams' page, you can configure your bot for messaging in Teams. This is a good first step because it is simple, you do not need to deal with a submission process, yet you can test your bot quickly in a real-world environment. In this paragraph, you will configure the bot for messaging in Microsoft Teams. There is not much to it.
- On the 'Messaging' tab in the 'Configure Microsoft Teams' page, you should leave the radio button where it is ('Microsoft Teams Commercial') and click 'Save'.

That's all there is to it. Ok ... you also must accept the terms of use when prompted. Now your bot is ready to chat with you in Microsoft Teams.
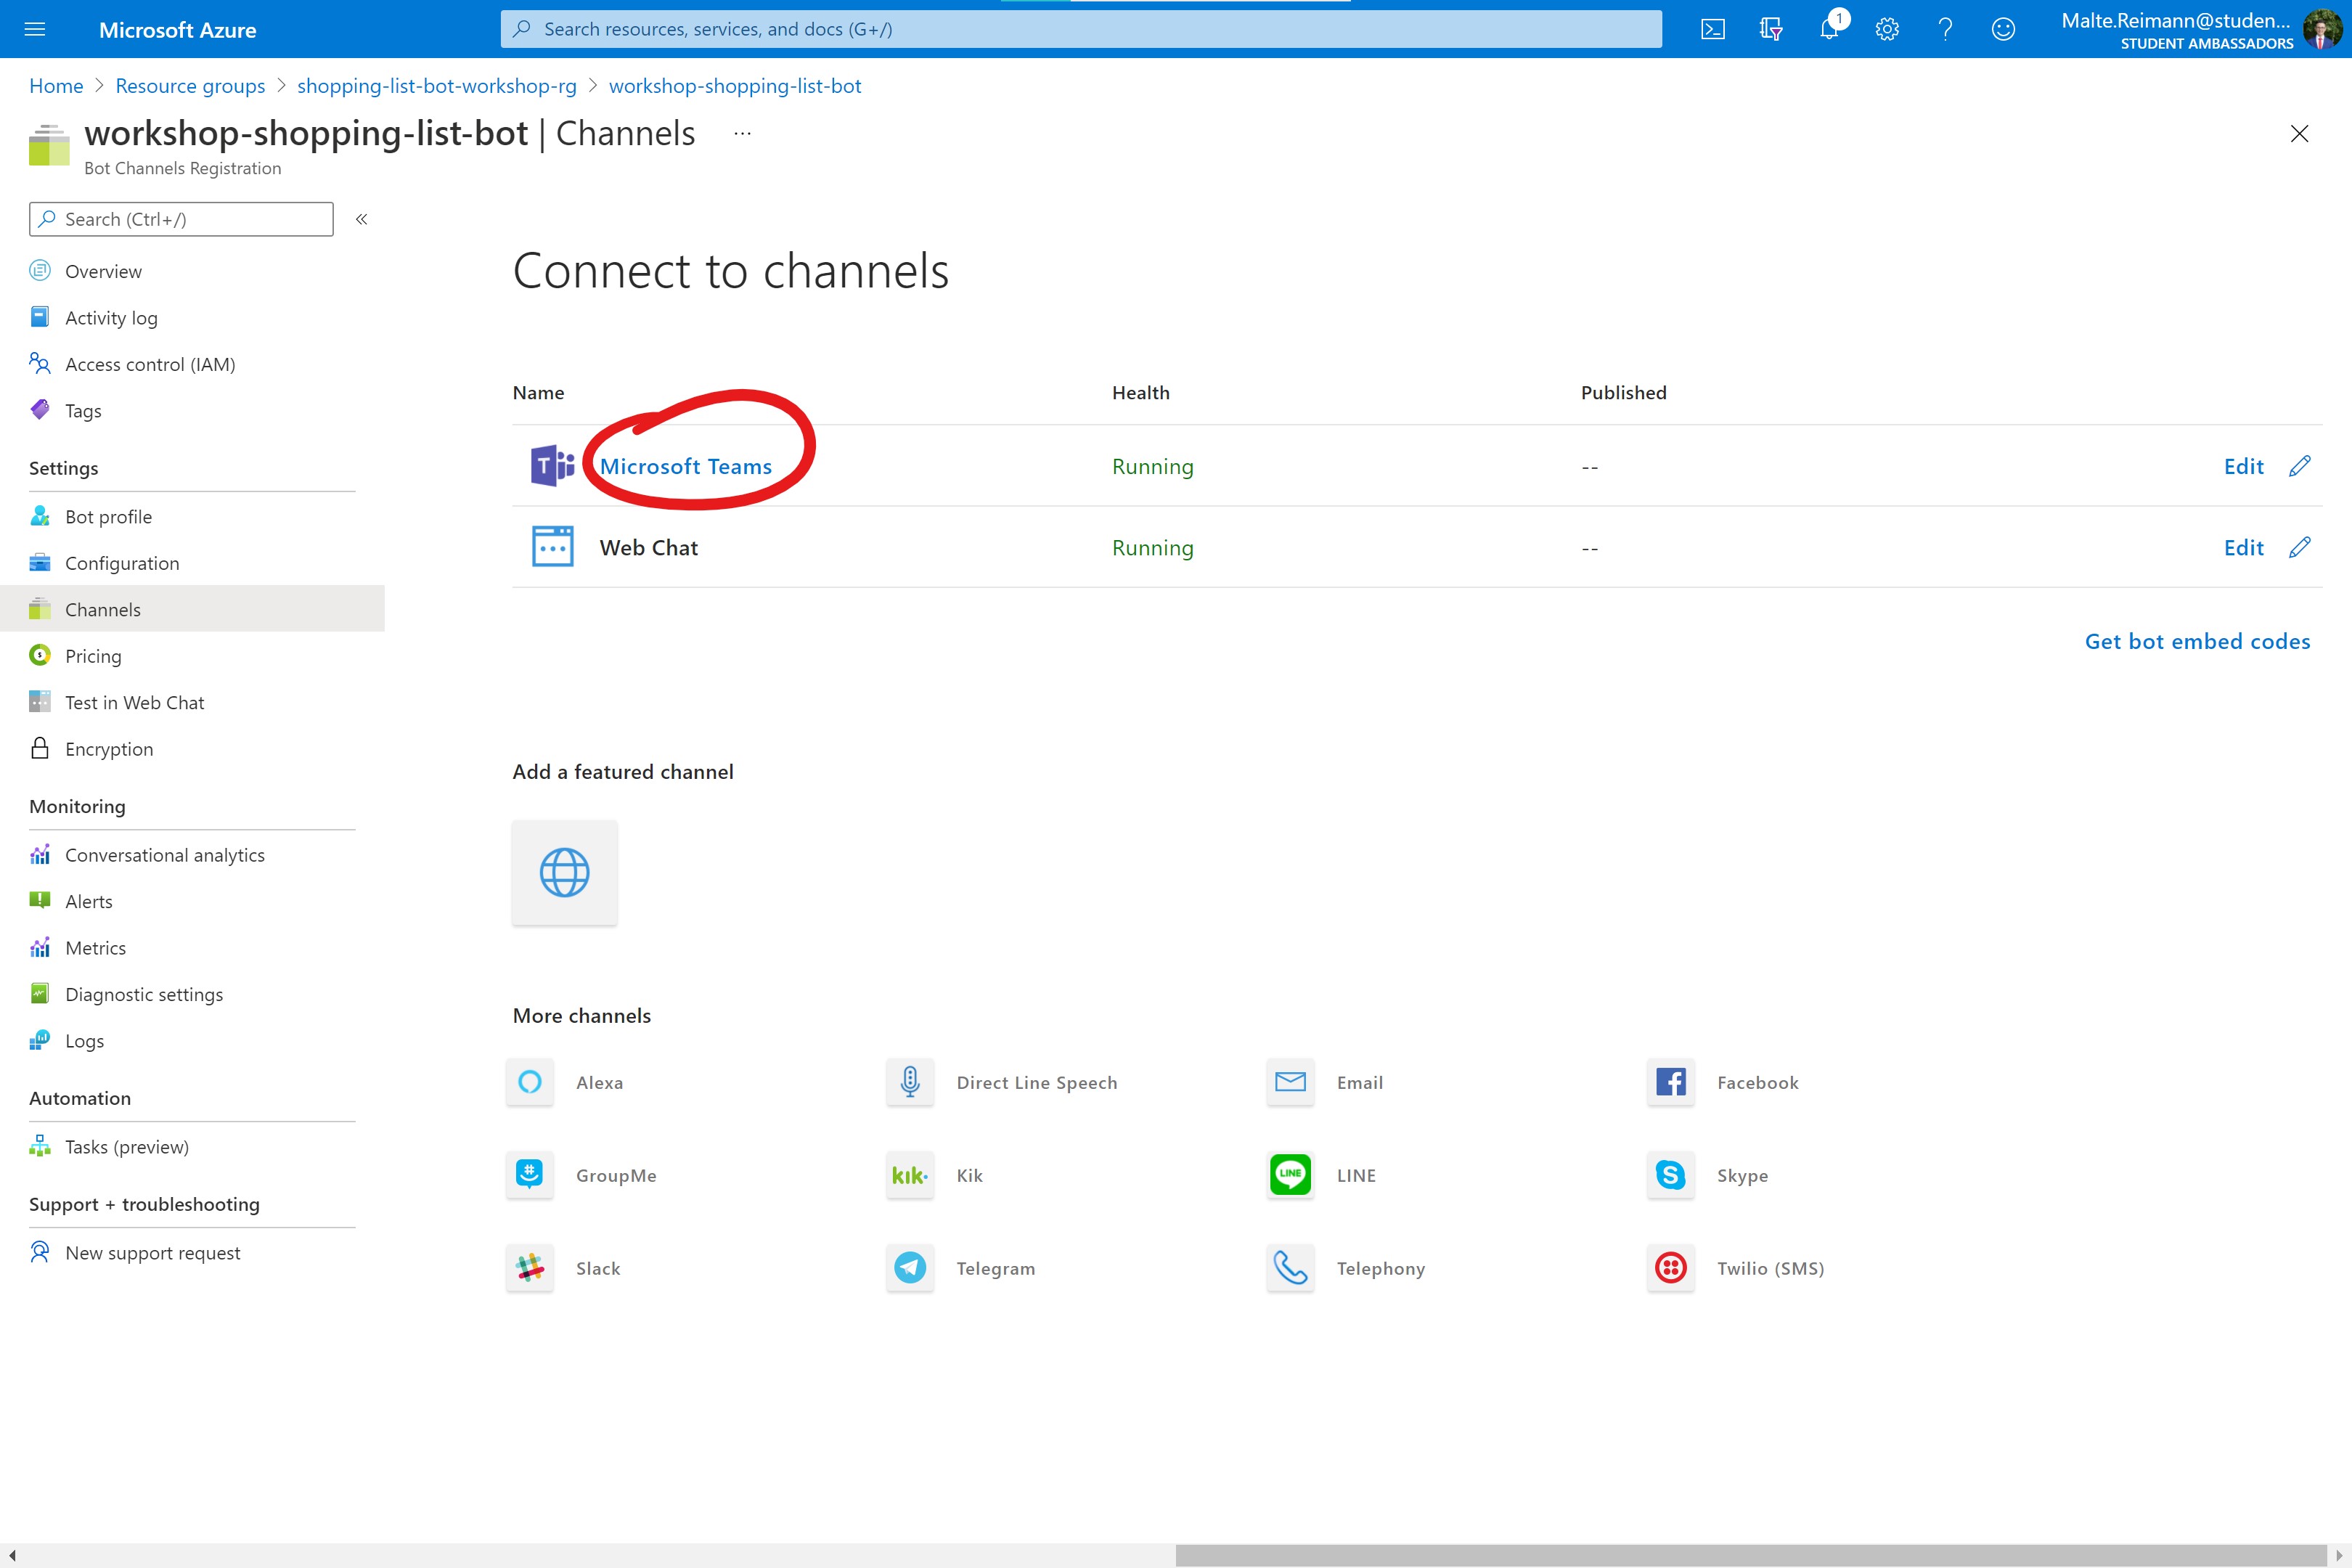
Back on the 'Channels' page, you should now see Microsoft Teams in the list of all channels your bot is connected to, like the Web Chat. The blue 'Microsoft Teams' label is a link directly to a chat with your bot. Click on it, and it will open your bot in Microsoft Teams.

You could distribute this link for others to chat with your bot. However, if you would like to have the bot easily available to the public, you should better publish it.