Setting up MaRGE and MaRCoS from scratch (Windows) - josalggui/MaRGE GitHub Wiki
- Requirements
- Software requirements
- Hardware and Network requirements
- Set up MaRGE
- Install MaRGE from PyPI
- Install MaRGE from source
- Minimal Hardware Configuration
- Guided set up of MaRCoS Server, MaRCoS Client, and Tyger (Only for Ubuntu)
- Set up MarCoS Server
- Set up Client
- Configure a static IP address
- Set up Tyger
| Component | Requirement Level | Tested Version(s) | Notes |
|---|---|---|---|
| Operating System | Required | Windows 10, Windows 11 | Officially tested platforms |
| Python | Required | 3.12, 3.13, 3.14 | Other Python 3 versions may work but have not been tested |
| pip | Required | Included with tested Python versions | Required for installing Python packages |
| venv | Required | Included with tested Python versions | Required for creating virtual environments |
| Git for Windows | Required | Any recent version | Required for cloning repositories and installing some dependencies |
| Git Bash | Recommended | Included with Git for Windows | Recommended terminal for running the commands described in this wiki |
Install Python from the official Python website:
https://www.python.org/downloads/windows/
During installation, enable the option:
Add python.exe to PATH
Install Git for Windows from:
https://git-scm.com/download/win
Git Bash is installed together with Git for Windows and is the recommended terminal for this setup.
After installing Python and Git, open Git Bash and check that both are available:
python --version
pip --version
git --version
Create and activate a virtual environment using Git Bash:
python -m venv venv
source venv/Scripts/activate
After activation, the terminal prompt should show the active virtual environment.
| Component | Status | Notes |
|---|---|---|
| Red Pitaya board | Required | Target hardware for MaRGE |
| MicroSD card | Required | Used to flash and boot the Red Pitaya image |
| Ethernet port | Required | Available Ethernet port on the host computer |
| Ethernet connection | Required | Dedicated connection between the host computer and the Red Pitaya |
| Internet connection | Required during installation | Needed to download dependencies and complete the setup process |
MaRGE is available on PyPI, making it easy to install with pip.
This option is ideal for users who want to use the existing sequences and toolkits.
If you plan to customize or add sequences, modify the GUI, or develop new features, proceed to the next section.
-
Go to your project folder and create and activate a virtual environment:
python -m venv venv source venv/bin/activate -
Install marge-mri
pip install marge-mri==1.0.0b2
-
Launch the GUI from terminal:
marge-mri
-
Configure your MaRGE session and hardware by following this Hardware Configuration Guide.
Installing MaRGE from source is recommended for users who want full control over the codebase.
This option allows you to modify existing sequences, extend the GUI, contribute new features, or adapt MaRGE to your specific workflows.
Note that the commands indicated here for Windows run on GitBash, not in PowerShell.
-
Go to the folder where you want to create the project and clone the repo
git clone https://github.com/josalggui/MaRGE.git
-
Go into the created
MaRGEfolder. Create and activate a virtual environment. Then, add the current folder (MaRGE) to Python's module search path:cd MaRGE python -m venv venv source venv/bin/activate export PYTHONPATH=$(pwd)
-
Install requirements
pip install -r requirements.txt
-
Go into
MaRGE/margefolder and run themain.py.cd marge python main.py -
Configure your MaRGE session and hardware by following this Hardware Configuration Guide.
After running MaRGe by the first time, you have to do a minimal configuration of the session and hardware to access the main window. This implies:
- Go to
Sessiontab and create aProjectand aStudy.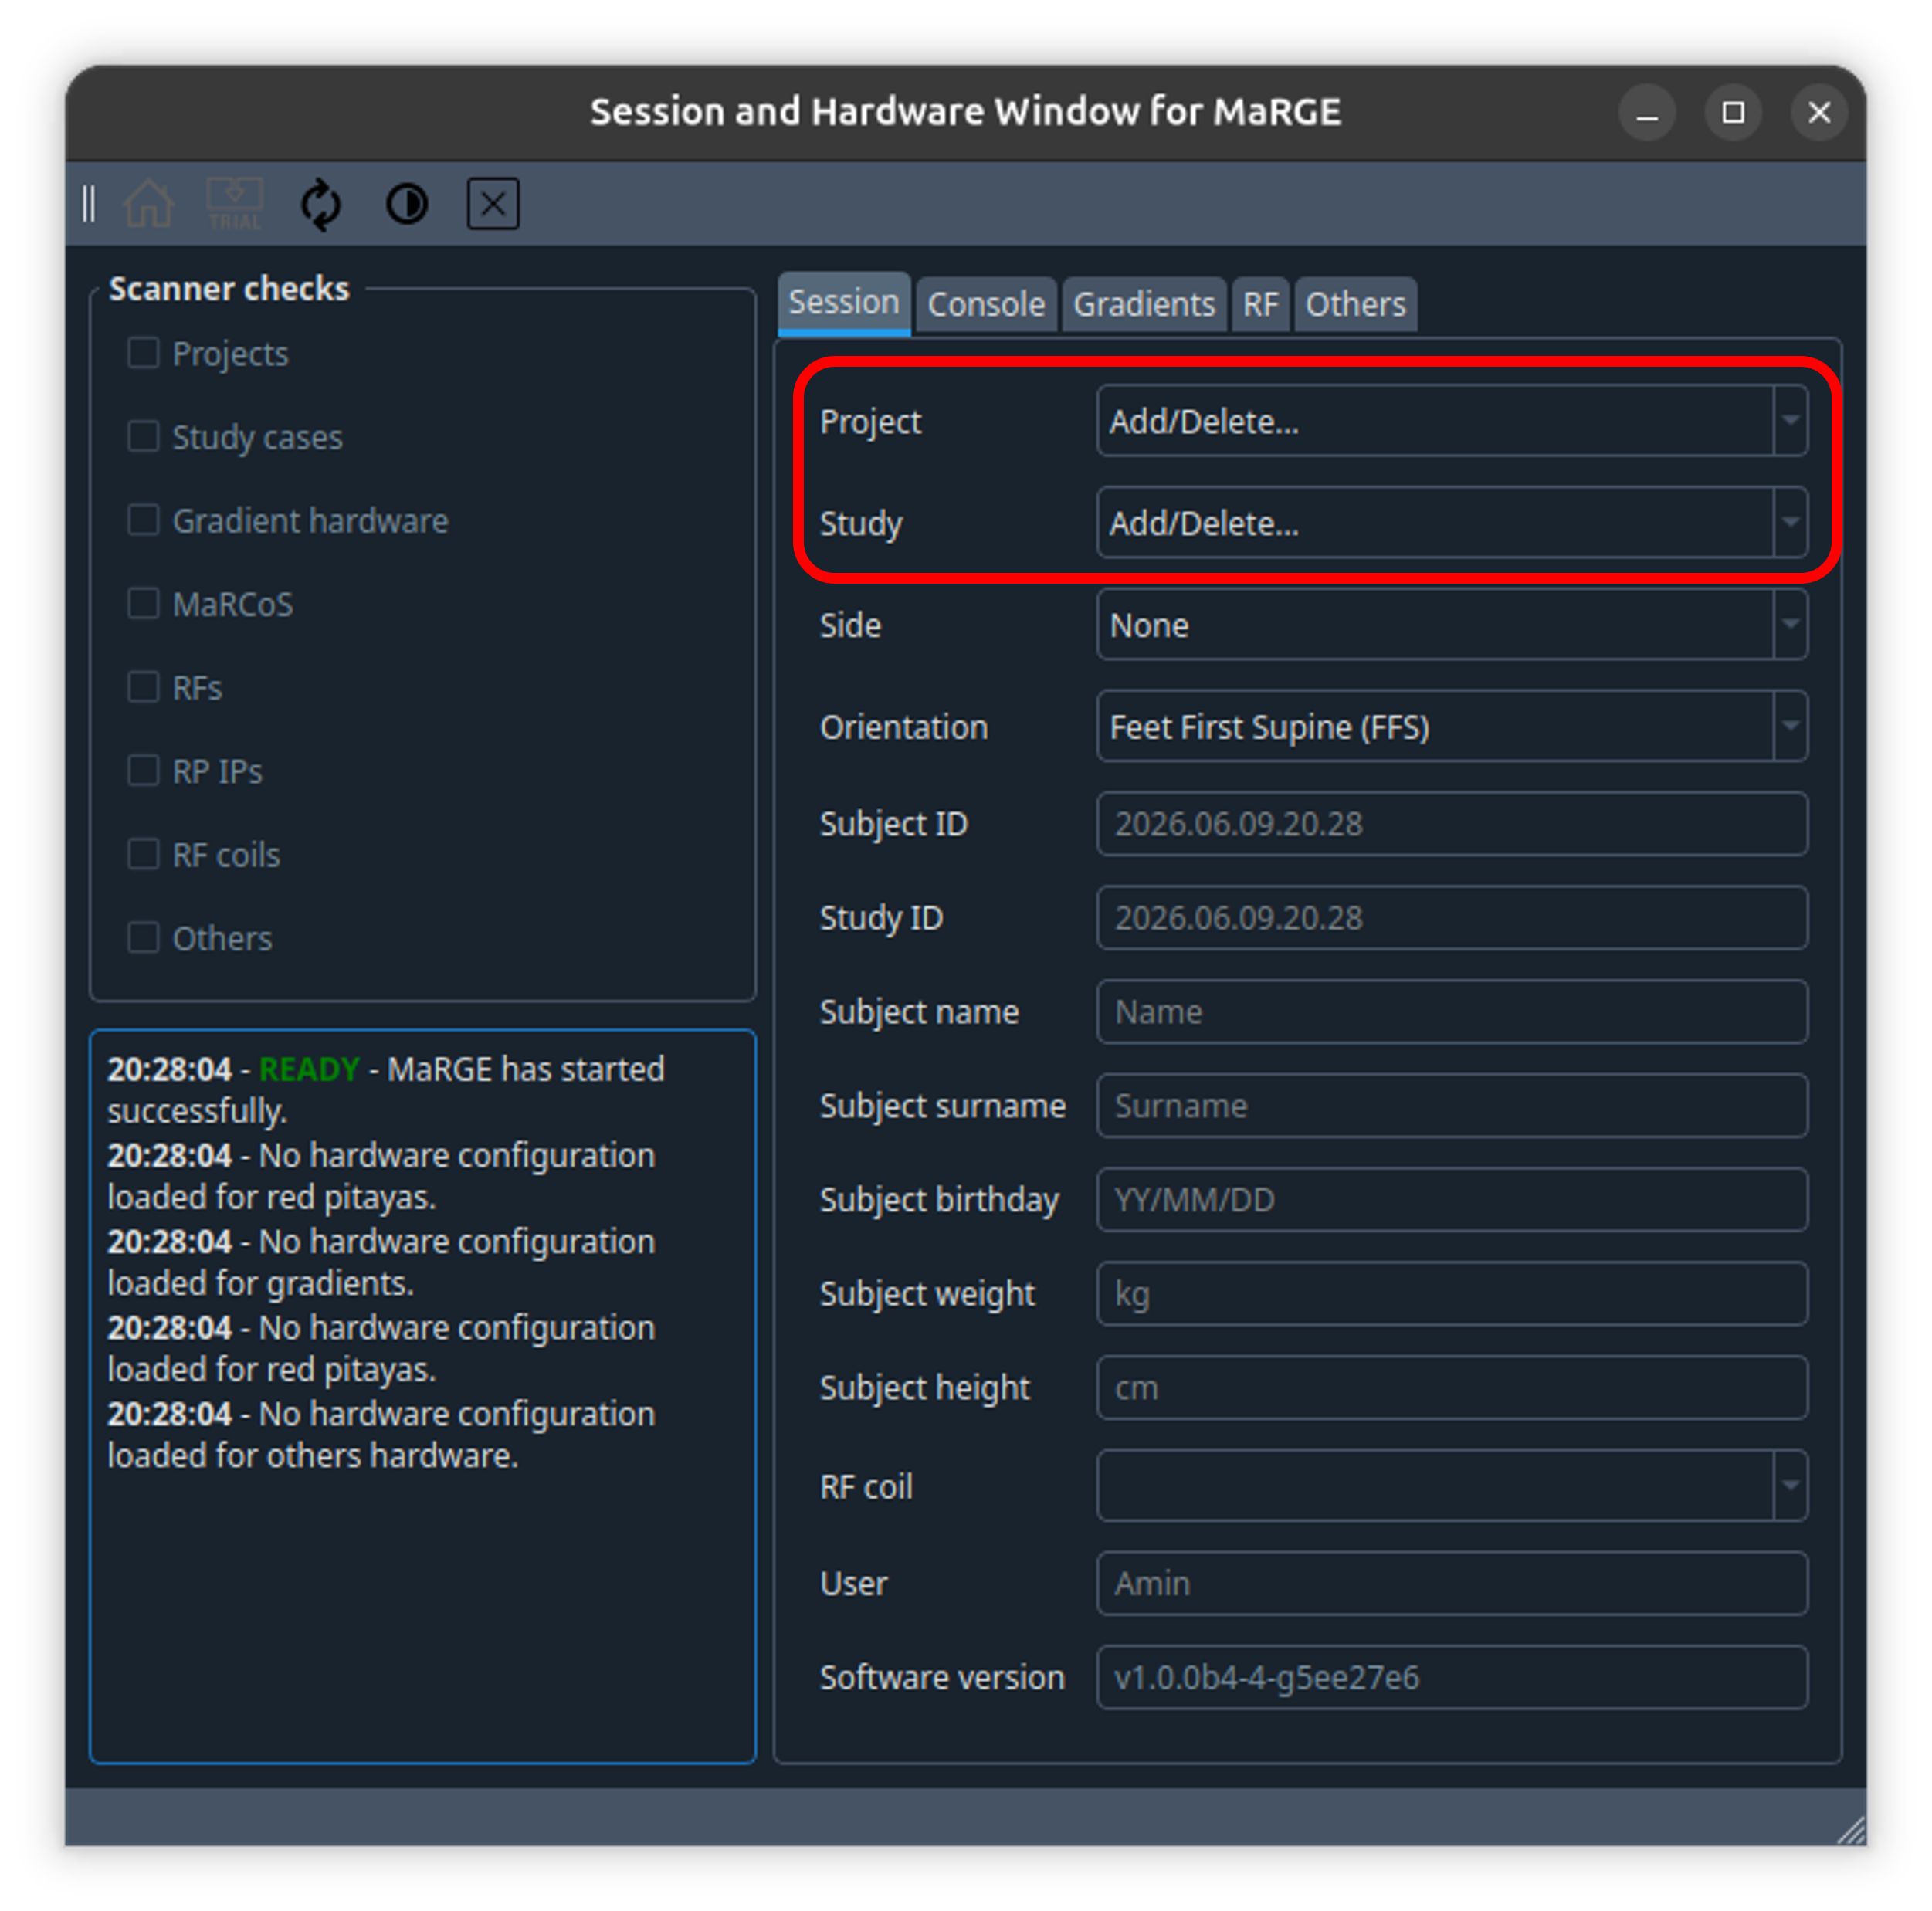
- Go to
Consoletab and add the IP address in the available text box for the Red Pitaya, then clickSave.
- Go to
Gradientstab and clickSave.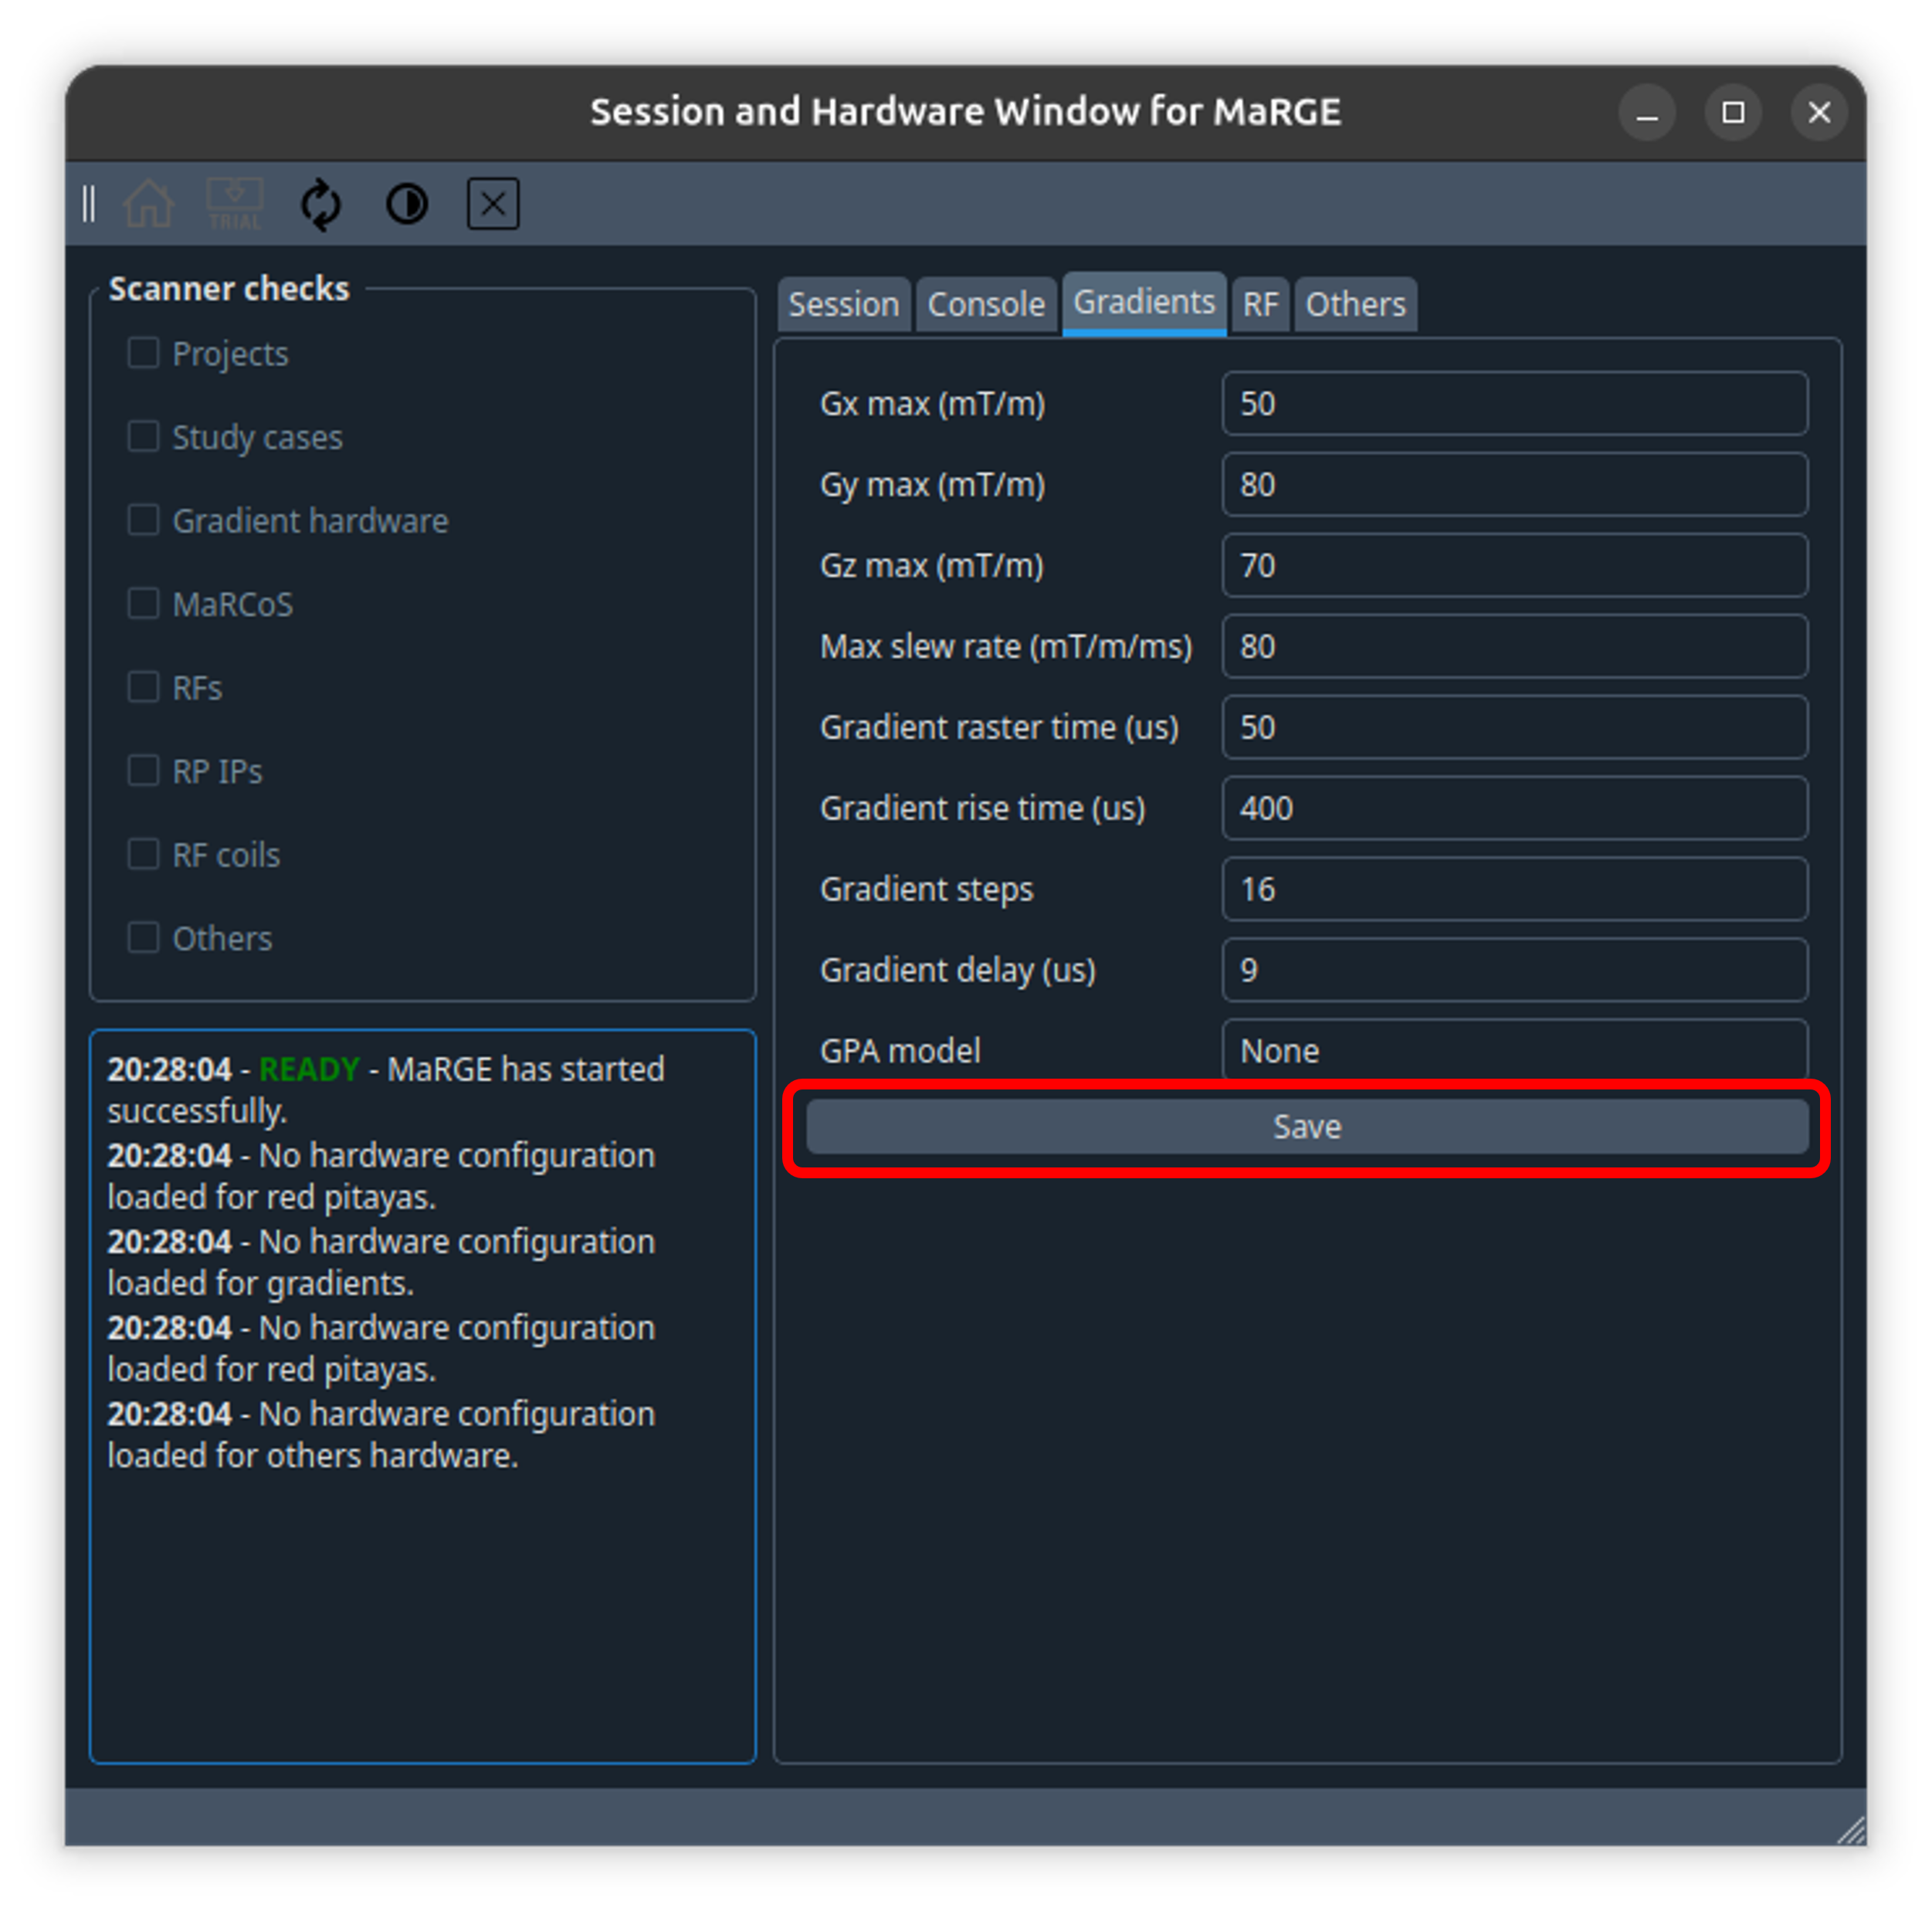
- Go to
RFtab and add a new RF coil using the text boxes available, then clickSave.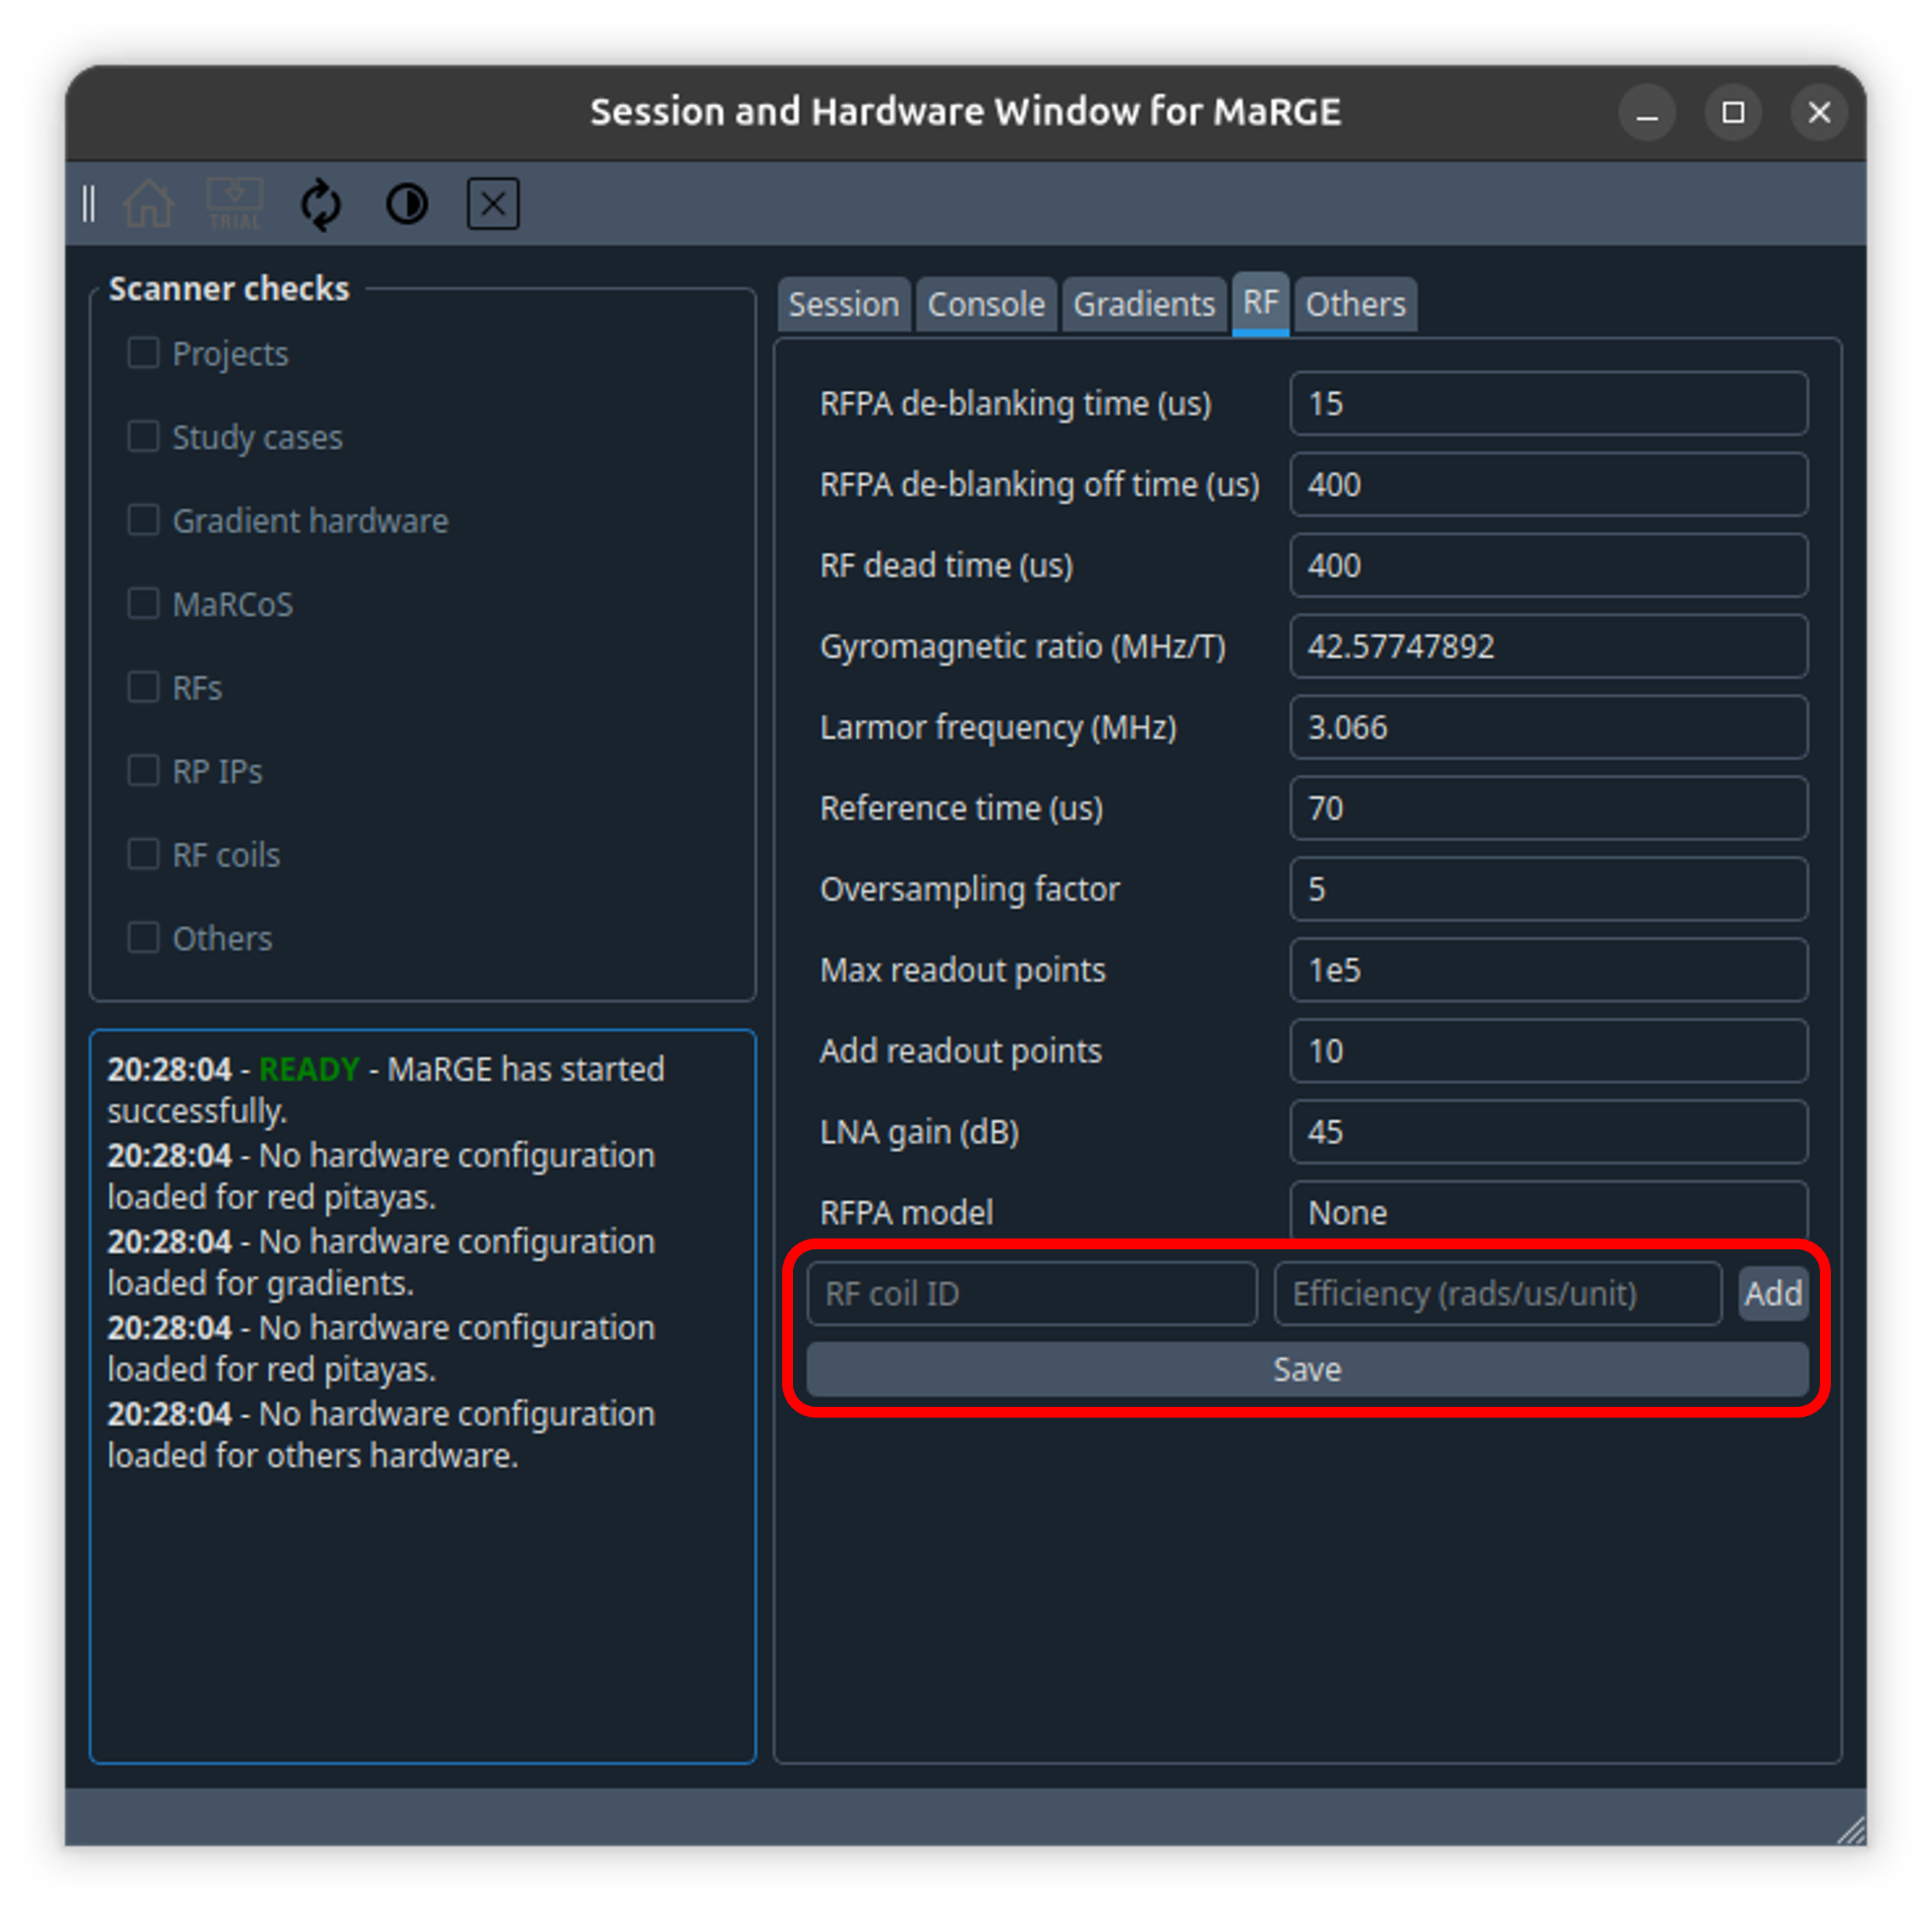
- Go to
Otherstab and write the name of your terminal on the Bash path. You can also configure your Tyger credentials if you want.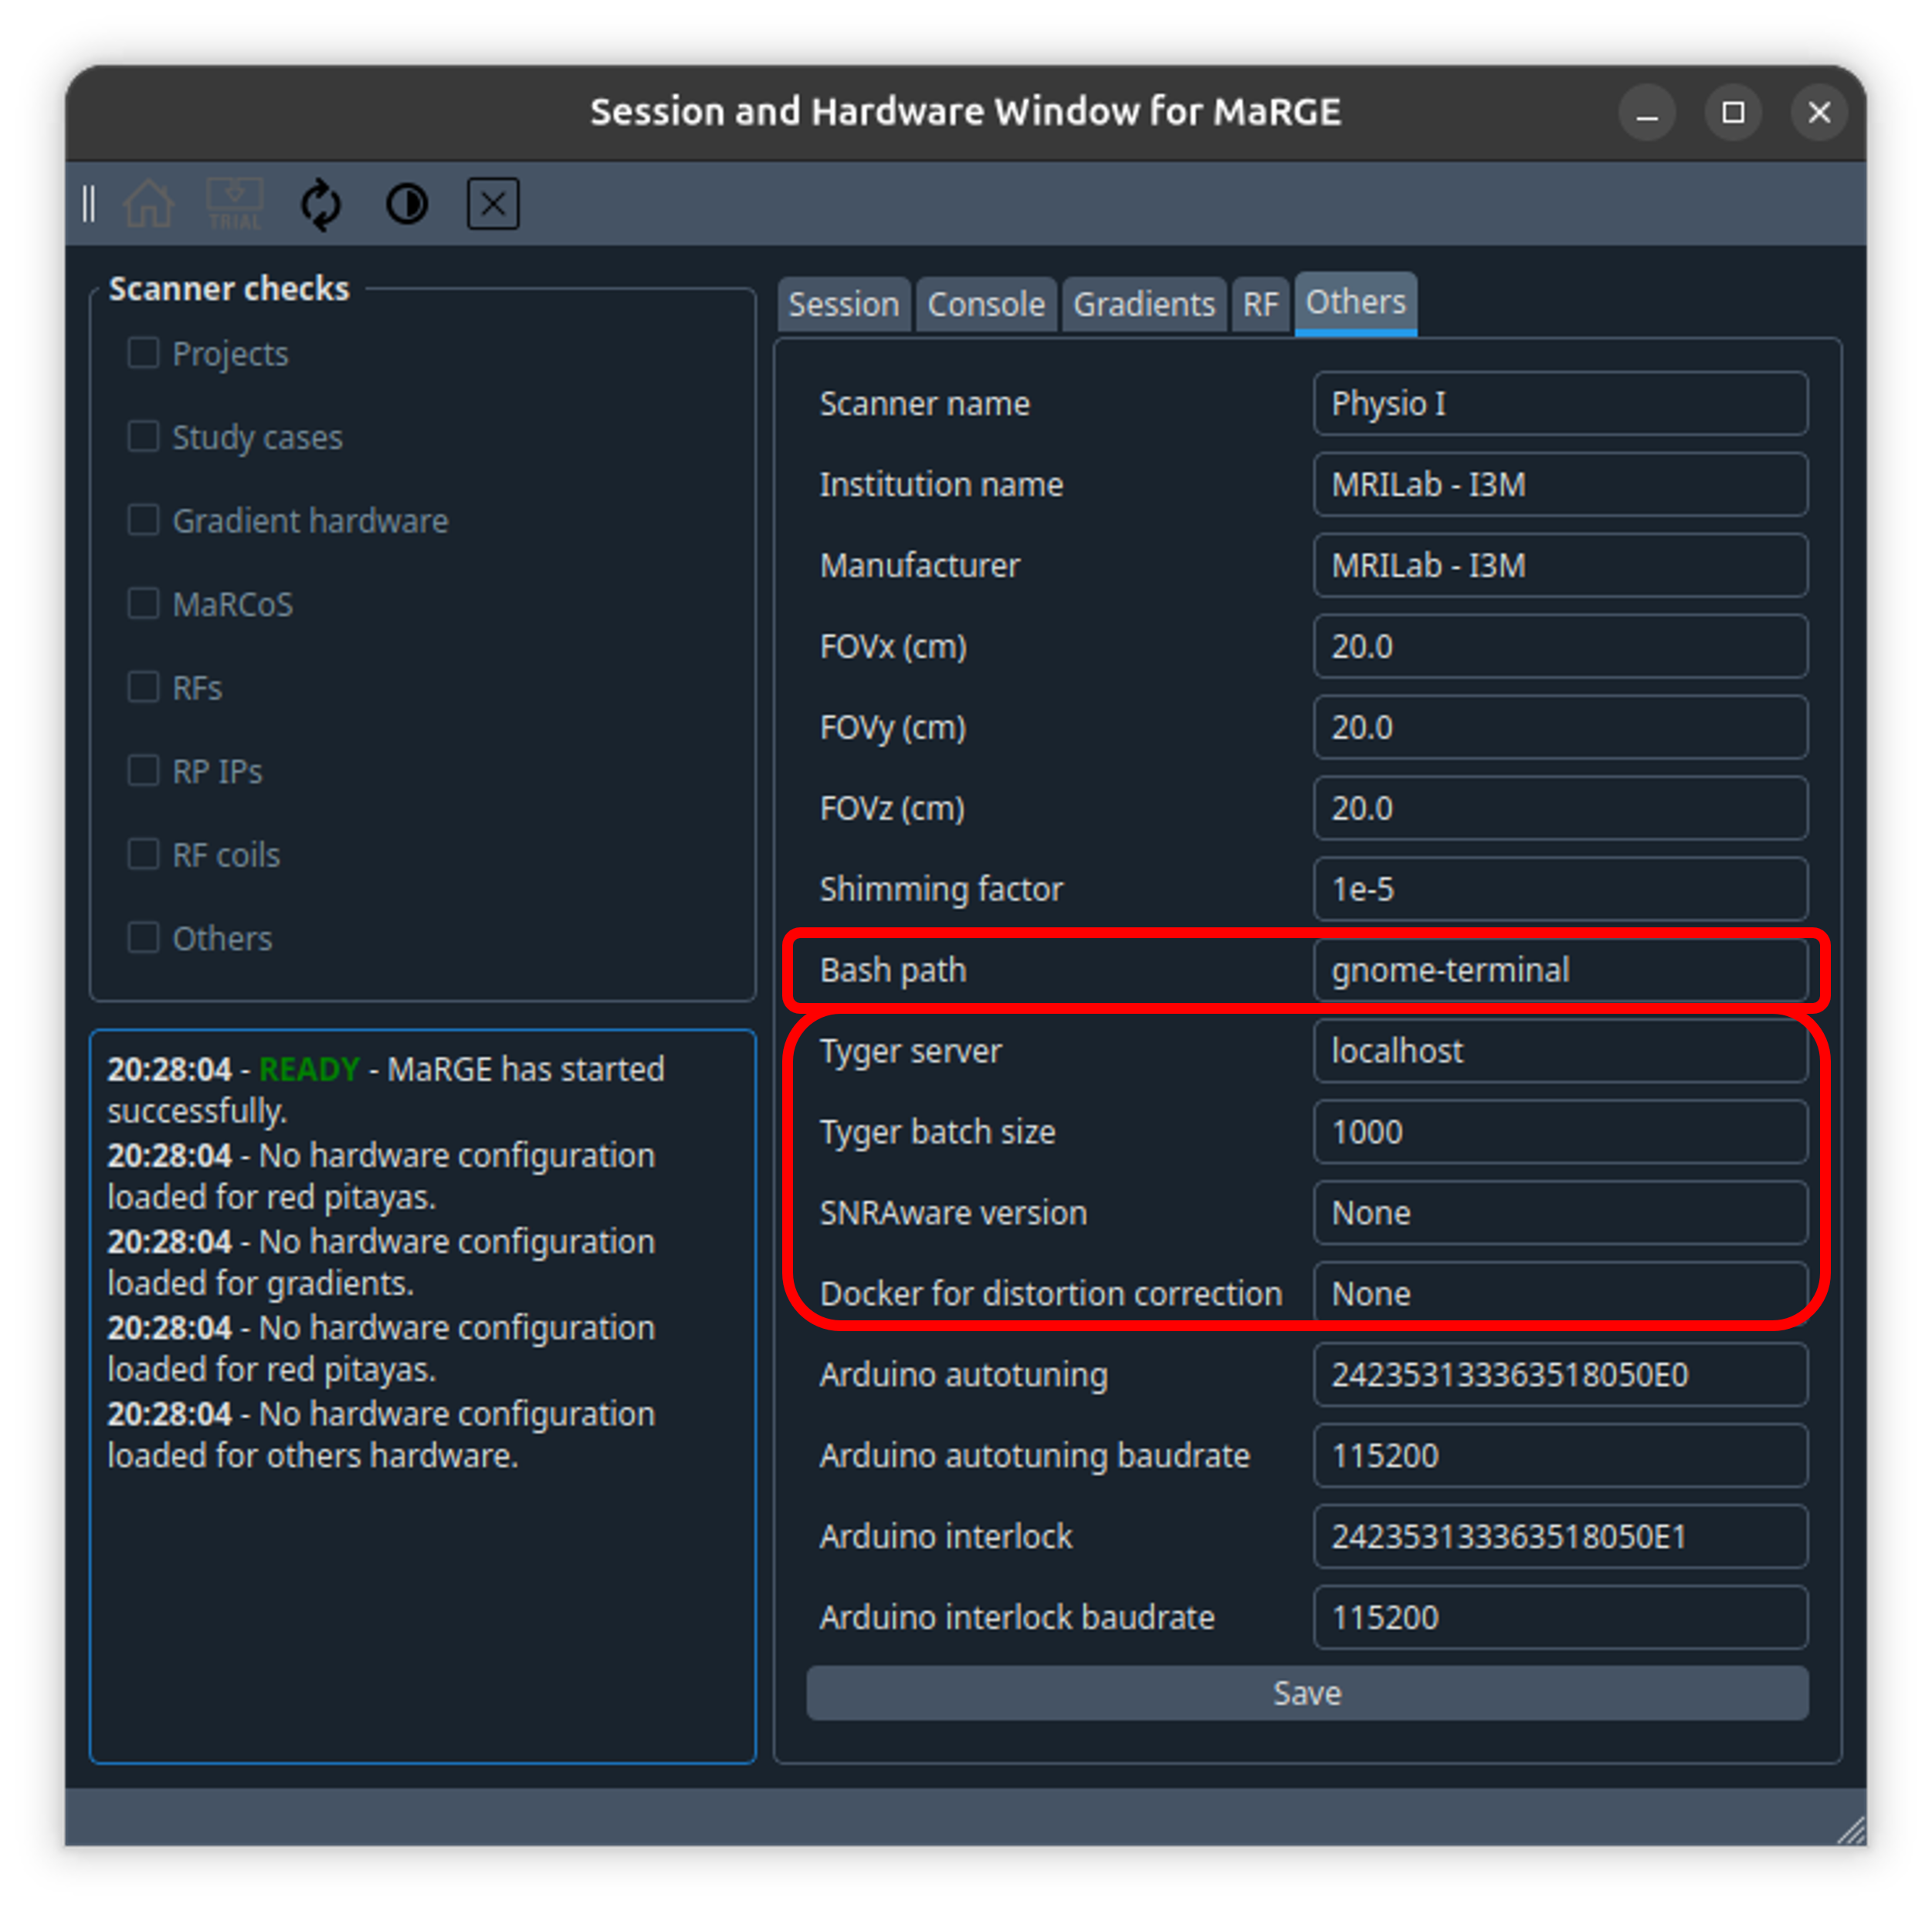
There is no guided installer for windows...
It is much better to do this in Ubuntu...
The client computer must be configured with a static IP address on the Ethernet interface connected to the Red Pitaya.
-
Open Network Connections:
- Press
Windows + Rto open the Run dialog box. - Type
ncpa.cpland press Enter to open the Network Connections window.
- Press
-
Access Ethernet Properties:
- Right-click on your Ethernet connection and select
Properties.
- Right-click on your Ethernet connection and select
-
Select IPv4 Properties:
- In the Ethernet Properties window, select
Internet Protocol Version 4 (TCP/IPv4)and click on thePropertiesbutton.
- In the Ethernet Properties window, select
-
Configure Static IP:
- In the Internet Protocol Version 4 (TCP/IPv4) Properties window, select
Use the following IP address. - Enter the following details:
-
IP address:
192.168.1.100 -
Subnet mask:
255.255.255.0
-
IP address:
- Select
Use the following DNS server addressesand leave them blank.
- In the Internet Protocol Version 4 (TCP/IPv4) Properties window, select
-
Save and Exit:
- Click
OKto save the changes and close the properties window. - Click
Closeto close the Ethernet Properties window.
- Click

This section describes the manual setup of Tyger on Windows. The procedure includes installing the Tyger CLI, configuring the executable path, installing Azure CLI, logging in to Azure, and checking the Tyger connection from Git Bash and MaRGE. This procedure has been tested on Windows using Git Bash.
-
Download the latest Windows
.zipfile from the official Tyger releases page: -
Create a folder for command-line executables. For example:
C:\Users\<user>\bin -
Extract the Tyger
.zipfile into that folder. -
Add the folder to the Windows
PATHenvironment variable:-
Open the Windows configuration.
-
Search for
Edit the system environment variables. -
Click
Environment Variables.... -
In
User variablesselectNew. -
Add the Tyger executable folder, for example:
C:\Users\<user>\bin -
Save the changes.
-
-
Open Git Bash and check that Tyger is available:
tyger --version
Azure CLI is required to authenticate the Tyger client.
-
Download the Azure CLI
.zipinstaller for Windows from the official Microsoft documentation: -
Extract the Azure CLI package into a local folder. For example:
C:\Users\<user>\azure-cliIn Git Bash, this folder is accessed as:
/c/Users/<user>/azure-cli
-
Open Git Bash and go to the Azure CLI
binfolder:cd /c/Users/<user>/azure-cli/bin
-
Check that Azure CLI can be executed:
./az.cmd --version
-
Log in to Azure:
./az.cmd login --allow-no-subscriptions
A browser window will open to complete the login process.
After completing the Azure login, Tyger can be connected to the Tyger server.
Run the following command from Git Bash:
tyger login https://i3m.tyger.cloudThen check that Tyger can list the available runs:
tyger run listAt the end of this section, the Windows computer should be able to authenticate with Azure and communicate with the Tyger server.
After this configuration, Tyger processes should be executable from MaRGE on Windows.
-
Git Bash is recommended for this workflow.
-
After modifying the Windows
PATH, all open terminals must be closed and reopened. -
If the
azcommand is not recognized globally, Azure CLI can still be executed manually from itsbinfolder using:./az.cmd