Setup ROS Coding Environment using Windows WSL2 - ika-rwth-aachen/acdc GitHub Wiki
In this section, we'll guide you through setting up the WSL2 (Windows Subsystem for Linux Version 2) to run the code from the ACDC GitHub repository.
- Contents
- Set up WSL2
- Install Git and clone the ACDC repository
- Install Docker
- Install python3-pip and pipdocker-run-cli
- Install VS Code and add WSL extension
- Configure WSL to use the Linux graphical applications:
- Download Docker Images
- Start Docker Container
- Docker GUI Test
- Docker RVIZ Test
- Hints
- Troubleshooting
ROS (Robot Operating System) is essential for these exercises, and it operates within the Linux distribution, Ubuntu. For Windows users, there are typically two ways to use Ubuntu: through a dual-boot system or by installing a Virtual Machine. However, these methods can be complex and resource-intensive. As an alternative, we recommend using WSL2, a feature provided by Windows that allows you to run a Linux environment directly from the Windows command line. This setup is more streamlined and integrates seamlessly with your existing Windows system.
Below, we'll outline the steps to set up WSL2 on your Windows system, enabling you to efficiently run and work with the ACDC code.
-
Step 1 - Open the
PowerShellin administrator mode.

In the PowerShell command prompt, install WSL with Ubuntu using this command:
wsl --install -d Ubuntu
Create a username and password for the WSL Ubuntu instance and click ok (you need to remember them). Wait for the installation to finish, then restart your computer to properly activate WSL.
Windows 11 users, restart the computer first and then proceed to set up Ubuntu with a username and password.
)
- Step 2 - Check WSL if it is installed properly.
Check the version of the WSL using following command from the PowerShell command prompt:
wsl -l -v
If the reported name Ubuntu and version 2, then WSL is correctly installed and you can continue with step 3.
-
Step 3 - Set Case sensitive filesystem for the
DocumentsdirectorySince the Window filesystem is a case insensitive, we would need to make our workspace case sensitive as some files in our ROS workspace are case sensitive
Now run this command:
fsutil.exe file setCaseSensitiveInfo Documents enable
Congratulations! Now you are ready to start WSL and to clone the ACDC repository to your local system. Continue with the following steps.
If you are running WSL you will basically run Ubuntu on your Windows machine. Hence, we can continue with instructions for Ubuntu. In Ubuntu, you can install and update software packages via the terminal (Tutorial), which is called bash in our case. The "Advanced Package Tool" apt is called from the terminal. Download information and updates about new packages from remote package-hosting repositories.
Start your WSL environment in a new Powershell without adminstrator mode:
wslInside WSL, update your Ubuntu packages:
sudo apt updateNow, install the latest package versions.
sudo apt upgradeNow that you have an up-to-date Ubuntu distribution, you can install additional packages that might be required to clone our repositories or to install Docker.
- Git (package
git) is a version control system, which we use for- exchanging source code in between tutors and students
- tracking changes in the source code during development
- creating different so-called branches of the code, e.g. for individual exercises
- If needed, check out this cheat sheet for the most important git commands.
Install git on Ubuntu using the following command:
sudo apt install git-allOther libraries are currently not necessary to install, because we will use a Docker environment to compile and run our exercises.
Navigate to the Documents directory that you have made case sensitive.
cd DocumentsClone the acdc repository
git clone --recurse-submodules https://github.com/ika-rwth-aachen/acdc.git- Note that we use
--recurse-submodules, because we are using several other open source repositories that we have integrated into our repository as a submodule. If you do not use that flag, you might experience problems when compiling the workspace.
After cloning, your local acdc directory should have the same contents like you can see in the following:
.
├── assets
│   ├── ACDC_YT_Thumbnail.png
│   └── header_image.png
├── bag
│   ├── .gitkeep
├── catkin_workspace
│   └── src
├── colcon_workspace
│   └── src
├── docker
│   ├── Dockerfile.ros1
│   ├── Dockerfile.ros2
│   ├── Makefile
│   ├── TensorFlowConfig.cmake
│   ├── ros1_run.sh
│   └── ros2_run.sh
├── .gitignore
├── .gitlab-ci.yml
├── .gitmodules
├── LICENSE
└── README.md
You can also clone the ACDC notebooks repository
git clone https://github.com/ika-rwth-aachen/acdc-notebooksDocker is a tool designed to make it easier to create, deploy, and run applications by using containers. Containers are a standardized unit of software that allows developers to isolate their application from its environment and distribute safely it to any other environment. For the ACDC course, we created such a standardized container that allows every student to run our code without any manual installations of libraries or other programs. The requirements to use our container are an installation of Docker Version 19.03 or later.
For the installation of docker, we refer to the official installation guide:
- Before testing docker, start Docker service.
sudo service docker start- Test your installation of docker with
sudo docker run hello-world ⚠️ In case "Cannot connect to the Docker daemon at unix:///var/run/docker.sock. Is the docker daemon running?" error persists: [CLICK HERE]
Follow these steps to configure and start Docker in your WSL environment:
-
Run the command to configure iptables:
sudo update-alternatives --config iptables
This will present you with a selection of iptables versions.
-
When prompted,
enter 1to select iptables-legacy. This choice is crucial for Docker to function correctly in WSL. -
After setting iptables to legacy, start Docker with the following command:
sudo service docker start
This will activate the Docker service.
-
Test your installation of docker with
sudo docker run hello-world
With these steps, Docker will start as expected in your WSL environment.
-
Note that you will have to execute the docker commands with root-privileges (
sudo). If you have not added your user to a docker group follow the following steps or read it from https://docs.docker.com/engine/install/linux-postinstall/#manage-docker-as-a-non-root-user
Create the docker group and add your user:
sudo groupadd dockerAdd your user to the docker group.
sudo usermod -aG docker $USERLog out and log back in so that your group membership is re-evaluated.
exitwsl --shutdownand again open the powershell/command line, enter the wsl
wslVerify that you can run docker commands without sudo.
First run the docker service:
sudo service docker startdocker run hello-world- Check out the official documentation for more details and in case this does not work.
- If your machine has a Nvidia GPU, and if you want to use that GPU for faster computation you can also try to install nvidia-docker. However, this is not required as all exercises can be executed on CPU.
The docker-run-cli is necessary to execute our docker container in a very convinient way. Please install the pip and pip package with the following commands:
sudo apt install python3-pippip install docker-run-cli --break-system-packagesWarning
Outside of a virtual environment, pip may default to a user-site installation of executables to~/.local/bin, which may not be present in your shell'sPATH. If runningdocker-runerrors withdocker-run: command not found, add the directory to your path. (More information)echo "export PATH=\$HOME/.local/bin:\$PATH" >> ~/.bashrc source ~/.bashrc
-
Install VS Code for Windows from the available options and follow the instructions to set it up.

-
In order to use VS Code inside WSL, you will need the WSL extension for VS Code:
Open VS Code >> click on "Extensions" >> Search for "WSL" and click on it >> Click on the Install

-
From PowerShell WSL terminal, run VS code to access your files.

During our tutorials, we will be utilizing ROS applications like RVIZ or rqt. Consequently, it's important to verify the graphical application display capabilities of our WSL setup.
By default, WSL2 includes enabled WSLg, which permits the running of graphical Linux applications. To check the usability:
To launch 'xeyes', an application where eyes follow the mouse cursor, execute:
sudo apt install x11-apps
xeyes &
If you see the app running, you can continue with the next step Download Docker Images.
-
To run applications with graphical output on Windows 10, you need to install an X Server on Windows.
Download the VcXSrv X-server from the link and click on the executable in the download folder and complete the installation. In your desktop you will have
XLaunchicon:
-
Click over the created shortcut icon on the desktop. Now you can start the X11 server by double clicking on the shortcut and configuring setting.
 click on >>Next
click on >>Next
You should should check the
Disable access controland uncheckNative openglas shown in the image. Otherwise applications such as RVIZ do not run as expected.
click on save configuration >> Finish

Then you can see X server icon at right corner of your screen:

-
After you have installed VcXsrv, you also need to edit docker file configuration to use it. To do so we should enable X-forwarding in the docker container.
- Edit the
${REPOSITORY}/docker/ros1_run.shand${REPOSITORY}/docker/ros2_run.shfile with your preferred editor:
FOR ROS1 [CLICK HERE]
The script looks like this:#!/bin/bash
# in order to be able to use this script install:
# pip install docker-run-cli --break-system-packages
DIR="$(cd -P "$(dirname "$0")" && pwd)"
if docker ps --format '{{.Names}}' | grep -q "acdc_ros1"; then
docker-run --name acdc_ros1
else
docker-run --no-gpu --volume $(dirname "$DIR"):/home/rosuser/ws --image rwthika/acdc:ros1 --workdir="/home/rosuser/ws/catkin_workspace" --name acdc_ros1
fiModify the docker-run line after the else clause to include at end the --env DISPLAY=$(cat /etc/resolv.conf | grep nameserver | awk '{print $2}'):0 fi flag.
After modification, the script should look like this:
#!/bin/bash

# in order to be able to use this script install:
# pip install docker-run-cli --break-system-packages
DIR="$(cd -P "$(dirname "$0")" && pwd)"
if docker ps --format '{{.Names}}' | grep -q "acdc_ros1"; then
    docker-run --name acdc_ros1
else
    docker-run --no-gpu --volume $(dirname "$DIR"):/home/rosuser/ws --image rwthika/acdc:ros1 --workdir="/home/rosuser/ws/catkin_workspace" --name acdc_ros1 --env DISPLAY=$(cat /etc/resolv.conf | grep nameserver | awk '{print $2}'):0
fi
FOR ROS2 [CLICK HERE]
The script looks like this:#!/bin/bash
# in order to be able to use this script install:
# pip install docker-run-cli --break-system-packages
DIR="$(cd -P "$(dirname "$0")" && pwd)"
if docker ps --format '{{.Names}}' | grep -q "acdc_ros2"; then
docker-run --name acdc_ros2
else
docker-run --no-gpu --volume $(dirname "$DIR"):/home/rosuser/ws --image rwthika/acdc:ros2 --name acdc_ros2
fiModify the docker-run line after the else clause to include at end the --env DISPLAY=$(cat /etc/resolv.conf | grep nameserver | awk '{print $2}'):0 fi flag.
After modification, the script should look like this:
#!/bin/bash

# in order to be able to use this script install:
# pip install docker-run-cli --break-system-packages
DIR="$(cd -P "$(dirname "$0")" && pwd)"
if docker ps --format '{{.Names}}' | grep -q "acdc_ros2"; then
    docker-run --name acdc_ros2
else
    docker-run --no-gpu --volume $(dirname "$DIR"):/home/rosuser/ws --image rwthika/acdc:ros2 --name acdc_ros2 --env DISPLAY=$(cat /etc/resolv.conf | grep nameserver | awk '{print $2}'):0
fi
Congratulations! Now we can download and start our docker environment.
For the ACDC exercises we already created and compiled a container and uploaded it to Dockerhub. Dockerhub is a public registry where it is possible to upload and download docker images. You can find the docker image that is necessary for executing this repository in the following link
All libraries to run the notebooks are already compiled into the image and you can simply download it and use it on your machine. You can pull (download) the image with the following command
docker pull rwthika/acdc:ros1This might need some time, depending on your internet connection. Also make sure, that your computer has enough disk space available. We recommend at least 40 GB of free disk space.
In order to open the new terminal, open Powershell >> type wsl >> enter.
Firstly, run the docker service:
sudo service docker startNavigate to the local directory ${REPOSITORY}/docker/ and execute ./ros1_run.sh.
Note: When referring to the directory /mnt/c/Users/${USERNAME}/Documents/acdc on your machine, we will use the placeholder ${REPOSITORY} in subsequent exercises. This is to standardize the path name and maintain consistency with other Linux users. The ${REPOSITORY} placeholder represents the location of your own acdc repository on your machine.
cd Documents/acdc/docker/
./ros1_run.sh
This will start an Docker container instance based on the Docker image rwthika/acdc:ros1, in which ROS and all required libraries are preinstalled. You can stop the container by pressing Ctrl+C in the terminal. If everything is setup correctly you will see the following:
Starting new container 'acdc' ...
================================================================================

find: '/proc/28/task/28/fdinfo/5': No such file or directory
find: '/proc/28/fdinfo/6': No such file or directory
The container is running.

Execute the run script again from another terminal to open a shell in the container.
Alternatively, the container could have been launched with '-a' to attach directly.
Press Ctrl+Z followed and issue 'bg' to put this process into the background.
Press Ctrl+C to stop the container.
Now, open a second terminal (open the powershell/command line >> type "wsl" >> enter) and navigate again to ${REPOSITORY}/docker/. Then, execute ./ros1_run.sh again to open a shell inside the running container.
cd Documents/acdc/docker/
./ros1_run.sh
You should see this:
Attaching to running container 'acdc' ...
================================================================================

=== ROS Docker Container =======================================================

root@ad4e1bd914e1:/home/rosuser/ws/catkin_workspace#
The whole acdc folder is mounted from your host file system into the container. That means, all changes in the source codes or other files are mirrored into the container, and vice-versa! Note that your current working directory inside the container is /home/rosuser/ws/catkin_workspace. You basically have now a second Linux System running on your machine inside a Docker container.
Please test if the GUI is working for you. Please run rqt in the terminal. An empty window should pop up now:
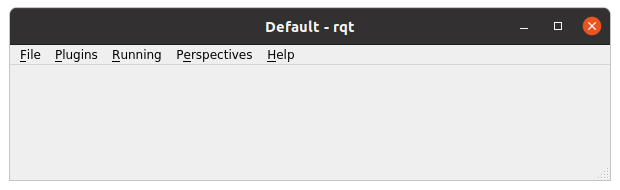
In case you experienced errors during the GUI test, please revise the Troubleshooting section below.
We also want to test if RVIZ is working for you. RVIZ is an important 3D visualization tool for ROS. Now, you can press Ctrl+C in the terminal where you ran rqt in order to cancel it. Open another (3rd) terminal and run ./ros1_run.sh to enter the container.
Now you have three terminals. Execute roscore in the second one to start a ROS Master and execute rviz in the third one to start RVIZ:
- Initial
./ros1_run.sh - Execute
roscorein the container - Execute
rvizin the container
You should now see an empty RVIZ window as in the image below
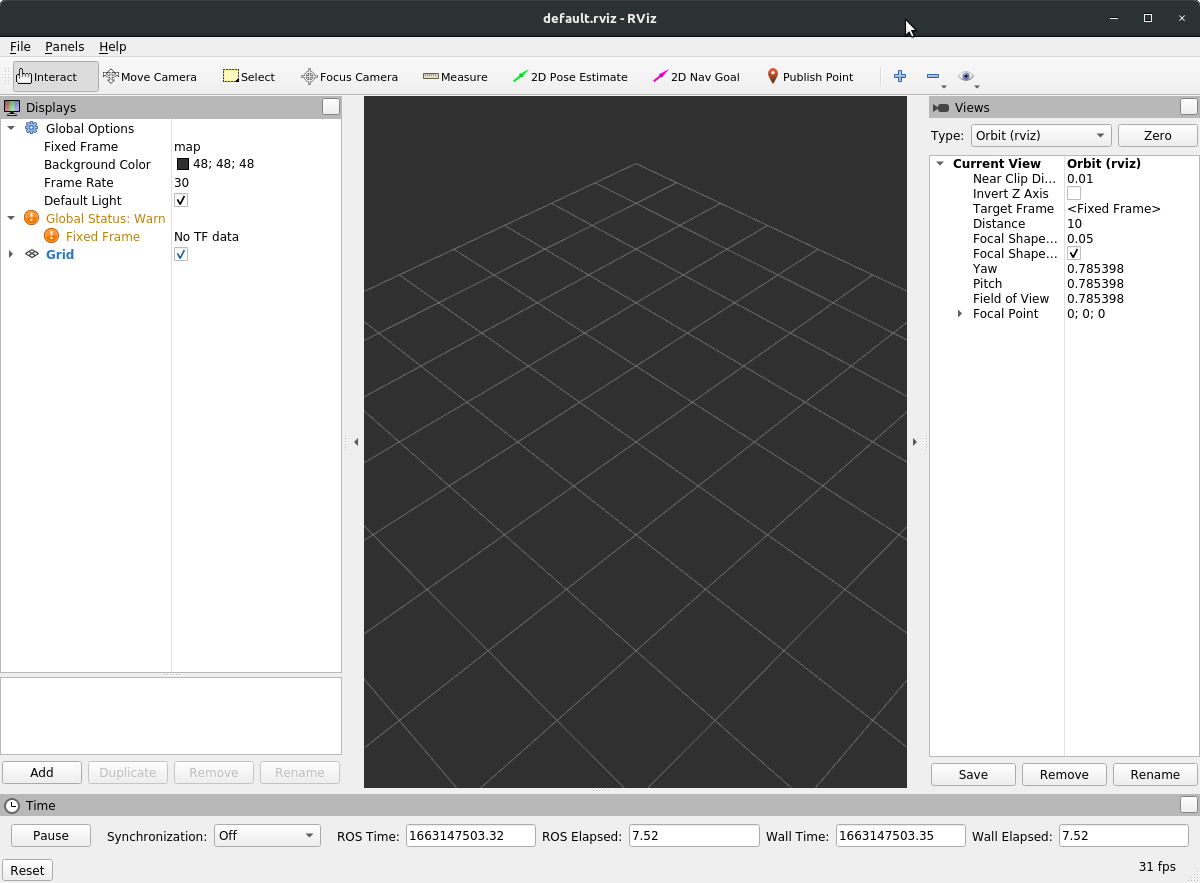
Congratulations, you successfully set up your coding environment! You may now press Ctrl+C in the terminal where you opened rviz to close the application again.
If that is working, please read the Hints below and continue with the next tutorial. There, we will compile the code in the workspace and then test the first ROS application.
- You can escape the container by just writing
exitor pressing Ctrl+C in the container's terminal. - You can attach to the same container multiple times by calling
./ros1_run.shagain in several terminals. - When using the
./ros1_run.shscript: directoriescatkin_workspaceandbagare shared both on your host machine and the docker container! That means you can drop of files (such as.bagfiles) intobagand access them from the container. Further, you can edit the code from your local machine and all changes also happen in the container.
The Linux kernel update package ensures the installation of the latest version of the WSL 2 Linux kernel, necessary for operating WSL within the Windows system environment.
-
Download the Linux kernel update package
Run the update package downloaded in the previous step. (Double-click to run - you will be prompted for elevated permissions, select ‘yes’ to approve this installation.)
After the installation, in the PowerShell command prompt, install WSL with Ubuntu using this command again:
wsl --install -d UbuntuReturn to the step 2 of the main tutorial.
Note: If you're using an ARM64 machine, please download the ARM64 package instead. If you're not sure what kind of machine you have, open Command Prompt or PowerShell and enter:
systeminfo | find"System Type" Caveat: On non-English Windows versions, you might have to modify the search text, translating the "System Type" string. You may also need to escape the quotations for the find command.
Please read WSL2 install to install Windows Subsystem for Linux, if you're running an older build of Windows, that may not be supported. We have included the manual installation steps below.
-
Step 1 - Enable the Windows Subsystem for Linux
dism.exe /online /enable-feature /featurename:Microsoft-Windows-Subsystem-Linux /all /norestart
Check the version of the WSL using following command from the powershell/command-line
wsl -l -v
If the reported versions 2, then you are done an can continue with Step 5, if not try to install the necessary kernel from this website:
-
Step 2 - Check requirements for running WSL 2
To update to WSL 2, you must be running Windows 10 with the following requirements.
- For x64 systems: Version 1903 or later, with Build 18362 or later.
- For ARM64 systems: Version 2004 or later, with Build 19041 or later.
-
Step 3 - Enable Virtual Machine feature
Before installing WSL 2, you must enable the Virtual Machine Platform optional feature. Your machine will require virtualization capabilities to use this feature.
Open PowerShell as Administrator and run:
dism.exe /online /enable-feature /featurename:VirtualMachinePlatform /all /norestart
Restart your machine to complete the WSL install and update to WSL2.
- If you get following error because of the incorrect timezone,
Hit:1 ubuntu bionic InRelease
Ign:3 linux/chrome/deb stable InRelease
Get:2 /ubuntu bionic-updates InRelease [88.7 kB]
Get:5 /linux/chrome/deb stable Release [943 B]
Get:6 http://dl.google.com/linux/chrome/deb stable Release.gpg [819 B]
Get:4 http://us.archive.ubuntu.com/ubuntu bionic-backports InRelease [74.6 kB]
Get:7 http://security.ubuntu.com/ubuntu bionic-security InRelease [83.2 kB]
Reading package lists... Done
E: Release file for http://dl.google.com/linux/chrome/deb/dists/stable/Release is not valid yet (invalid for another 2h 45min 28s). Updates for this repository will not be applied.
E: Release file for http://us.archive.ubuntu.com/ubuntu/dists/bionic-updates/InRelease is not valid yet (invalid for another 4h 34min 33s). Updates for this repository will not be applied.
E: Release file for http://us.archive.ubuntu.com/ubuntu/dists/bionic-backports/InRelease is not valid yet (invalid for another 1h 22min 16s). Updates for this repository will not be applied.
E: Release file for http://security.ubuntu.com/ubuntu/dists/bionic-security/InRelease is not valid yet (invalid for another 4h 32min 36s).
you can use the following commands to fix this,
sudo apt install ntp
sudo service ntp restart 