Section 2 Semantic Image Segmentation - ika-rwth-aachen/acdc GitHub Wiki

In this workshop, we will perform semantic image segmentation on raw camera data using a deep learning model. In particular, we will take a recording from our test vehicle which is equipped with a on board camera and we will apply the segmentation model on the sensor data stream.
The learning goals of this workshop are
- Inspect a rosbag which contains camera data
- Learn about ROS2 standard camera and camera info message format
- Learn about a simple Python inference node for semantic image segmentation
- Learn to visualize the output of semantic image segmentation
- Contents
- Start the Docker Environment
- Download and Inspect Bag file
- ROS2's
sensor_msgs/msg/ImageMessage - ROS2's
sensor_msgs/msg/CameraInfoMessage - Build and source the package
- Replay rosbag and run image segmentation
- Review of file image_segmentation.py
- Task 1: Implement conversion from segmentation map to RGB encoding
- Wrap-up
- ROS1 Instructions
Navigate to the local directory ${REPOSITORY}/docker and execute ./ros2_run.sh. This will start the Docker container, in which ROS and all required libraries are preinstalled. You can stop the container by pressing Ctrl+C in the terminal. If everything is setup correctly you will see the following:
Starting new container...
================================================================================

=== CONTAINER INFORMATION ======================================================
Architecture: x86_64
Ubuntu: 22.04.2 LTS (Jammy Jellyfish)
Python: 3.10.6
ROS: humble
CMake: 3.22.1
CUDA: 12.1.105
cuDNN: 8.9.2
TensorRT: 8.6.1
TensorFlow Python: 2.13.0
TensorFlow C/C++:
PyTorch Python:
PyTorch C/C++:
Available GPUs: 1
  name               driver_version   utilization.gpu [%]   utilization.memory [%]   memory.used [MiB]   memory.total [MiB]
  NVIDIA TITAN RTX   470.182.03       0 %                   2 %                      552 MiB             24217 MiB
===============================================================================

root@******:/home/rosuser/ws/colcon_workspace#
The acdc folder is mounted from your host into the container. Note that your current working directory inside the container is /home/rosuser/ws/colcon_workspace.
Download the rosbag left_camera_templergraben.db3 from here (1.2 GB).
Save this file to your local directory ${REPOSITORY}/bag. This directory will be mounted into the docker container to the path /home/rosuser/ws/bag.
You can start the docker container now with ./ros2_run.sh (if you haven't already).
Inside the container, you can navigate to /home/rosuser/ws/bag and execute ros2 bag info left_camera_templergraben.db3 to inspect the rosbag:
~/bag$ ros2 bag info lef_camera_templegraben
Files:             left_camera_templergraben.db3
Bag size:          1.2 GiB
Storage id:        sqlite3
Duration:          17.999s
Start:             Aug  9 2019 10:59:01.823 (1565341141.823)
End:               Aug  9 2019 10:59:19.823 (1565341159.823)
Messages:          2881
Topic information:
    Topic: /tf | Type: tf2_msgs/msg/TFMessage | Count: 1801 | Serialization Format: cdr
    Topic: /sensors/camera/left/camera_info |
    Type: sensor_msgs/msg/CameraInfo | Count: 540 | Serialization
    Format: cdr
    Topic: /sensors/camera/left/image_raw |
    Type: sensor_msgs/msg/Image | Count: 540 |  Serialization
    Format: cdr
You can see that the rosbag has a duration of 18 seconds and contains 540 image frames of type sensor_msgs/Image and 540 corresponding sensor_msgs/CameraInfo messages. We will use these camera images in this assignment in order to apply image segmentation.
The message definition sensor_msgs/msg/Image is ROS2's standard image message format. It is used for all kind of camera image message types and can be used seamlessly with many different ROS2 visualization and image processing tools. Please read the documentation about the detailed message format and it's content.
The message definition sensor_msgs/msg/CameraInfo is ROS2's standard camera info message format. It is send together with sensor_msgs/msg/Image to provide additional information about the current camera image such as camera calibration parameters. Feel free to read the documentation about the detailed message format.
The code for the image segmentation inference node can be found in the directory colcon_workspace/src/section_2/image_segmentation_r2. The structure of this Python package is illustrated in the following:
image_segmentation_r2/
├── package.xml
├── setup.cfg
│   └── params.yaml
├── image_segmentation_r2
│   ├── image_segmentation.py
│   ├── img_utils.py
│   └── __init__.py
├── launch
│   └── image_segmentation_r2.launch.py
├── models
│   ├── convert_cityscapes_to_ika_reduced.xml
│   ├── mobilenet_v3_large_968_608_os8.pb
│   └── mobilenet_v3_small_968_608_os8.pb
├── resource
└── test
The main source code is located in the directory image_segmentation_r2, the pretrained segmentation models are located in models and the launch file is located in directory launch and parameters are located in config. Feel free to read all the code, parameters and launch files.
Note, that we provide here two image segmentation models for you. Both rely on the MobilenetV3 architecture:
-
mobilenet_v3_large_968_608_os8.pb: Larger model, slower inference, more RAM needed -
mobilenet_v3_small_968_608_os8.pb: Smaller model, faster inference, less RAM needed
These models are trained on a much larger dataset compared to the model you have trained in the exercise, but the overall training pipeline and additional augmentation methods applied during the training are almost identical.
You might change the model in the params.yaml configuration file depending on the capabilities of your computer.
Now, let's build the package with with colcon build
colcon build --packages-select image_segmentation_r2 --symlink-installand source the workspace
source install/setup.bashPerfect! Now you will be able to perform inference on camera images with this package. Let's go to the next section.
We have already prepared a launch file for you to execute the image segmentation. Please read carefully through the following lines of code.
Contents of the file image_segmentation_r2.launch.py:
import os

from ament_index_python.packages import get_package_share_directory
from launch import LaunchDescription
from launch.actions import DeclareLaunchArgument
from launch_ros.actions import Node
from launch.actions import ExecuteProcess

def generate_launch_description():

    # Get the package and params directory
    image_segmentation_dir = get_package_share_directory('image_segmentation_r2')
    config = os.path.join(image_segmentation_dir, "config","params.yaml")

    # Declare launch arguments
    use_sim_time = DeclareLaunchArgument(
        'use_sim_time',
        default_value='true',
        description='Use simulation clock time')

    # ROSBAG PLAY node
    rosbag_play_node = ExecuteProcess(
        cmd=['ros2', 'bag', 'play', '--rate', '0.05', '-l',
             '/home/rosuser/ws/bag/left_camera_templergraben',
             '--topics', '/sensors/camera/left/image_raw',
             '/sensors/camera/left/camera_info'],
        output='screen'
    )

    # IMAGE_PROC node
    image_proc_node = Node(
        package='image_proc',
        name='image_proc',
        executable='image_proc',
        namespace='sensors/camera/left',
        output='screen',
        remappings=[
            ('image', 'image_raw'),
        ],
    )
        # CAMERA SEGMENTATION NODE
    camera_segmentation_node = Node(
        package='image_segmentation_r2',
        name='image_segmentation',
        executable='image_segmentation',
        output='screen',
        parameters=[config],
        remappings=[
            ('image_color', 'sensors/camera/left/image_color')
        ]
    )

        # NODES FOR VISUALIZATION
    segmentation_viewer_node = Node(
        package='image_view',
        executable='image_view',
        name='segmentatibashon_viewer',
        remappings=[
            ('image', 'image_segmented'),ros2 launch image_segmentation_py start_all.launch
        ],
    )

    camera_node = Node(
        package='image_view',
        executable='image_view',
        name='camera_viewer',
        remappings=[
            ('image', 'sensors/camera/left/image_color'),
        ],
        parameters=[
                {'autosize': True},
        ]
    )

    # Create the launch description and populate
    ld = LaunchDescription()

    # Add the actions to the launch description
    ld.add_action(use_sim_time)
    ld.add_action(rosbag_play_node)
    ld.add_action(image_proc_node)
    ld.add_action(camera_node)
    ld.add_action(camera_segmentation_node)
    ld.add_action(segmentation_viewer_node)

    return ld
Hence, we perform the following tasks:
- Replay the rosbag with a speed of 0.05. Note, that we set the speed to a very low value here, because your computer might be very slow. You can adapt this values if your computer is fast enough to compute the segmentation at a higher speed.
-
Apply
image_procto the raw sensor data. The topic/sensors/camera/left/image_rawwas recorded in the raw data format. Withimage_procwe convert it to a RGB encoding. Read more here about it. -
Start the
image_segmentationnode and feed it with the correct topic name and load the parameters that are necessary for the node. - Start two nodes for visualization
Note: You can also use RVIZ to visualize the RGB camera image and the segmented camera image.
We can now start the launch file with:
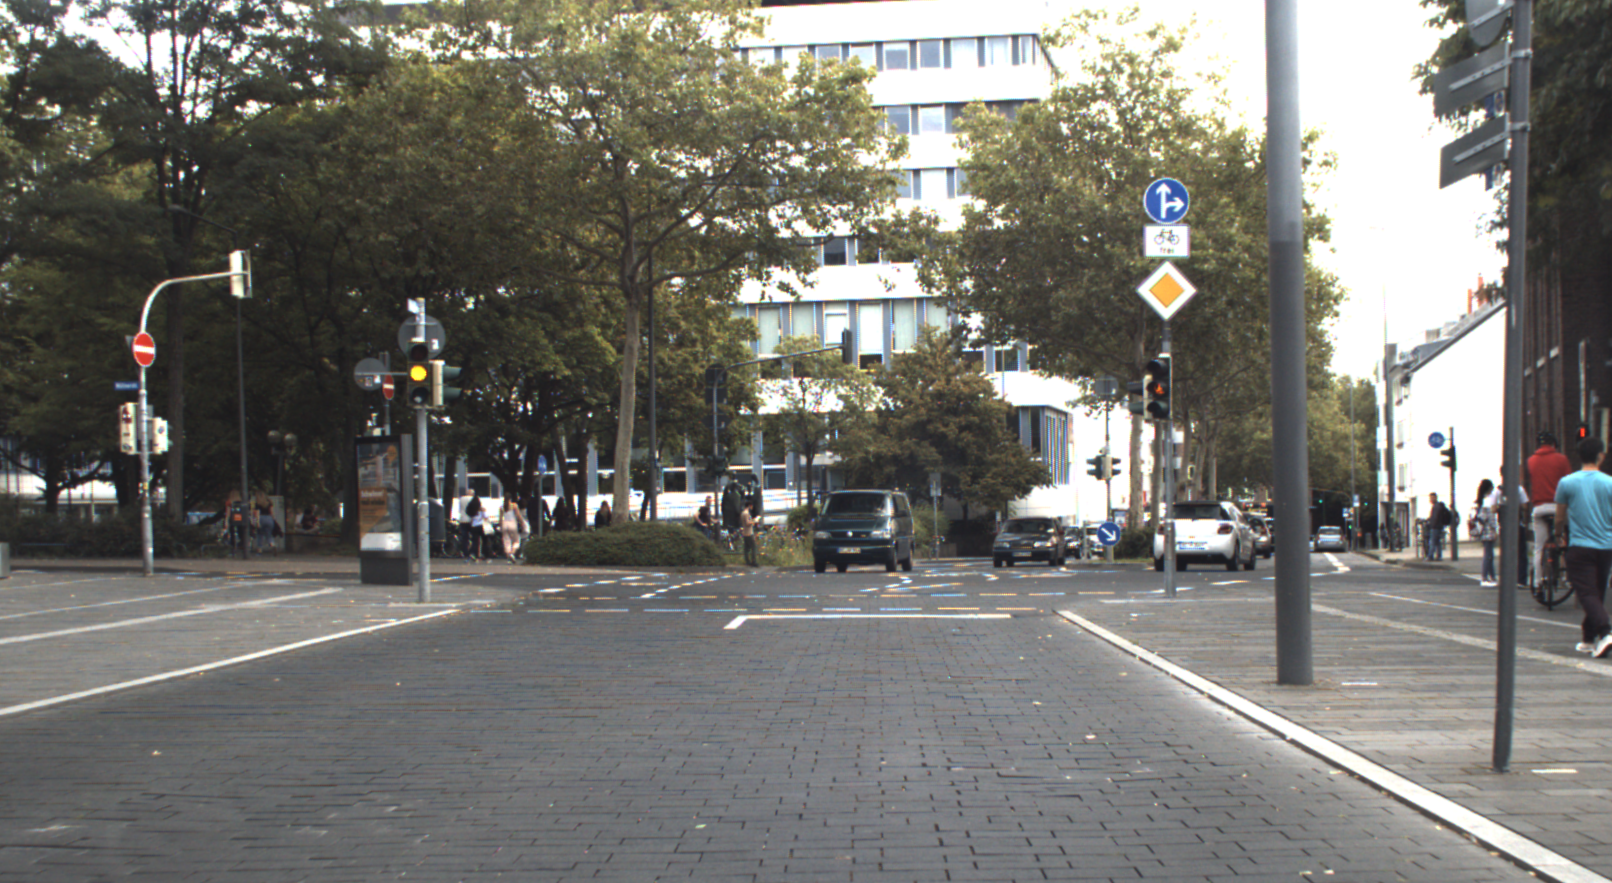
ros2 launch image_segmentation_r2 image_segmentation_r2.launch.py The image_view node should show you directly the camera image as shown in this image:
However, the segmented image looks like this
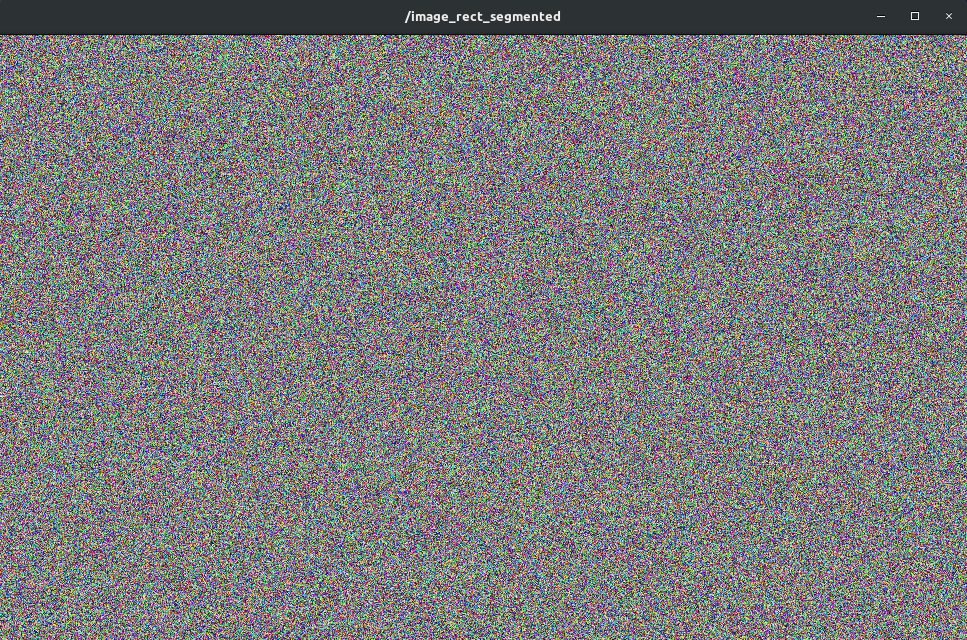
Something is wrong. We have apparently a bug in the code !!! Let's solve this problem.
Before we start with the task, let's try to understand what happens in the file image_segmentation.py.
The file image_segmentation.py contains the inference node for the image segmentation task. The inference node is implemented as a Python class called ImageSegmentation. The class has the following member functions. We will give here a short description of each class so you can understand what each class is doing.
-
class ImageSegmentation
Class which implements image segmentation inference applied on images send as ROS2 MSG of type
sensor_msgs/msg/Image__init__(self)
Initializes the class by initializing it with a ROS Node. Calls
setup()andload_parameters()to load the model and necessary parameters.- load_parameters(self)
Loads the ROS params and stores them into the current instance of ImageSegmentation
- setup(self)
Loads the image segmentation model which are stored in the directory
models. Also creates acv_bridgewhich allows to convertsensor_msgs/msg/Imageinto an image which can be processed by the neural network. Also registers subscribers and publishers.- predict(self, img_color_msg)
This is the so called callback function. This function is triggered, when the subscriber
self.sub_imagereceives a message on topic"/image_color". This function performs the actual inference of the neural network. It converts thesensor_msgs/msg/Imagemessage into a format that can be processed by the neural network, then performs the inference and then converts the output, a segmentation maps, into a RGB encoding which is then send as an image using publisherself.pub_seg- load_frozen_graph(path_to_frozen_graph)
Takes the path to one of the models stored in the directory
modelsand converts the frozen graph into an executable Python function. Uses helper functionwrap_frozen_graph()- wrap_frozen_graph(graph_def, inputs, outputs, print_graph=False)
Helper function that converts a frozen graph, which is a type how a neural network can be stored using Tensorflow, into an executable Python function
- segmentation_map_to_rgb(segmentation_map)
A function which converts a segmentation map into RGB encoded image
- parse_convert_xml(conversion_file_path)
Reads a xml file which is located in
modelsand which contains information which class ID is associated with which RGB value and vice versa. It processes the xml file in such a way that it can be used to convert a segmentation map in to an RGB encoded image.
Unfortunately, the function segmentation_map_to_rgb() in the file image_segmentation.py wasn't implemented correctly. Open this file with your favorite code editor and let's have a look on this function.
def segmentation_map_to_rgb(self, segmentation_map):
    """
    Converts segmentation map to a RGB encoding according to self.color_palette
    Eg. 0 (Class 0) -> Pixel value [128, 64, 128] which is on index 0 of self.color_palette
        1 (Class 1) -> Pixel value [244, 35, 232] which is on index 1 of self.color_palette

    self.color_palette has shape [256, 3]. Each index of the first dimension is associated
    with an RGB value. The index corresponds to the class ID.

    :param segmentation_map: ndarray numpy with shape (height, width)
    :return: RGB encoding with shape (height, width, 3)
    """
    ### START CODE HERE ###

    # Replace the following command
    rgb_encoding = np.random.randint(
        low=0,
        high=255,
        size=[self.resize_height, self.resize_width, 3]
    )

    ### END CODE HERE ###
    return rgb_encoding
Instead of computing the RGB encoding from the segmentation map, the function generates only a random image. Your task is now to implement the function correctly. Note that self.color_palette is here not a function parameter but a class attribute of the class ImageSegmentation.
Hints
- There are several approaches how to convert from segmentation map to the color encoding
- Loop approach: Iterate over all class IDs in segmentation map and retrieve the corresponding RGB value for each class and place this triplet (R,G,B) at the correct location of the returned RGB image.
- Advanced vectorized approach: Should be the faster and more efficient implementation. Avoid using a loop, but rather rely on numpy's vectorized indexing operations!
After fixing the function segmentation_map_to_rgb(), you will see that the inference node now will publish correct RGB encoded segmentations of the camera image. You will obtain segmented images as shown here:

- You learned about the ROS2 definitions for camera images and camera info messages
- You learned about a simple Python ROS2 package for semantic image segmentation
- You learned about encoding the segmentation map to the RGB encoding
- You learned about
image_view, a node for visualizing image data
CLICK TO OPEN INSTRUCTIONS
In this workshop, we will perform semantic image segmentation on raw camera data using a deep learning model. In particular, we will take a recording from our test vehicle which is equipped with a on board camera and we will apply the segmentation model on the sensor data stream.
The learning goals of this workshop are
- Inspect a rosbag which contains camera data
- Learn about ROS' standard camera and camera info message format
- Learn about a simple Python inference node for semantic image segmentation
- Learn to visualize the output of semantic image segmentation
Navigate to the local directory ${REPOSITORY}/docker and execute ./ros1_run.sh. This will start the Docker container, in which ROS and all required libraries are preinstalled. You can stop the container by pressing Ctrl+C in the terminal. If everything is setup correctly you will see the following:
Starting container ...
Starting container in mode: gpu
non-network local connections being added to access control list
Container setup:
- Ubuntu: 20.04.2 LTS (Focal Fossa) (user: rosuser, password: rosuser)
- CUDA: Cuda compilation tools, release 11.2, V11.2.152
- cuDNN: 8.1.0
- TensorRT: 8.0.3
- TensorFlow Python3: 2.6.0 (GPUs available: 1)
- TensorFlow C/C++: 2.6
- ROS: noetic
- CMake: cmake version 3.12.3

Template Commands:
- Create new ROS package:            ros-add-package
  - Add node to package:               ros-add-node
  - Add nodelet to package:            ros-add-nodelet
- Initialize ROS GitLab repository:  ros-init-repo


The container is running. Execute the run script again from another terminal to open a shell in the container or press `CTRL-C` to stop the container.
From another terminal, execute ./ros1_run.sh again to open a shell in the running container. You should see this:
Attaching to running container ...
===================================================================
= ROS Docker Container                                            =
===================================================================

This is the image.
rosuser@******:~/ws/catkin_workspace$
The acdc folder is mounted from your host into the container. Note that your current working directory inside the container is /home/rosuser/ws/catkin_workspace.
Download the file left_camera_templergraben.bag from here (1.2 GB).
Save this file to your local directory ${REPOSITORY}/bag. This directory will be mounted into the docker container to the path /home/rosuser/ws/bag.
You can start the docker container now with ./ros1_run.sh (if you haven't already).
Inside the container, you can navigate to /home/rosuser/ws/bag and execute rosbag info left_camera_templergraben.bag to inspect the rosbag:
rosuser@i2000033:~/ws/bag$ rosbag info left_camera_templergraben.bag
path:        left_camera_templergraben.bag
version:     2.0
duration:    18.0s
start:       Aug 09 2019 10:59:01.82 (1565341141.82)
end:         Aug 09 2019 10:59:19.82 (1565341159.82)
size:        1.2 GB
messages:    2881
compression: none [541/541 chunks]
types:       sensor_msgs/CameraInfo [c9a58c1b0b154e0e6da7578cb991d214]
             sensor_msgs/Image      [060021388200f6f0f447d0fcd9c64743]
             tf2_msgs/TFMessage     [94810edda583a504dfda3829e70d7eec]
topics:      /sensors/camera/left/camera_info    540 msgs    : sensor_msgs/CameraInfo
             /sensors/camera/left/image_raw      540 msgs    : sensor_msgs/Image
             /tf                                1801 msgs    : tf2_msgs/TFMessage
You can see that the rosbag has a duration of 18 seconds and contains 540 image frames of type sensor_msgs/Image and 540 corresponding sensor_msgs/CameraInfo messages. We will use these camera images in this assignment in order to apply image segmentation.
The message definition sensor_msgs/Image is ROS' standard image message format. It is used for all kind of camera image message types and can be used seamlessly with many different ROS visualization and image processing tools. Please read the documentation about the detailed message format and it's content.
The message definition sensor_msgs/CameraInfo is ROS' standard camera info message format. It is send together with sensor_msgs/Image to provide additional information about the current camera image such as camera calibration parameters. Feel free to read the documentation about the detailed message format.
The code for the image segmentation inference node can be found in the directory workshops/section_2/image_segmentation_py. The structure of this Python package is illustrated in the following:
image_segmentation_py/
├── package.xml
├── CMakeLists.txt
├── launch
│   ├── params.yaml
│   └── start_all.launch
├── models
│   ├── convert_cityscapes_to_ika_reduced.xml
│   ├── mobilenet_v3_large_968_608_os8.pb
│   └── mobilenet_v3_small_968_608_os8.pb
└── src
    ├── image_segmentation.py
    ├── img_utils.py
The main source code is located in the directory src, the pretrained segmentation models are located in models and the launch file and parameters are located in directory launch. Feel free to read all the code, parameters and launch files.
Note, that we provide here two image segmentation models for you. Both rely on the MobilnetV3 architecture:
-
mobilenet_v3_large_968_608_os8.pb: Larger model, slower inference, more RAM needed -
mobilenet_v3_small_968_608_os8.pb: Smaller model, faster inference, less RAM needed
These models are trained on a much larger dataset compared to the model you have trained in the exercise, but the overall training pipeline and additional augmentation methods applied during the training are almost identical.
You might change the model in the params.yaml configuration file depending on the capabilities of your computer.
Now, let's build the package with with catkin build
catkin build image_segmentation_pyand source the workspace
source devel/setup.bashPerfect! Now you will be able to perform inference on camera images with this package. Let's go to the next section.
We have already prepared a launch file for you to execute the image segmentation. Please read carefully through the following lines of code.
Contents of the file start_all.launch:
<launch>
    <param name ="/use_sim_time" value="true"/>

    <!-- ROSBAG PLAY -->
    <node pkg="rosbag"
          type="play"
          name="player"
          output="screen"
          args="--rate 0.05 -s 0 --clock /home/rosuser/bag/left_camera_templergraben.bag
                --topics /sensors/camera/left/image_raw
                         /sensors/camera/left/camera_info">
    </node>

    <!-- STEREO IMAGE PROC -->
    <node name="stereo_image_proc"
          pkg="stereo_image_proc"
          type="stereo_image_proc"
          ns="sensors/camera/"
          output="screen">
    </node>


    <!--- CAMERA SEGMENTATION NODE -->
    <rosparam
      command="load"
      file="$(find image_segmentation_py)/launch/params.yaml"
    />

    <node
        name="image_segmentation"
        pkg="image_segmentation_py"
        type="image_segmentation.py"
        output="screen">
        <remap from="/image_rect_color" to="/sensors/camera/left/image_rect_color"/>
    </node>


    <!--- NODES FOR VISUALIZATION -->
    <node pkg="image_view"
          type="image_view"
          name="segmentation_viewer"
          args="image:=/image_rect_segmented">
    </node>

    <node pkg="image_view"
          type="image_view"
          name="camera_left"
          args="image:=/sensors/camera/left/image_rect_color">
    </node>
</launch>
Hence, we perform the following tasks:
- Replay the rosbag with a speed of 0.05. Note, that we set the speed to a very low value here, because your computer might be very slow. You can adapt this values if your computer is fast enough to compute the segmentation at a higher speed.
-
Apply
stereo_image_procto the raw sensor data. The topic/sensors/camera/left/image_rawwas recorded in the raw data format. Withstereo_image_procwe convert it to a RGB encoding. Read more here about it. -
Load the parameters that are necessary for the
image_segmentation_pynode -
Start the
image_segmentation_pynode and feed it with the correct topic name - Start two nodes for visualization
Note: You can also use RVIZ to visualize the RGB camera image and the segmented camera image.
We can now start the launch file with:
roslaunch image_segmentation_py start_all.launchThe image_view node should show you directly the camera image as shown in this image:
However, the segmented image looks like this
Something is wrong. We have apparently a bug in the code !!! Let's solve this problem.
Before we start with the task, let's try to understand what happens in the file image_segmentation.py.
The file image_segmentation.py contains the inference node for the image segmentation task. The inference node is implemented as a Python class called ImageSegmentation. The class has the following member functions. We will give here a short description of each class so you can understand what each class is doing.
-
class ImageSegmentation
Class which implements image segmentation inference applied on images send as ROS MSG of type
sensor_msgs/Image__init__(self)
Initializes the class by initializing it with a ROS Node. Calls
setup()andload_parameters()to load the model and necessary parameters.- load_parameters(self)
Loads the ROS params and stores them into the current instance of ImageSegmentation
- setup(self)
Loads the image segmentation model which are stored in the directory
models. Also creates acv_bridgewhich allows to convertsensor_msgs/Imageinto an image which can be processed by the neural network. Also registers subscribers and publishers.- predict(self, img_rect_color_msg)
This is the so called callback function. This function is triggered, when the subscriber
self.sub_imagereceives a message on topic"/image_rect_color". This function performs the actual inference of the neural network. It converts thesensor_msgs/Imagemessage into a format that can be processed by the neural network, then performs the inference and then converts the output, a segmentation maps, into a RGB encoding which is then send as an image using publisherself.pub_seg- load_frozen_graph(path_to_frozen_graph)
Takes the path to one of the models stored in the directory
modelsand converts the frozen graph into an executable Python function. Uses helper functionwrap_frozen_graph()- wrap_frozen_graph(graph_def, inputs, outputs, print_graph=False)
Helper function that converts a frozen graph, which is a type how a neural network can be stored using Tensorflow, into an executable Python function
- segmentation_map_to_rgb(segmentation_map)
A function which converts a segmentation map into RGB encoded image
- parse_convert_xml(conversion_file_path)
Reads a xml file which is located in
modelsand which contains information which class ID is associated with which RGB value and vice versa. It processes the xml file in such a way that it can be used to convert a segmentation map in to an RGB encoded image.
Unfortunately, the function segmentation_map_to_rgb() in the file image_segmentation.py wasn't implemented correctly. Open this file with your favorite code editor and let's have a look on this function.
def segmentation_map_to_rgb(self, segmentation_map):
    """
    Converts segmentation map to a RGB encoding according to self.color_palette
    Eg. 0 (Class 0) -> Pixel value [128, 64, 128] which is on index 0 of self.color_palette
        1 (Class 1) -> Pixel value [244, 35, 232] which is on index 1 of self.color_palette

    self.color_palette has shape [256, 3]. Each index of the first dimension is associated
    with an RGB value. The index corresponds to the class ID.

    :param segmentation_map: ndarray numpy with shape (height, width)
    :return: RGB encoding with shape (height, width, 3)
    """
    ### START CODE HERE ###

    # Replace the following command
    rgb_encoding = np.random.randint(
        low=0,
        high=255,
        size=[self.resize_height, self.resize_width, 3]
    )

    ### END CODE HERE ###
    return rgb_encoding
Instead of computing the RGB encoding from the segmentation map, the function generates only a random image. Your task is now to implement the function correctly. Note that self.color_palette is here not a function parameter but a class attribute of the class ImageSegmentation.
Hints
- There are several approaches how to convert from segmentation map to the color encoding
- Loop approach: Iterate over all class IDs in segmentation map and retrieve the corresponding RGB value for each class and place this triplet (R,G,B) at the correct location of the returned RGB image.
- Advanced vectorized approach: Should be the faster and more efficient implementation. Avoid using a loop, but rather rely on numpy's vectorized indexing operations!
After fixing the function segmentation_map_to_rgb(), you will see that the inference node now will publish correct RGB encoded segmentations of the camera image. You will obtain segmented images as shown here:
- You learned about the ROS definitions for camera images and camera info messages
- You learned about a simple Python ROS package for semantic image segmentation
- You learned about encoding the segmentation map to the RGB encoding
- You learned about
image_view, a node for visualizing image data
