Some use cases - enimaroah-cubic/Sb3UGS GitHub Wiki
Making a modified Accessory standalone
After learning the Production Cycle you have a modified accessory in an original file. So you might want to make the accessory independent and revert the original file afterwards.
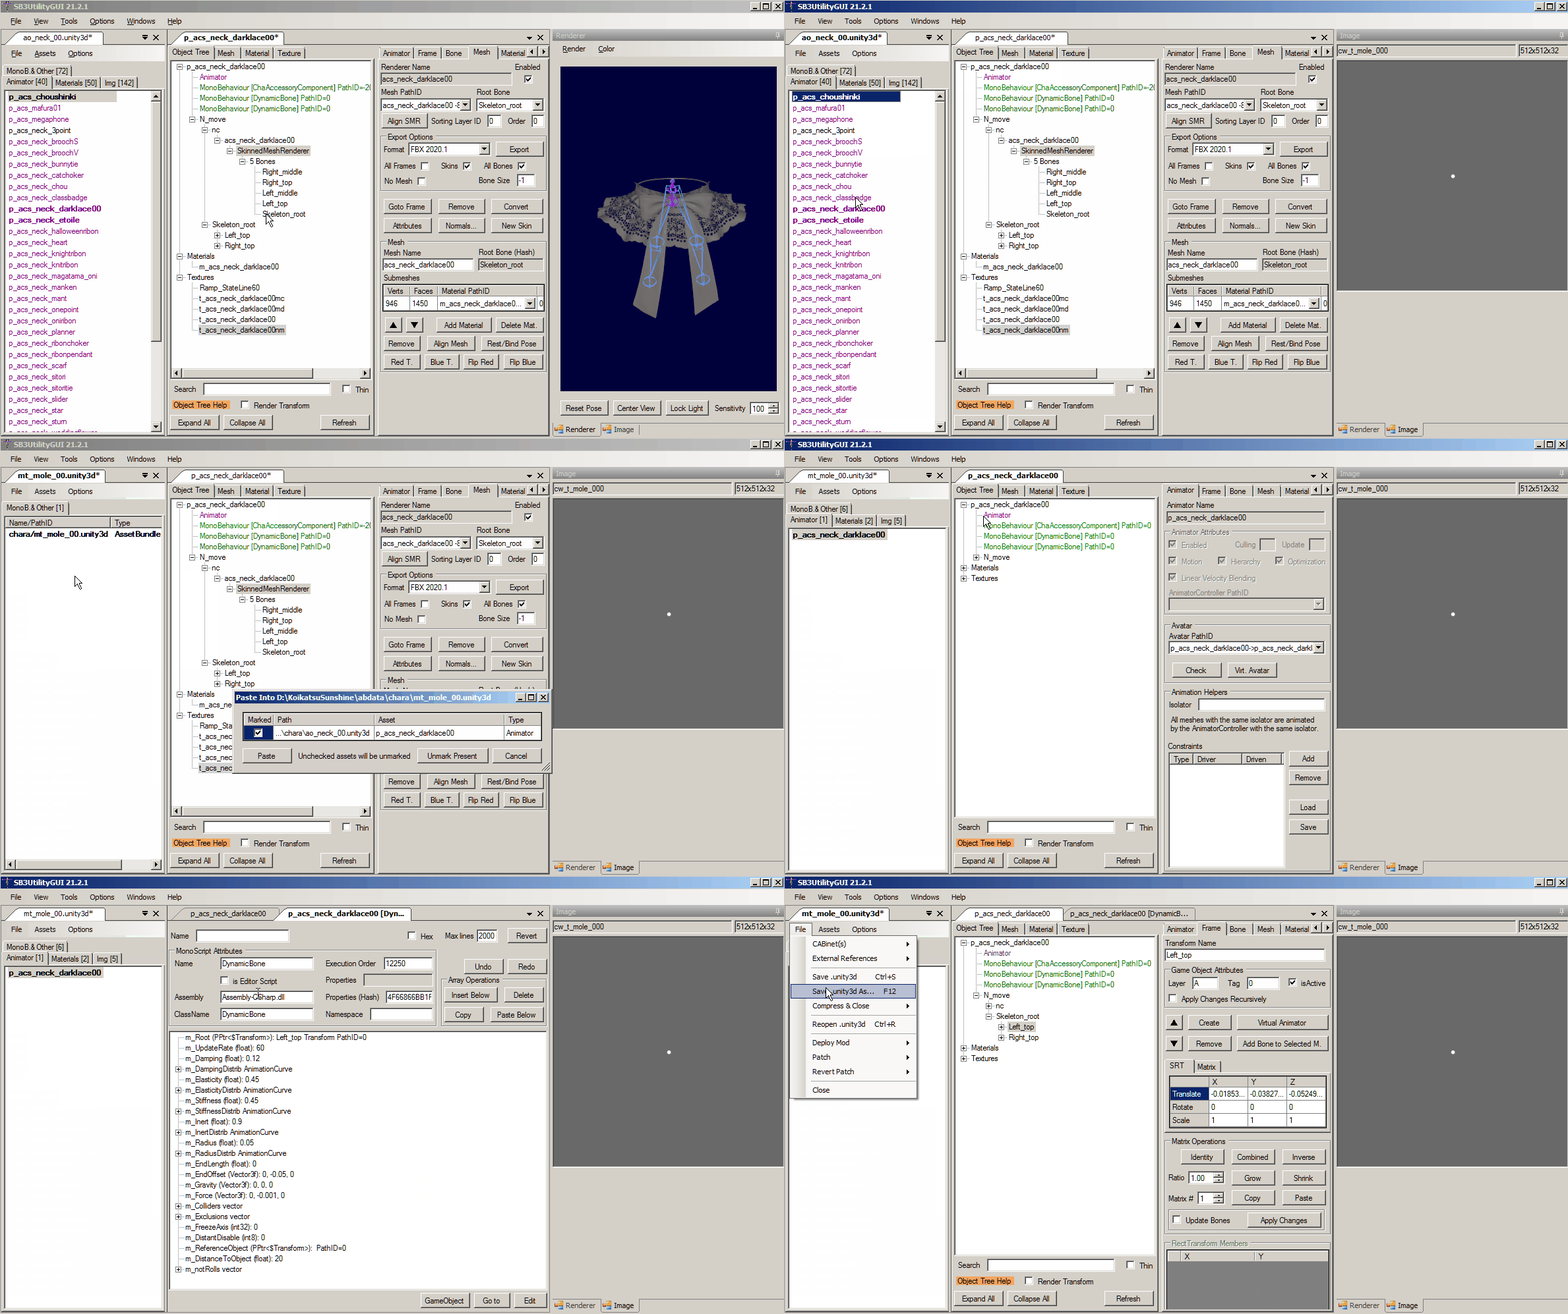
You need a small helper AssetBundle file as container for this. And here I used the orignal mole file from the game folder because it has only a few textures in it. The textures are selected and deleted (Shift-Del), the modified accessory p_acs_neck_darklace00 in ao_neck_00.unity3d is selected and gets underlined with "Mark for Copying" as indication for being pasted. After "Paste All Marked" into the mole file, I checked two MBs for verification, then used "Save As..." which allows to store it in a new path and file.

If you forgot to mark an asset, you can repeat the marking and pasting. See the tooltip of "Paste All Marked". It has a list of supported assets for this operation.
Editing MonoBehaviours
Open MBs (like all other "green" assets) with a double-click in the Object Tree or in the "MonoB. & Other" file tab. Click on a line then edit the value in the input field at the bottom. For references you can use drag 'n drop. And even for that is a tooltip in the input field.
Editors open with docked state in the middle. And as long as they are docked you need to drag the assets over the titles to reach the destination Object Tree:
Titles can be dragged and then the editor gets undocked which makes drag 'n drop operations a little easier:
MBs can be copied inside the same Object Tree, even into the same hosting GameObject. In this example an accessory has one DynamicBone MB. The MB gets opened and a new m_Root Transform is assigned. The MB is then copied, opened and that copy gets a different m_Root Transform assigned.
Replacing a skinned mesh
This is an advanced use case and requires an understanding of skinned meshes. When the skeleton already is in the Animator and had not been changed, then you can replace an existing mesh in place like shown below.
Note the number of bones of SkinnedMeshRenderer and the number of bones of the ImportedMesh. The Blue Area lets Sb3UGS search for a mesh with the same name in the Animator. No need to drop precisely onto a Transform in the Animator or change the Destination Transform in the dialog. The default method is Merge, but we don't want to retain anything from the SkinnedMeshRenderer (especially not the long bone list), so we change the method to Replace.
Since the mesh is already shown in the preview and had more than the supported number of bones for Sb3UGS, it gets shown animated like body and other clothes only after replacement.