vB1 CubeSat Simulator Lite vB1 - alanbjohnston/CubeSatSim GitHub Wiki
See below for the instructions for the original CubeSat Simulator Lite. It transmits pre-recorded telemetry on the FM broadcast band.
Coming soon is the new CubeSatSim Lite - an all new board that provides the functionality of the CubeSatSim but without the cost and complexity of batteries and solar panels.
CubeSatSim Lite
The circuit board for the CubeSatSim Lite is shown here
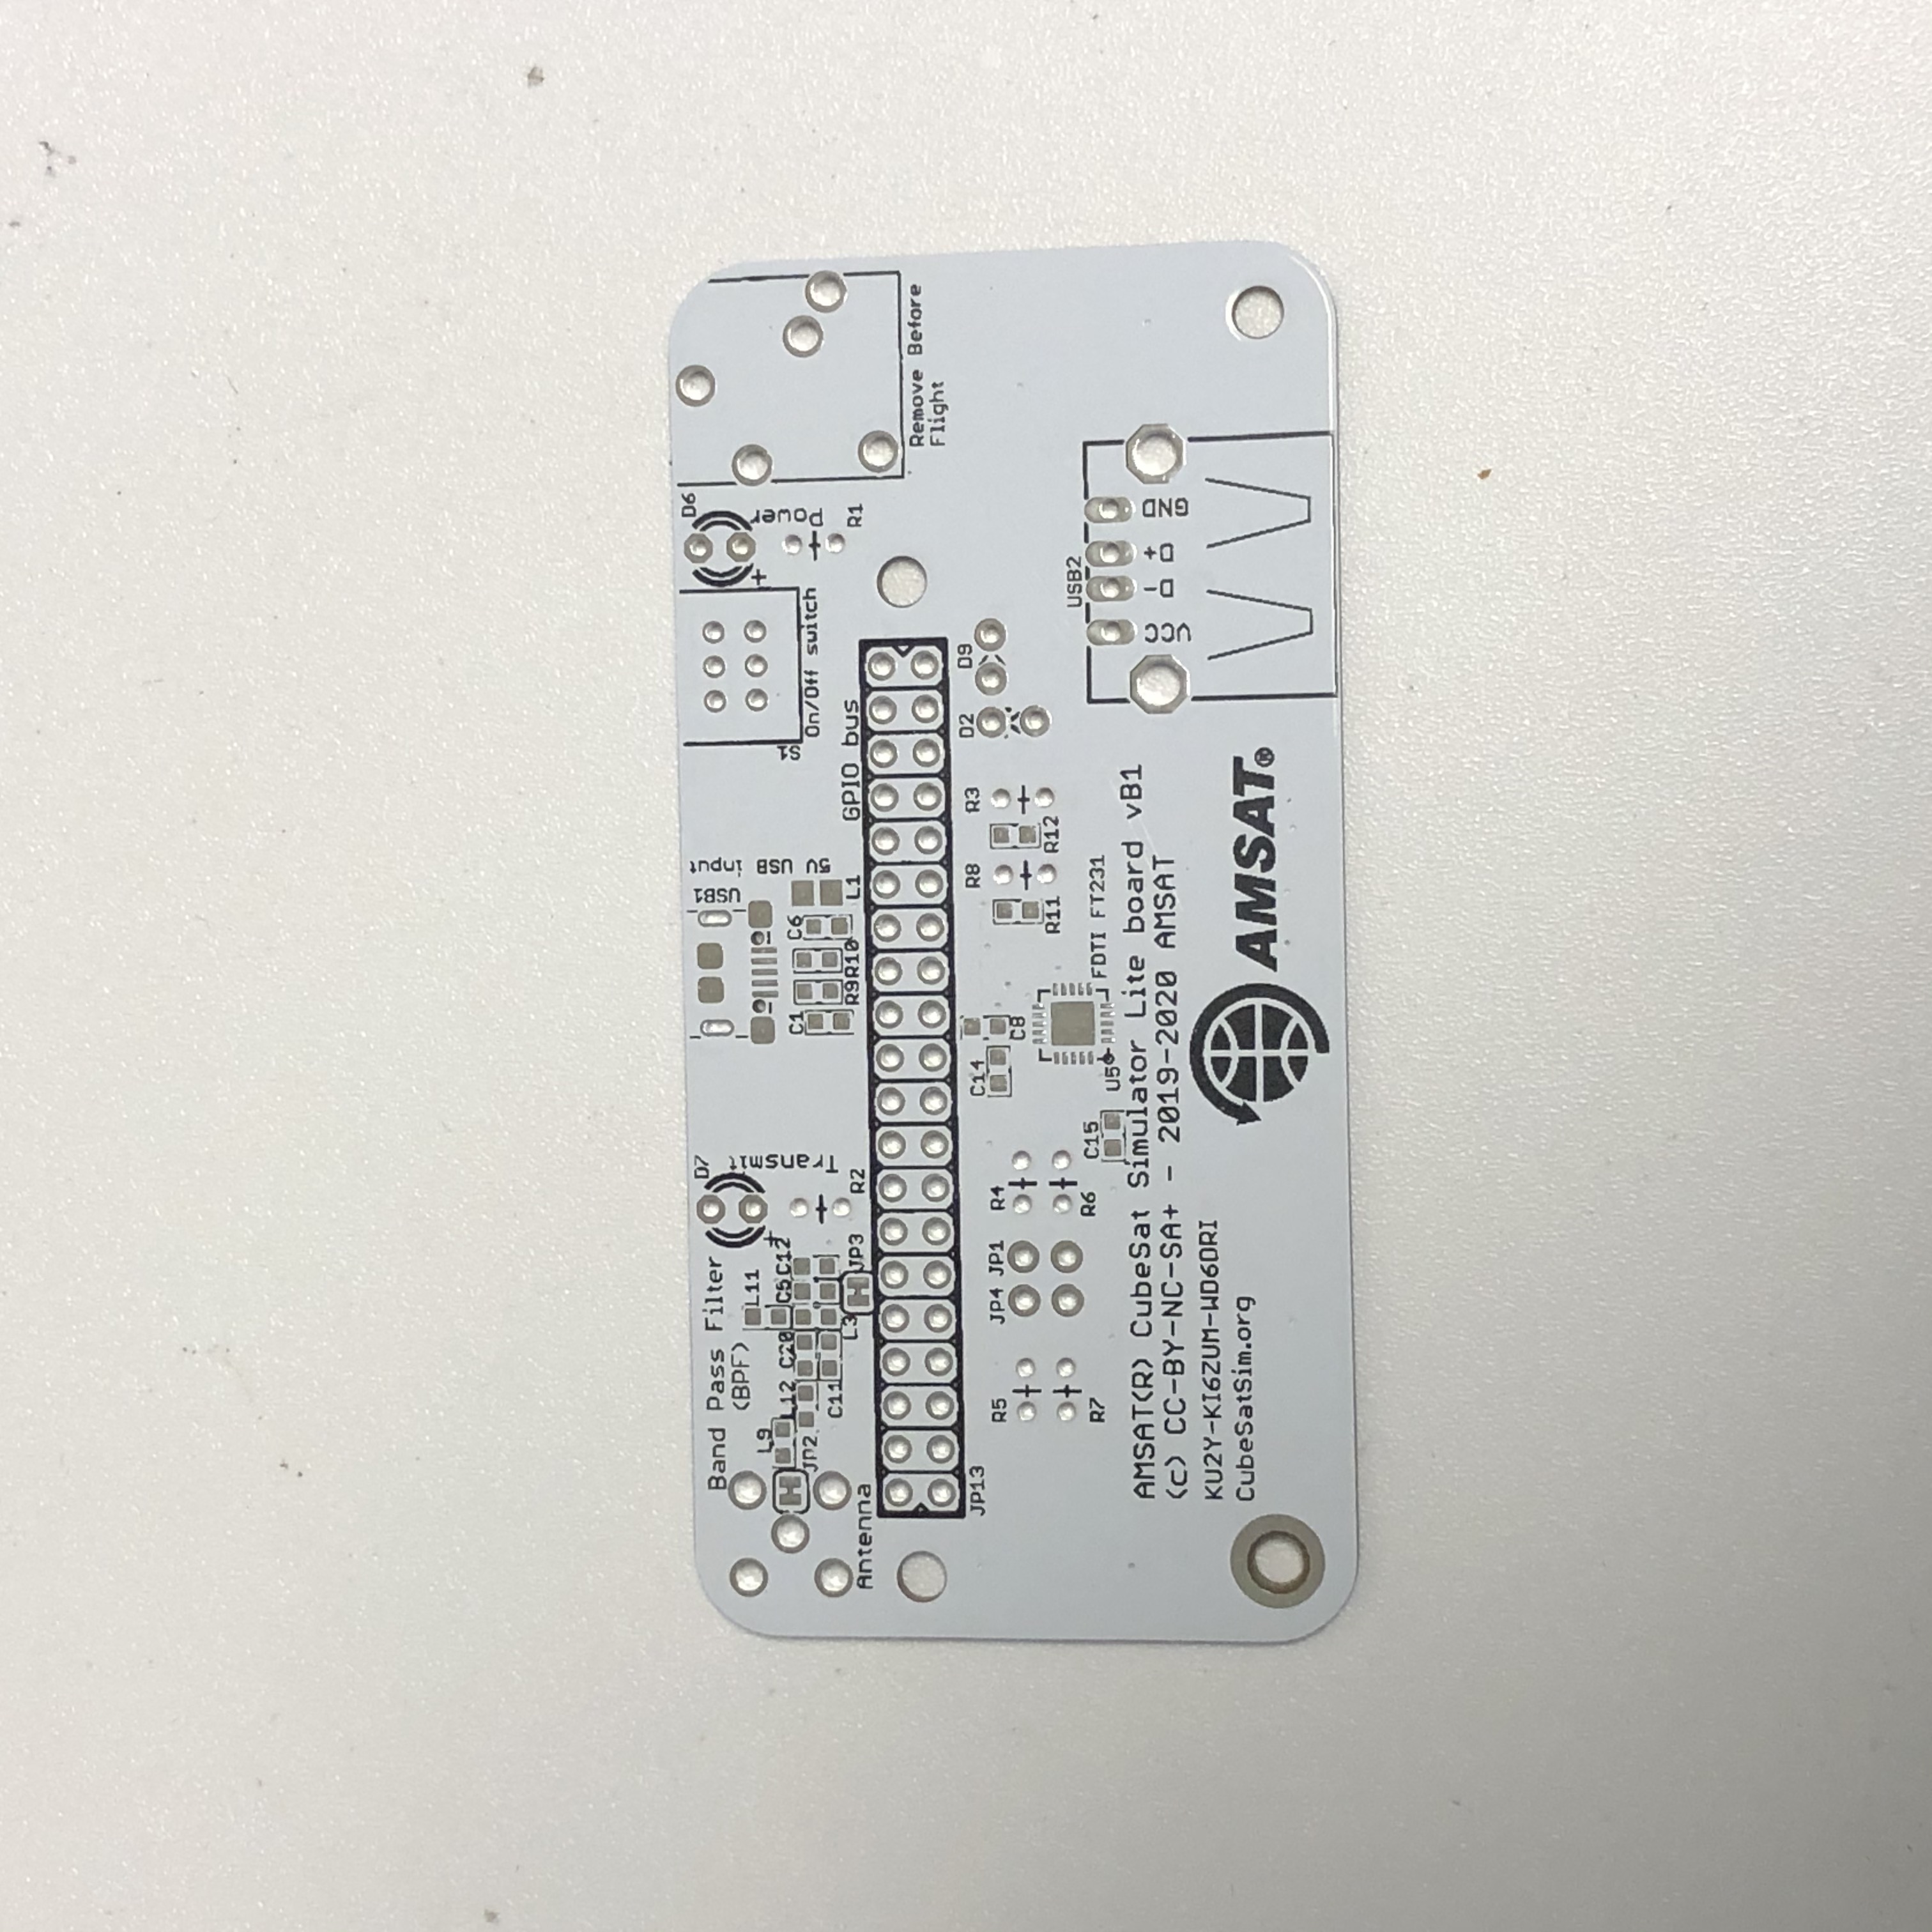
Normally, the CubeSatSim Lite board will be provided with the Band Pass Filter (BPF), inductor L1, and micro USB connector pre-soldered. With just these components soldered in, you can install the CubeSatSim software, plug in a Raspberry Pi Zero or Pi Zero W and start getting telemetry:
- GPIO connector, 2x20 pin female, JP 13 on schematic
- 1k Ohm resistor, R8 on schematic
- SMA female connector for Antenna
- SMA 433 MHz antenna
With just these components added, install the CubeSatSim software, plug in the Raspberry Pi Zero W or Pi Zero and perform this test:
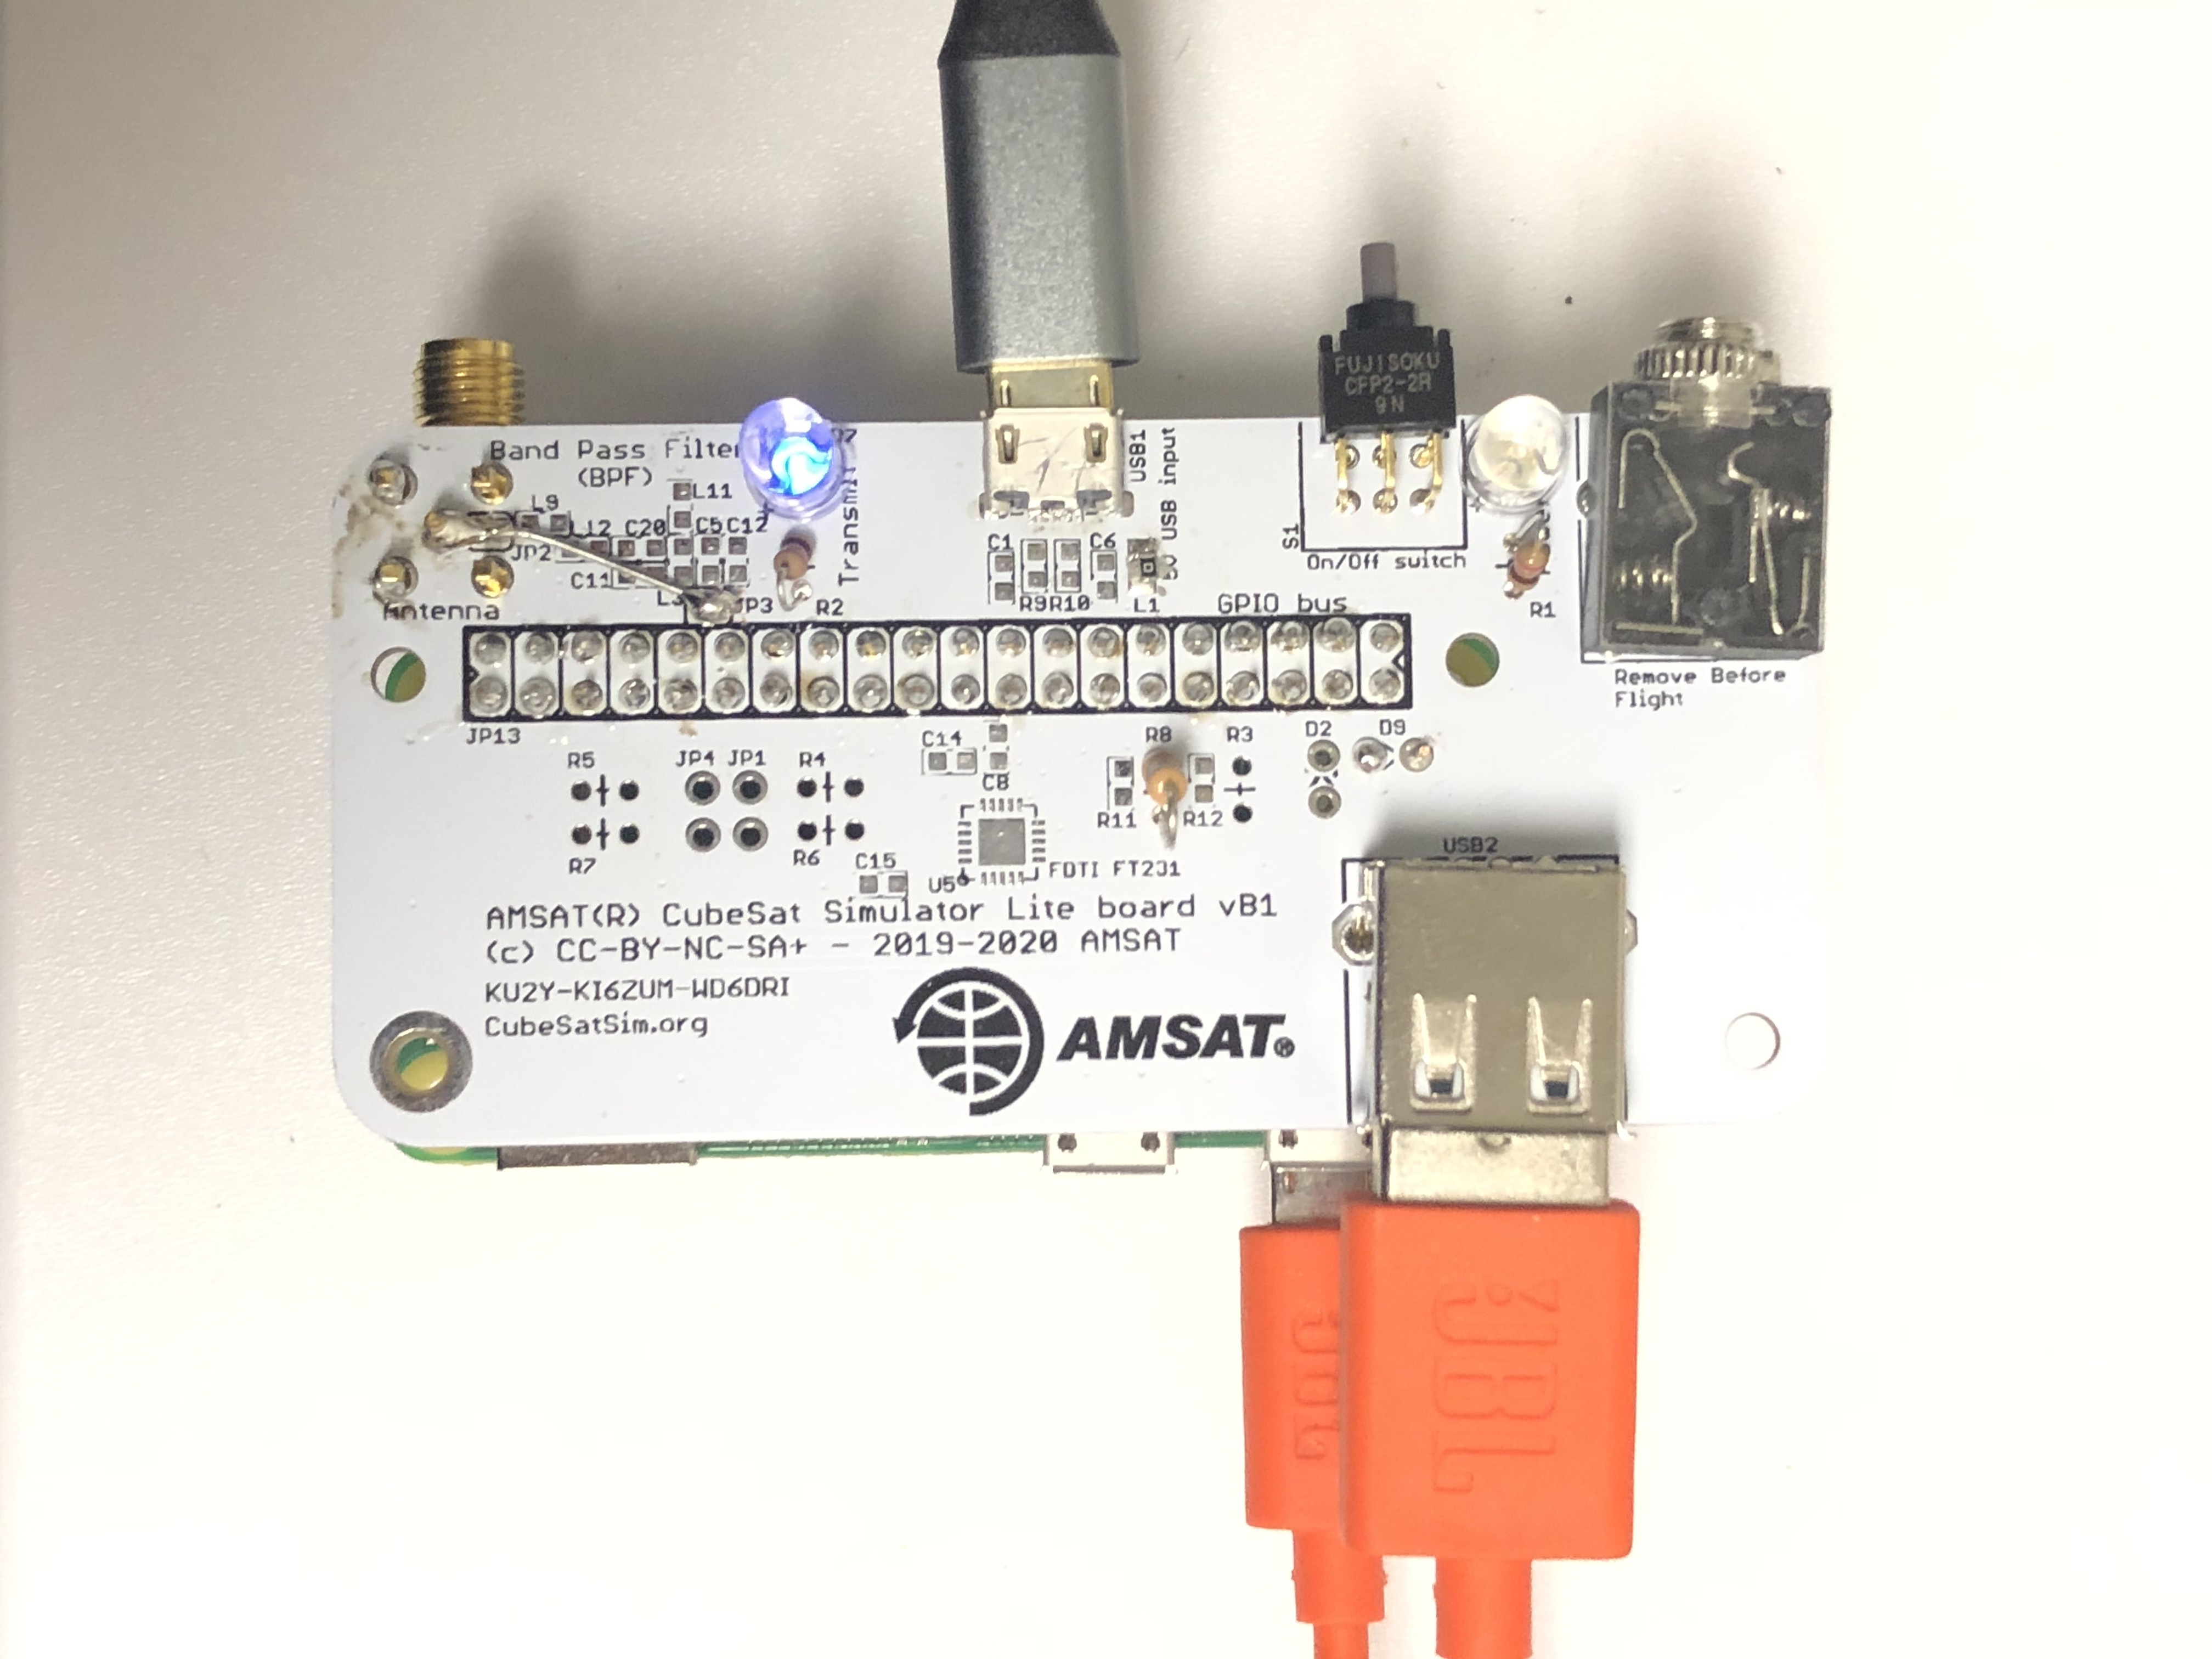
Adding the following components provides additional functionality to the CubeSatSim Lite:
- Green (Power) and Blue (Transmit) LEDs D6 and D7, and 470 Ohm resistors R1 and R2 - this provides the Power and Transmit lights
- Push button S1 - this allows you to start up and shutdown the CubeSatSim Lite, and also change telemetry modes using the Green LED
- RBF switch, USB connector, diode D9, and USB to micro USB cable - this allows you to use an RBF pin to start up the CubeSatSim by powering the Pi through the Lite board
With these components, you can perform these tests:
A CubeSatSim Lite board with this functionality is shown here:
There is one additional component that will provide future functionality: a UART FT231 IC which provides a serial port connection to a computer plugged into the micro USB port. In the future, this will provide interesting capabilities for the CubeSatSim Lite to interact with software running on a computer.
Here is the schematic for the CubeSatSim Lite Board
https://countingfromzero.net/amsat/cubesat-sim-lite-0.1_schematic.pdf
Original CubeSat Simulator Lite
If you don't have the time or the money to build a CubeSat Simulator with real telemetry, you could build a CubeSat Simulator Lite.
Actually, if you have a Raspberry Pi (any model), there's nothing to build - you just need to download some software and install an antenna on one of the GPIO pins and you can receive simulated telemetry on any FM radio.
Here's the instructions. On your Raspberry Pi, run:
sudo apt-get install git
Answer 'y' if prompted Do you want to continue? [Y/n] to install git.
git clone https://github.com/alanbjohnston/CubeSatSim.git
cd CubeSatSim
sudo apt-get install libsndfile1-dev
Answer 'y' if prompted Do you want to continue? [Y/n] to install the library.
git clone https://github.com/ChristopheJacquet/PiFmRds.git
cd PiFmRds/src
make
cd ../../
Then, to start the FM transmitter, run:
sudo ./PiFmRds/src/pi_fm_rds -audio wav/cw.wav
or
sudo ./PiFmRds/src/pi_fm_rds -audio wav/afsk2.wav
Tune to 107.9 MHz on any FM receiver and you will receive recorded telemetry from the CubeSat Simulator!
Note: if you have a station on 107.9 (as I do here), then pick an open frequency (for example, 107.5 MHz), and run:
sudo ./PiFmRds/src/pi_fm_rds -audio wav/cw.wav -freq 107.5
The simulator can be configured to automatically start transmitting on startup by following these instructions.
Find out the private IP address of your Raspberry Pi by typing ifconfig when there is no network connected (i.e. WiFi disabled or disconnected and no Ethernet connection.) Note this address as 169.xxx.yyy.zzz where xxx, yyy, and zzz are numbers 1-255.
Instructions for Starting Up CubeSatSim Lite
-
Connect the power supply to the CubeSat Simulator Lite. If it is a powerbank, might also need to press the on button on the powerbank. When the Pi starts up, you will see a red LED on solidly and a green LED that flickers.
-
Wait 10 seconds then listen for AFSK telemetry on 107.907 MHz NBFM 20kHz bandwidth. (See section on Ground Station setup, except tune to 107.907 MHz. You can also use an FM radio to hear it.)
-
If you are receiving the telemetry on your SDR software on your ground station PC, run AFSK1200Decoder (with VBCable configured) and you should see telemetry decode beginning with “hi hi ...”
Instructions for Shutting Down CubeSatSim Lite
-
To shutdown the Raspberry Pi safely, you need a PC with PuTTY installed and an Ethernet cable.
-
Disable WiFi on the laptop. Go to a web page and verify nothing loads
No internet. Plug Ethernet into Pi and into laptop. You should see yellow and green lights on Pi Ethernet jack. -
Open Putty on PC. In Host Name type
169.xxx.yyy.zzzand leave port set to 22. Click Open button. -
If this is the first time you have done this on your PC, you will see the PuTTY SSH security alert, as shown above. Click Yes to continue and you will get a black Raspberry Pi window.
-
When black Pi window opens at prompt
login as:typepithen return. Forpassword:typeraspberrythen return (all lower case). -
Once logged into the Pi, at prompt
pi@raspberrypi:typesudo shutdown nowthen return. -
The green LED will blink for a few seconds then go dark. The FM transmissions will stop. It is now safe to turn off the powerpack or unplug the power cord to power off the Pi. The red LED on the Pi will go out. PuTTY will pop up an error
Putty Fatal Errorwhich is normal. You can now close Putty, unplug the Ethernet cable and turn WiFi back on the laptop.
Back to the CubeSat Simulator Wiki Home