v1.2 2. Software Install - alanbjohnston/CubeSatSim GitHub Wiki
If the images on this page fail to display, you can download a PDF of the page.
Software Install
There are two ways to get the CubeSatSim software for your Pi.
One option is to download the disk image file and write it to a 16GB or larger micro SD card. The image is based on Raspberry Pi OS (Rasbian) Lite, Buster version dated November 2020.
All the software is installed, you just need to login to change your password and set your amateur radio callsign if you have one. You can run the ./update.sh script to update all packages and update and compile the latest CubeSatSim software.
The other option is to start with any Raspberry Pi OS (Rasbian) image and run the installation script ./install.sh which will install and compile all the related software. This includes the following packages:
- wiringpi
- git
- libasound2-dev
- pi-power-button
- Direwolf
- rpitx
- python3-pip
- python-smbus
Video
Here is a video showing how to install the software: https://youtu.be/swWasXBH7PU
Checklist
The BOM has a sheet "By Steps" which lists the parts needed for each step in order. http://cubesatsim.org/bom-v1 If you have a Google account, you can make a copy of this spreadsheet ("File" then "Make a Copy") and check off each part as you install it.
For example, here is the checklist for this step:

Disk Image Option Steps
You can write a pre-built Raspberry Pi disk image to your SD card. Your Pi then should boot up immediately and run the CubeSatSim software. You can configure a few settings, but it will run right away.
Here are the steps we use to create the Raspberry image, so you can create your own if you want.
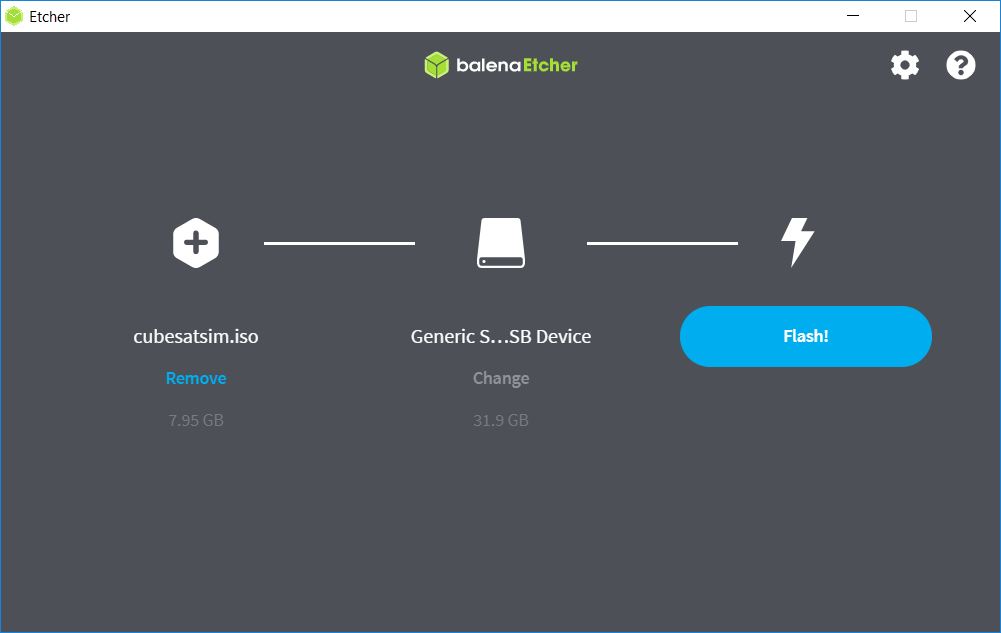
You will need a micro SD card with at least 16GB of capacity and a micro SD card writer and free software such as balenaEtcher: https://www.balena.io/etcher/ You will need to have administrator privileges on your computer in order to do this.
The image file is larger than 1GB, but with balenaEtcher you can write it from the URL without having to download it first. When you run balenaEtcher, select the Flash from URL option with this URL: http://cubesatsim.org/download/cubesatsim.iso.zip (Note: if you want to run the original v1.2 software instead of the latest version, use this URL: http://cubesatsim.org/download/cubesatsim-v1.2.iso.zip ) Here is the readme file for the image: http://cubesatsim.org/download/cubesatsim-readme.pdf Insert your micro SD card - the card will be erased in the process of writing. Click on Select Target and select your SD card writer. The Size shown here should match the size of your micro SD card.
Then select Flash to begin writing. You will need to input your administrator password, then the write will begin. It will take a while.
Alternatively, you can first download the disk image by opening http://cubesatsim.org/download/cubesatsim.iso.zip in your web browser, then choose the Flash from File option in balenaEtcher then select the image file you downloaded.
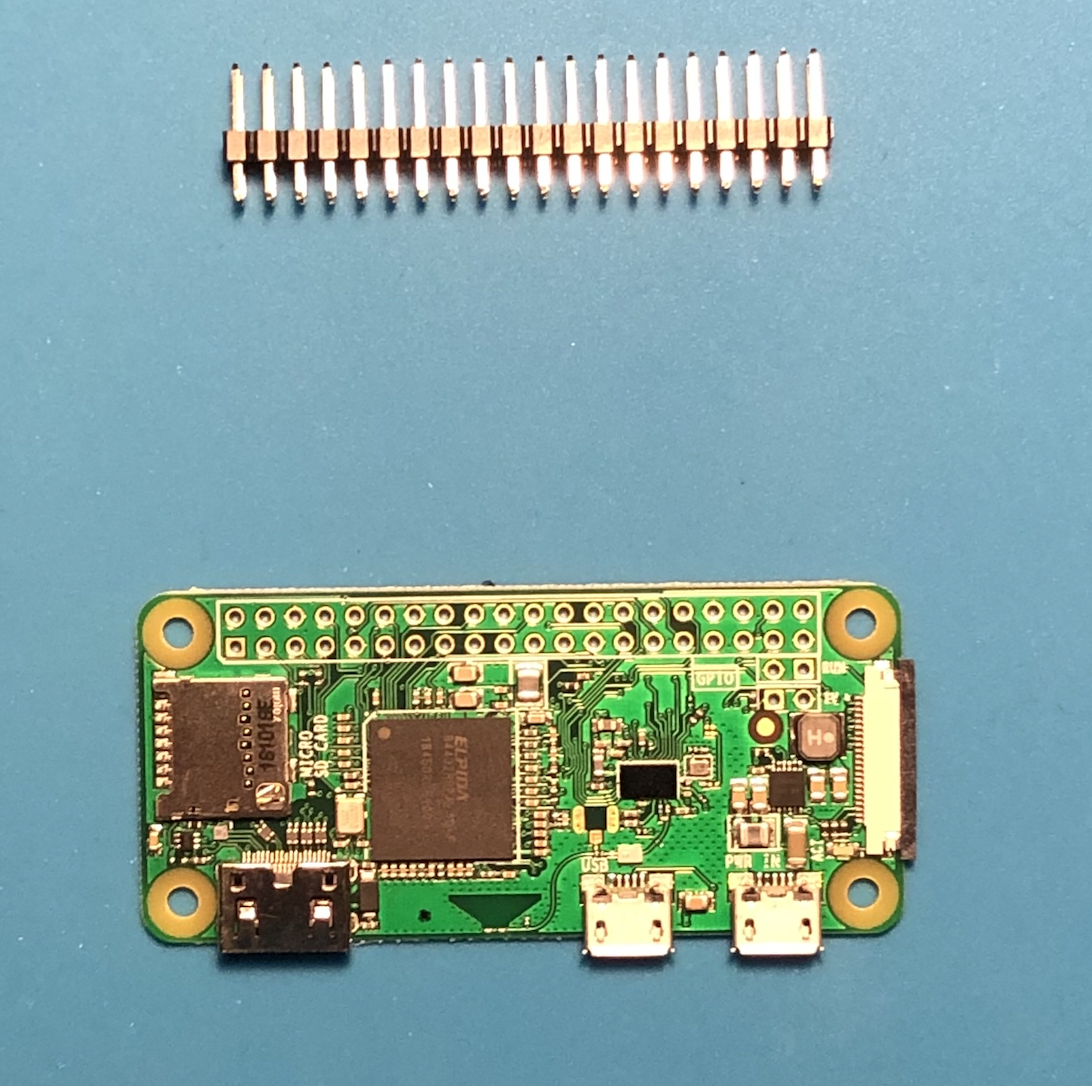
If your Raspberry Pi Zero does not have the GPIO header pins installed, you will need to solder them in:
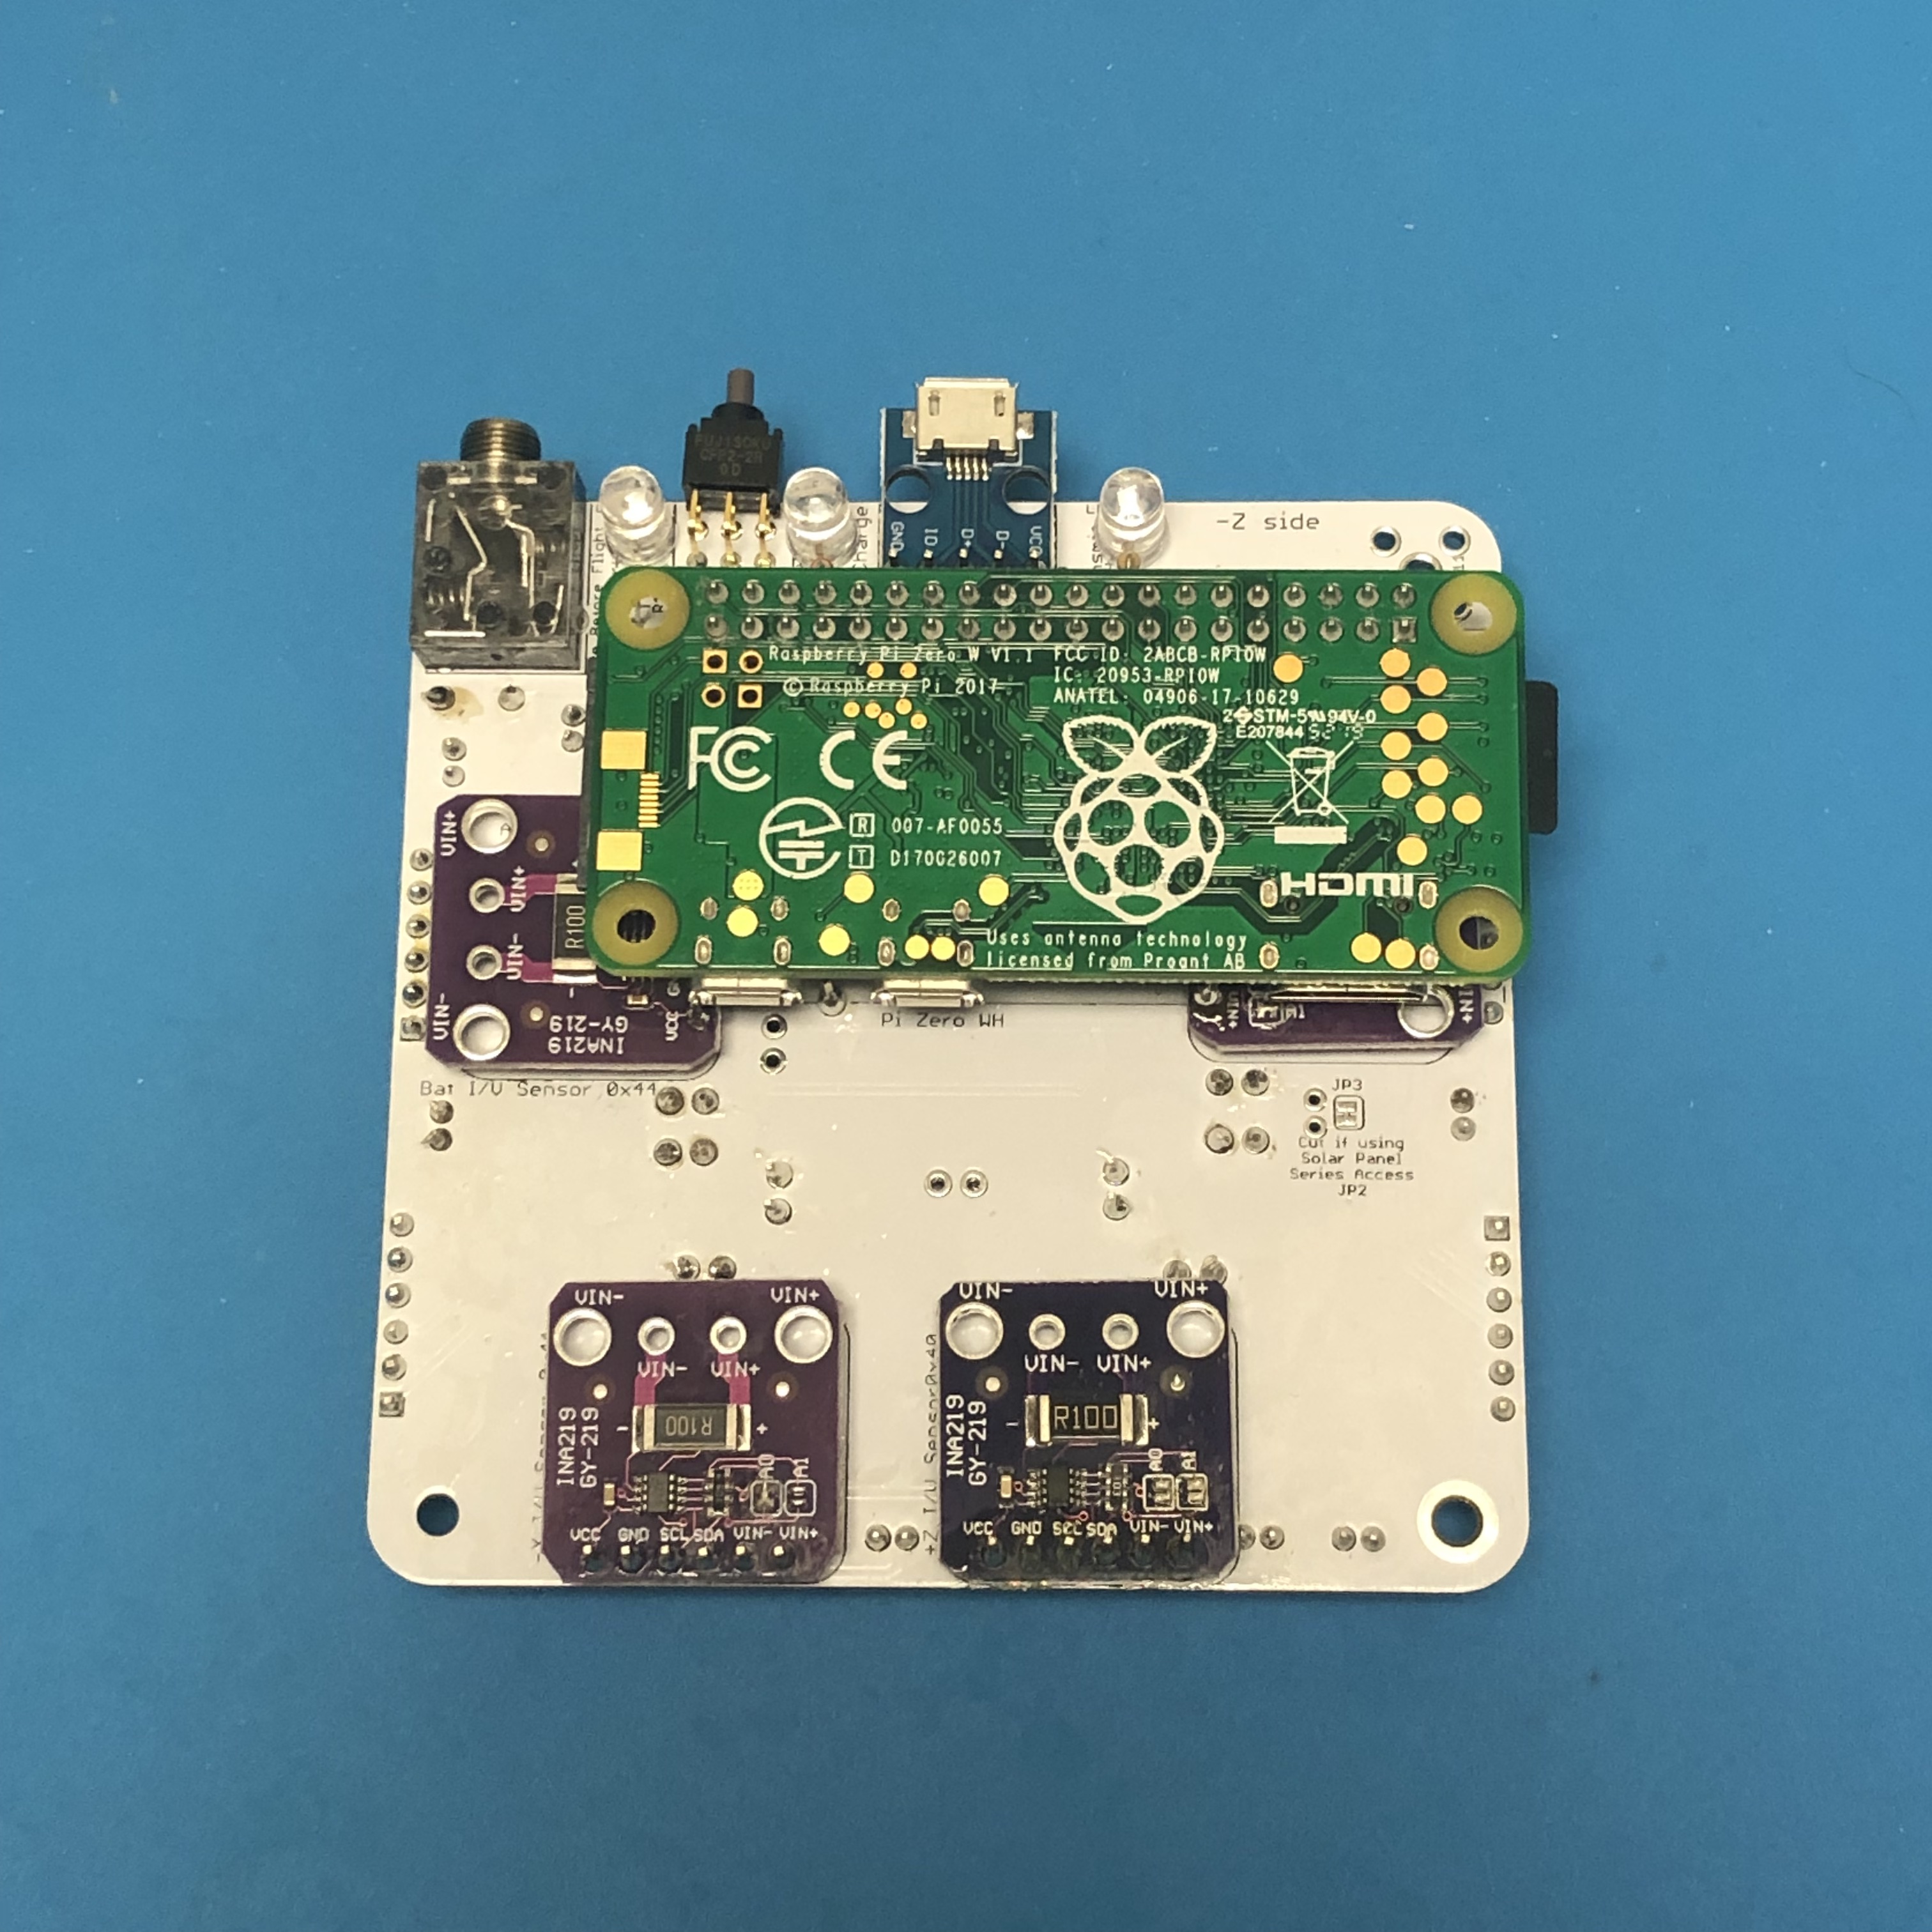
You can then insert the micro SD card in your Pi and it will boot and run the CubeSatSim software. NOTE: in order to transmit telemetry, you will need to have your Pi plugged into the CubeSatSim Main board or CubeSatSim Lite board. If you don't, it will only transmit the callsign in CW (Morse Code) once at the start. Instructions on how to plug the Pi into the Main board are in Step 4: https://github.com/alanbjohnston/CubeSatSim/wiki/v1.2-4.-Main-Board-2 The Pi Zero plugs into the bottom of the Main board, as shown here:
You can customize your software by logging into the Pi. If you have an HDMI monitor (and mini HDMI adapter or cable) and a USB keyboard (and micro USB to USB adapter or OTG cable), you can access the console directly.
If not, you can access your Pi from a computer using just a USB cable. This Ethernet over USB service is known as RNDIS on Windows and USB Gadget on Linux.
On Mac or Linux, you don't need to install any software to use this. On Windows, you need the mDNS discovery program Bonjour. If you already have iTunes installed, you should have it. If not, you can download it from Apple here:
https://support.apple.com/kb/dl999?locale=en_US
Note that it is called Bonjour Printer Services, since that is the most common standalone use for the application. Run the installer and reboot.
On your Pi Zero, connect a micro USB cable to the inner micro USB connector which is labeled "USB", not the one on the edge labeled PWR IN (Power In) as shown here:
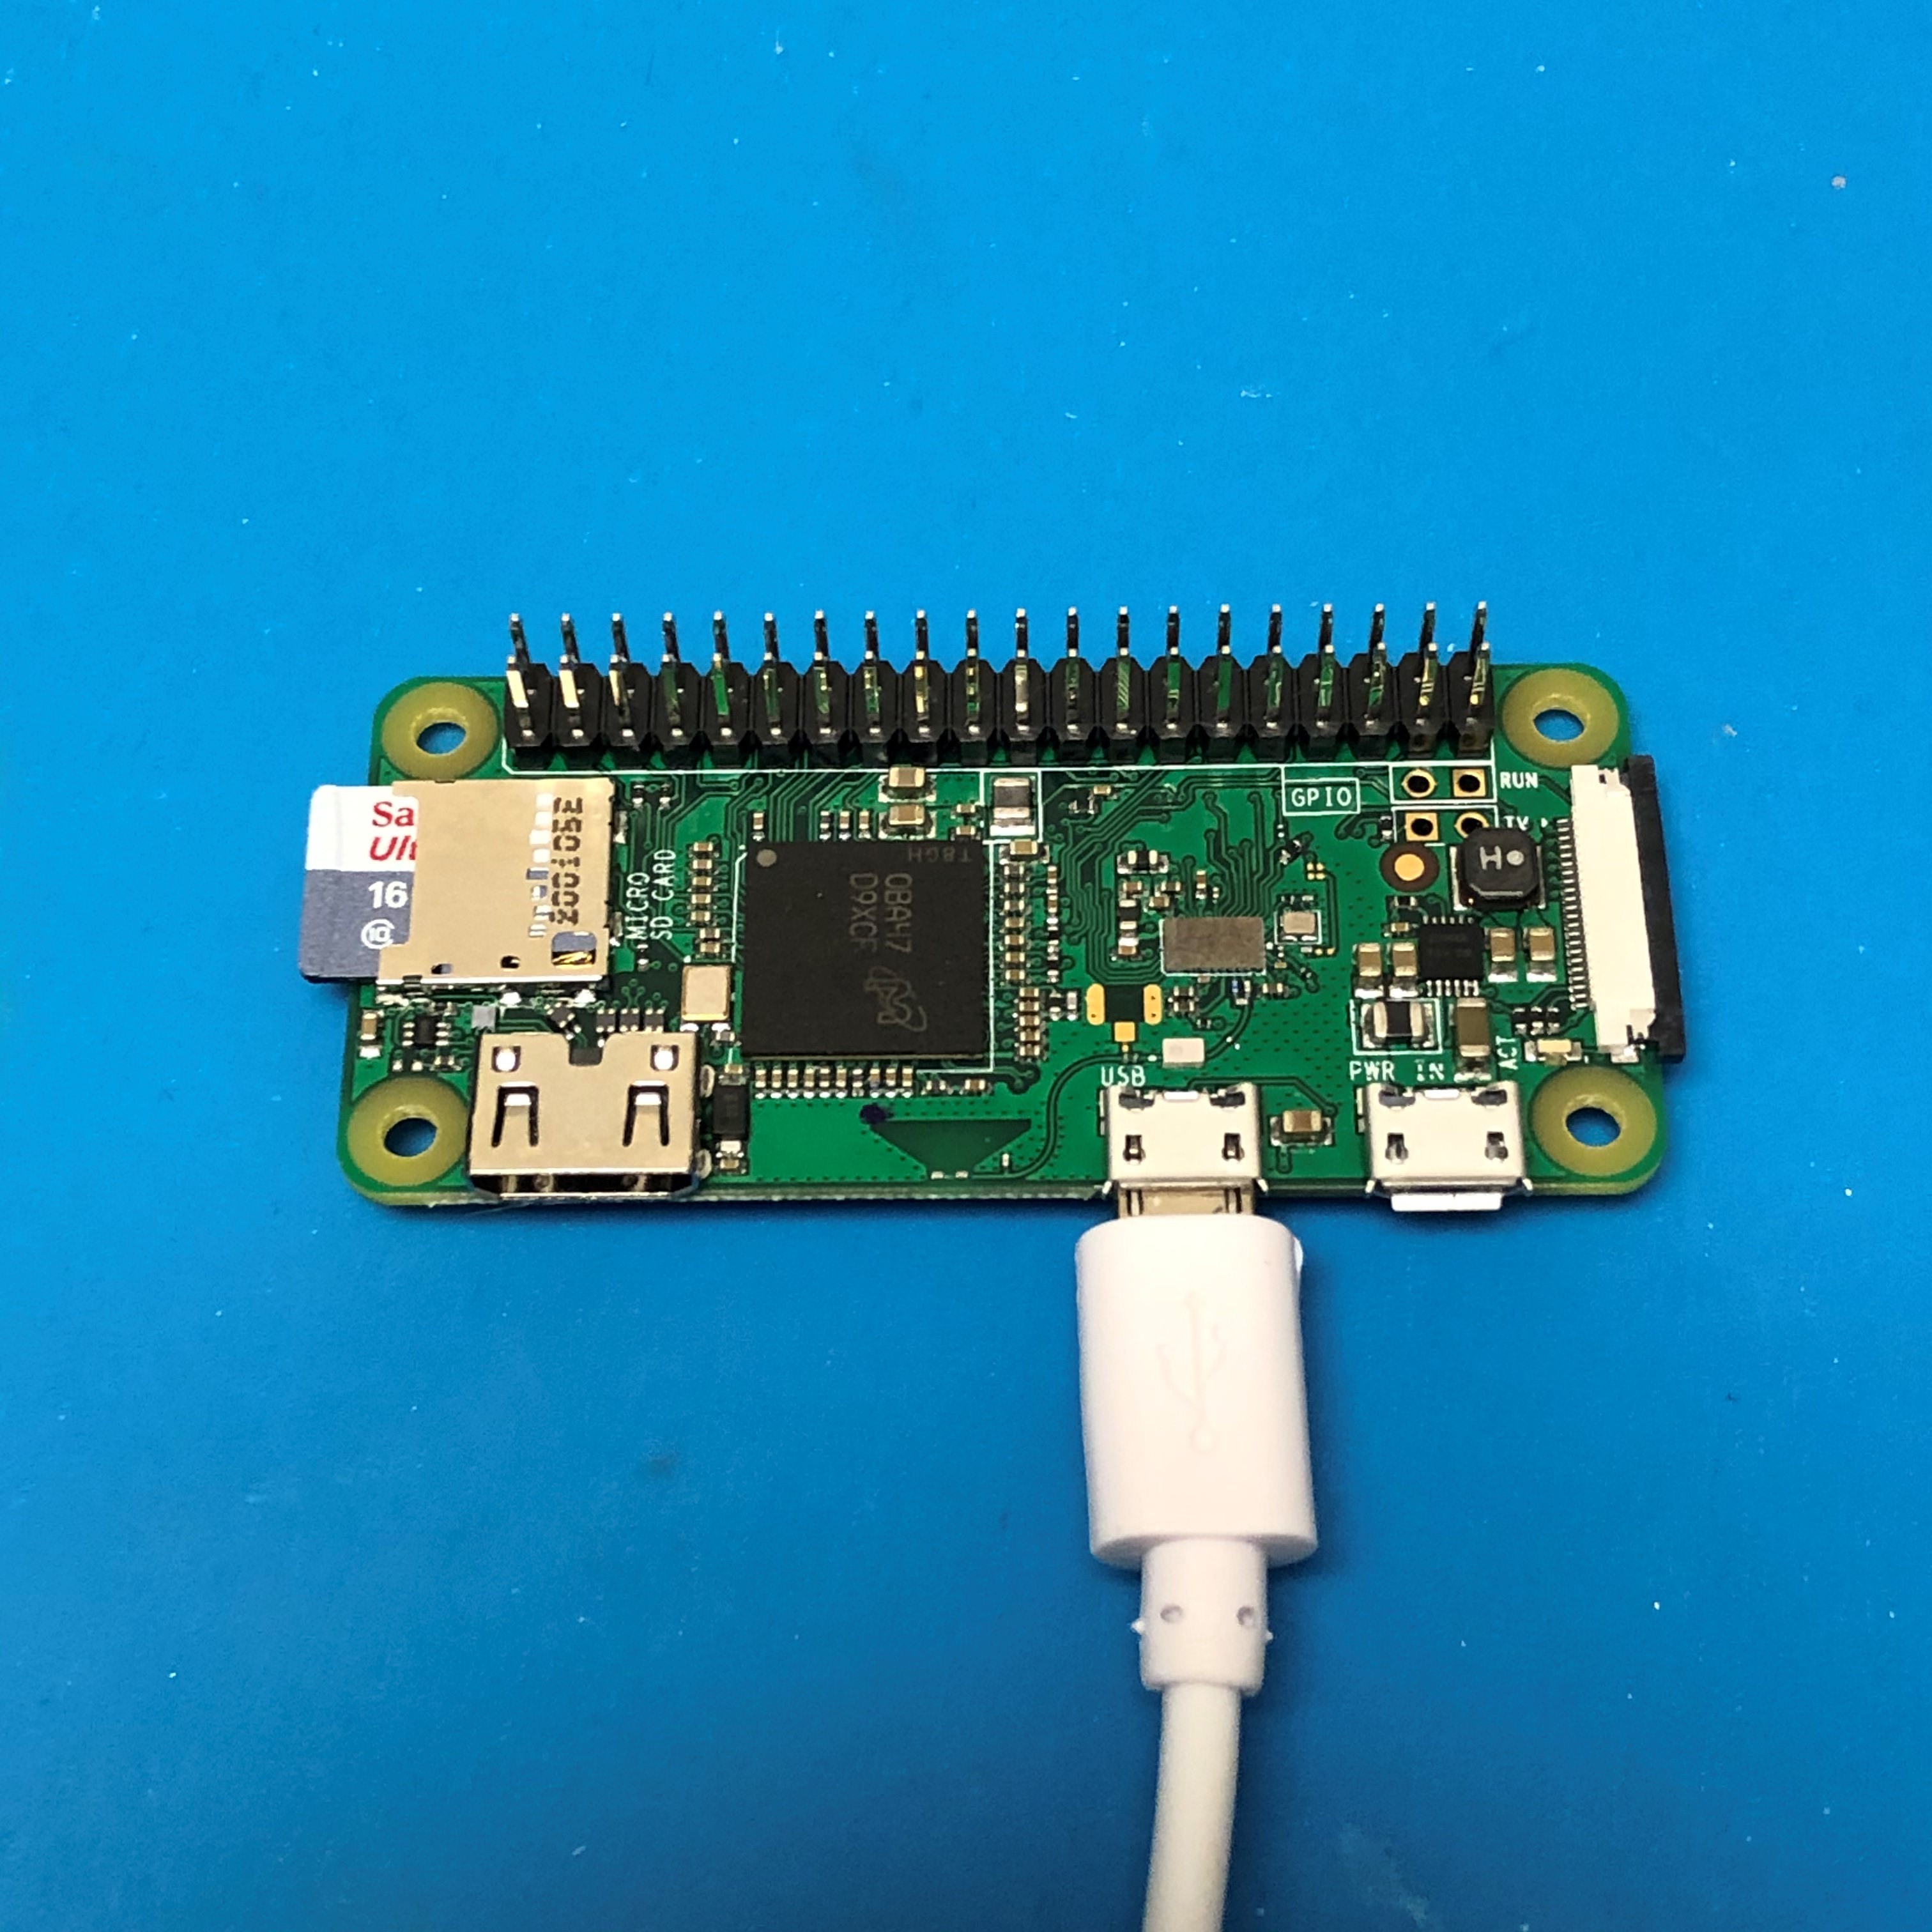
When you connect the other end of the USB cable to your computer, it will power up the Pi. After a few moments, you will have network connectivity to your Pi. For example, in the Terminal Window or Windows Command Prompt, you can type:
and you can login using the default password raspberry.
Sometimes, this doesn't work on Windows - if you are unable to connect after installing the software, try the steps described here: https://fredricraab.wordpress.com/cubesat-simulators/raspberrypi-zero-windows-10-rndis- driver-problems/
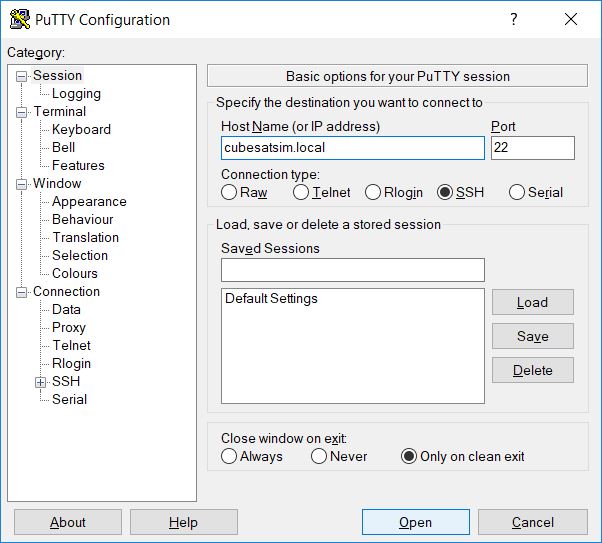
Alternatively, you can use a free application such as PuTTY on Windows. Download it here https://www.putty.org/ and open it, setting the Host Name to cubesatsim.local and then click Open to connect:
Here is how it looks when you login on Windows using PuTTY after entering the default password raspberry
You should set your amateur radio callsign which is transmitted as CW telemetry on 434.9 MHz (+/- 15 kHz) every time the CubeSatSim software starts up. You should edit the CubeSatSim/sim.cfg file to set your own callsign. You can also change localization settings or configure your local WiFi network by running sudo raspi-config.
The CubeSatSim software runs as a systemd service called cubesatsim.service. There is also a rpitx.service which runs as well.
Changing the hostname
If you want to change the hostname from cubesatsim, you can run raspi-config by typing this command:
sudo raspi-config
You will see menu like this:
Hit the Enter key to select the System Options (or use the up and down arrows if you are on a different option). You will then see:
Use the down arrow to select Hostname then hit Enter. You will then see this message saying what characters can be used:
Hit the Enter key to continue:
Now enter your chosen hostname then hit Enter or use the down arrow to select the OK button then hit Enter.
Use the right arrow to select the Finish button then hit Enter:
Hit Enter to select Yes to reboot. When the Pi reboots in about 30 seconds, you will need to ssh using your new hostname.
Installation Script Option Steps
You can start with Raspberry Pi OS Bullseye (Desktop or Lite), although a Pi Zero or Pi Zero W should only run Bullseye Lite. Make sure you create a user pi and do the install with that user or there may be issues with configuration files and settings as it references many paths in /home/pi/*. Your Pi will need to have internet access to update settings and install packages.
To get the software follow these steps:
sudo apt-get update && sudo apt-get dist-upgrade -y
sudo apt-get install -y git
git clone http://github.com/alanbjohnston/CubeSatSim.git
cd CubeSatSim
git checkout v1.2
You are now ready to install the software.
./install
Note: You can also use the master branch (git checkout master) and you will be running the v2.0 software. You will also need to update the software on your Pro Micro microcontroller to the v2.0 software as well.
You will be prompted for your amateur radio callsign. If you don't have one or just hit Return, the default AMSAT will be used. The Callsign is transmitted as a CW ID (Morse code) each time the CubeSatSim software starts up.
The installation script will run for quite a while. It will prompt you if you want to modify /boot/config.txt file. Type a y and the script will complete. You will need to reboot.
Using the CubeSatSim
After rebooting or powering up your Pi, tune your radio or SDR to 434.9 MHz (+/- 15 kHz) FM, and you should receive a signal. If you are testing with only the Pi (no CubeSatSim Main board or Lite board plugged in), you will just hear the Morse Code (CW) of your callsign once (or the default AMSAT if you didn't supply one to the install script run the ‘CubeSatSim/config -c’ command. If you have build the Main Board or have the Lite board and plugged it in or have build the TFB and plugged it into your Pi, you will hear telemetry signals as well after about 30 seconds.
On the Main Board, the green LED will be on when the CubeSatSim software is running. The red LED will illuminate when charging is occurring through the micro USB cable. The blue LED will illuminate when the CubeSatSim is transmitting.
The pushbutton with the pi-power-button software will cause the Pi to reboot, change telemetry mode, or shutdown. Pressing and holding the pushbutton will make the green power LED blink first once, then two times, then three times, then four times, then five times, then blink slowly. Depending on when you release the button, different things will happen. Here's what happens if you:
Press and release (don't hold button in at all): reboots CubeSatSim. The green LED will go out, and after 30 seconds, the CubeSatSim will be transmitting again.
Press and release after one blink of green LED: switches to mode 1 which is APRS/AFSK telemetry mode. After about 5 seconds, the telemetry mode will switch to APRS.
Press and release after two blinks of green LED: switches to mode 2 which is FSK/DUV mode. After about 5 seconds, the telemetry mode will switch to FSK.
Press and release after three blinks of green LED: switches to mode 3 which is BPSK mode. After about 5 seconds, the telemetry mode will switch to BPSK.
Press and release after four blinks of green LED: switches to mode 4 which is SSTV mode. After about 5 seconds, a Scottie 2 SSTV image will be transmitted instead of telemetry. The first image transmitted is a stored image. If a Pi Camera is installed and enabled, a camera image will be transmitted every 30 seconds after that. Otherwise, a different stored image is repeatedly transmitted.
Press and release after five blinks of green LED: switches to mode 5 which is CW mode. After about 5 seconds, the telemetry mode will switch to CW (Morse code).
Press and release after green LED begins slow blinking: shuts down CubeSatSim.
Once the CubeSatSim shuts down, the RBF pin can then be safely inserted. Removing the RBF pin or pressing the push button will cause the CubeSatSim to start up again. It will use the same mode it was running when it was shutdown.
You can also change the telemetry mode using the command line. Typing CubeSatSim/config will show you the configuration options including how to change the mode. For example CubeSatSim/config -s will change to SSTV mode.
If you want to stop the CubeSatSim software, you can type these two commands:
sudo systemctl stop cubesatsim
sudo systemctl stop rpitx
After rebooting, the CubeSatSim software will start unless you disable it by typing:
sudo systemctl disable cubesatsim
sudo systemctl disable rpitx
You can then re-enable it on the next boot by typing:
sudo systemctl enable cubesatsim
sudo systemctl enable rpitx
Next step is to setup your Ground Station.
