4.5.3 Input a customized AD4 parameter file - Valdes-Tresanco-MS/AMDock-win GitHub Wiki
AD4.1_bound.dat is the default parameter file for AutoGrid 4.2 and AutoDock 4.2. Here is where all the weighted coefficients for the scoring function, as well as the parameters for different atom types, are located. Sometimes the system under study contains "special" atoms or simply a new set of weighted coefficients has been derived for certain systems, i.e. protein:carbohydrates, metalloprotein:ligand, etc. AMDock provides a simple way to input a customized AD4 parameter file as well as keeping "special" atoms in the receptor during processing.
In this tutorial, we are going to work with the E.coli Polypeptide Deformylase complexed with SB-485343 (PDB ID: 2AI8) which contains a Nickel atom in the active site. Receptor (rec.pdb) and ligand (lig.pdb) files are available at Installation_path/Doc/Tutorials/V_Additional_Tutorials/3.Input_a_customized_AD4_parameter_file... folder. The crystal structure of the complex (complex.pdb) is available as well for comparison purposes.
Let's begin!
- Open AMDock program
- Select Autodock4
- Set the Project Name (default Docking_Project)
- Set the Location for Project and push the button “Create Project”
- Check that “Simple Docking” checkbox is selected (It is checked by default)
- Then, customized AD4 parameter files (AD4_customized.dat) containing all the information regarding the Nickel atom will be added. Also, we want to keep the Nickel atom while processing the receptor file; make sure the "Keep Metals in Receptor" checkbox is selected and add the following line... Ni:+2

- Choose the receptor file(Installation_path/Doc/Tutorials/V_Additional_Tutorials/3.Input_a_customized_AD4_parameter_file/rec.pdb)
- Choose the ligand file(Installation_path/Doc/Tutorials/V_Additional_Tutorials/3.Input_a_customized_AD4_parameter_file/lig.pdbqt)

- Press the “Prepare Input” button
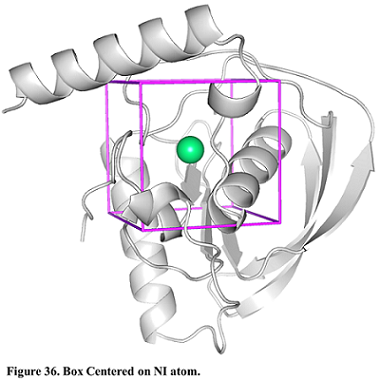
- Then, for defining a search space, pick “Center on Hetero” and select the ligand “A:NI:601”
- Press “Define Search Space” button
- Press the “Run” button
- When docking run ends, the “Results Analysis” tab will appear automatically. There, you will observe a summarizing table with Binding Energies, Estimated Ki values, and Ligand Efficiencies.
The number of poses and energies can vary since this is docking engine dependent.
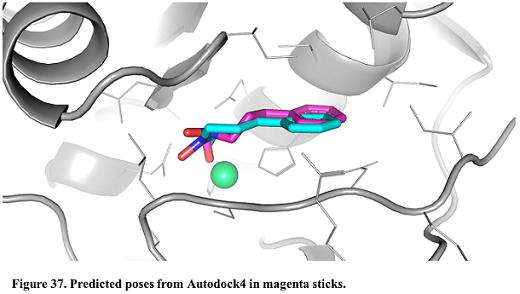
- In the results table, select the first poses. Press the button “Show in PyMOL” in the bottom left corner to visualize the complex.
- The crystal structure can be superposed on the predicted structures. Press “Open” in the upper left corner in PyMOL and find the X-ray structure (Installation_path/Doc/Tutorials/V_Additional_Tutorials/3.Input_a_customized_AD4_parameter_file/complex.pdb)