HOW TO Configure SpeedFan - SilverAzide/Gadgets GitHub Wiki
Using SpeedFan with Rainmeter skins requires installing and configuring the SpeedFan monitoring application.
- Download SpeedFan here.
- Install the application and run it.
SpeedFan's indexes to the temperature and fan values are dependent on your system configuration. Temperature and fan sensor data do not necessarily display in any particular order, which means the plug-in cannot tell the difference between a CPU core temperature and a hard drive temperature. Fortunately, SpeedFan allows manually ordering the temperature and fan sensors, so that items will appear in a predictable order. To configure SpeedFan, do the following:
- The main SpeedFan screen is the Readings tab, which will show your current fan speeds and device temperatures.
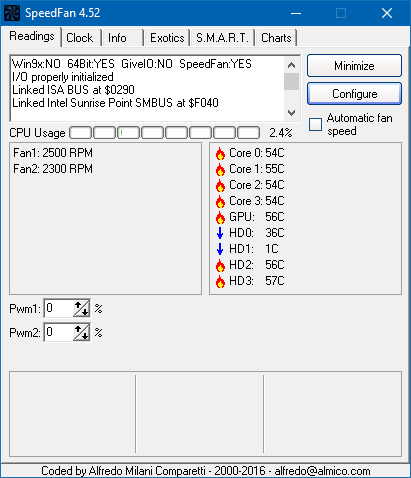
- NOTE: If you are missing some or all temperature data (in the right pane) or if you don't see any fan data (in the left pane), and you have a Dell laptop, click the Configure button and on the Configure dialog select the Options tab. Check the Enable DELL support option, then click OK to save your change and return to the Details tab. If you still do not see your fans and/or temperatures, restart SpeedFan.
⚠️ Attention Dell laptop users:⚠️
Please note that even after checking the Enable DELL support option, SpeedFan may still not see fans in newer Dell PCs and laptops. Dell uses proprietary fan controllers and does not make this information public, preventing third-party developers from being able to create tools to see them or control their behavior. - Click the Configure button.
- NOTE: If you are missing some or all temperature data (in the right pane) or if you don't see any fan data (in the left pane), and you have a Dell laptop, click the Configure button and on the Configure dialog select the Options tab. Check the Enable DELL support option, then click OK to save your change and return to the Details tab. If you still do not see your fans and/or temperatures, restart SpeedFan.
- On the Configure dialog, select the Temperatures tab. Use your mouse to drag and drop all the "Core" items to the top of the list and arrange them in order from lowest to highest. Unlike Intel CPUs, AMD CPUs have only a single "Core" temperature sensor per die or per CCD ("chiplet"), so arrange these sensors at the top of the list. The Gadgets do not use any other temperature sensors at this time, so the remaining temperature sensors can be ignored.

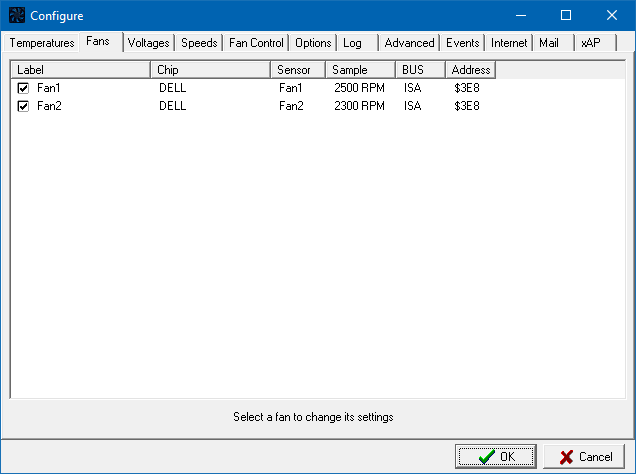
- Select the Fans tab. Arrange your CPU fan(s) at the top of the list. It may be difficult to tell which fan in the list is your CPU fan, so you may need to do some experimentation to determine which fans are which.
- Select the Options tab. In the Tray bar section, check the start minimized and static icon options. For the optimal user experience, check the Minimize on close option.
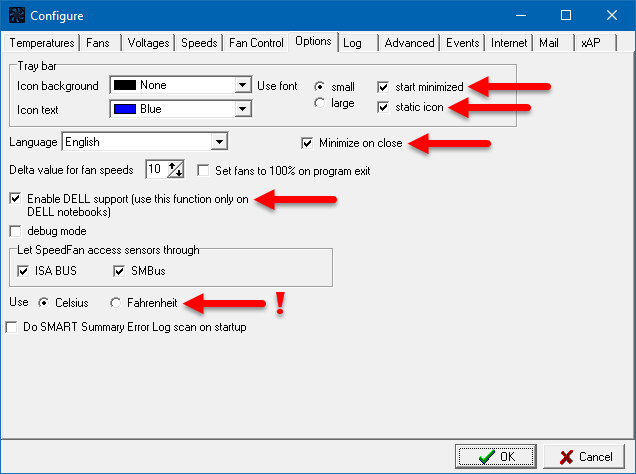
- Finally, on the Options tab, do not change the temperature option to Fahrenheit. The temperature option must be set to Celsius. The SpeedFan plug-in will handle any temperature conversions for you.
- Click the OK button to save your changes, then Minimize the SpeedFan window.
The configuration of SpeedFan is complete at this point. The final step is to configure your All CPU Meter Gadget.
- HOW TO: Configure the All CPU Meter to show core temperatures
- HOW TO: Configure the All CPU Meter to show fan usage
For more information on the Rainmeter plug-in for SpeedFan, see the SpeedFan documentation.