SWTOR holographic signs and how to make them work - SWTOR-Slicers/WikiPedia GitHub Wiki
By RandomUser
Note 1: This method can be found in a very helpful YouTube video I stumbled across, if you prefer to “learn” that way or want a better technical explanation: https://www.youtube.com/watch?v=_DYYlYrKvoE&t=28s.
Note 2: Advanced Blender users who I’d bore to death with the explanations can just scroll down to ‘Finished Node Tree’ and look at the Node Tree there.
Note 3: This is a very basic method, and the game handles it differently. It is possible it may be janky or not work for some textures.
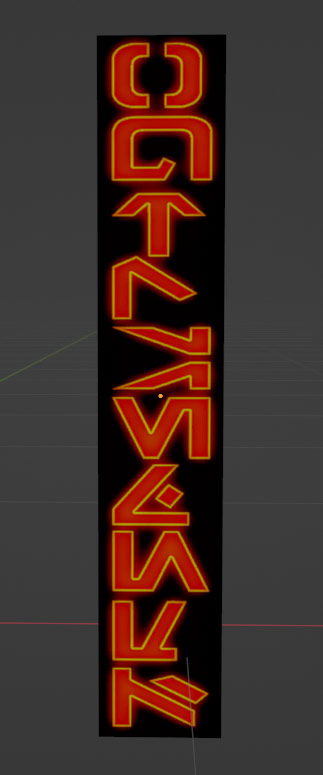
Have you ever tried importing a holographic advertisement like nar_item_signage_01_02.gr2 from SWTOR into Blender, and it looked like this when you textured it?
And have you spent sleepless nights wondering how to make this thing work properly so you can use it in your scene?
No? I’m the only one? Okay, fine. But in case you were wondering, here’s an easy way to do it.
The importer shaders don’t have a way to get rid of the black background, so those won’t be of any use. All we need for this, though, is the object material’s diffuse map (for example a file like nar_item_signage_redlight_02_d.dds belonging to the material nar_item_signage_redlight_suv_02).
We’re going to import that as an image texture and hook it up to a Math node which we set to Distance, together with an RGB node, like so:

Set the color space of the image texture to sRGB, it’ll look a bit nicer.
Next, we’ll want to select the background color of the hologram and get that into the RGB node. You can use the RGB node’s color picker, or just use pitch black (which is usually the background color, or close enough to it.
The Distance node calculates the “distance” between the two colors, and since they’re identical, that value is 0. This’ll come in handy in the next step.
We’re going to add a Mix Shader, connect it to the output node, and plug in two nodes. One is an emission, and the other is a Transparent BSDF. Plug them in as you see in this image:

IMPORTANT: Make sure that the Transparent BSDF is plugged in on top. Bad things happen otherwise.
Next, plug the color of your image texture into the Emission, and the Value of the Distance into the Mix Shader’s factor. Also, make sure the Material’s Blend Mode is set to anything but Opaque.

The object might now look like this:

What happened?
Well, in places where the distance of the color of the image and the color we put into the RGB node is 0 (read: the colors are identical), the Mix Shader’s factor is 0, which makes it apply the Transparent shader in those areas, and the Emission/Image Texture in the rest. This still eliminates some of the Red though, so we’ll throw in a Math Node set to “Greater Than” into the mix to adjust Blender’s “tolerance” for colors. I find a value of around 0.3 worked for me, but it can depend on the image you’re using. Play around with it until you like the result.
Finished Node Tree:

Now for a hologram, which is supposed to glow, you can raise the Emission’s value to something like 20 (though ultimately up to preference) to make it all shiny, et voila:

This method also works for non-glowy things like Graffiti on the wall, just lower the Emission’s value to something like 0.1 for that purpose.