Connect Four Demo - RethinkRobotics/sdk-docs GitHub Wiki
![]()
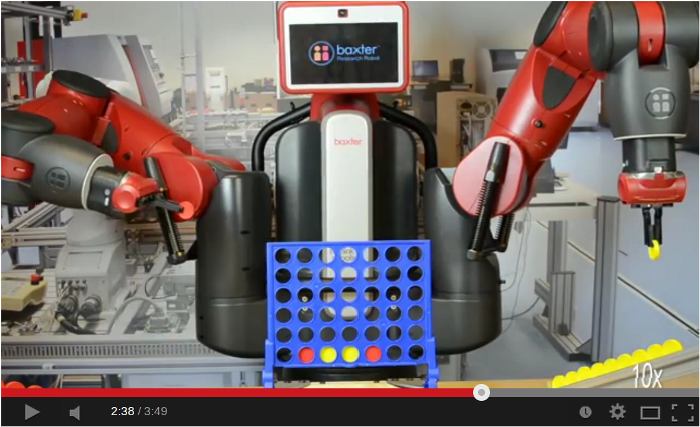
This demonstration allows Baxter to play Connect 4!
- Installation/Prerequisites
- Video
- Overview
- Hardware Setup
- Tutorial
- Interfaces
- Related Examples/Tutorials
- Troubleshooting
Required:
- A Baxter Robot with a SDK software version >= 0.7.0
- A development PC setup with >= 0.7.0 software (development branch latest)
- A Connect 4 game board and pieces
- At least one Baxter Electric Gripper
- A game piece feeder (instructions for building below)
Check out the baxter_sandbox software (where Connect 4 demo is hosted) into your ROS workspace
    $ cd ~/ros_ws/src
    $ git clone https://github.com/RethinkRobotics/baxter_sandbox.git
This demo requires the ability to specify the precision of joint position moves. This is availble in the development of the baxter_interface repository.
    $ cd ~/ros_ws/src/baxter_interface
    $ git checkout development
    $ git pull
Run catkin_make to build the new additions in your ROS workspace
    $ cd ~/ros_ws/
    $ ./baxter.sh
$ catkin_makeConnect Four is a two player, turn based game, where each player tries to align four game pieces either horizontally, vertically or diagonally in the 7x6 game board. This demonstration was inspired by Victor Allis' Masters Thesis - A Knowledge-based Approach of Connect-Four (although Baxter is currently not nearly this good!), during a one week hackathon.
This demonstration exemplifies Baxter's SDK 0.7 software advances, including manipulation/accuracy improvements, as well as OpenCV usage for perception of the board state, and a minimax strategy implementation.
##Hardware Setup
The shape (particularly the lips around the edges) of the Connect 4 game pieces required some modification of the gripper fingertips allowing Baxter to grasp the pieces solidly.
To do this, simply file down plastic fingertips allowing the parallel gripper to close solidly on the center of the piece.
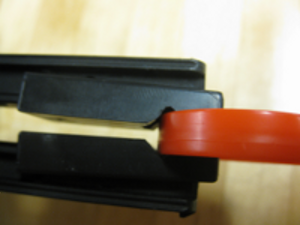
During modification, test that the gripper has a solid grasp on the piece using the gripper_cuff_control example:
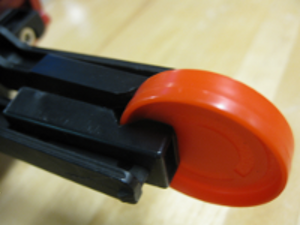
$ rosrun baxter_examples gripper_cuff_control.pyIt will be necessary to create a feeder which will provide Baxter with pieces for grasping in a static location.
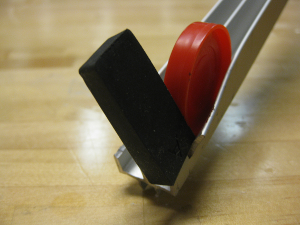
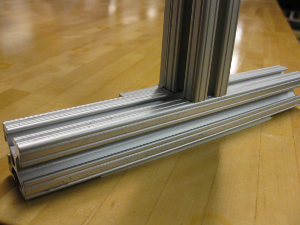
80x20 was used to create a feeder which will backfill the pieces some static location -
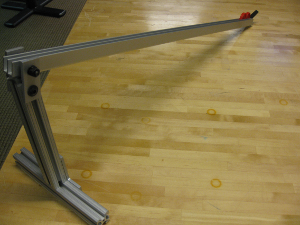
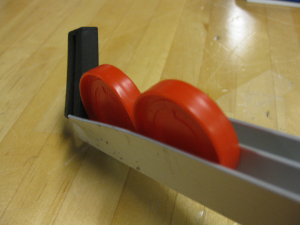
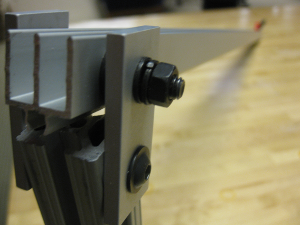
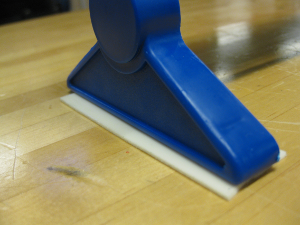
The end of the extruded portion was bent, to stop the pieces from further rolling. Adding the rubber finger tip over this allowed for a gentle stop.

Choosing an appropriate location for the game board and feeder is important due to Baxter's manipulation space.
Place the game board and feeder in a location where Baxter will be able to manipulate pieces into each of the board slots (Adding 10cm for approach/retreats in the Z-axis), and pick game pieces appropriately. Grasping the limb and entering it into zero-g mode should allow you to verify these locations.
It is advised to use double sided tape to prevent the game board/feeder from moving during play.
Verify that the robot is enabled from an RSDK terminal session, ex:
$ rosrun baxter_tools enable_robot.py -eStart the vision from an RSDK terminal session, making sure to define which hand camera we will use, ex:
$ rosrun connect_four connect_vision.py -l rightResulting in the connect four vision gui being launched
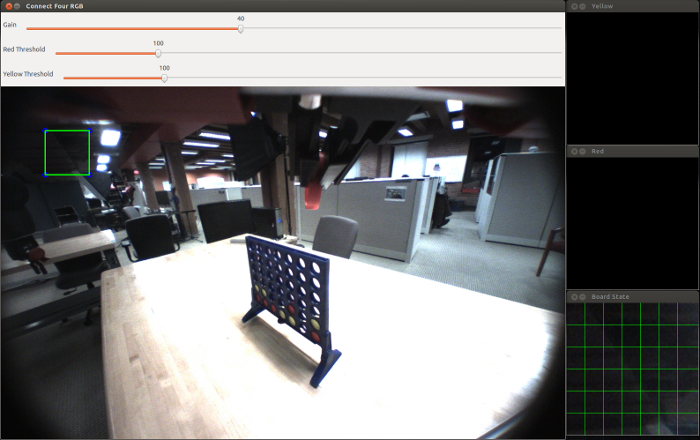
Grasp the cuff, placing Baxter's hand camera in a location where he will be able to see all placements locations on the board (such as above). Be sure that the fingers or a grasped game piece will not occlude the board.
Click and drag all four corners corners of the ROI (Region Of Interest) selector (green quadrilateral) to locations at the edge of the game board.

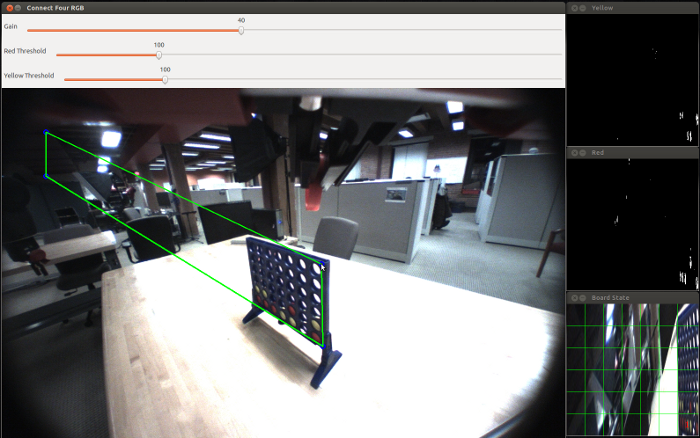
Resulting in
The 'Yellow' subwindow describes the perceived yellow game pieces. This is done in HSV space, identifying yellow pixels based on a chosen hue range.
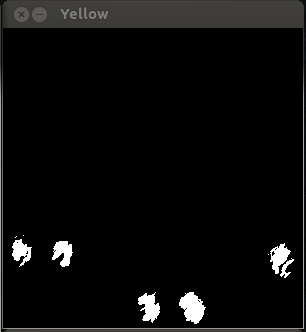
Likewise, the 'Red' subwindow describes observed red game pieces.

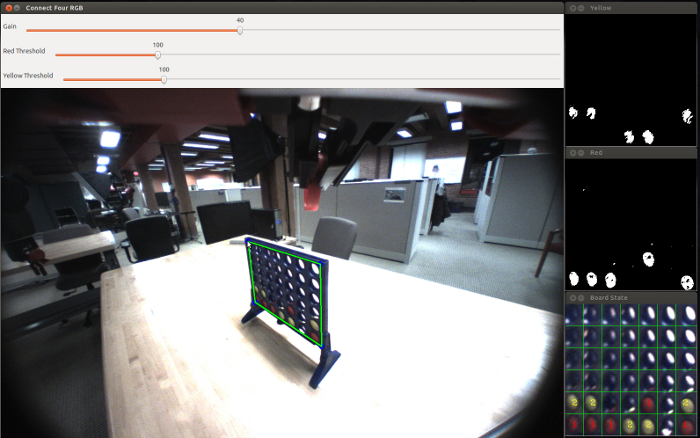
Because we have a known grid size, 7x6, and a user selected ROI describing the whole of the game board, the perception is done by counting the observed yellow/red pixels in each grid location. We then threshold (configurable with the slider on the main window) on the total count of pixels per grid location.
The result is overlaid on the following image. The numbers 1 and 2 denote that Baxter has seen the placed pieces.
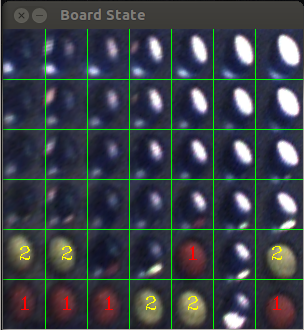
This exact structure 7x6 matrix, is published on the topic /vision/connect_four_state as a string, where 0's denote unoccupied, 1 denoting red, 2 denoting yellow.
Important Note: You may need to adjust the gain for the camera based on the lighting. This has been provided through a slider at the top of the main window. Adjust this to a level where the yellow and red subwindows look to be observing the game pieces regularly.
Important Note: You will need to adjust the ROI so that in the 'Board State' window's grid is filled accurately with the actual game board locations. Making sure that the locations do not cross into multiple grid locations as this will cause false positives.
After starting the vision as shown above, from another RSDK terminal session, start a new Connect Four game, defining which limb you will be using, as well as the color of Baxter's game pieces, ex:
    # We will use the right arm, where Baxter is playing with the red pieces
    $ rosrun connect_four connect_game.py -l right -c red
There are four limb configurations the player will need to specify, the camera location (where the game board can be observed through the hand camera), the game piece pick location (from the feeder), the left most board location (from Baxter's perspective), and the right most board location.
These locations will be saved to a file for convenience for future games.
You will be prompted to use these previously specified locations:
Would you like to use the previously found pick and place locations (y/n)?Specifying 'y' will jump you to the start of the game.
Specifying 'n' will allow you to record the required locations for your setup.
Move right arm into a location allowing the camera to see the board - press Circle button to confirmThe circle button here, refers to the circle button on the cuff on the chosen limb.
Likewise, you will specify the game piece pick location with the circle button. The gripper will grasp your game piece.
You will then be prompted to:
Move Gripper into left most drop slot - press Dash button to recordMove the limb so that the held game piece is just inside the left most (from Baxter's perspective) drop slot, where if released would result in a successful placement. Press the dash button.
Do the same for the right most drop slot.
The manipulation portion will then be able to create/segment a vector across the top of the game board identifying the other place locations. It will also use the IK solver service to find an appropriate approach for the piece pick location, and each of the place locations 5cm above in the z-axis.
The hand camera will then go back to the camera observation location, prompting you to validate the ROI. This simply allows you to make any final adjustments so that the 'Board State' window is appropriately populated.
You will then enter your name and a difficulty level (1-4). This difficulty level describes the depth of recursion in which Baxter will explore the search tree in the minimax implementation. 1 being the easiest, 4 being the hardest. Please feel free to make this demo better by submitting pulls with improvements in Baxter's gameplay!!
Lastly, you will choose who will go first.
That's it! Game on!
If you come across any issues please see the below troubleshooting section, or post to the forum!
See the API Reference page for details.
- Joint Position Commands - /robot/limb/<left/right>/joint_command
[baxter_core_msgs/JointCommand] - Baxter Hand Cameras - /cameras/<left/right>_hand_camera/image
[sensor_msgs/Image] - IK Solver Service:
/ExternalTools/<limb>/PositionKinematicsNode/IKService
- Limb class:
limb.py
It is possible that the IK solutions found may have resulted in an 'elbow down' configuration causing the motion between positions to be large causing the collision.
Restart the demo recording new joint configurations. Make sure that the arm is capable of reaching 5cm above the board across all positions while holding the limb in zero-g mode.
The vision portion of the program is not configured correctly.
Please verify that the ROI (dragging the blue circles overlaid on the image to the corners of the game board) of the board slots line up with the projected image grid ('Board State' subwindow), and that the gain is set (sliding the gain slider) so that the pieces are identified in the red and yellow subwindows accurately (lighting dependent).
© 2008-2013 Rethink Robotics. All rights reserved. ![]()