Development - OpenSourceEBike/TSDZ2_wiki GitHub Wiki
See here technical notes about TSDZ2: https://opensourceebikefirmware.bitbucket.io/development_tsdz2
On this wiki page the development software for the OpenSource-EBike-firmware is discribed. Although the examples are shown for OSX these steps are also applicable for other operating systems like Linux and Windows.
Download and install the Small Device C Compiler (SDCC) toolchain the website For Windows use version 3.7 or 3.8 (NOTE: 3.9 has a bug which causes it to crash while building LCD3). Make sure to add it to your PATH (option in one of the last screens of the installer... ) Install/unpack the package to a separate folder, I've put all my development tools in a folder in my HomeFolder called "Development". Use your command line tool of choice to go to this folder and dive into the "bin" folder, run the command "sdcc -v". If this shows the below code then the toolchain is working.
user@pc:~/Development/sdcc-3.9.0/bin$ ./sdcc -v
SDCC : mcs51/z80/z180/r2k/r3ka/gbz80/tlcs90/ez80_z80/ds390/pic16/pic14/TININative/ds400/hc08/s08/stm8/pdk14/pdk15 3.9.0 #11195 (Mac OS X x86_64)
published under GNU General Public License (GPL)
For Linux user there is an alternative: The stm8 eforth project is developed on linux (https://github.com/TG9541/stm8ef/wiki/STM8S-Programming)
Download and install the GNU ARM toolchain from the website. Move the package to a separate folder, I've put all my development tools in a folder in my HomeFolder called "Development". There you can unpack the package. Use your command line tool of choice to go to this folder and dive into the "bin" folder, run the command "arm-none-eabi-gcc --version". If this shows the below code then the toolchain is working.
$ bin/arm-none-eabi-gcc --version
arm-none-eabi-gcc (GNU Tools for Arm Embedded Processors 8-2019-q3-update)
8.3.1 20190703 (release) [gcc-8-branch revision 273027]
Copyright (C) 2018 Free Software Foundation, Inc.
This is free software; see the source for copying conditions.  There is NO
warranty; not even for MERCHANTABILITY or FITNESS FOR A PARTICULAR PURPOSE.
Currently the build did not work for me on Windows (even after installing gnu make and find and placing them to the PATH). Easiest way to at least compile (not debug) on Windows for me was by using the The Linux Subsystem. After install issue
apt update
apt install wget bzip2 make
wget "https://developer.arm.com/-/media/Files/downloads/gnu-rm/9-2019q4/gcc-arm-none-eabi-9-2019-q4-major-x86_64-linux.tar.bz2?revision=108bd959-44bd-4619-9c19-26187abf5225&la=en&hash=E788CE92E5DFD64B2A8C246BBA91A249CB8E2D2D" -O gcc-arm-none-eabi.tar.bz2
tar xvf gcc-arm-none-eabi.tar.bz2
mv gcc-arm-none-eabi-*-major /opt/gcc-arm-none-eabi
echo "export PATH=\"/opt/gcc-arm-none-eabi/bin:$PATH\"" >> ~/.bashrc
source ~/.bashrc
you can now cd to the place where the sourcecode is located on your windows under /mnt/c/ and run make all or one of the release*.sh scripts.
Download and install the most current version of jdk (Java Development Kit) from the Oracle website.
Download and install Eclipse prepared for C/C++ development: "Eclipse IDE for C/C++ Developers" from the website. After installing you can close Eclipse.
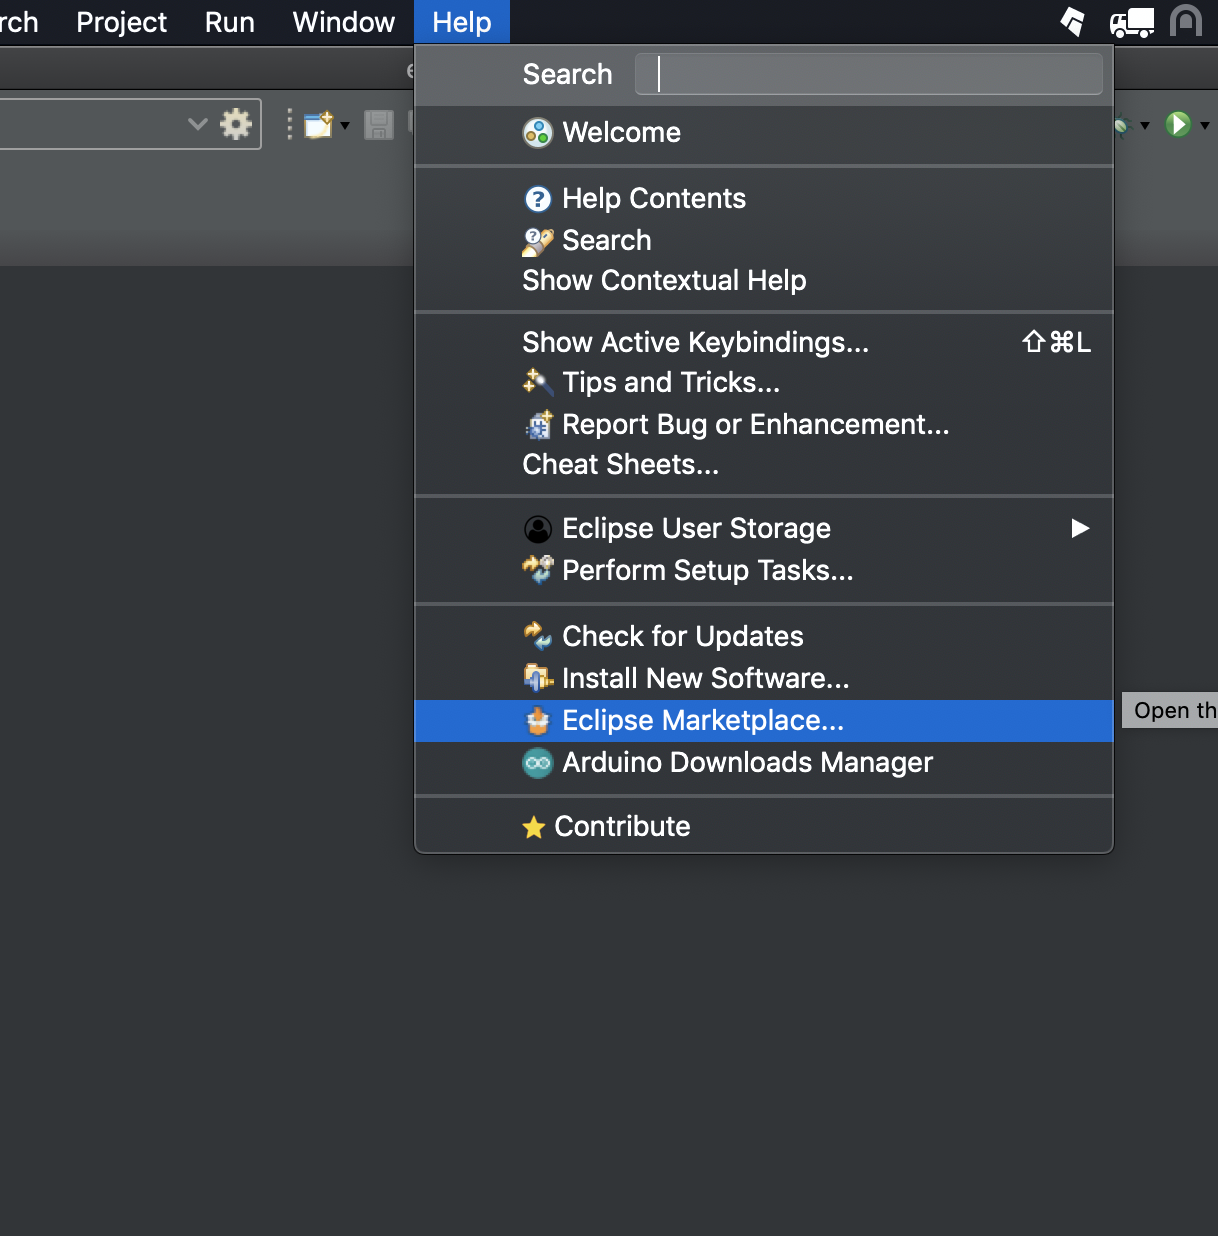
Start Eclipse and go to Help->Marketplace, wait for the marketplace to update.
Then type "GNU ARM" in the search field, the top result should show "GNU MCU Eclipse" press the install button. Wait for it to install, Eclipse will ask for a restart, you can do so.

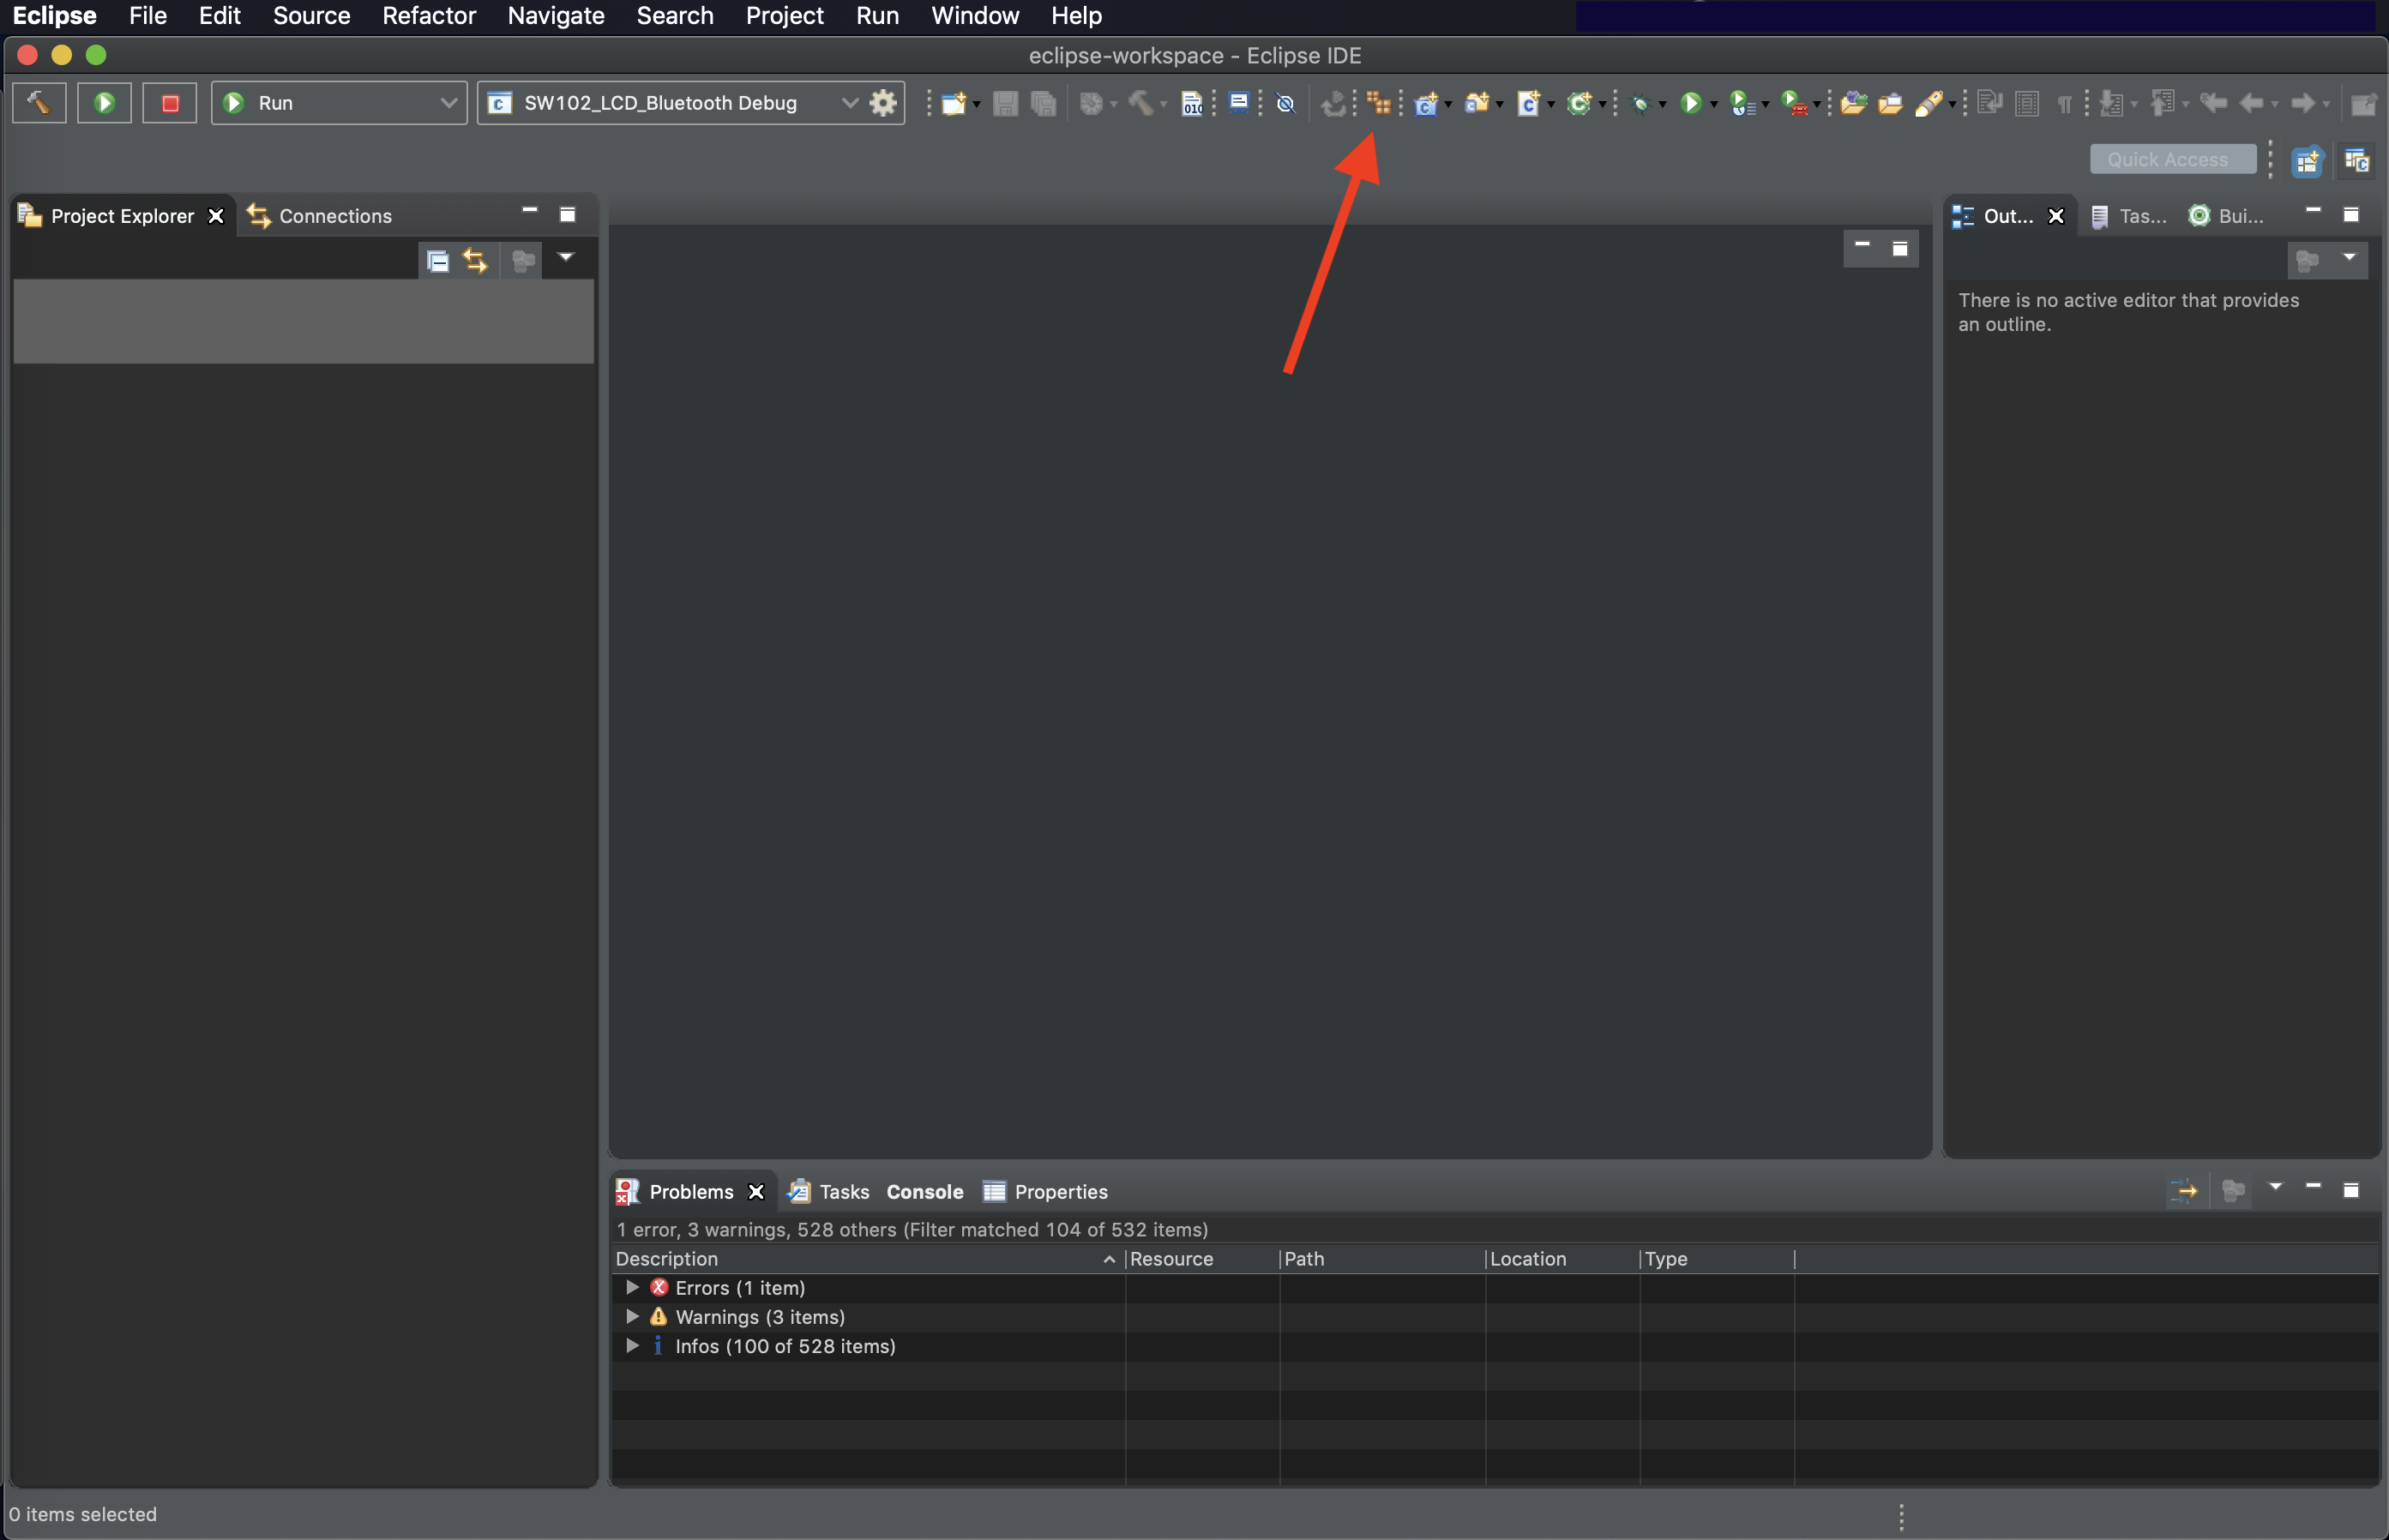
When Eclipse is restarted close the welcome screen and click in the toolbar on the icon "Packs".
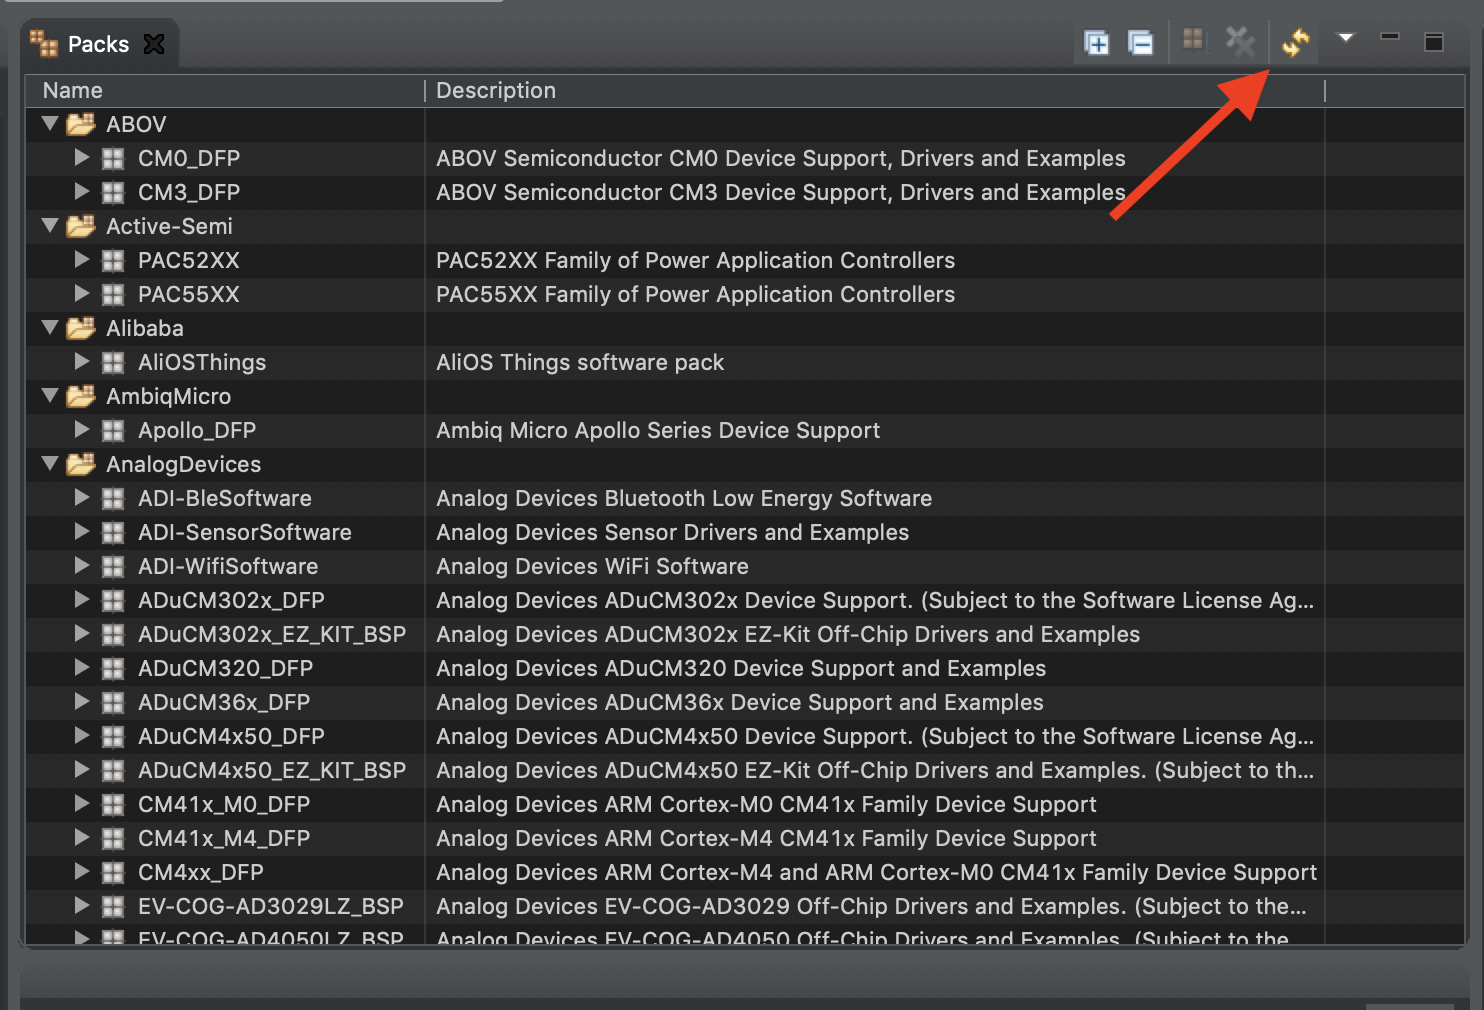
 In the new window click on the double arrow sync icon called "Update the packages definitions from all repositories". Wait for it to sync.
 Once the sync is completed you can find in the left pane in the tree the "STMicroelectronics" folder, unfold it and search for "STM32F1 Series". In the middle pane right click on the STM32F1xx file and click install.
When the installation is done you can close the packs windows (on the right most icon right mouse click a choose close)
Once the sync is completed you can find in the left pane in the tree the "STMicroelectronics" folder, unfold it and search for "STM32F1 Series". In the middle pane right click on the STM32F1xx file and click install.
When the installation is done you can close the packs windows (on the right most icon right mouse click a choose close)

Visit the OpenOCD website for more information. Once there you can download the package for your platform. Move the package to a separate folder, I've put all my development tools in a folder in my HomeFolder called "Development". There you can unpack the package. Use your command line tool of choice to go to this folder and dive into the "bin" folder, run the command "openocd --version". If this shows the below code then the toolchain is working.
$ ./openocd -v
GNU MCU Eclipse OpenOCD, 64-bitOpen On-Chip Debugger 0.10.0+dev-00593-g23ad80df4 (2019-04-23-00:01)
Licensed under GNU GPL v2
For bug reports, read
	http://openocd.org/doc/doxygen/bugs.html
Open a browser and navigate to the github site and into the "OpenSource-EBike-firmware/Color_LCD" click on the clone/copy dropdown arrow and copy the "url".
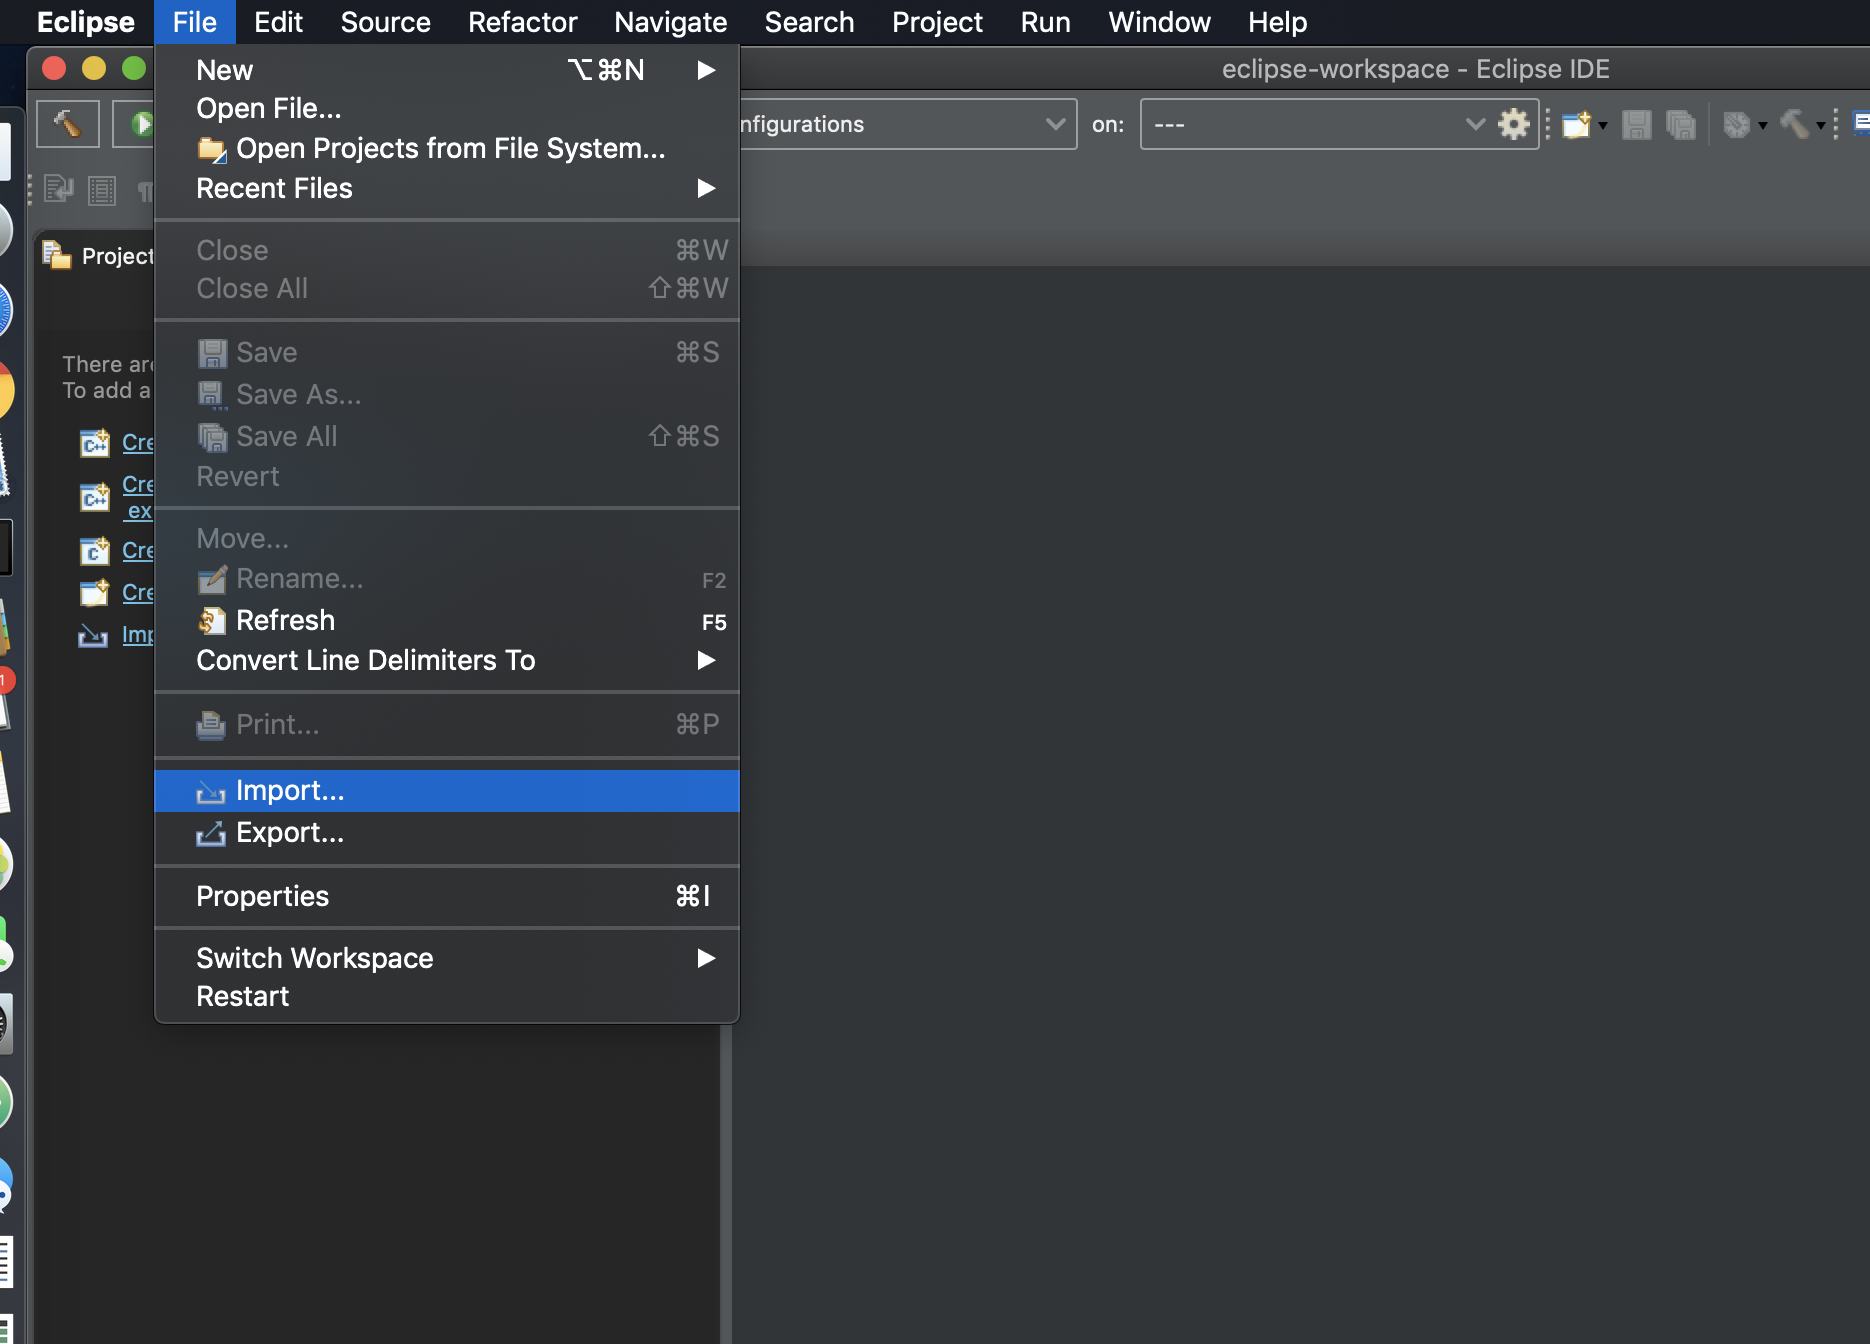
Open Eclipse and click in the menu bar on "File" and navigate to "import".
 Search for the option "Git", unfold it and select "Projects from Git (with smart import)" click "Next".
 Select the option "Clone URL", click "Next".
 The URL is automatically pasted, if not, copy and paste it yourself. Click "Next".
 Select the "master" repository, click "Next".
 Change the location as you like and make sure the "master" branch is selected. Click "Next".
 Uncheck the "search for nested projects" and click "Finish".

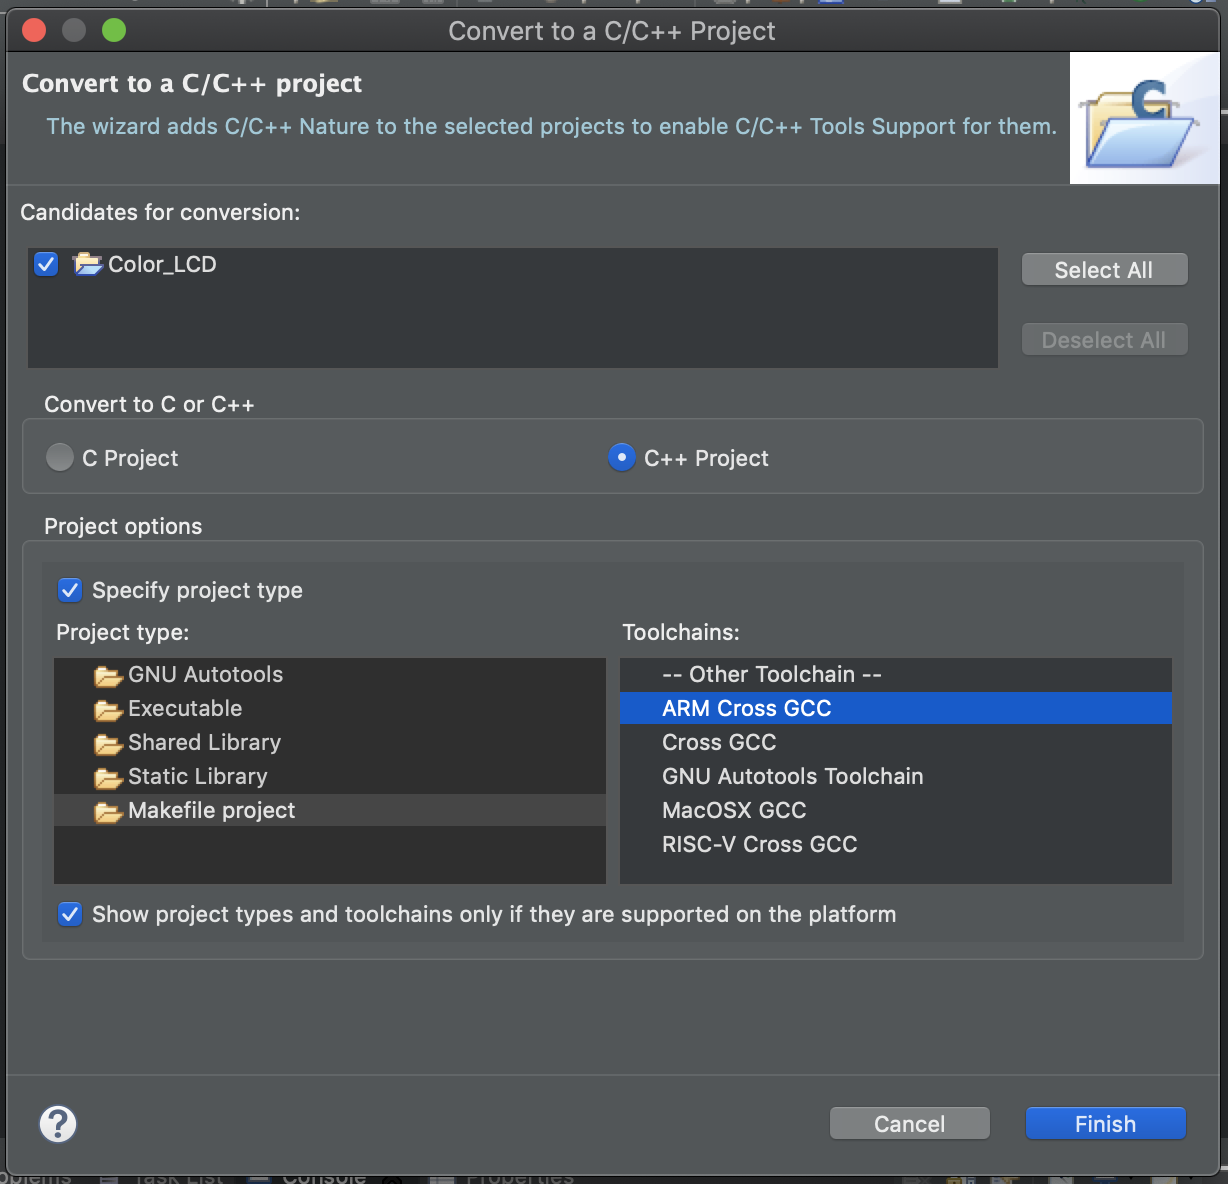
Once the project is added to Eclipse the project has to be converted to a C/C++ project. Right click on the project folder and select "New" and then "Convert to a C/C++ project", select the "Makefile project" and "ARM Cross GCC" and click "Finish"

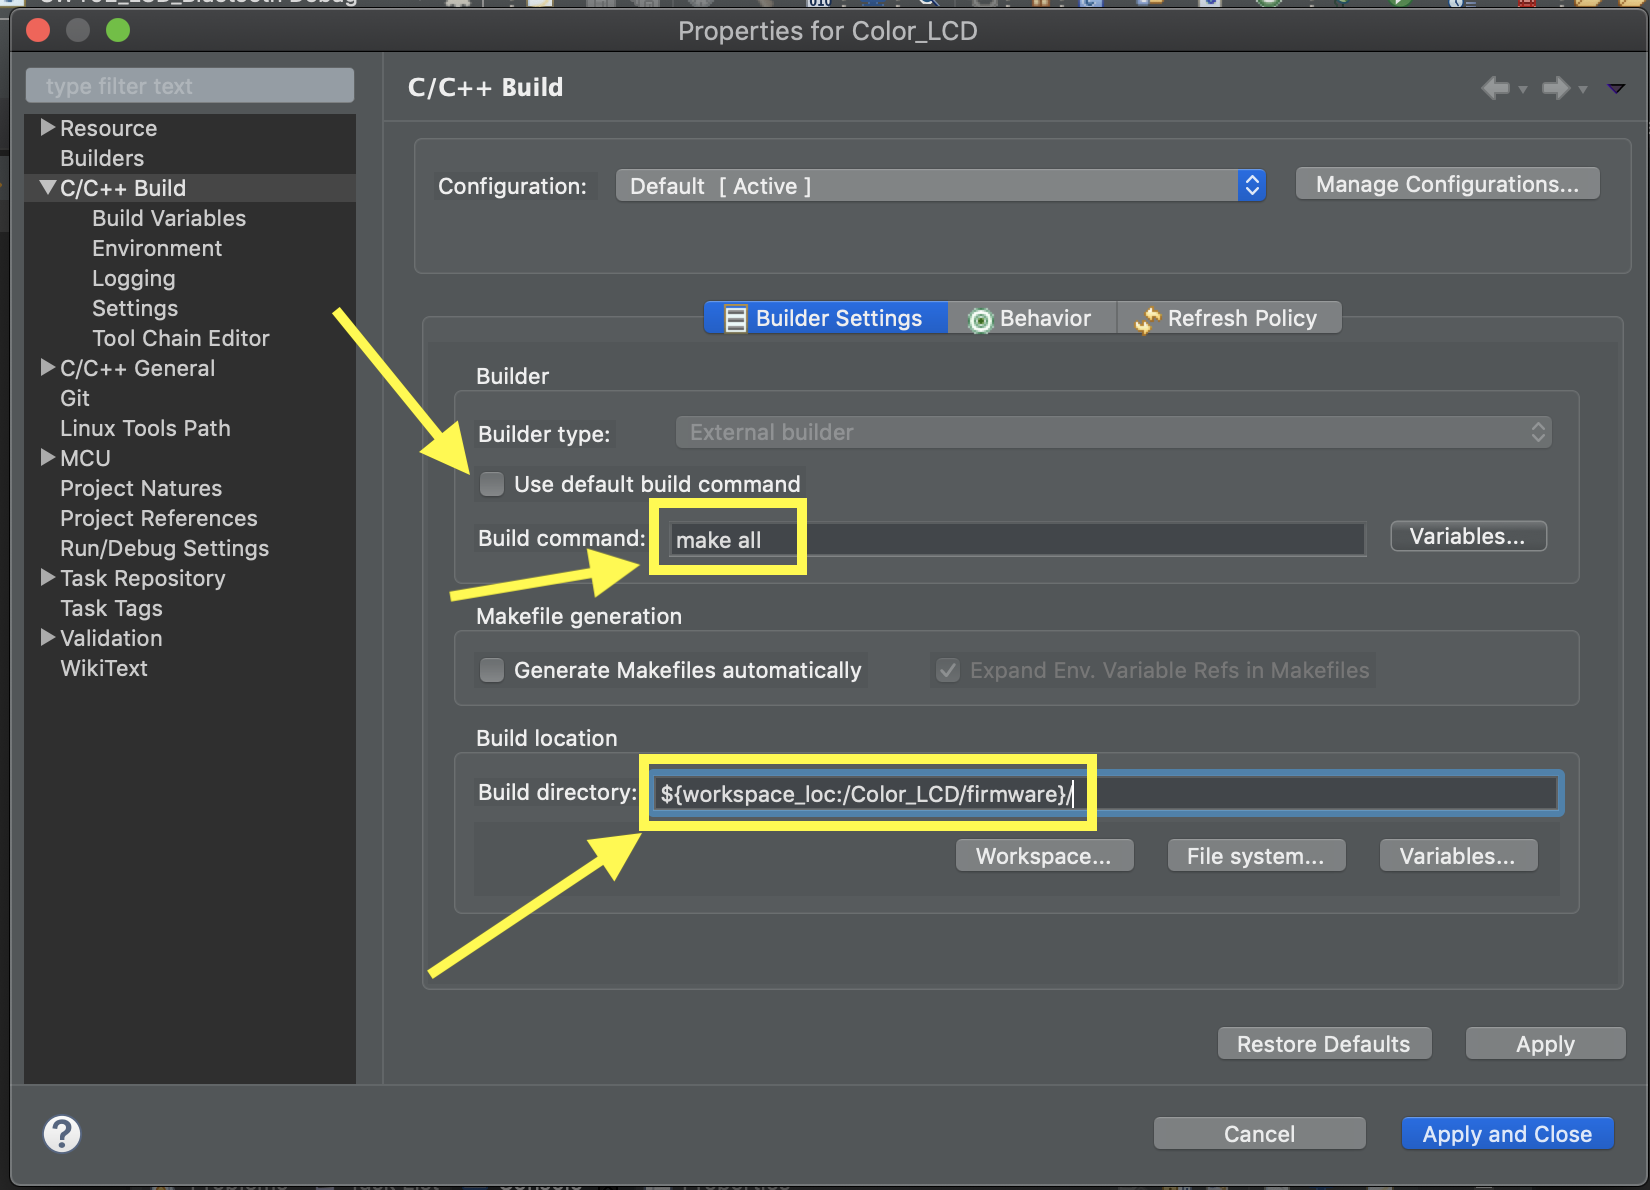
Then go to the project properties:

There a few settings have to be set:
- "build tools"
- "make settings"

Uncheck the "Use default build command" and add the command: "make all" in the box below. At the bottom make sure the path is set to the "firmware" path, this is where the Makefile lives.
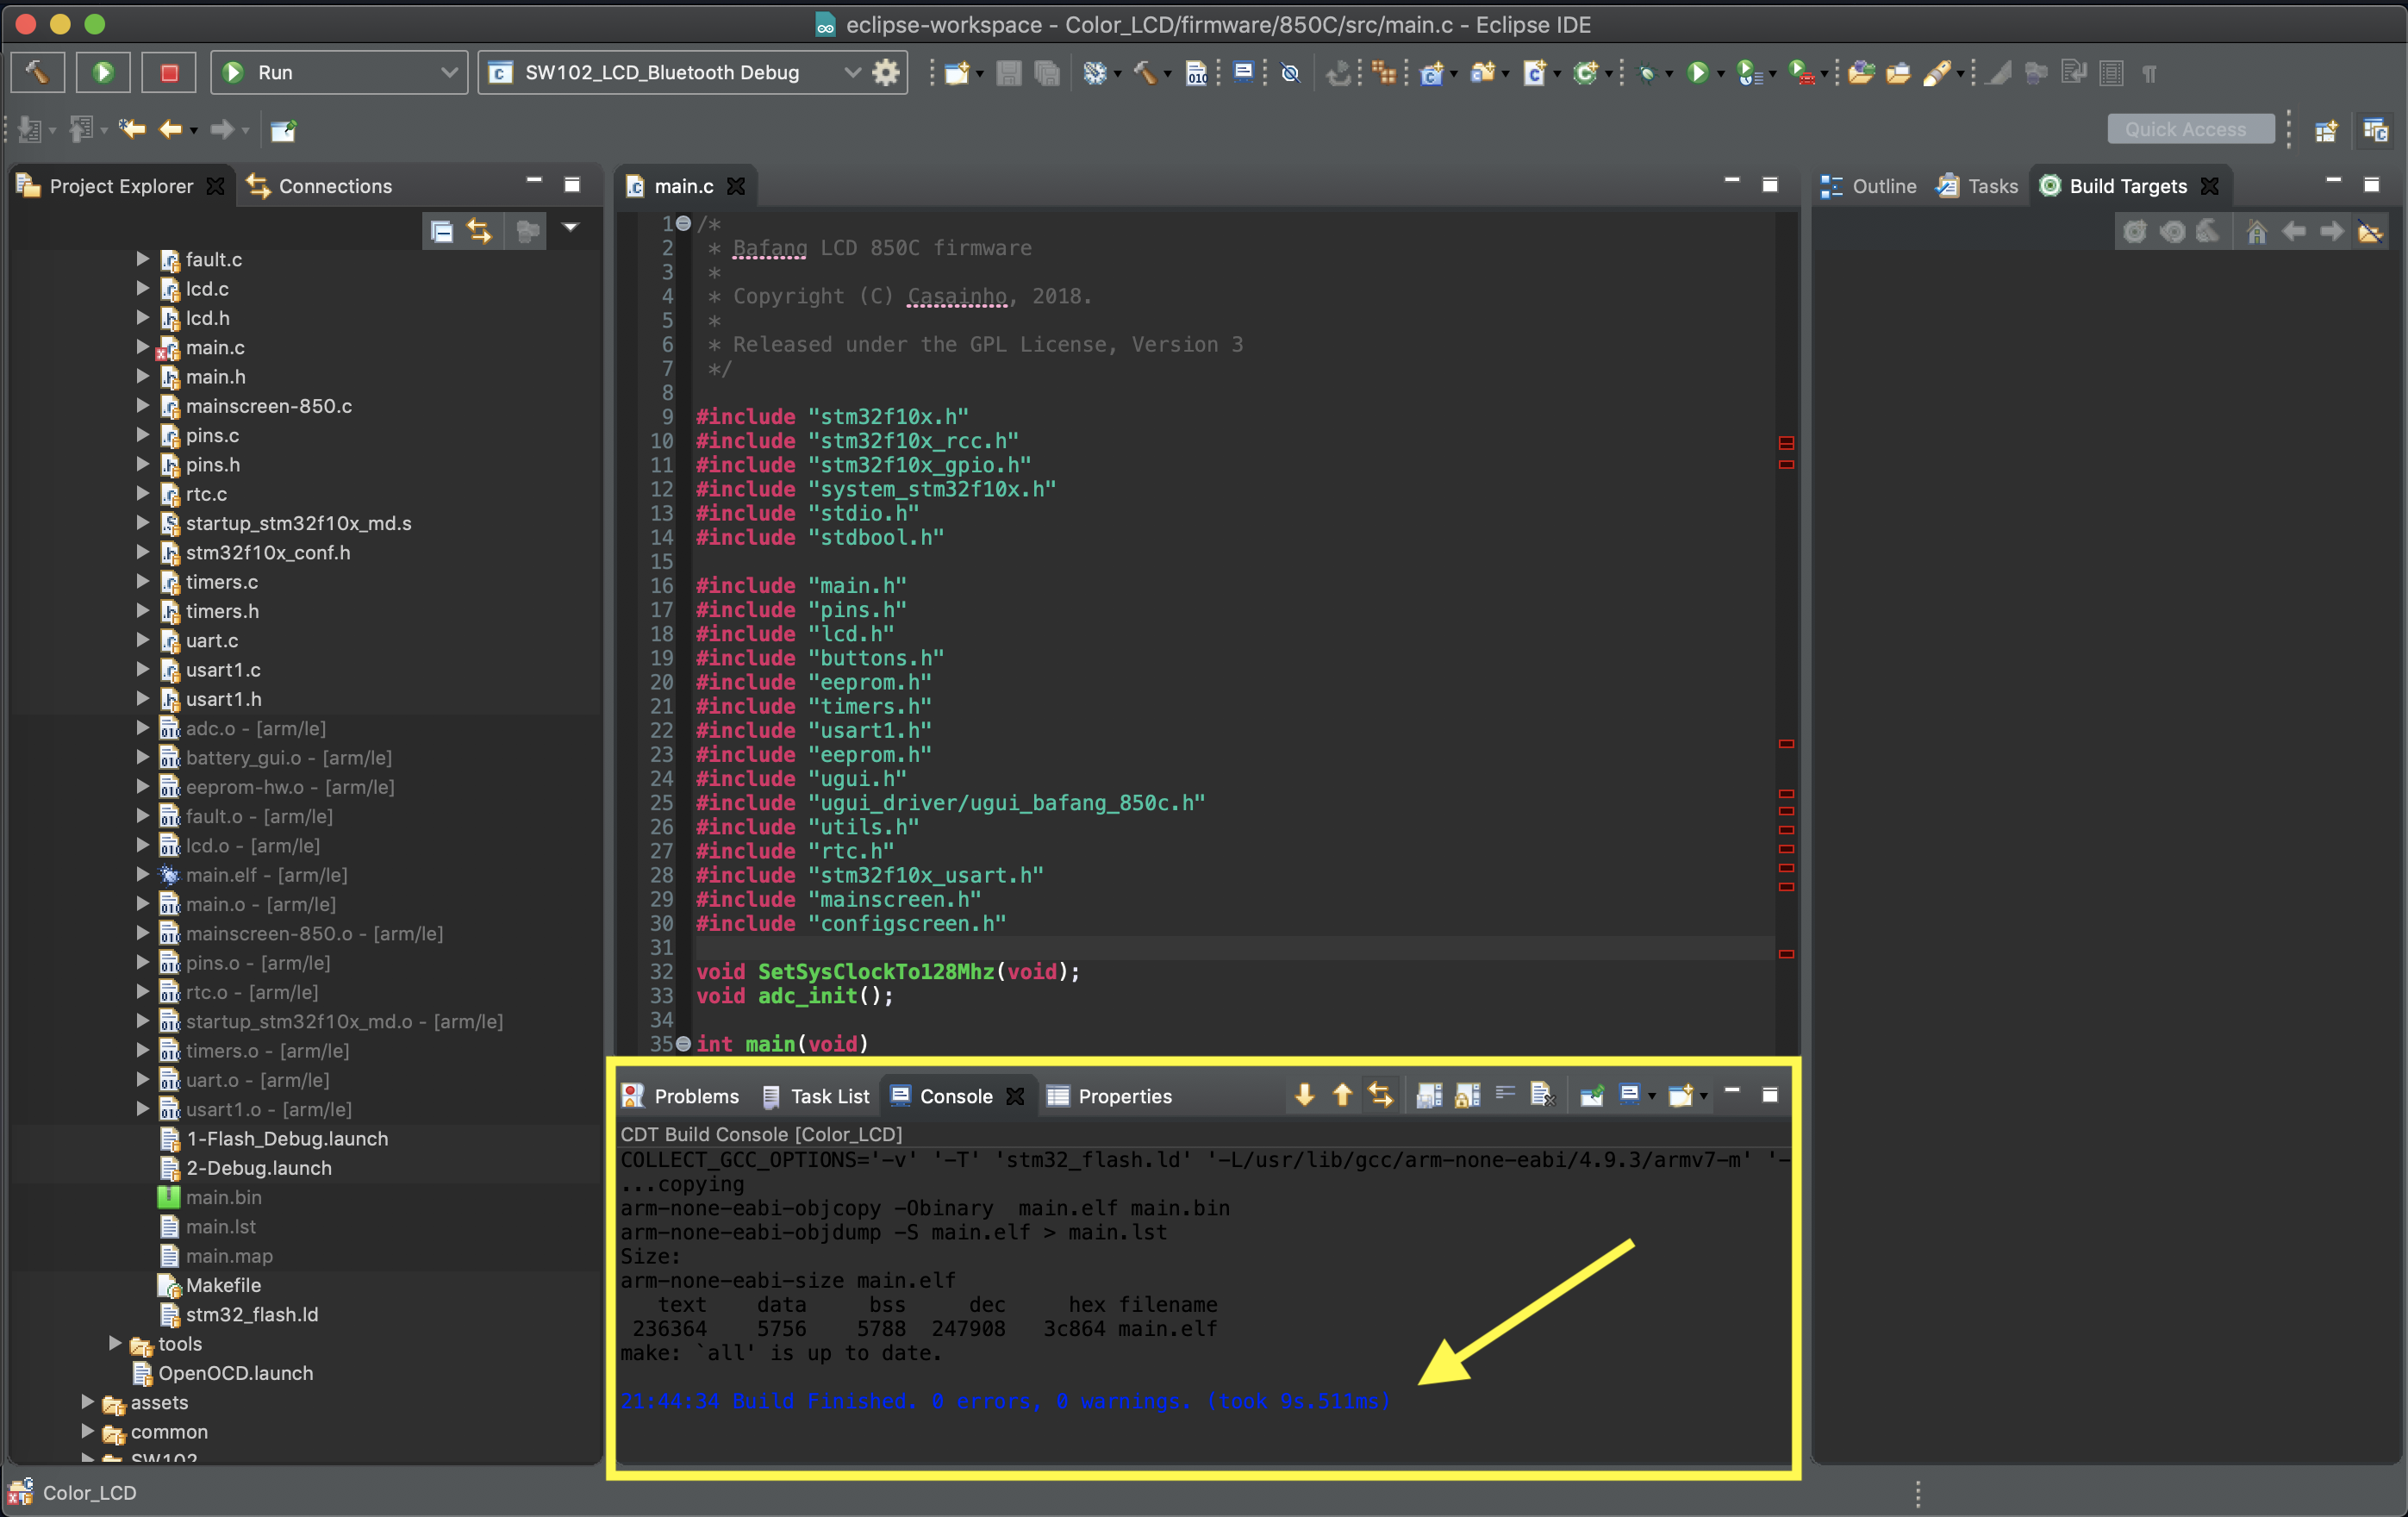
Now go to "Project" in the toolbar and click "Build All", if everything is set correctly the project will build and the compile message will be shown in the console window.

You don't need to use Eclipse, you can use any text editor you like. After editing the code to your needs, just open a terminal and change directory to the "firmware" folder. There you run "make all". This will make the "main.bin" file. This file can then be flashed to the hardware.
If you receive an error that the arm tool chain can not be found:
user@pc:~/git/OpenSource-EBike-firmware/Color_LCD/firmware$ make all
# cd SW102; make
cd 850C/src; make clean; make
rm -f main.lst main.elf main.bin
rm ../../common/src/*.o
find *.o | xargs rm
find spl/src/*.o | xargs rm
find spl/CMSIS/*.o | xargs rm
.compiling
arm-none-eabi-gcc -I./GD32F10x_standard_peripheral/Include -I./ -I./spl/CMSIS -I./spl/CMSIS/inc -I./spl/inc -DUSE_FULL_ASSERT -DSTM32F10X_MD -DUSE_STDPERIPH_DRIVER -c -fno-common -O0 -g -mcpu=cortex-m3 -mthumb -ffunction-sections -fdata-sections -l libgcc  -fno-builtin -std=c99 --specs=nano.specs --specs=nosys.specs -Wall -Werror -I../../common/include -DVERSION_STRING=\"0.19.17\" spl/CMSIS/system_stm32f10x.c -o spl/CMSIS/system_stm32f10x.o
make[1]: arm-none-eabi-gcc: No such file or directory
make[1]: *** [spl/CMSIS/system_stm32f10x.o] Error 1
make: *** [all] Error 2
This is caused by the "Makefile", in there the toolchain is expected to be in the firmware directory, this can be changed by editing the "Makefile", for the '850C LCD' search for this line in the "Makefile" of the '850C LCD' directory:
TCPREFIX = arm-none-eabi-and change it to:
ARM_GCC = /path/to/your/arm-tool-chain/bin/
TCPREFIX = $(ARM_GCC)arm-none-eabi-
And for the 'SW102 LCD' search for the line below in the Makefile.windows in the directory:"./git/OpenSource-EBike-firmware/Color_LCD/firmware/SW102/nRF5_SDK_12.3.0/components/toolchain/gcc" change it to reflect your GNU-ARM directory from Step 1.
GNU_INSTALL_ROOT := /path/to/the/toolchain/bin/
- Double-click Start_Compiling.bat to compile the firmware. The resulting main.ihx can be programmed in the controller.