SystemAdminGuide - OpenESignForms/openesignforms GitHub Wiki
 |
is brought to you by |  |
- Concepts, Tips & Tricks (Read first)
- User's Guide (Read first)
- System Administrator's Guide (this guide)
- Point & Click Programming Guide
- Reports and Transaction Setup Guide
- Point & Click Programming Integration API Guide
- Point & Click Programming Tutorial
Every deployment should have at least one user assigned to the System/Administrator group. The system administrator can delegate powers to other groups, including creating partner/department administrator groups who have similar capabilities, but over only a subset of all users.
The system administrator is responsible for various system-wide settings, creating new users, groups, permissions, resetting passwords and checking system activity logs.
See the User Guide for common user activities, or the Point & Click Programming Guide for programming documents, packages, transactions and reports.
A key concept in eSignForms is that permissions are assigned to Groups, and Users are assigned to Groups. Therefore, a User has the sum of permissions for all groups he or she belongs in. The pseudo-group (no need to define) ESF/Groups/AllUsers will appear in group selection lists which effectively means "all users."
All deployments will have the System/Administrator group. It has access to all regular* users and groups. We recommend at least the following additional groups be created:
- A group for your company or department, such as MyCompany. You can put all users who belong into this group.
- A group for the programmers in your company or department, such as MyCompany/Programming. You can put just those folks, whether in your company or a hired professional services consultant, who will program documents and transactions in this group.
- A group for managers in your company or department who can see across all users in your company or department, such as MyCompany/Manager.
- If you will have multiple companies or departments using your deployment, you may consider a group for that plays the system administrator function, but limited to the company/department, such as MyCompany/Administrator.
(* There is also one special group called ESF/Group/Deployment/SuperAdmin that is created when the system is deployed. It is used to ensure access like "root" or "Administrator" provides for servers and PCs and is managed by whoever is responsible for the web application deployment.)
Watch our How-To Video on YouTube: HTV Users, Groups and Permissions.
All records (also known as objects) in the system generally have four common permissions associated with them:
- List permission specifies the groups that are allowed to see the record in a list, such as a drop down list or menu.
- View Details permission specifies the groups that are allowed to see the details of a record, such as all of the fields used to configure it.
- Create/Create Like permission specifies the groups that are allowed to create a new record (or object) like the existing record.
- Update permission specifies the groups that are allowed to update or modify the record.
- Delete permission specifies the groups that are allowed to delete the record.
For User Interface (screens/views) components, the permissions generally describe whether a 'Create like' or 'Save' or 'Delete' button will even appear on that screen, and 'List' means whether that item will even appear on the navigation menu list on the left side.
The Group object itself is special in that it also has a similar set of List, View, Create, Update and Delete permissions that are directed at the Users who belong to the group. An administrator for a group of users needs to have these permissions to manage the users in the group, but may only need List permission on the group itself.
Watch our How-To Video on YouTube: HTV Users, Groups and Permissions.
If you have View Details and Update permission for a given record, you can change the groups who have permission to manipulate that record, too. For example, for a given Group record's List permission:
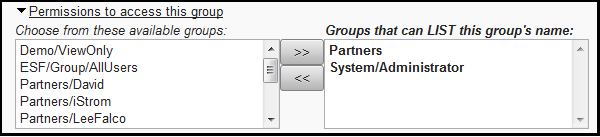
Select one or more groups from the left column (available groups you can choose from -- because you have List permission to those groups), and click the >> button to move them to the right side, which is the list of Groups that will have the specified permission.
Of course, you will have to click the Save button after your have made your changes.
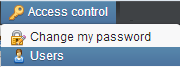
Click on Access control->Users to list and update user records. You may also download selected users' configuration (not including passwords and property sets) to a CSV file, suitable for importing into another system.
Each user who can start transactions, run reports, or process work via the To Do queue needs a user account. While you can share user accounts, we recommend you give each user his or her own login and password to aid in tracking user activity and to make it easier to handle password issues should one of the users no longer need access to the system.
Configuring a user involves setting up the user's email address, name and what groups he or she belongs to:
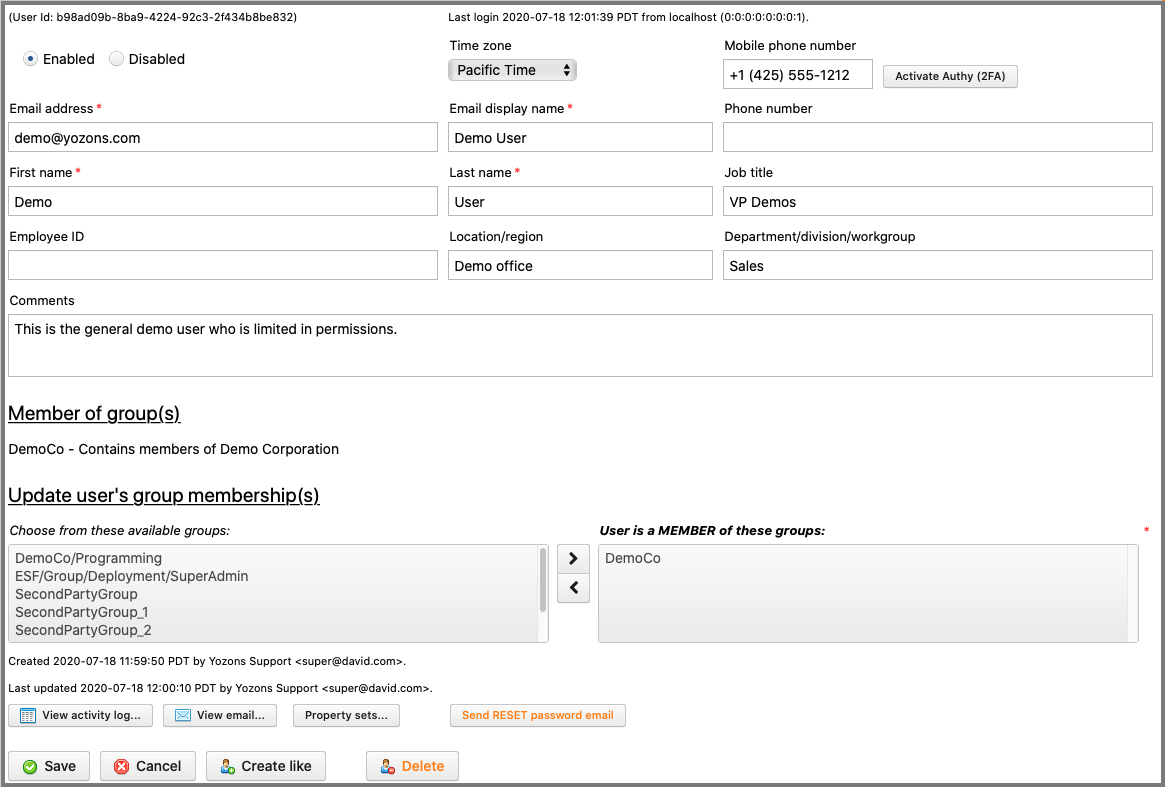
- Check Allow PRODUCTION mode only to limit this user to only PRODUCTION:Live mode. The user will not be allowed to select the development/test modes.
- Select Enabled to allow this user to login. Choose Disabled to block user logins. We recommend disabling user accounts, rather than deleting them, to keep any associations that point back to the user.
- Time zone specifies the user's preferred time zone for dates and times shown in forms, logs, reports, etc.
- Mobile phone number specifies the user's mobile phone number. If Authy Two-Factor Authentication is enabled, you can click the 'Activate Authy (2FA)' button to enroll that number. If already activated, click the 'Remove Authy (2FA)' button to remove Authy enrollment. When enrolled, this user will need to provide an Authy token when logging in or setting a new password. If Amazon SNS for SMS Two-Factor Authentication is enabled, you can click the 'Activate SMS (2FA)' button to enroll that number. If already activated, click the 'Remove SMS (2FA)' button to remove SMS enrollment. When enrolled, this user will need to provide an SMS token when logging in or setting a new password. Read more about which industries require 2FA.
- Email address must uniquely identify this user, and it should be a valid, working email address in order for the user to set a password, get email notifications, etc.
- Email display name is the name shown that goes with the email address to create a "fully qualified" email address. Most people use their full name or role, such as "Support" or "David Jones", which results in an email address of "Support [email protected]" or "David Jones [email protected]".
- First name is the user's first, or personal, name.
- Last name is the user's last, or family, name.
The following additional fields are generally for information only and can be accessed in documents and custom logic using field specifiers.
- Phone number is the user's contact phone number.
- Job title is the user's job title.
- Employee ID is the user employee ID or related ID.
- Location/region is the user's location or region.
- Department/division/workgroup is the user's department.
To list the groups the user belongs to, open the Member of groups(s) panel:

To update the groups the user belongs to, open the Update member of groups(s) panel:

Select one or more groups from the left side and click the >> button to add the user to those groups. Select one or more groups from the right side and click the << button to remove the user from those groups.
Remember to click Save after changing the group membership.
Click on the View activity log button to display activity associated with the user:
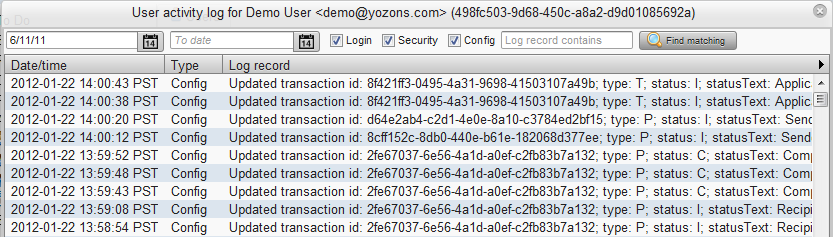
- Enter a From date to start from a specific date (or select the date from the calendar popup). Leave blank to include the oldest records.
- Enter a To date to specify and ending date (or select the date from the calendar popup). Leave blank to include the newest records.
- Check Login to include user logins and logoffs.
- Check Security to include user security-related events.
- Check Config to include user updates, like adding, changing or deleting records.
- Enter some text in Log record contains field to search for records that contain the specified string.
Click the Find matching button to list up to 20,000 matching records.
Click on the View email button to display emails sent to or on behalf of the user:
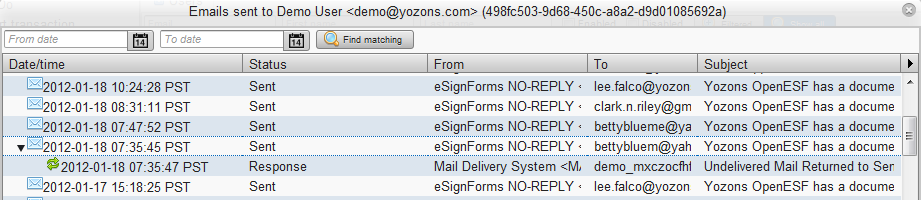
- Enter a From date to start from a specific date (or select the date from the calendar popup). Leave blank to include the oldest records.
- Enter a To date to specify and ending date (or select the date from the calendar popup). Leave blank to include the newest records.
Click the Find matching button to list all matching records.
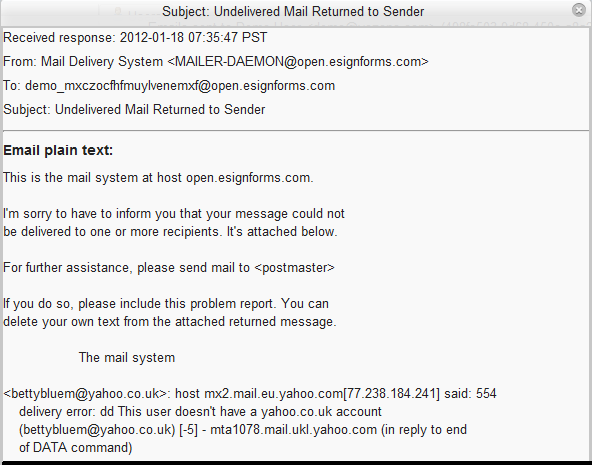
Emails that have an arrow next to them have a correlated reply or bounce. Click on the arrow to view those emails.
Click on any row to view the email text:
Click on the View SMS button to display text messages sent to or on behalf of the user:
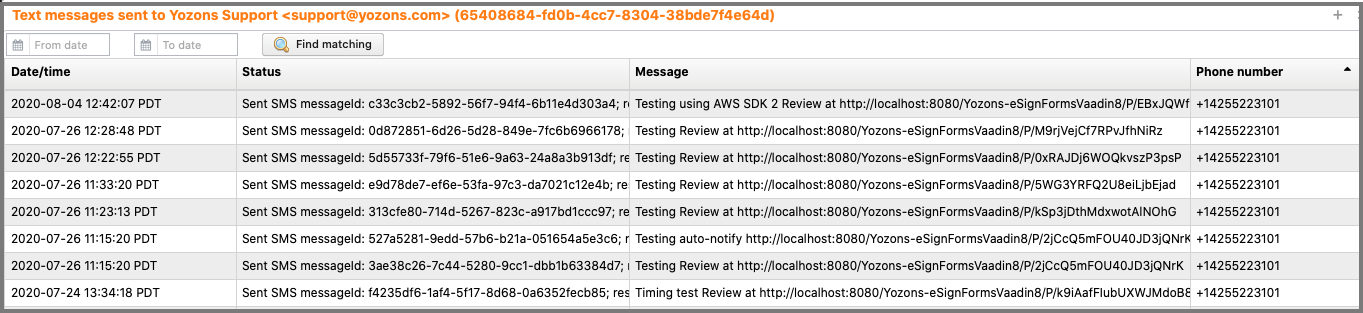
- Enter a From date to start from a specific date (or select the date from the calendar popup). Leave blank to include the oldest records.
- Enter a To date to specify and ending date (or select the date from the calendar popup). Leave blank to include the newest records.
Click the Find matching button to list all matching records.
Click on any row to view the SMS text:

Click the Send RESET password email to reset a user's password so that the user cannot login until he or she retrieves the email, clicks on the unique link it contains, and then chooses a password. If the user is enrolled in Authy or Amazon SMS 2FA, a token will be required to set a new password.
Note that the user cannot login once you click this button until they set a new password. The original password will no longer be valid once the button is clicked.
Click the Property sets.... button to create or override a property for a given user. Most often this is used to store user-centric authentication credentials for external systems or to expand the list of pre-defined user fields (phone, title, ID, etc.). User properties will be searched before transaction template branding libraries, document libraries and the system default template library.
Setup is the same as when done in a library.
Click on Access control->Users:
- Select an existing user that is most like the new user you want to add.
- Click the Create like button to create a new user record.
- Ensure the record id Enabled.
- Change the Email address to the new user's email address.
- Change the Email display name, First name and Last name.
- Click Member of Groups to open the panel that shows the groups. Adjust as necessary.
- Click the Save button to save the new user.
- Once you are ready to allow the user to login, click the Send RESET password email button.
An email will be sent to the user's email address so he or she can choose a password and set the forgotten password question & answer.
If the user does not receive the email in after a normal amount of time, you can click the View email button to see if there was a bounce, such as if you had the email address incorrect or there was some other error.
Watch our How-To Video on YouTube: HTV Password Reset & Add New Users.
While every user can reset his or her own password using the forgotten password feature linked on the login page, it is possible the user has forgotten the answer to that question as well.
Click on Access control->Users:
- Select the user who has forgotten his password.
- Ensure the user is not Disabled as this could have been the reason why he or she could not login.
- Click the Send RESET password email.
An email will be sent to the user's email address so he or she can choose a new password and, you hope, set a better forgotten password question & answer. If the user is enrolled in Authy or Amazon SMS 2FA, a token will be required to set a new password.
If the user does not receive the email in after a normal amount of time, you can click the View email button to see if there was a bounce, such as if the email address was no longer valid or there was some other error.
Watch our How-To Video on YouTube: HTV Password Reset & Add New Users.
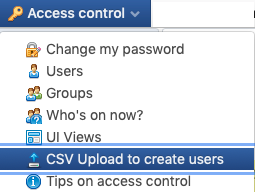
Click on Access control->CSV Upload to create users to create users in bulk by uploading a CSV file.
The general format of the CSV file is the first line is a header line to identify the fields being used to create users, followed by 1 or more lines containing the user information for the newly create users. Blank lines and comment lines after the first line are skipped. Comment lines with with: //## Also, if any lines starts with two commas (,,), that is taken to imply an artificial end-of-file (EOF) marker.
The order of header fields is not important (so long as the data lines match the order!). Also, header field names are case insensitive.
A minimal CSV file must include these required fields (at least one group, but can have multiple 'group' columns to support the max number of groups any given user must belong to; each specified group must be an Enabled Group):
- email - the user's email address
- personalName - the user's first or personal name
- familyName - the user's last or family name
- group - the ESF Path Name of a group the user belongs to; at least one group must be present, but as many as are needed can be supplied
Additional headers that can be specified to set the respective fields in the user record:
- status - defaults to "Enabled" or "E"; may set to "Disabled" or "D"
- allowModes - defaults to "both" or "B" for allowing both production and test modes; may be set to "production" or "P" to limit the user to production mode
- displayName - defaults to "personalName familyName"
- mobilePhoneNumber
- employeeId
- jobTitle
- location
- department
- phoneNumber
- timezone - defaults to the system default timezone
- sendSetPasswordEmail - defaults to "Yes" or "Y"; may be set to "No" or "N". When "Yes" an email is sent to the user to set a password.
email,personalName,familyName,status,allowModes,displayName,employeeId,jobTitle,location,department,phoneNumber,timezone,sendSetPasswordEmail,group,group,group,group,group
 * [email protected],John,Doe,E,Both,J Doe,1234,Tester,Kirkland,IT,425-555-1212,PST8PDT,Y,Group1,Other/Group2,Group3,Other/Group4,Group5
 * //## this is a comment line
Read more about which industries require 2FA.
Click on Programming->Libraries->ESF/Library/Template to update the Authy property set.
To activate Authy 2FA, you must update the Authy property set.
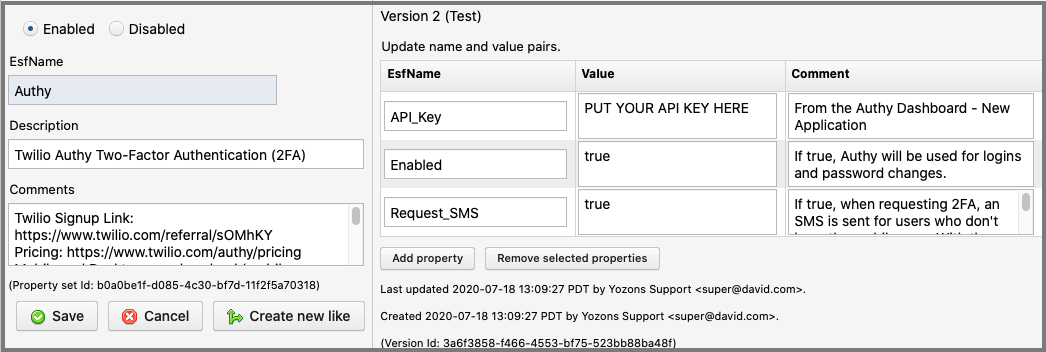
- Set API_Key to the API key from the Authy Dashboard application you created or otherwise already use.
- Set Enabled to true for Authy to be used for user logins and setting passwords.
- Set Request_SMS to true if you'd like the 'request SMS' feature to be called when Authy tokens are prompted for. If the user has the mobile app installed, no SMS is sent, but a notification will appear on their mobile device.
If you are not registered with Twilio, you can signup using our referral link or you can sign up directly at the Twilio web site.
See more about Twilio's pricing for Authy. The apps are free for all of your users.
The Authy mobile app can be downloaded for free by all your users. Each user must enroll with a mobile app to avoid charges for sending text messages. A newly registered user will receive an Authy text message (SMS) to download the app.
Authy console Settings (API key is shown here) recommendation:
- TOTP Settings OTP length: No less than 6
- Transaction TOTP: Disabled
- Installation Message: Enabled
- Authentication via Phone Call: Disabled (phone not supported)
- Force Phone Calls: Disabled (phone not supported)
- Authentication via SMS: Enabled. Enabled or Disabled (if enabled, SMS charges will apply)
- Force SMS: Disabled. Enable or Disabled (if enabled, SMS charges will apply)
- Force SMS: Disabled
- Force Email: Disabled
- Force Validation: Enabled
- Phone call authentication requires input: Disabled
- Enable TOTP token and Push Authentication in Authy App: Enabled
- Generic authenticator tokens: Disabled
- Restrict API calls by IP address: Disabled (if enabled, be sure to keep it current with your server's IP address)
- Email Integration: no changes
If you are not registered with Amazon AWS, you can sign up directly at the Amazon AWS console.
See more about Amazon's pricing for SMS. SMS changes may apply to some mobile phone contracts for parties/users who receive an SMS sent by the service.
To use the SMS API, you will need the access key and secret access key configured under IAM (Identity and Access Management). From the console's main screen:
- Recommend creating a Group 'YozonsSMS' (name as you want) with the Permissions having the Attached Policy 'AmazonSNSFullAccess'.
- Then create a User 'YozonsSMS' (name as you want) and add the Group 'YozonsSMS'.
- For that User, click to 'Create access key' to generate and then show the access key id and secret access keys. You will need to record these here. You can view the Access key ID under the user's 'Security credentials'. Note that if you don't record the secret access key above, you'll need to create a new access key and record it then.
You will also need an Origination number to tie into Amazon Simple Notification Service (SNS). This number is tied to the Amazon Region you have selected in the upper right corner of your logged in Console. It makes sense to create this in the same region where your Amazon server is located, but it should work (if less efficiently) if it's in another region.
- From the console, go to “Simple Notification Service". Set your region in the upper right corner if you haven't already done so.
- In the left panel (dashboard) of SNS, select “Origination numbers”.
- Presuming you don't already have a number, click “Provision numbers in Pinpoint”.
- In Pinpoint, click “Request phone number”. Select country "United States" and radio button “Toll-free”, check SMS only (uncheck VOICE), with the type "Transactional." As of 12/17/2021, this toll free phone number costs $2/month. You are free to also purchase a short code instead by following the Amazon process to request one, but this is generally not needed for sending outgoing text messages.
- While in Pinpont, click on "Phone numbers" in the left side navigation area. If you have not done so before, click on the 'Toll-free registrations' tab. Click the 'Create registration' button and be sure to select your new toll free number and complete the registration form.
- While in Pinpoint, click on "Phone numbers" in the left side navigation area. You should see your phone number there. You can configure SMS settings by clicking on that phone number:
- We recommend setting the 'Response message' for the HELP keyword to something like:
Please contact XXXX for questions. Text "stop" to stop receiving text messages from us, or "unstop" to resume them.Then click 'Save'. The SMS API does not support two-way SMS, so it's best not to enable it.
- We recommend setting the 'Response message' for the HELP keyword to something like:
- While in Pinpoint, click on "Overview" in the left side navigation area. You can click 'Edit' in the SMS Settings area. If so, you can change the default message type to 'Transactional', and you may set a monthly account spending limit, though once the limit is reached, subsequent attempts to send text messages will fail until the next month arrives. We recommend keeping it at '0' to just pay for all the text messages you want to send. Click 'Save changes' if you do update it.
- Click on 'Services' in the upper left corner to return the Simple Notification Service, then click 'Origination numbers' in the left side dashboard and confirm it shows your new toll-free number. If you see under "Account information" that you are in production access for your region, you are ready to go. However, if it says you are still in the sandbox (normal for new activations of SNS), you will need to click "Exit sandbox" before you can send text messages to other numbers (feel free to create sandbox testing mobile numbers and test as desired before exiting the sandbox).
If you are in the sandbox for SNS and want to start production use, click "Exit sandbox" and provide the following sort of information into the Support Case to request this change:
- Limit type: SNS Text Messaging
- Link to site: https://esign.example.com (use your web site base address)
- Type of messages: Transactional
- Region: US East (N. Virginia) or US West (Oregon) (use the region you have configured for SNS)
- Countries: US
- How opt out: They can reply back STOP so Amazon SNS stops sending. But all who receive texts from us have opted in for notifications and that mobile number can be removed in our system.
- Message template: None. Varies depending on notification type.
- Request 1 Region: US East (N. Virginia) or US West (Oregon) (use the region you have configured for SNS)
- Resource type: General limits
- Limit: Exit SMS Sandbox
- New limit value: 100 (specify any SMS spending limit, like 50 for $50/month).
- Case description: We'd like to begin using our SMS sending of notifications from our e-contracting web site. We have completed the API coding and no longer want to be limited to the sandbox, and would like to set our higher spending limit.
Once Amazon responds to your case saying you have exited the sandbox, you can confirm this by returning to the Simple Notification Service in the console, click on 'Text messaging (SMS)' in the left side dashboard, scrolling to 'Account information' and it should say "This account has production access in the REGION" where REGION is the one you setup the toll free number in. At this point, you should be good to go.
Read more about which industries require 2FA.
Click on Programming->Libraries->ESF/Library/Template to update the AmazonSNSforSMS property set.
To activate Amazons SNS for SMS and optionally for 2FA, you must update the AmazonSNSforSMS property set.

- Set Access_key_ID to the API key from the User's access key setup in Amazon EC2/IAM for SNS API access.
- Set Enabled to true for SMS to be used for notifying parties.
- Set Enabled_2FA to true for SMS to be used for two-factor authentication for user logins.
- Set Message_2FA to the text message to send when two-factor authentication is requested.
${CODE}is replaced with the generated 2FA code. Along with other property set substitutions, you can also replace${NAME},${EMAIL},${SMSPHONE}and${CONTEXTPATH}to match the configuration of the User who receives the SMS code. - Set Region to the AWS region closest to your server, such as us-west-2 that offers Amazon SNS.
- Set Secret_Access_Key to the User's secret access key setup in Amazon EC2/IAM for SNS API access.
Password limits reduce the potential set of passwords (and pass phrases), but for those who have untrained users who are not likely to choose longer secure pass phrases, they may be forced to do so. Note that severe restrictions tend to cause users to write down passwords because they cannot remember them. The recommendation is for users to be trained to use things like PasswordSafe to generate long random passwords and not have to remember them, or to use non-trivial longer pass phrases.
Note that password guessing to break into a user account is non-trivial. After three failed attempts, logins are paused for 5 minutes and an email is sent to the user to inform them of this fact.
Click on Programming->Libraries->ESF/Library/Template to update the PasswordLimits property set.
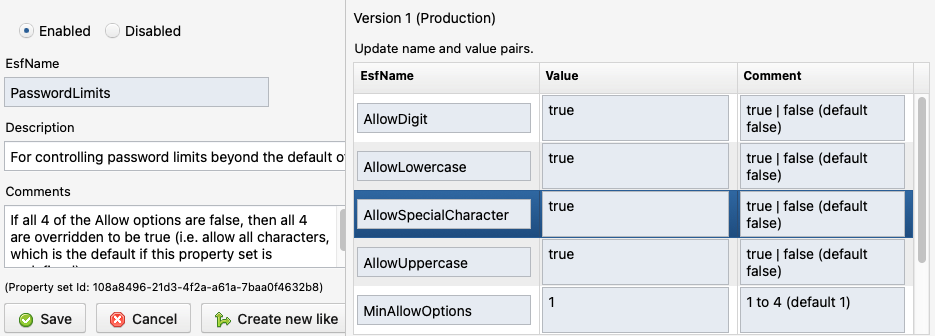
- Set AllowDigit to true to allow numbers 0 to 9 to be used. The default is false unless all 'Allow*' options are set to false. Recommend setting it to true.
- Set AllowLowercase to true to allow lowercase letters (such as 'a' to 'z' in the en_US locale) to be used. The default is false unless all 'Allow*' options are set to false. Recommend setting it to true.
- Set AllowSpecialCharacter to true to allow non-letter and non-digit characters to be used (i.e.
`~!@#$%^&*()-_=+[{]}\|;:'",<.>/?in the en_US locale). The default is false unless all 'Allow*' options are set to false. Recommend setting it to true. - Set AllowUppercase to true to allow uppercase letters (such as 'A' to 'Z' in the en_US locale) to be used. The default is false unless all 'Allow*' options are set to false. Recommend setting it to true.
- Set MinAllowOptions to the number 1 to 4 based on the minimum number of the above 'Allow*' options to be required. The default is 1.
- Set MinLength to the number 4 to 100 to set the shortest password or phrase allowed. The default is 4. For those not using Two-Factor Authentication, the longer the pass phrase the better.
- Set Tip to a short statement of the password limits so users know what the requirements are. The default is:
Your password must have between 4 and 100 characters. Longer pass phrases, including a variety of character types (uppercase, lowercase, digit, special character), are more secure.
Click on Programming->Libraries->ESF/Library/Template to update the ClassLinkSSO property set.
To activate ClassLink SSO, you must update the ClassLinkSSO property set.
- Set ClientId to the API client ID from the ClassLink Partner portal's OAuth2 Connection for your Application.
- Set ClientSecret to the API client secret from the ClassLink Partner portal's OAuth2 Connection for your Application.
- Set Enabled to true for ClassLink SSO to be used for user logins.
You must be a customer/partner of ClassLink with a compatible directory connected to them so they can access it to do login authentications. Please work directly with ClassLink.
ClassLink partner portal settings for OAuth2/OpenId connections:
- Domains: Your server's name, i.e. www.example.com
- Initiation Type: Partner Initiated
- Launch URL: Your server's main URL for login
- User Scopes: openid
- Enable PKCE: No
- Your Client ID and Client Secret are shown in the Authentication Details.
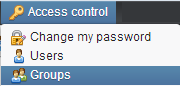
Click on Access control->Groups to list and update group records.
All permissions are applied to groups, which is just a simple name used to identify one or more users who perform similar jobs or work together. A user can belong to one or more groups, and it's possible to create multiple groups to support multiple companies/partners who are sharing a single system so that each such company only sees users and groups that belong to their company, while allowing the owner of the deployment to view all users and all transactions across those companies.
Configuring a group involves giving it a name and specifying which users belong to the group:
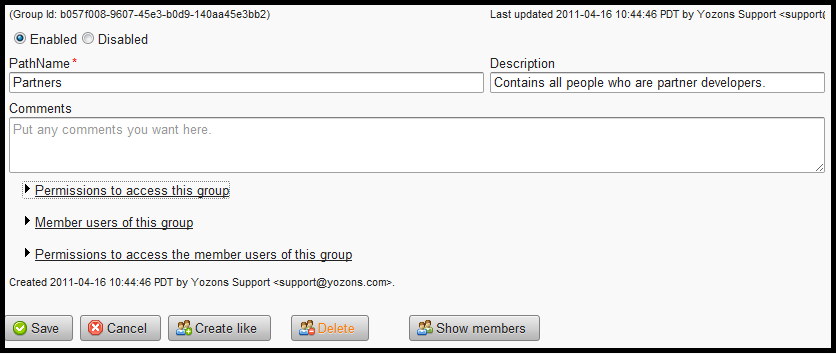
We recommend using a simple PathName that describes your group. However, if you support multiple companies or departments, you can prefix them to keep them organized, such as Company1 (for all users who work at Company1), Company1/Admin (for the users who can do the user administration functions for Company1), Company1/Manager (for the managers in Company1 that can see across all users), and Company1/Programming (for those who program the forms for Company1).
You are free to name as you see fit, of course, but since you will use them for assigning permissions, it's best if they make clear sense to you. If you have multiple companies with multiple departments in each, and you want each department to have control or limited access to just that department, consider using a scheme like Company1/Department1, Company1/Department1/Admin, Company1/Department1/Manager, etc., so you can then have Company1/Department2, Company1/Department2/Admin, Company1/Department2/Manager, etc.
The pseudo-group (no need to define) ESF/Groups/AllUsers will appear in group selection lists which effectively means "all users." This group is not real, but allows you to easily give all users permission to a given feature without listing all groups that have distinct users in them. This special group is also used for granting "sub-permissions" on things like report templates and transaction templates. That is, if you already have permissions on who can run a report, for example, you can use ESF/Groups/AllUsers (rather than specifying a specific set of groups again) on a permission like "can view activity log." Since users can't view the activity log without first being able to run the report, only users who can run the report effectively can then view the activity log, even if granted to "all users."
See Overview the permissions overview for this basic setup of group permissions:
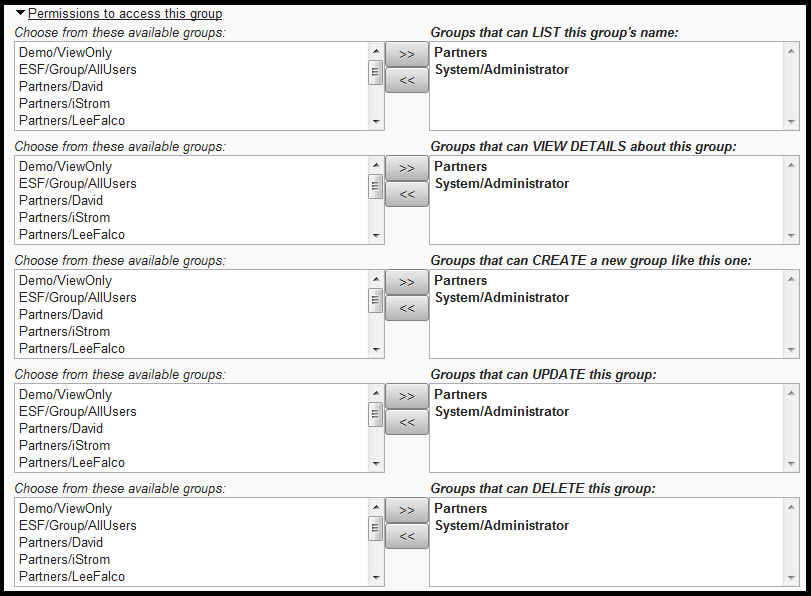
This list specifies who can perform various operations related to this group record alone.
Remember to click Save after changing permissions.
To set which users are members of this group, click to open:

You can click one or more users from the left side and then click the >> button to add users to the group. Or click one or more users from the right side and then click the << button to remove users from the group.
You can also set which groups a given user belongs to by modifying that user's record.
Remember to click Save after changing the group membership.
The permissions for accessing the records of the users who belong to a group are set here:
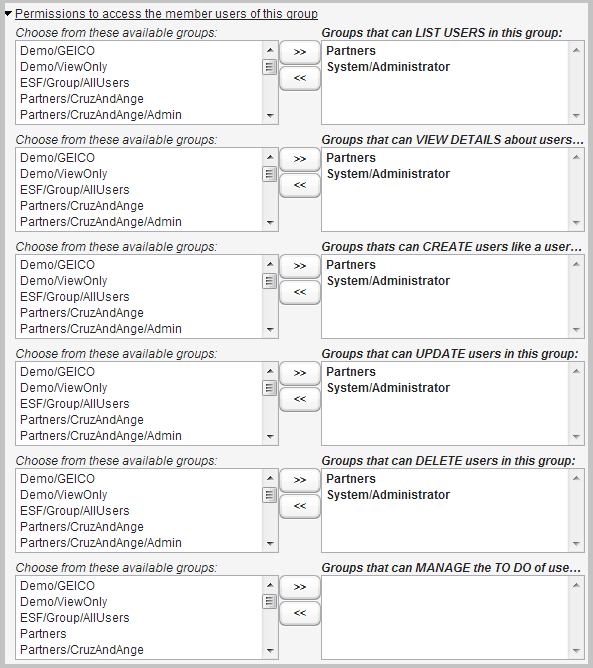
Like the standard permissions, you can specify who can List, View Details, Create, Update and Delete users who belong to this group. Normally, this permission is left to the System/Administrator or if the group administrator, such as Company1/Admin if you build such a group.
In addition, there's a special Manage To Do permission that allows members of a group to access the To Do screen of members of the selected group. Normally, other users do not need access to the To Do list of other users, but managers may want it to unlock transactions queued up to a user based on the To Do Group setting for a party, when that user has left the company, is on vacation, etc.
Remember to click Save after changing permissions.
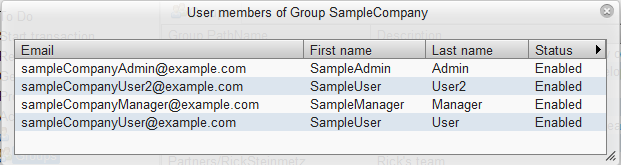
If you click on the Show members button, a popup window that lists all users appears:
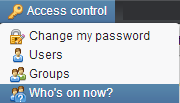
Click on Access control->Who's on now to display all active user sessions:

- For logged in users, the Name column is the user's login name. For external users, it is the transaction and role they are playing if that has been determined.
- The IP column shows the IP address (and host name when it can be determined by a reverse DNS lookup).
- The Last column shows the date-time when the user last accessed the server.
- The Started column shows the date-time when the user first accessed the server.
- The Timeout column shows the number of minutes the user's session will remain active if no user activity is taking place. Generally speaking, if the Last column is more than Timeout minutes from now, that user's session will timeout and the user will need to restart.
- If you have permission (give 'delete' permission as configured in the UI UserSessionView), an End Session button will appear. Click on it to force that user's session to end.
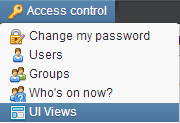
Click on Access control->UI Views to list all of the views (main pages/screens) that are accessible from the left side panel menu navigation. "UI" stands for "user interface."
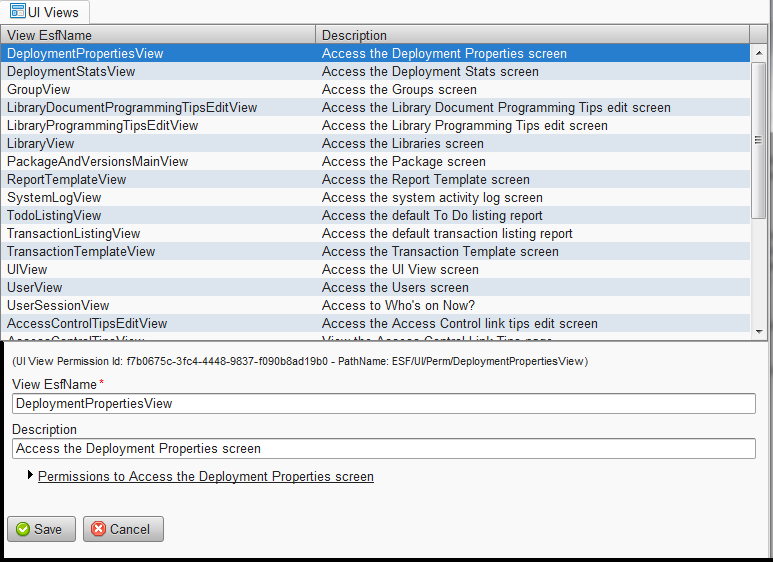
We do not recommend changing the View EsfName of any views as it will break their functionality unless other programmer-level changes are made.
We do not recommend changing permissions here much as it is generally best to set them once for all users, since users will naturally be limited to the users, groups, libraries and transactions that have been granted to them based on their permissions. The UI permissions are mostly to determine whether a given item appears in the menu navigation or not.
- DeploymentPropertiesView controls System config->Deployment
- DeploymentStatsView controls System config->Stats
- GroupView controls Access control->Groups
- LibraryDocumentProgrammingTipsEditView controls System config->Document program tips
- LibraryProgrammingTipsEditView controls System config->Program tips
- LibraryView controls Programming->Libraries
- PackageAndVersionsMainView controls Programming->Packages
- ReportTemplateView controls Programming->Report templates
- SystemLogView controls System config->System logs
- ToDoListingView controls To Do
- TransactionCsvStartView controls Start transaction->CVS Upload
- TransactionUpdateAPIView controls Start transaction->Update data in a transaction
- TransactionListingView controls General tran search
- TransactionTemplateView controls Programming->Tran templates
- UIView controls Access control->UI Views
- UserChangePasswordView controls Access control->Change my password
- UserView controls Access control->Users
- UserSessionView control Access control->Who's on now?. 'Delete' permission allows the user to end any user session listed.
- AccessControlTipsEditView controls System config->Access control link
- AccessControlTipsView controls Access control
- ProgrammingTipsEditView controls System config->Program link
- ProgrammingTipsView controls Programming
- ReportTipsEditView controls System config->Report link tips
- ReportTipsView controls Reports
- StartTransactionTipsEditView controls System config->Start tran tips
- StartTransactionTipsView controls Start transaction
- SystemConfigTipsEditView controls System config->System config link
- SystemConfigTipsView controls System config
- WelcomeTipsEditView controls System config->Welcome link
- WelcomeTipsView* controls Welcome
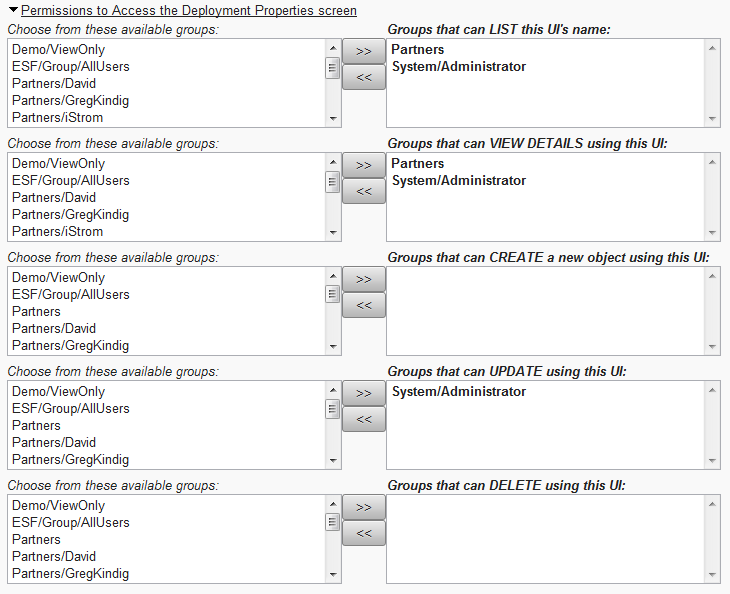
Permissions work the same here as for other permissions, but it doesn't affect the ability to change the UI record itself, but how the user interface works.
- List permission means the user will see this UI in the menus.
- View details means the user will see this UI in the menus.
- Create means the user will be allowed a Create or Create like button.
- Update means the user will be allowed a Save button.
- Delete means the user will be allowed a Delete button.
Note that having the permission here does not mean the button will always appear, since for records that have their own permissions, the user will need it on the specific object as well. If you remove Delete permissions for the UI, for example, that button will not appear even if the user's group allows them to otherwise delete that record.
Under System config->Deployment you can view and modify certain deployment properties. Please do so with care. Click the Edit button to change values, but be certain you know what you are doing.
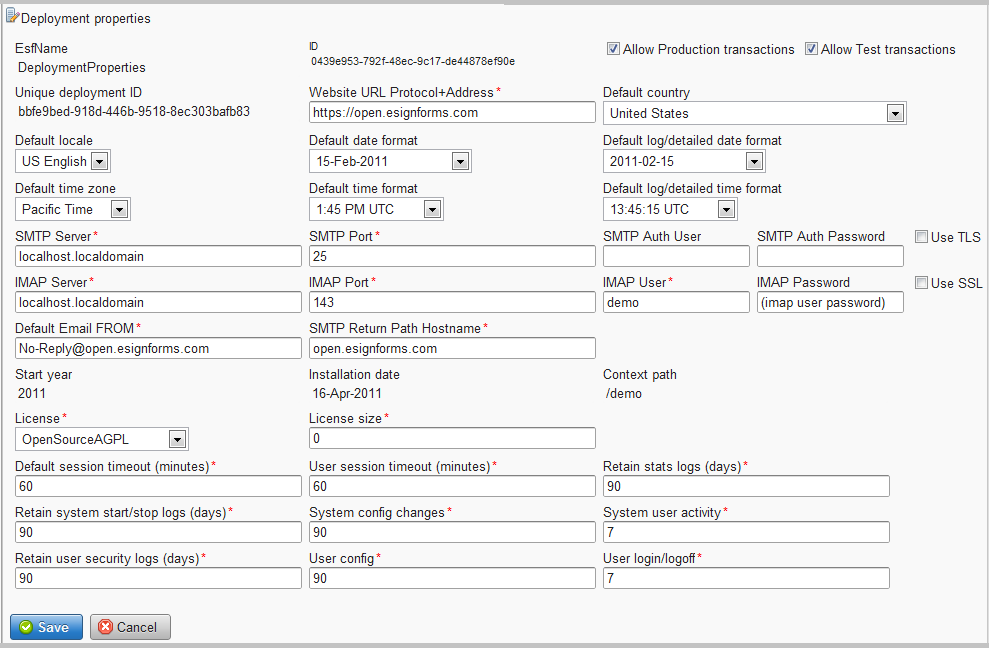
- Every deployment has a Unique deployment ID, which is displayed at the top.
- Note that the ID field is the related to the deployment properties record id as stored in the database.
- Ensure Allow Production transactions is checked if your deployment can run production transactions.
- Ensure Allow Test transactions is checked if your deployment can run test transactions.
- The Website URL Protocol+Address is the domain name where your application runs and is used in all links sent out. Most deployments use the 'https://' protocol to ensure secure communications between the browser and the server.
- The Default country is used to specify what country the deployment is for. It is used, for example, to aid in phone numbers being entered and interpreted correctly.
- The Default locale specifies the language the application runs as. Currently, we only support US English (en_US), Spanish (es_CO, es_MX), German (de_DE) and Portuguese (pt_BR).
- The Default date format specifies how dates are displayed by default. There is a known issue as of the 14.6.7 release if you use the DateComparison condition in an action and your date format is not one of the top 3 options. We recommend you only use the top 3 for your date formats (15-Feb-2011, 02/15/2011 or 2011-02-15) as these can be correctly transformed back into date objects.
- The Default log/detailed date format specifies how dates are displayed in various logs and other places where full dates are displayed.
- The Default time zone specifies the default time zone used. This can be overridden on a per-user basis.
- The Default time format specifies how times are displayed by default. Most people only show times through minutes.
- The Default log/detailed time format specifies how times are displayed in various logs. For logs, you probably want to display seconds, if not milliseconds.
- The SMTP Server is the IP address or host name of the SMTP server to use for sending outbound emails. Most will keep this set to 'localhost.localdomain' to use the system's SMTP server.
- The SMTP Port is the TCP port number SMTP is listening on. The default is 25. For some remote SMTP servers, you may have a value like 587 or perhaps 465 if you use SSL.
- The SMTP Auth User is set if your SMTP server requires AUTH protocol to send.
- The SMTP Auth Password is set if your SMTP server requires AUTH protocol to send.
- Check the Use TLS box if your SMTP server communicates over TLS.
- The IMAP Server is the IP address or host name of the IMAP server to use for retrieving inbound emails (mostly bounces and replies to automatically created emails sent by the application). Most will keep this set to 'localhost.localdomain' to use the system's IMAP server.
- The IMAP Port is the TCP port number IMAP is listening on. The default is 143.
- The IMAP User is generally set to your unique database name set for your deployment. It must be a valid user account on the server which is only used to accept inbound email for your application. On a secure server, we do not recommend allowing actual user logins to this account (we set it up so it's not valid to login to this account via SSH, for example), and keep it in its own group.
- The IMAP Password is the password that goes with the IMAP User login.
- Check the Use SSL box if your IMAP server communicates over SSL.
- The **Default Email FROM is used as the FROM email address for emails not sent out on behalf of a user. We recommend the
[email protected]form as automated emails generally do not expect replies. Note, however, that many emails sent out will correlate a reply back to it if you view the emails through the application. - The SMTP Return Path Hostname is the hostname where emails sent out will show. For anti-spamming measures, it should generally be the actual host name where your application is running and where the IMAP server will be able to process bounces.
- The Start year is the year your deployment was installed.
- The Installation date is the date your deployment was installed.
- The Context path is the URL path name appended to the 'Website URL Protocol+Address' to indicate your web application instance.
- The License specifies the license your system is running under, including if you have a commercial license based on number of users or database size.
- The License size specifies the maximum number of users or database size (in MB) of your license. Note that exceeding the maximum will not affect the system operation, but additional licensing fees will apply on renewal.
- The Default session timeout specifies the default web application session timeout in minutes. Most use 30 minutes. It should be long enough for a typical party to process your electronic documents. If a party is processing a document and does not interact with the server in this many minutes, the session will be terminated and the party will have to restart access.
- The User session timeout specifies the web application session timeout in minutes for users who have logged in. This is often used to ensure that users who login have a shorter timeout than parties who are invited to sign your documents.
- The Retain stats logs specifies how many days to keep usage statistics.
- The Retain system start/stop logs specifies how many days to keep system activity logs related to system starts and stops. Most will keep it for 365 days.
- The System config changes specifies how many days to keep system activity logs related to configuration changes, like creating, updating or deleting documents, packages and transactions across all users. Most will keep it for 90 days.
- The System user activity specifies how many days to keep system activity logs related to users logging in and out. Most will keep it for 90 days.
- The Retain user security logs specifies how many days to keep security-related log records for each user who can login.
- The User config specifies how many days to keep log records regarding configuration changes, like creating, updating and deleting documents, packages and transactions, for each user.
- The User login/logoff specifies how many days to keep log records regarding logins and logoffs for each user.
Remember to click Save after changing any values.
Under System config->Stats you can view statistics related to your system activity and versions.
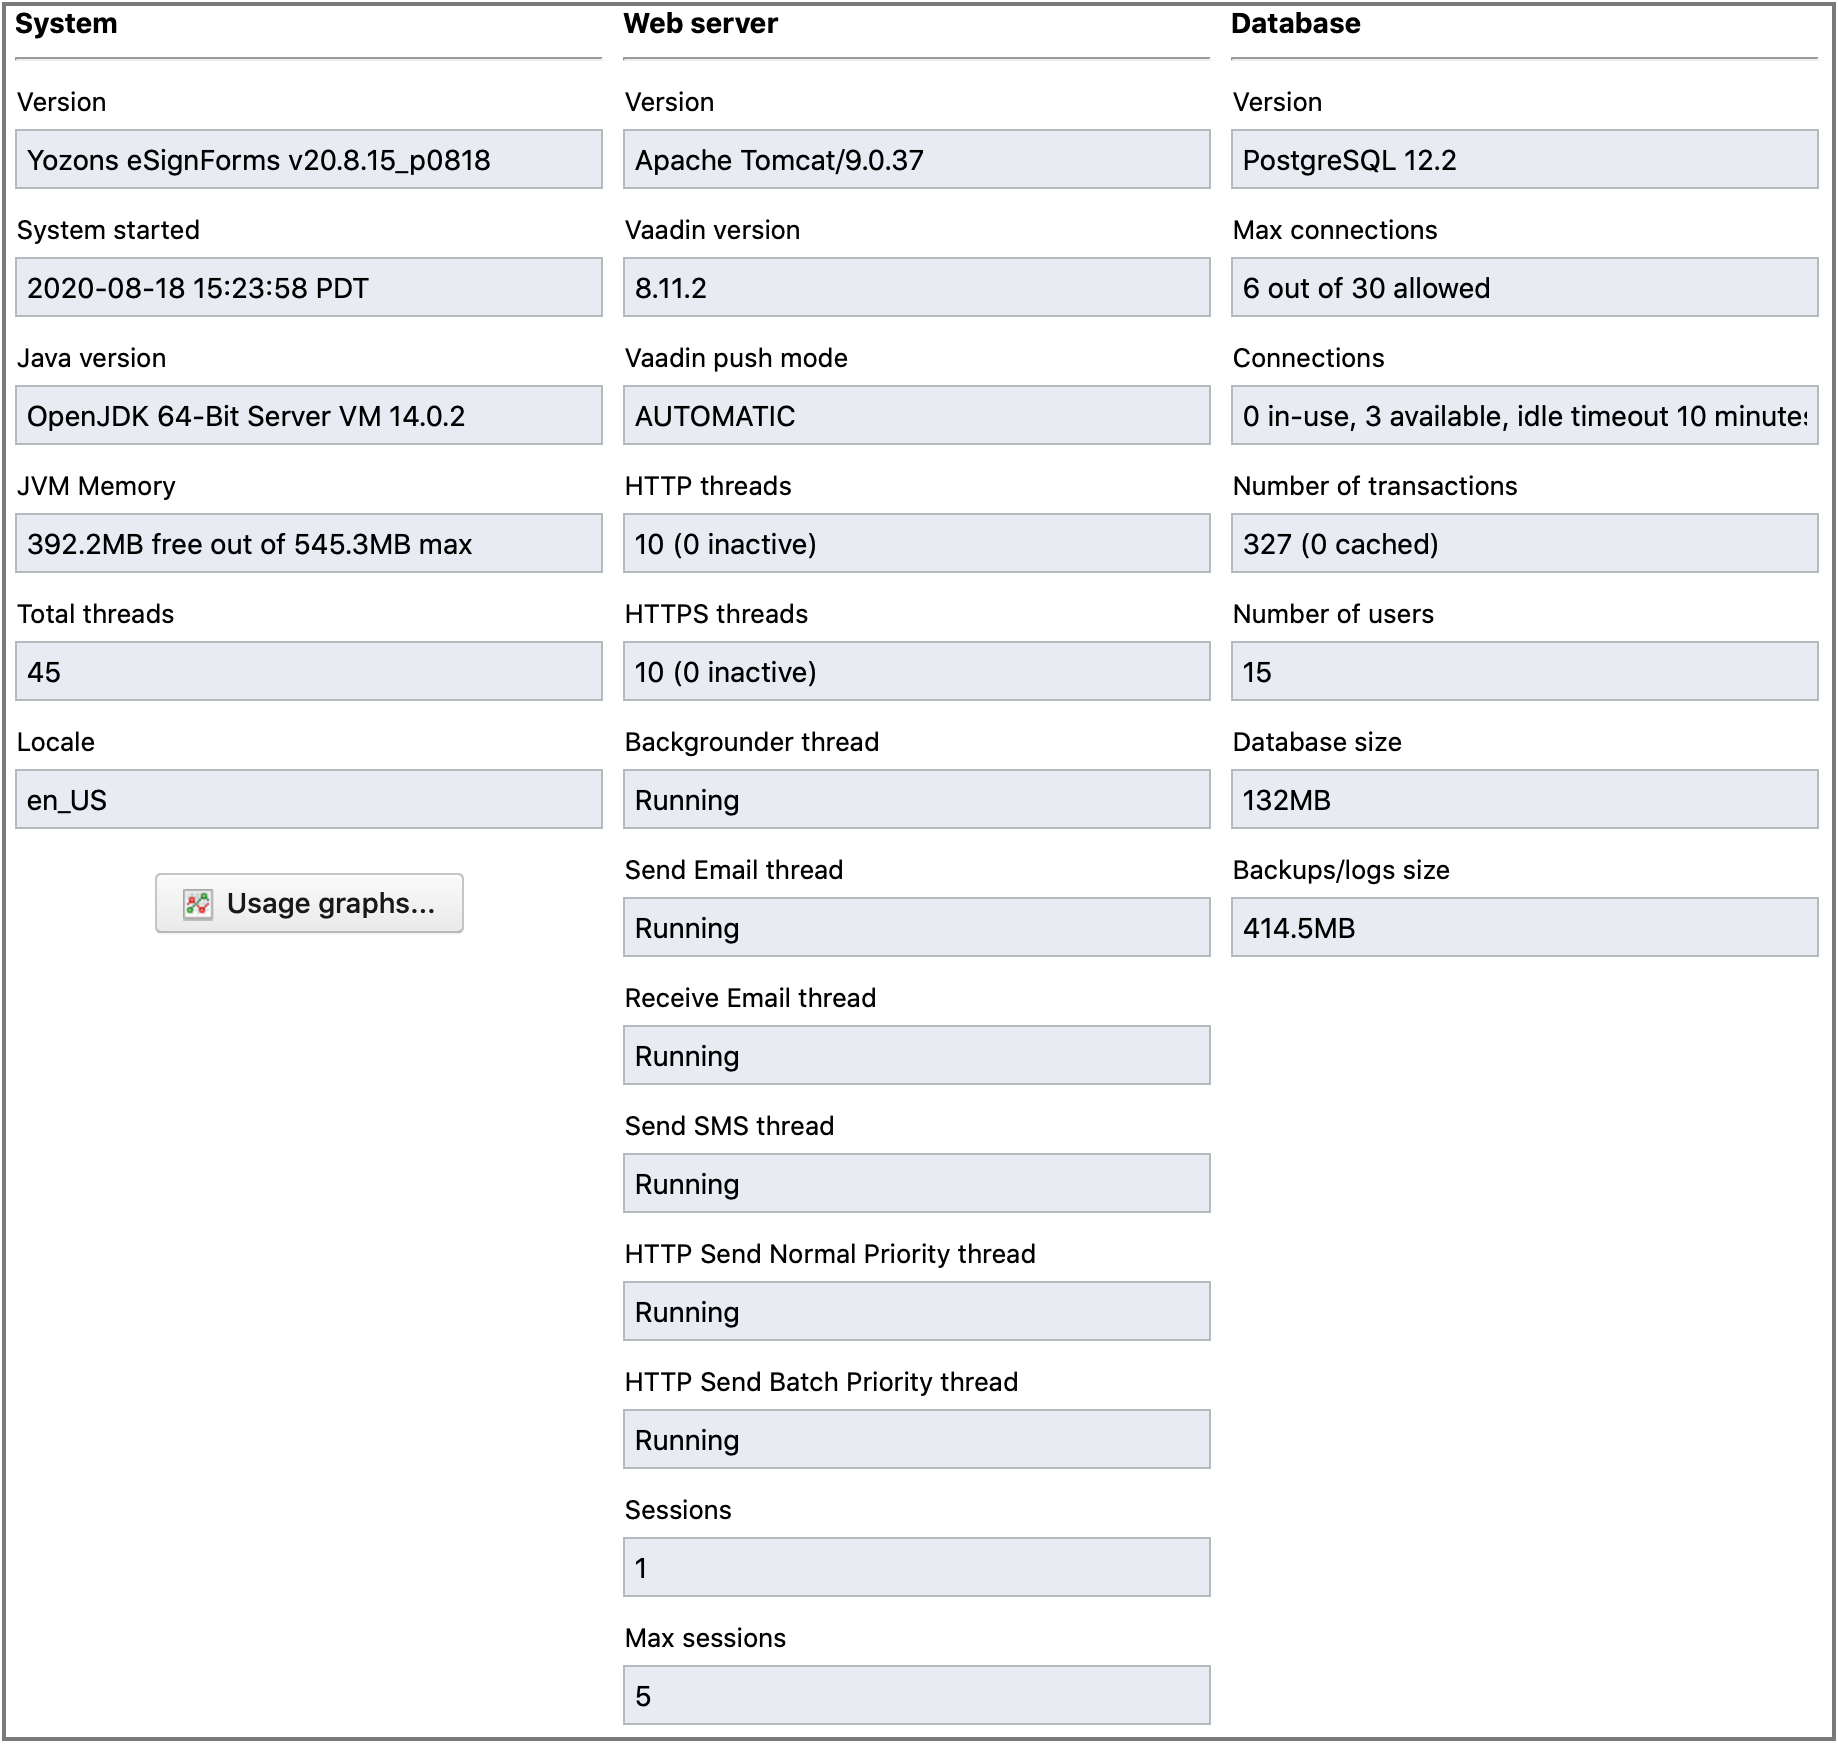
Under the System column:
-
Version is the eSignForms application version. This is also displayed at the bottom right of the application window and you can click on the version to see the version history.
- System started is the date+time when the application was last started.
- Java version is the Java version used to run your application.
- JVM Memory is the amount of memory assigned to Java, as well as the maximum specified it can use. If the amount used reaches the maximum, garbage collection takes place to try to reduce the amount of memory in use. This is for all web applications.
- Total threads is the number of threads Java is using. This is for all web applications.
- Locale shows the language and country locale setting. 'en_US' is the default for 'English' in the 'United States'.
- Usage Graphs... is a button that will show a graph of your transaction usage, database usage and how that compares to your license size.

Under the Web server column:
- Version is the web server version, which by default is Apache Tomcat.
- Vaadin version is the version of Vaadin used, which provides the user interface code for the Web 2.0 look.
- Vaadin push mode is the UI push mode used. The value AUTOMATIC is normal when push is enabled. DISABLED means push is not enabled.
- HTTP threads specifies the number of HTTP (non-secure) access threads are in the web server (and how many are inactive). This is for all web applications.
- HTTPS threads specifies the number of HTTPS (secure) access threads are in the web server (and how many are inactive). This is for all web applications.
- Backgrounder thread should say 'Running' to indicate that the background task processor is running.
- Send Email thread should say 'Running' to indicate that the outbound email processor is running.
- Receive Email thread should say 'Running' to indicate the inbound email processor is running.
- Send SMS thread should say 'Running' to indicate that the outbound SMS (text messaging) processor is running. This thread will run even if Amazon SNS for SMS is not enabled.
- HTTP Send Normal Priority thread should say 'Running' to indicate the normal priority HTTP(S) GET/POST processor is running.
- HTTP Send Batch Priority thread should say 'Running' to indicate the batch/low priority HTTP(S) GET/POST processor is running.
- Sessions shows how many current web server sessions are active.
- Max sessions shows the maximum concurrent web server sessions have been active since the system was started.
Under the Database column:
- Version is the database version, which by default is PostgreSQL.
- Max connections specifies the maximum number of database connections in use out of the maximum allowed.
- Connections specifies the number of database connections currently in use, the number available for use, as well as the "idle" timeout for connections if they are not used.
- Number of transactions specifies the number of transactions in your database.
- Number of users specifies the number of user accounts in your system. If you have a commercial users license, this is important to compare with your license size.
- Database size specifies the size of your database. If you have a commercial DB license, this is important to compare with your license size.
- Backups/logs size this is the additional space used to store database backups and application log files.
The graph will show the actual numbers behind each data point if you hover your mouse over the graph.

- The gray/blue line shows the number of transactions in your database.
- The red line shows your database license size in megabytes (MB).
- The orange line and area under it are colored to show your database license usage in megabytes (MB).
Under System config->System logs, you can view activities that take place on the system that are logged. This allows for trouble shooting as well as assigning blame (yes, we know you did it)! See the Deployment configuration for how long these log records are kept.
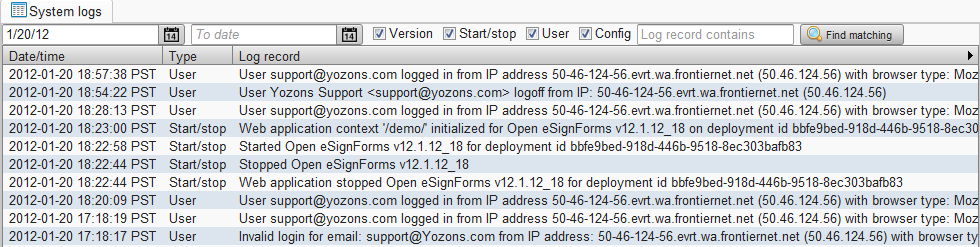
Specify the start date (or leave blank for the oldest records) and end date (or leave blank for the most recent records) and check the various types of records you want to see. If you are looking for something in particular, you can enter a value in the Log record contains field. Click Find matching to list all matching system activity log records.
Record types:
- Version records indicate new version installations and updates. Note that only version changes that require 'DbSetup' log such changes here.
- Start/stop records are recorded whenever your application starts and stops.
- User records show when any user logs in or out, or has an invalid password.
- Config records show when any user makes a configuration change to documents, packages, transactions, reports, etc.
Under Start transaction->Update data in a transaction is a utility tool that makes use of the Update API. It can be used in an emergency to update data values in an existing transaction (when the ESF_reports_access for update won't suffice to correct any data), or by developers who want a simple way to test any Update API event handling specified in their package custom logic. You will need 'Use the Update API' permission on the transaction template of the transaction you wish to update.
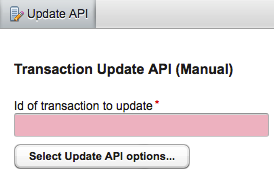
- Enter the transaction id to update in the Id of transaction to update field.
- Click Select Update API options...
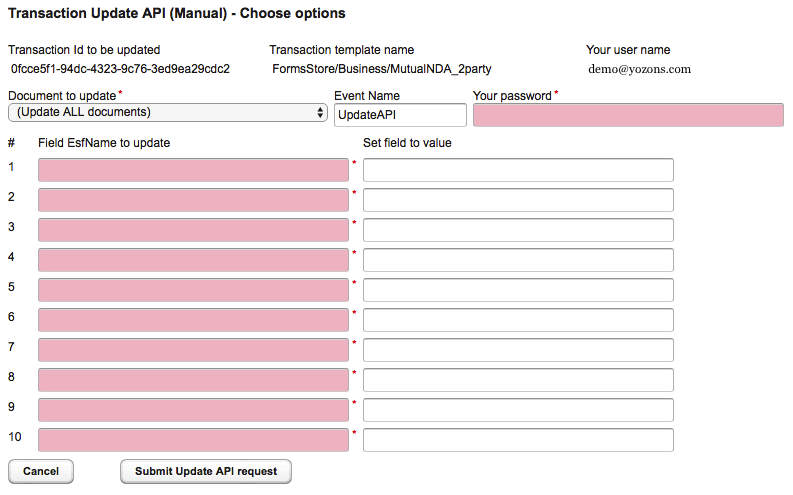
- Select from Document to update which document to update, or let the system update all documents that have the respective field(s) specified.
- Enter the Event Name to be sent for the Update API call. By default, 'UpdateAPI' is used, but any value that is tied to your package custom logic event handler will work to match the actions to do for this UpdateAPI call. You do not need to have custom logic for the Update API to work, but if you'd like to trigger additional actions when the Update API is done, then you would.
- Enter Your password as it will be sent along with the Your user name to authenticate the Update API request.
- Enter up to 10 Field EsfName to update field names with their corresponding Set field to value values. At least one row is required.
- Click Cancel to select another transaction id.
- Click Submit Update API request to submit the above data via the Update API. The API response will appear below.
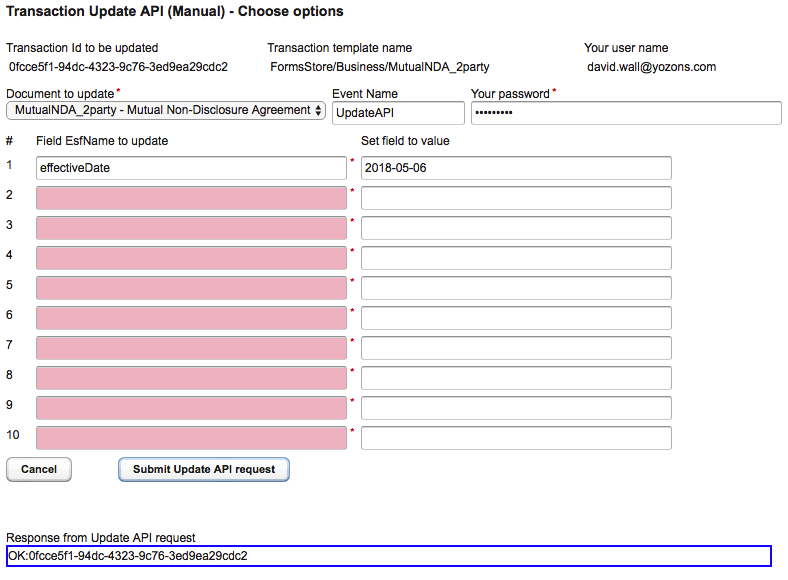
- The Response from Update API request will show the Update API response received. Typically, this will be "OK:" followed by your transaction id to indicate it was successfully done.
Under Programming->Libraries->ESF/Library/Template are the system configurations for you deployment. We will discuss a few of the key elements that you may want to tweak for you deployment.
The system standard package listing and E-Sign Disclosures are defined in the document StandardPackageDisclosures. We do not recommend changing this document, but you may find that you want to export it and import into your own library so you can change the layout and wording of the standard package listing and disclosures.
The system standard buttons and messages are defined in the button message set ESF_DefaultButtonMessage. We do not recommend changing this button set, but you may find that you want to export it and import into your own library so you change the button labels and messages.
The system also includes a Spanish version called ESF_DefaultSpanishButtonMessage, a German version called ESF_DefaultGermanButtonMessage, and a Portuguese version called ESF_DefaultPortugueseButtonMessage.
The system standard styles are defined in the document style ESF_DefaultDocumentStyle. We do not recommend changing this document style, but you may find that you want to export it and import into your own library so you change the default styles for your documents.
In general, the drop downs here will need to be changed if you need values that are not currently supported. Of course, you should take care to ensure your values are correct.
The system sends a few emails for its own needs and they are defined here, as well as the standard pickup notification.
DefaultPickupNotification contains the default email notification that is sent out for a party to process your documents. We do not recommend changing this email, but you may find that you want to export it and import into your own library so you change the default emails for your transactions.
ForgotPassword is sent when a user requests that their password be reset automatically.
IncomingEmailIssue is used to send a notice when a bounce/reply email arrives back at the OpenESF service and is correlated back to a user or transaction. By default, it's never sent out. To activate it, you must specify who gets the notification in other email templates via the 'Notify Bounce/Reply/Send issues to' field. No bounce/replies are processed related to sending this particular email template. By default, all email templates set the bounce/notify issue email to ${property:ESF.NotifyEmailIssuesTo}, but that property has no value by default.
OutgoingEmailIssue is used to send a notice when an outgoing email fails to be sent. By default, it's never sent out. To activate it, you must specify who gets the notification in other email templates via the 'Notify Bounce/Reply/Send issues to' field. No bounce/replies are processed related to sending this particular email template. By default, all email templates set the bounce/notify issue email to ${property:ESF.NotifyEmailIssuesTo}, but that property has no value by default.
PasswordChanged is sent to the user's email address any time the password is changed.
PasswordLockout is sent to the user's email address whenever they are locked out because of three login failures.
SetPassword is sent to the user's email to have them set a new password for their account.
The file Logo is the default logo used for your deployment, such as on the login page. The various other images allow you to change other icons used in documents, error messages, etc.
The ESF property set contains a few configurable elements to personalize your deployment.
- AllowMapAllDocumentFields is an optional property that defaults to 'false'. Set to 'true' to add a package report field mapping button that allows mapping all document fields. This is generally not recommended as it's rare to need every field in a document to appear in a report listing.
- AppTitleInHtml is the HTML used to render the application title seen at the top/middle once logged in.
- LoginPageAllowEmbedded can be set to true if you plan to embed the login page in another web page. We do not recommend this for security reasons (the domain name, SSL cert, etc. are hidden and enable phishing attacks and hacks that occur on the web page where it is embedded. This basically removes the javascript that forces the login page to be to the top level page.
- LoginPageTitle sets the web page title for the login page.
- LoginWelcomeHeader sets the main welcome message that appears on the login page.
-
NotifyEmailIssuesTo sets the email address(es) -- separate multiple email addresses with a semicolon (;) -- who will receive notifications for incoming and outgoing email issues. By default, it's blank. Note that each email template can be configured to use a different property (or other field spec or literal email address), so setting this only applies to email templates that are configured with the default 'notify issues to' set to
${property:ESF.NotifyEmailIssuesTo}. - MenubarHideIcons is an optional property that if set to 'true' will suppress the icons shown on the menu bar and in the menu drop downs. This is generally defined in the ESF/Library/Template property set ESF to apply to all users, but it can be overridden for a given user by specifying the property in the user's setup.
- MenubarShowDisplayNameOnly is an optional property that if set to 'true' will only list the transaction and report 'display name' in their respective drop downs rather than also include the template names and description. This is generally defined in the ESF/Library/Template property set ESF to apply to all users, but it can be overridden for a given user by specifying the property in the user's setup.
-
ReportsDefaultSearchPrefix is an optional property that defaults to '
'. Set to '' for the default 'contains' search (slowest, but most general), '^' for a 'starts with' search, or '=' for an exact match search (most efficient). This is generally defined in theESF/Library/Templateproperty setESFto apply to all users, but it can be overridden for a given user by specifying the property in the user's setup. Regardless, all search criteria with no prefix are re-written with this specified prefix to make it clear which type of search is used for any given searchable report field. This also applies to the built-in search field for party email address. -
ReportsHideSearchByPartyEmail is an optional property that defaults to 'false'. Set to 'true' if you don't want the 'party email' search field to appear in reports. This is generally defined in the
ESF/Library/Templateproperty setESFto apply to all users, but it can be overridden for a given user by specifying the property in the user's setup. -
ReportsHideSearchByTranId is an optional property that defaults to 'false'. Set to 'true' if you don't want the 'tran id only' search field to appear in reports. This is generally defined in the
ESF/Library/Templateproperty setESFto apply to all users, but it can be overridden for a given user by specifying the property in the user's setup. -
ReportsHideSearchStartedByPartyTo is an optional property that defaults to 'false'. Set to 'true' if you don't want the 'started by/party to' selection boxes to appear in report. 'true' implies it will default to 'Started by' that includes Me, All Users and External Parties based on report permissions. Note that 'All Users' just means all users a given user is able to LIST. This is generally defined in the
ESF/Library/Templateproperty setESFto apply to all users, but it can be overridden for a given user by specifying the property in the user's setup. - SendEmailFrom contains the default FROM email address to be used when sending out emails from this deployment.
- Theme is optional and can be set to 'esfvalo' to have an alternative color scheme. This can be applied to all here, or on a per user basis in the User's property set. The default is 'yozonsesf' for the standard look.
The optional HtmlToPdf property set may be used to override some aspects of the HTML to PDF conversion (via the wkhtmltopdf tool). Since this mostly applies to PDFs created from documents in a transaction, you may override these values in your brand library or even a user's specific property set.
- CommandName sets the command name run the 'wkhtmltopdf' tool. This is mostly used when testing different versions of the tool. By default, it uses 'wkhtmltopdf' or 'wkhtmltopdf.exe' on Window.
- PageSize sets page size. By default, it uses 'Letter'
- DisableSmartShrinking sets whether the --disable-smart-shrinking option is included. By default, it is set to 'true'. Unless needed because of wkhtmltopdf version issues, we do not recommend configuring this property set.
- EnabledDigitalSignature sets whether generated PDFs are digitally signed or not. By default, it is set to 'true'.
- HeaderText and/or FooterText can be used to add generated headers/footers to each PDF page. Typical settings for this include '[title] - Page [page] of [topage]' to show the document title, the page number and the total number of pages. By default, no header or footer is generated.
- HeaderAlign and/or FooterAlign sets the alignment for HeaderText/FooterText. It defaults to 'center' but can be set to 'left' or 'right'.
- MergeMultipleDocumentsSeparately defaults to false, but if true, will convert multiple HTML documents into multiple PDF files, so header/footer text settings can apply to each document versus the combined PDF, which are then merged and then digitally signed. Merging them separately does have a performance cost as it takes longer to convert documents one at a time and merge them.
eSignForms uses industry standard XML Digital Signatures to create reliable records of every step of a transaction. Our digital signatures use the most powerful digital signatures on the marketplace today with 4096-bit RSA keys over SHA-512 hashes.
As each party completes a given document, the HTML sent to the party's web browser is captured and digitally signed along with an accurate timestamp providing an electronic record that cannot be subsequently changed without detection.
You can see the snapshot XML from the details page of a given transaction, whether from General Tran Search, or from one of your Reports. Just click on the Download Snapshot XML option for a given document and party:

The downloaded XML file contains the digital signature that can be re-verified independently to prove it's the original. It includes both the data in the document as well as the HTML the user saw when completing the document.
The downloaded snapshot XML file contains the public key that is uniquely associated with each deployment of eSignForms. Here's an example showing the key value (the RSA public key used) as well as the signature seal:
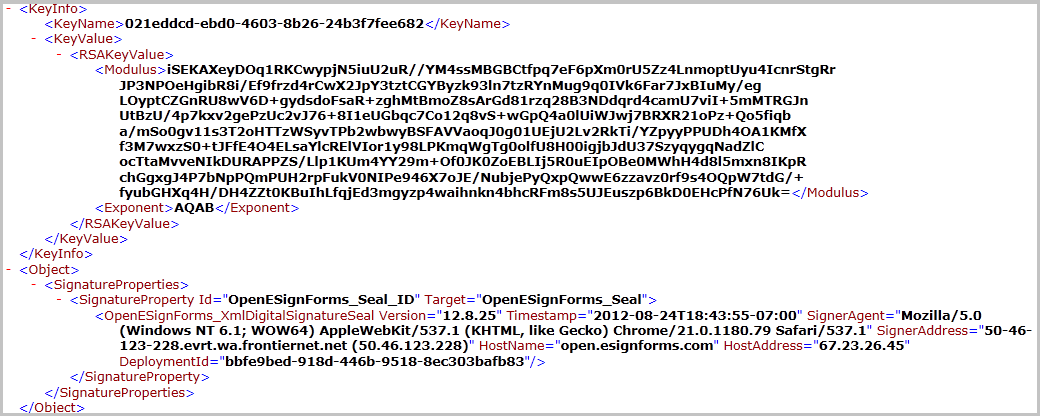
While anybody can revalidate the XML digital signature using any compliant XML digital signature verifier (we provide an example in the application code file com.esignforms.open.crypto.XmlDigitalSignatureSimpleVerifier), it is not obvious that the signing keys belong to you.
If there is any question about whether the public key and other information in the snapshot is valid and belongs to your deployment, anybody can compare them against your deployment's public keys where values like the KeyName, Modulus, Exponent and DeploymentId can be confirmed visually.
Just visit the showSigningKeys.jsp page for your deployment (i.e. https://open.esignforms.com/demo/showSigningKeys.jsp for our demo system) or whatever deployment you are checking. It will list all of the public keys used as well information like the key name and deployment id. The blue values in particular should all match between this listing and the snapshot XML's values.
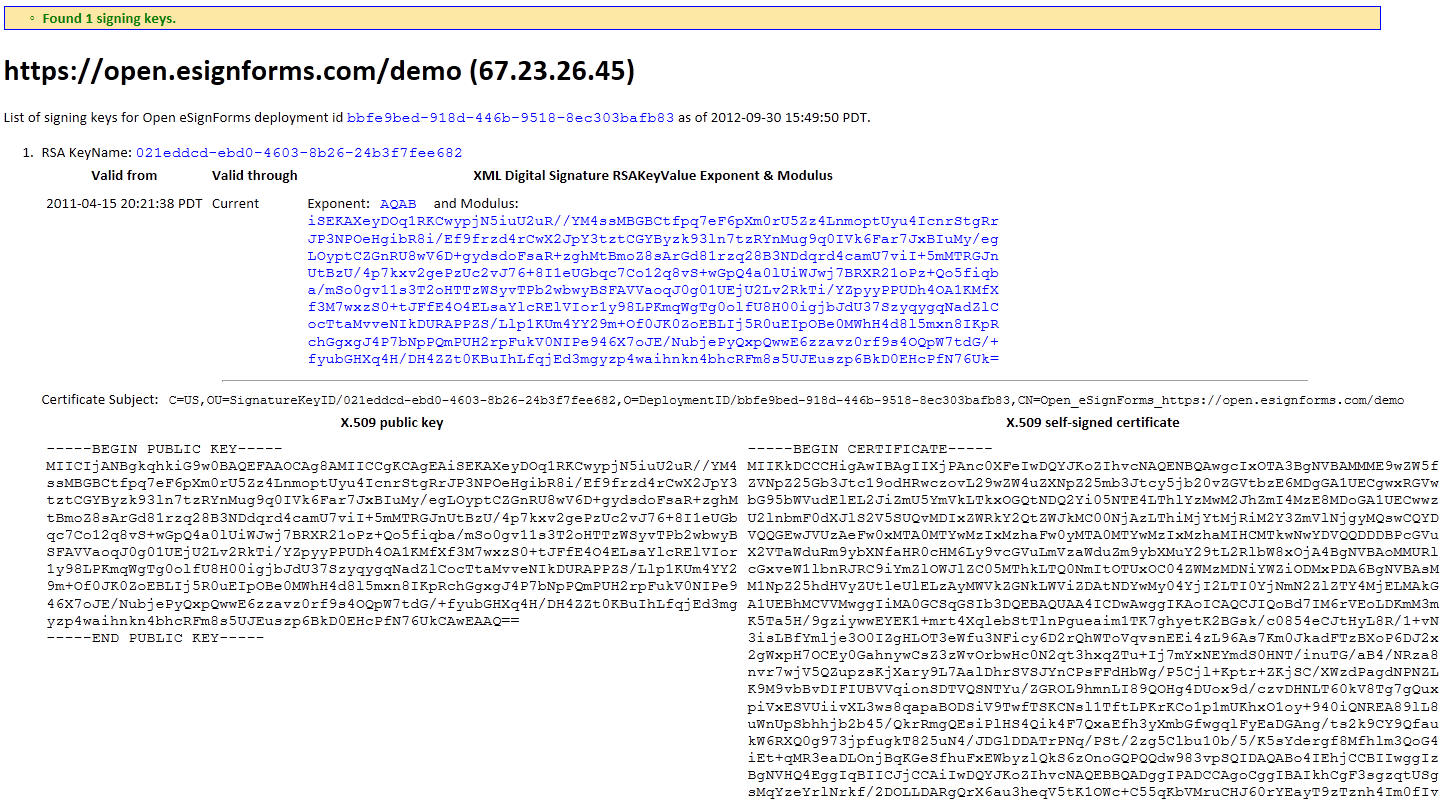
The web page lists the deployment id, KeyName and the XML Digital Signature style RSAKeyValue Exponent and Modulus. All validly signed documents created using your system will match one of your keys.
Furthermore, the self-sign X.509 Certificate, including the Subject Distinguished Name (DN) is shown to prove your deployment credentials. This is mostly used for PDF digital signature validations.
Most will want to keep production transaction indefinitely to allow for easy online access via the reports, knowing that the data and documents are securely encrypted on disk at all times. However, as both a backup and a means to shorten the retention period of transactions to keep a database small, we recommend that you periodically download a transaction archive of completed or important transactions.
Simply create a Report against transactions types you want to export. Most can use existing reports that are used on a daily basis to view the status of all transactions. Just give the archiving person, typically the system administrator, permission to run the report, see all transactions across users, download logs and snapshots, and of course the "download complete transaction archives" permission.
Then run that report to list matching transactions you'd like to export, and click the Download archive button. A ZIP file will be returned that contains the matching transactions. Assuming the user has full permissions specified in the report, this will include XML data for the transactions and documents, the activity log, the email sent log, attached files, and digitally signed snapshots.
Just unzip the downloaded file to access your transactions from your computer.
Tip: If you do expire transactions (set the retention to any value besides 'forever'), the report allows you to specify a data range along with the 'Will expire' option so you can download all transactions, for example, that will expire in the next month (or next quarter, next year, etc.), so you can do this on a periodic basis to keep a copy yourself even if the service will no longer have a copy online.