Deployment guide - OfficeDev/microsoft-teams-apps-rapid-assist GitHub Wiki
Prerequisites
To begin, you will need:
- Office 365 Subscription
- Microsoft Teams instance
- Required permissions to create SharePoint Lists
- App installer should be a member of expert team
- A copy of Rapid Assist app zip package
Step 1: Create SharePoint site
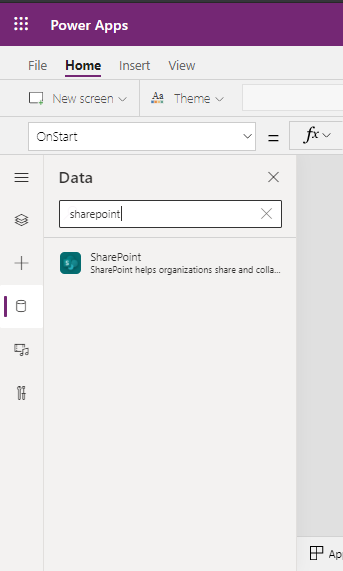
- Sign in to https://www.office.com/, and then select SharePoint on left navigation bar.
- After navigating to SharePoint, click on '+Create Site' button at the top left corner of the page.
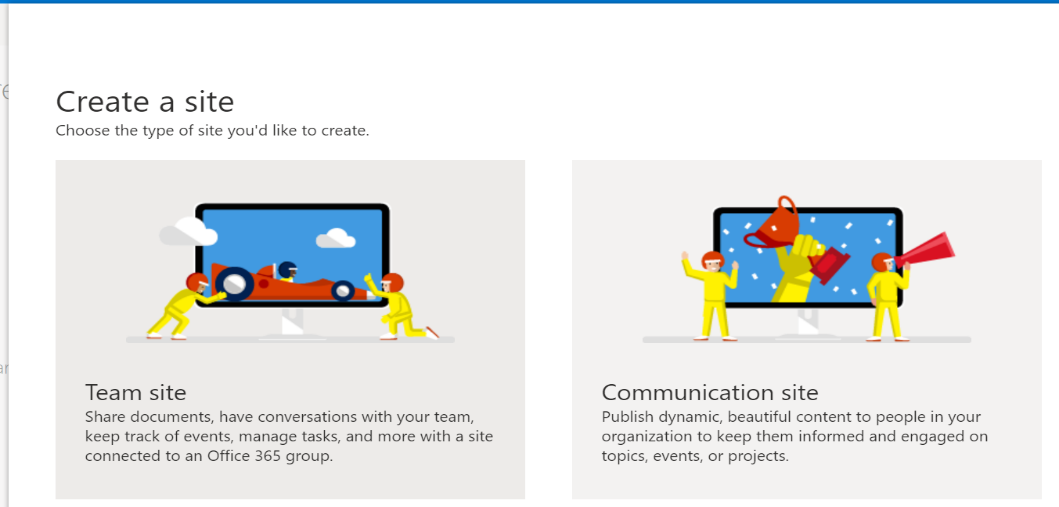
- Select Team Site.
- Enter name and description for your site. Set Privacy settings to Public so that everyone in the company can get the necessary information.
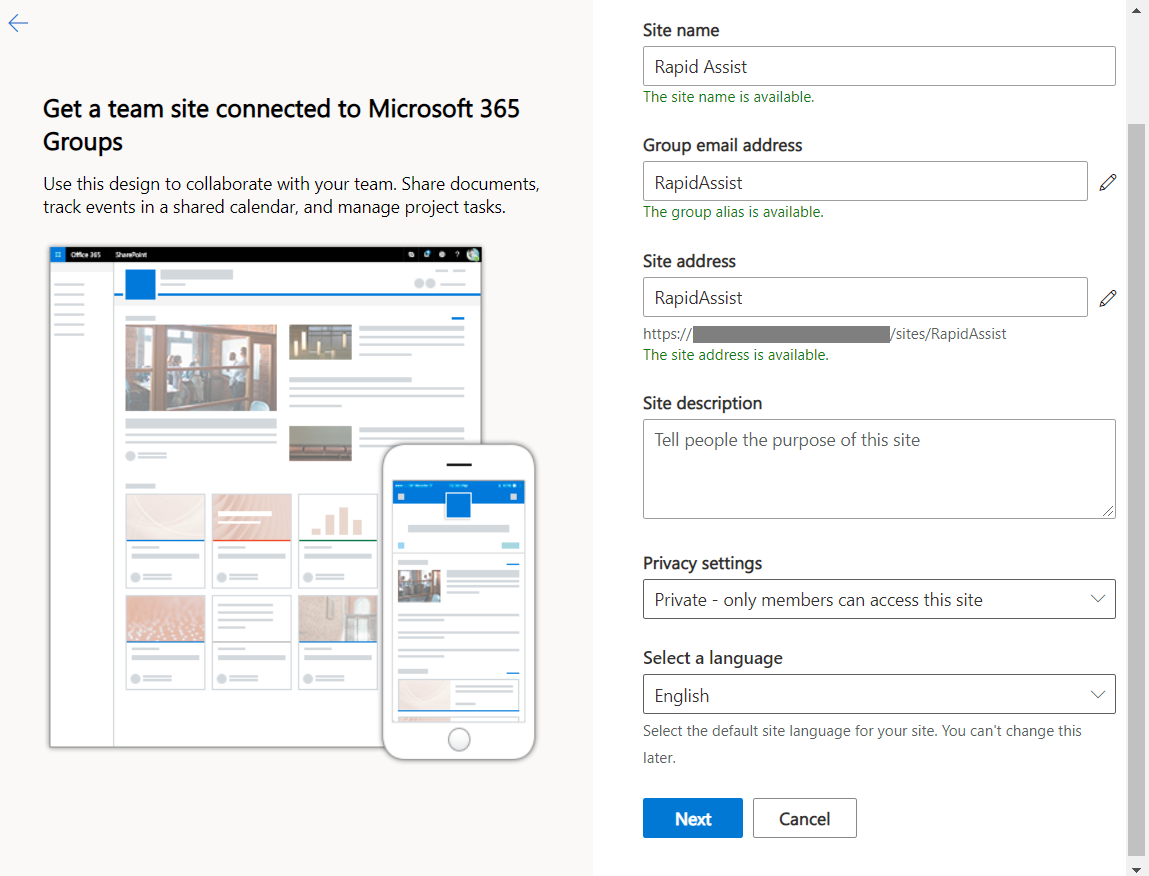
- Select 'Next'.
- Add additional owners and members (optional).
- Select 'Finish'.
- Note down the SharePoint site url as it will be used in further steps.
Step 2: Create SharePoint Lists
The app uses multiple lists to store its data. You can use the SharepointListCreationFlow Power Automate, available from the downloaded package, to automatically create these lists. This Power Automate creates the required lists and fields.
Import SharepointListCreation Flow
-
Sign in to Power Automate Click Here.
-
Select My Flows in the left panel.
-
Select 'Import'.
-
Upload SharepointListCreationFlow.zip from Flows folder in package provided.
-
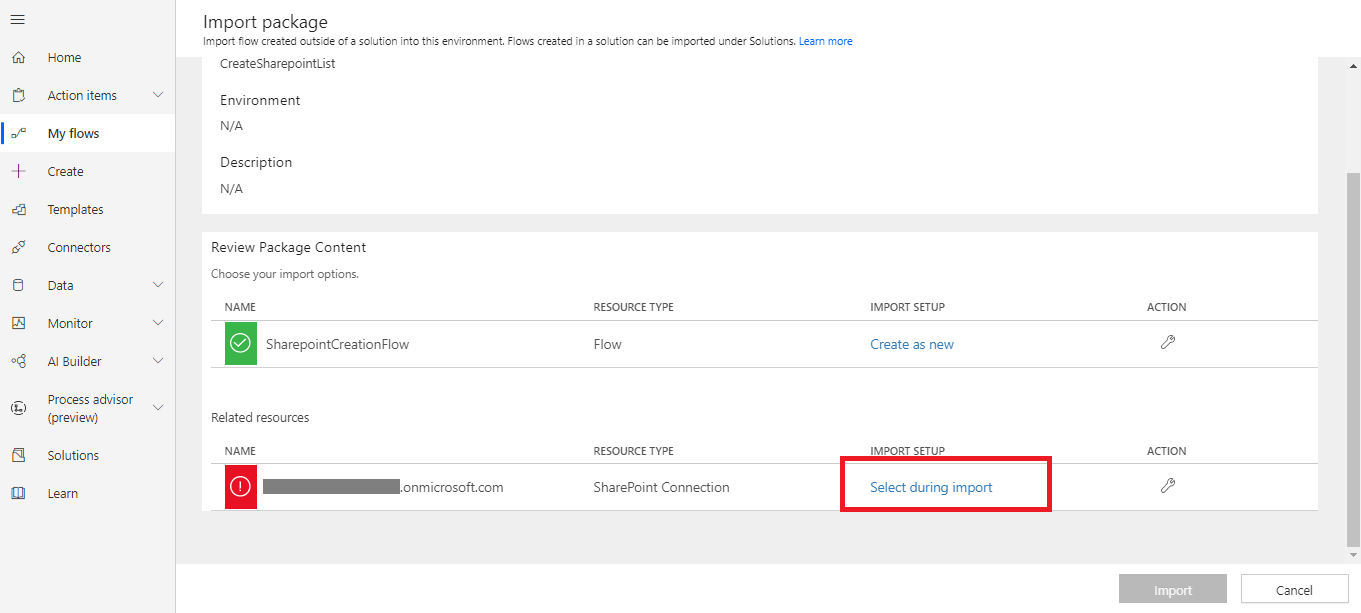
The import package page will open.
-
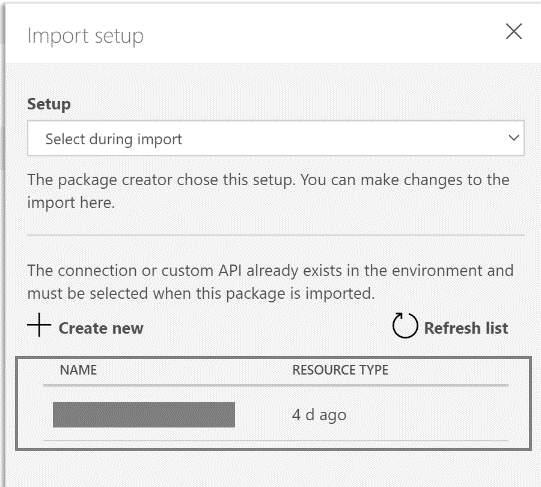
Add a SharePoint connection for the new flow by selecting the 'Select during import' link.
- If you need to create a new SharePoint connection, select +Create new in the Import setup pane.
Note: a new tab/window will open to allow creating new connection keeping the existing tab open. Please do not close the existing tab.
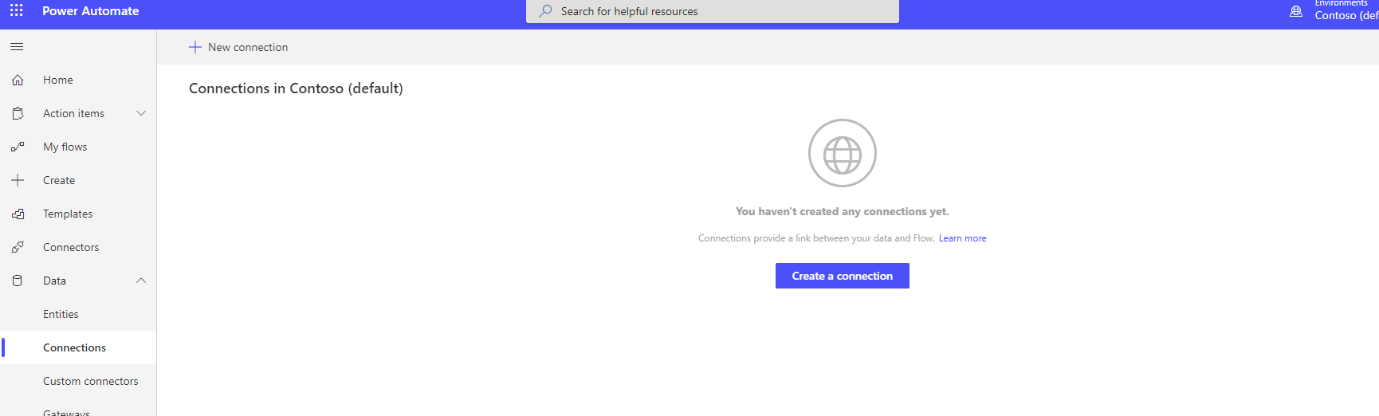
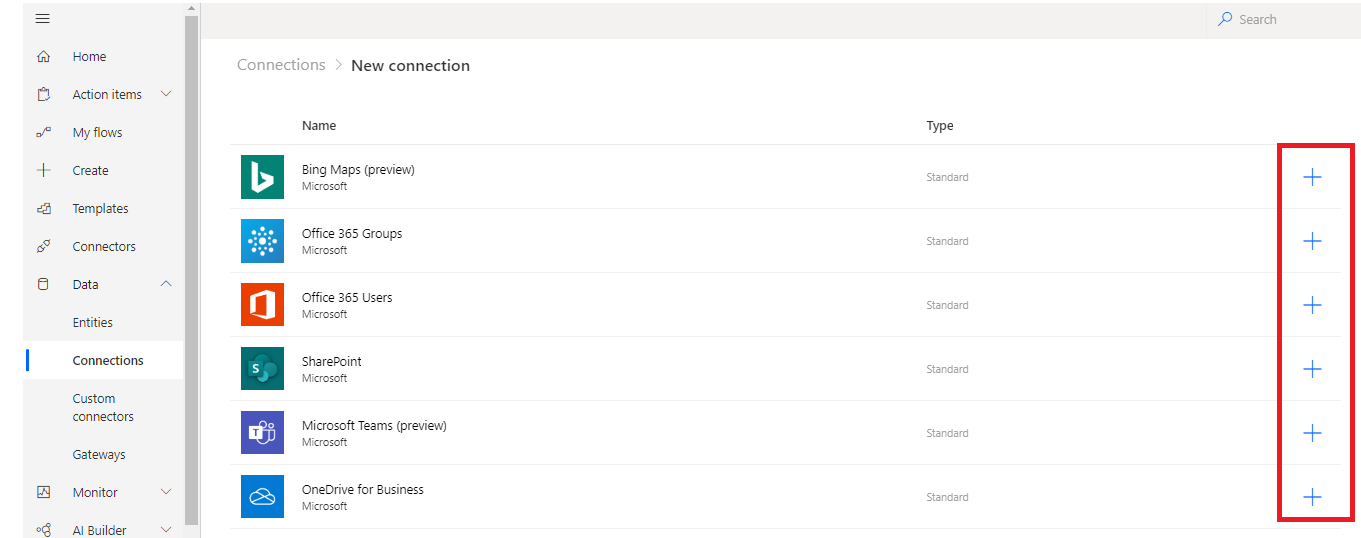
- Select 'New connection' on the command bar.
-
Search for the SharePoint connector and click on +.
-
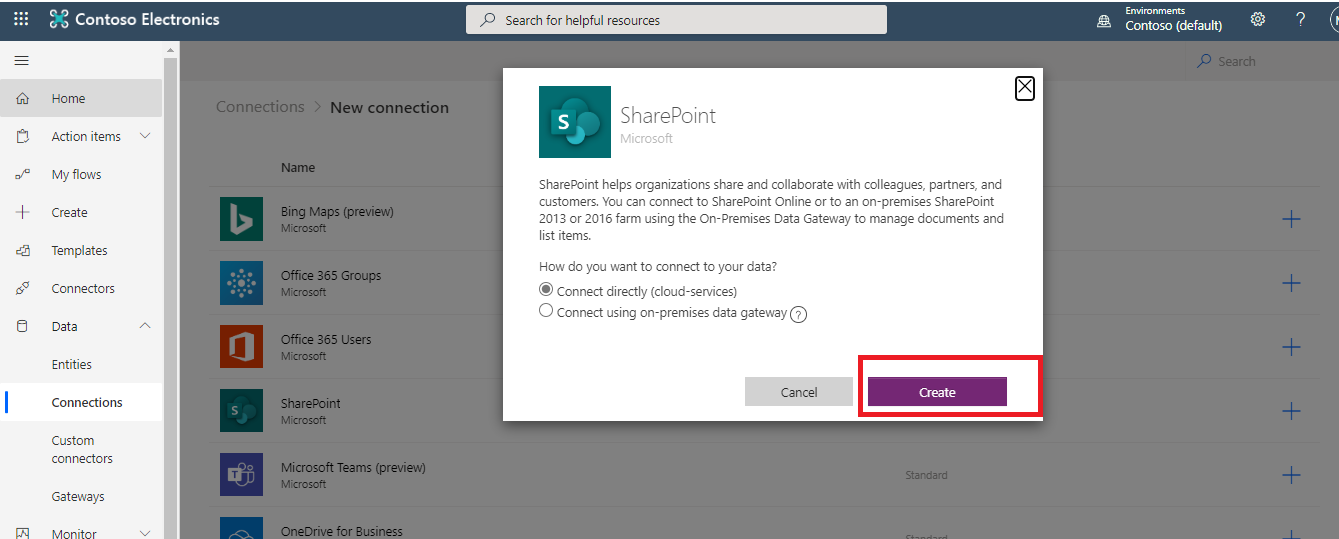
Choose "Connect directly (cloud-services)" to connect to SharePoint online.
-
Return to the tab where the flow is being imported and select the connection you just created.
-
Select 'Save'.
-
Select 'Import'.
Edit SharepointListCreation Flow
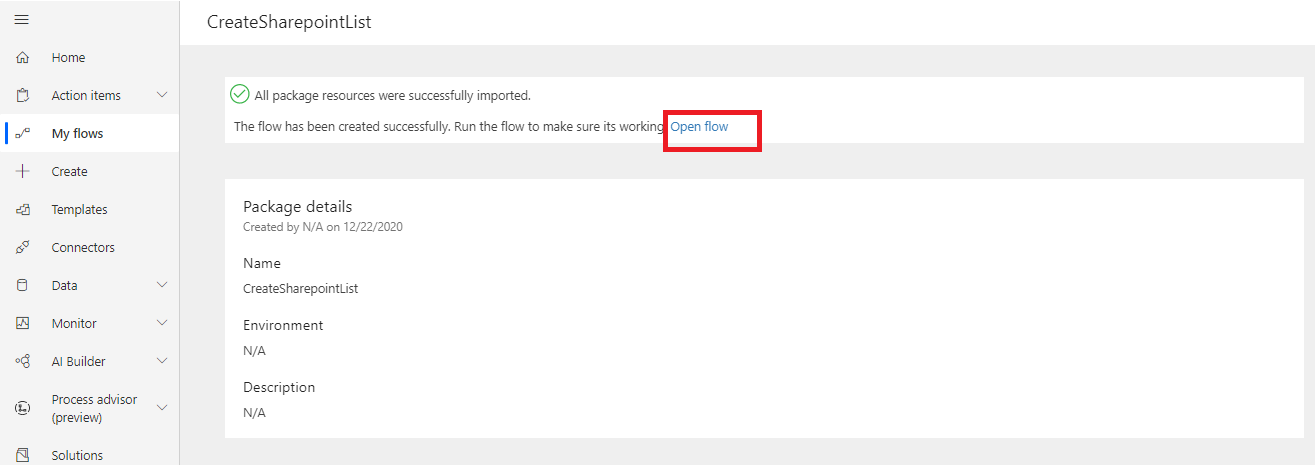
- Once the flow is successfully imported. Click on 'Open flow'.
-
Select 'Test' on top right corner.
-
If it shows "Your flow is disabled. You'll need to enable it before testing." as below.
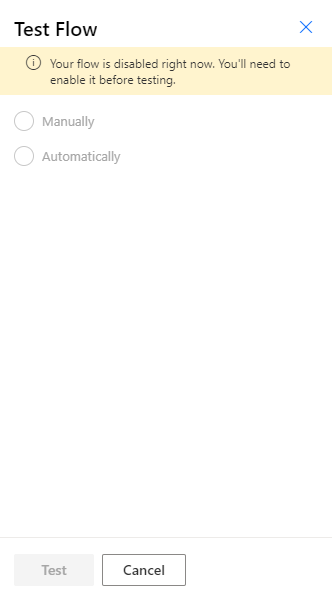
-   Click on 'My Flows' in left panel.
-   Click on "..." to the right of "SharepointListCreation" flow.
-   Click on 'Turn On'.
-
Once the flow is enabled, click on edit icon (or) click on "..." and select 'Edit'.
-
Then Select 'Test' on top right corner. Select 'Manually'. Click on 'Save&Test'.
-
Enter the URL of your SharePoint site created in step 1.
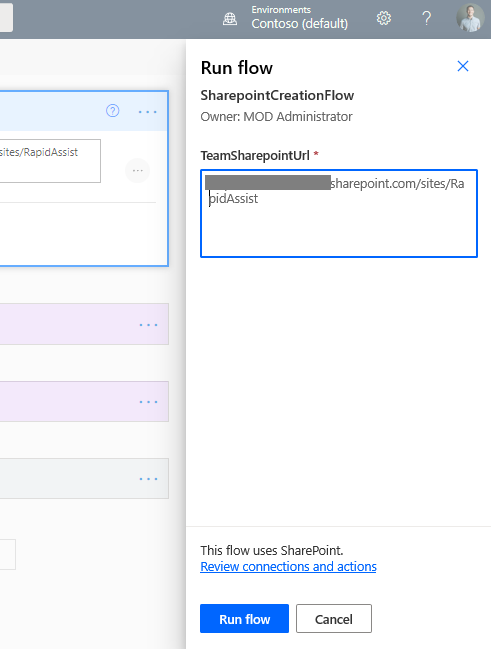
-
Select 'Save'
-
Once the flow is successful, You will get the below screen.
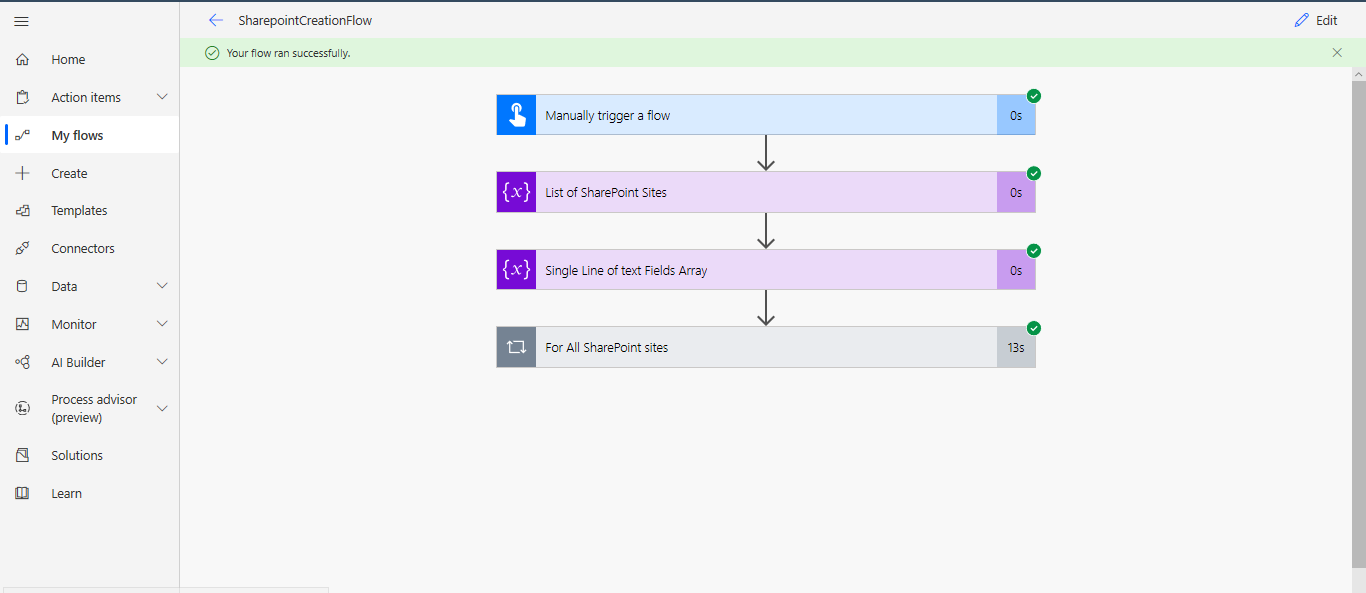
-
Now, all the 5 SharePoint lists will be created.
-
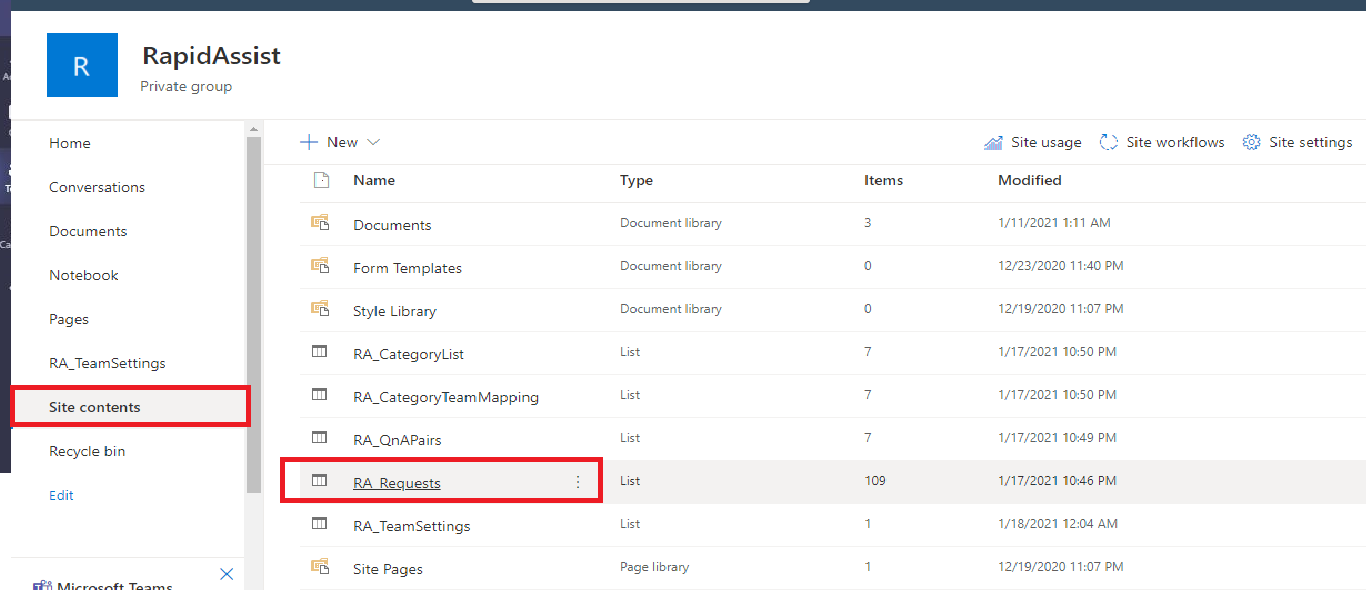
Return to the SharePoint site you specified above and verify below Sharepoint lists are created by clicking on the gear icon in the top right, then Site Contents.

- You should see the following Document Library and Lists created. Please check if there are 5 SharePoint Lists created (as shown in below screenshot).
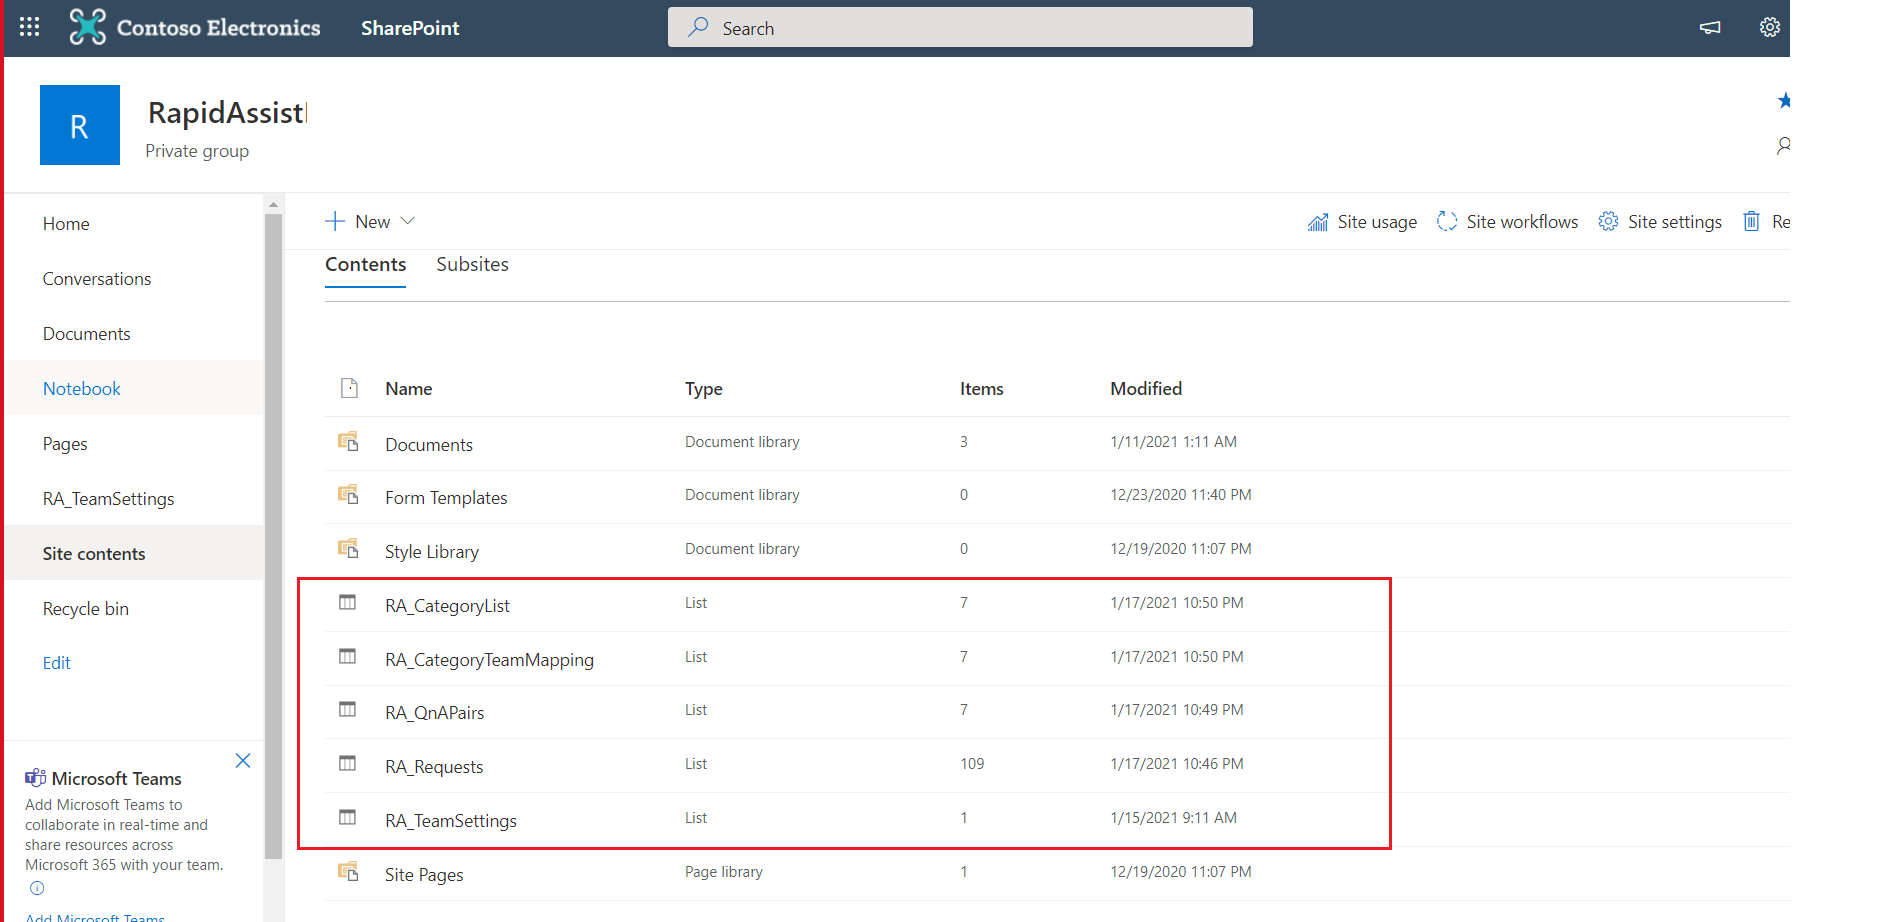
- This flow also indexes 'Category' column in 'RA_Requests' list, to support filtering/ searching in large datasets.
SharePoint Security
SharePoint Lists should be configured using principal of least privilege. This is to ensure that the users are only given privileges that they require for seamlessly using the Apps in an intended way.
Refer to the permission matrix below to ensure users have right level of access to the SharePoint Lists.
| LISTS | END USERS | EXPERTS |
|---|---|---|
| RA_Category | Read | Read, Edit |
| RA_CategoryTeamMapping | Read | Read, Edit |
| RA_QnAPairs | Read | Read, Edit |
| RA_Requests | Read,Edit | Read, Edit |
| RA_TeamSettings | Read | Read, Edit |
In the above permissions matrix:
-
End users use the Rapid Assist App. They can create a teams meeting with the experts.
-
Experts are users who use the Rapid Assist - Experts App. They are responsible to attend the teams meeting created by users and resolve their issue's.
Note
-
Currently SharePoint site has been configured as Public. This means all users in your organisation are members of the site.
-
As the site is public, Expert users are already part of the members group of the site.
Steps below show how to set up permissions for the RA_QnAPairs. Same steps can be followed for other lists to provide access as per the permission matrix above.
-
Navigate to the SharePoint site.
-
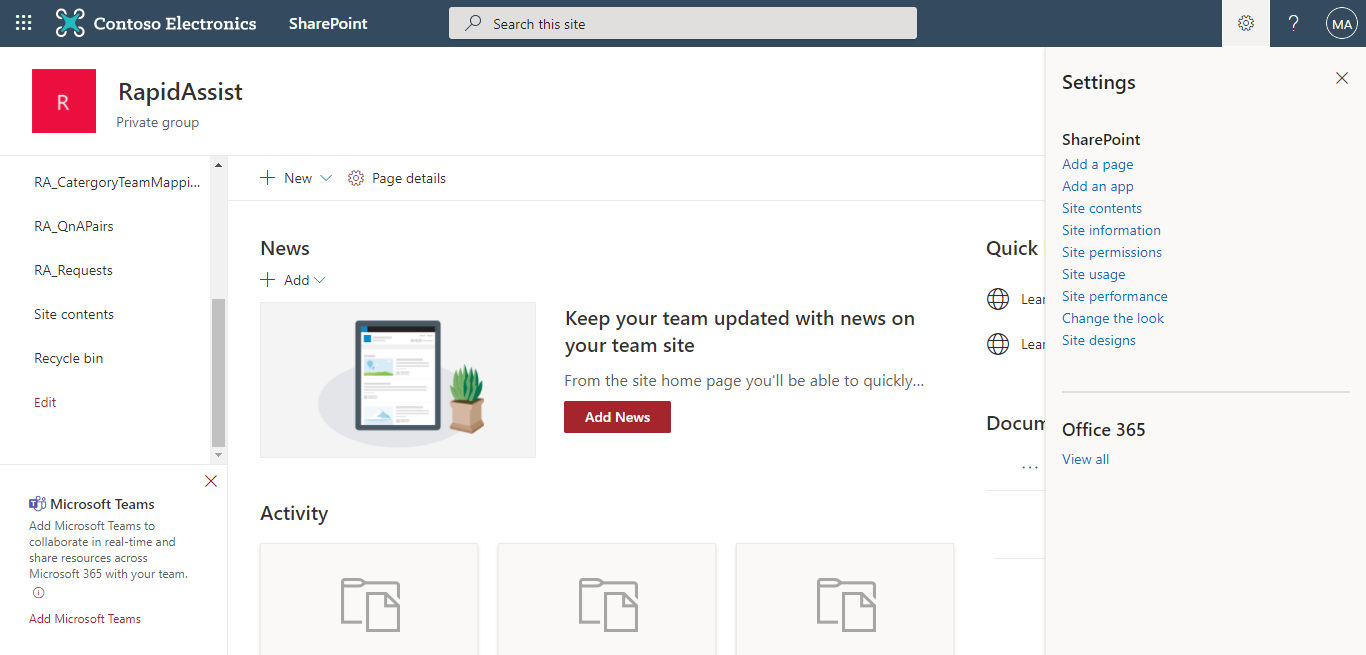
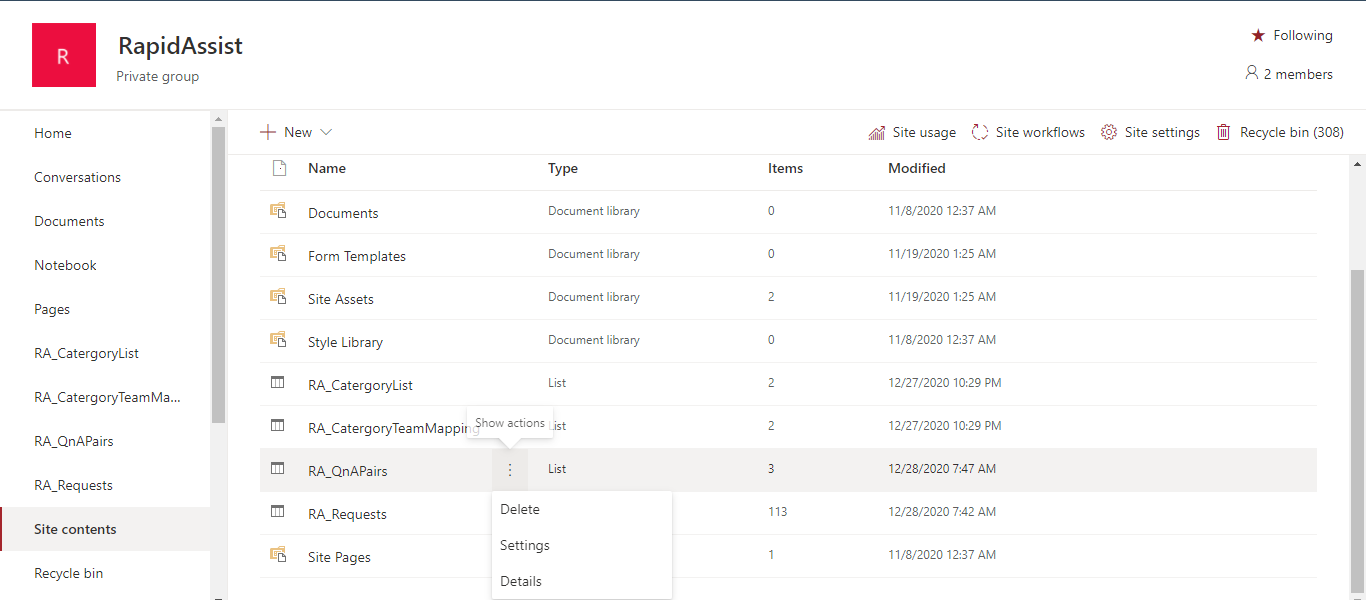
Click on the gear icon on top right and then click Site Contents.
- Click Show Actions icon and then select Settings
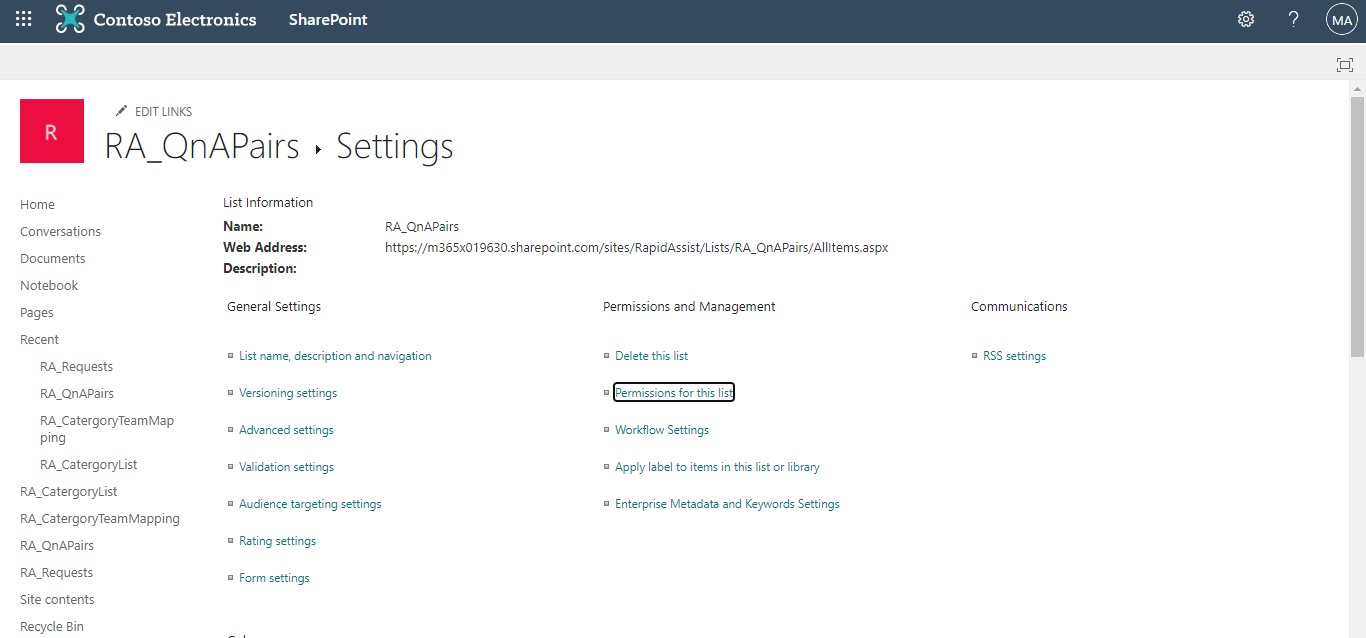
- In the Permissions and Management section, click Permissions for this List
-
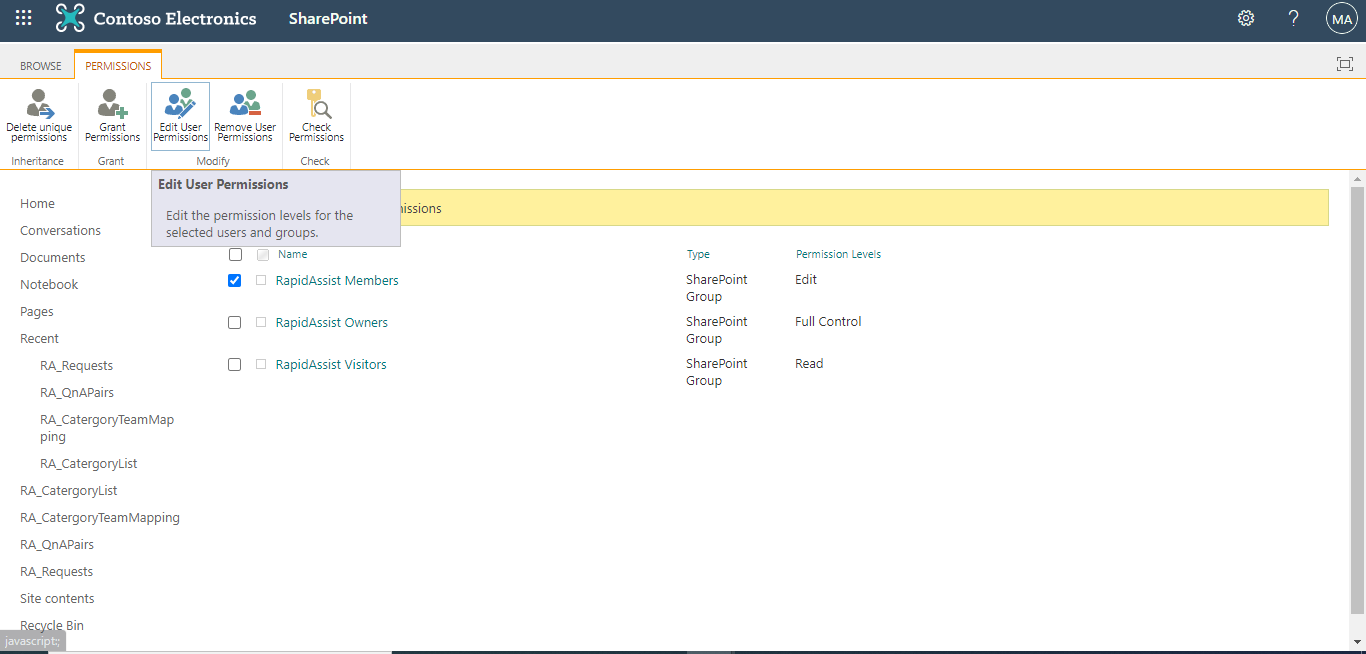
On the top left corner Click Stop Inheriting Permissions.
-
This creates unique permissions for the list.
-
Select the members group.
-
Select Edit User Permissions
- Check Edit and check Read.
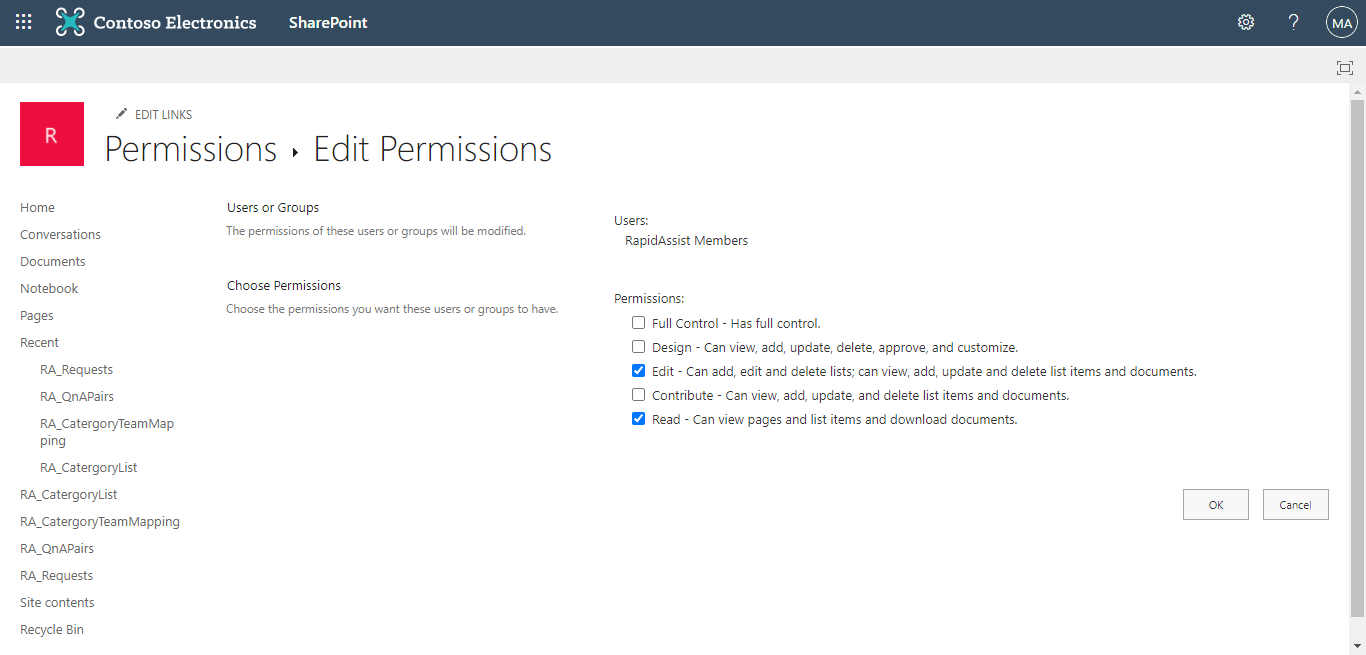
- Click Ok.
Note
-
The SharePoint site can be configured as a private site.
-
If site is configured as private, it is important that list permission matrix is followed.
Adding existing set of QnA Pairs to Sharepoint List (Optional) :
Follow this step if you have existing QnA Pairs and want to add them in the sharepoint list else go to step 3. However, Experts can configure QnA pairs through "Manage topics" under "Settings" feature from "Rapid Assist - Experts" app.
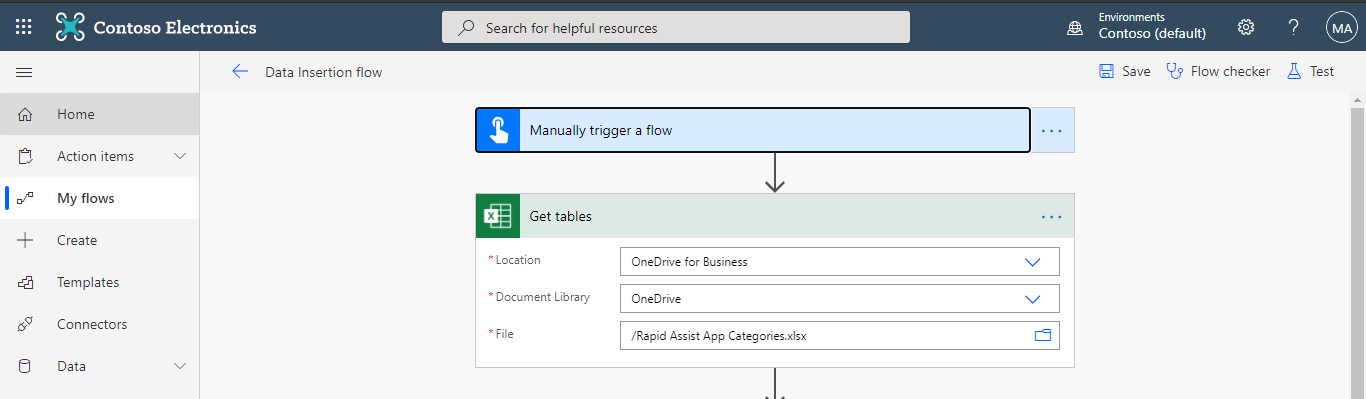
- Create one excel file. Make sure that the excel file has 2 columns - "Questions" & "Answers". Add all existing set of questions and answers in this excel in their respective columns.
Navigate to the OneDrive and upload the excel.
-
Navigate to the Power Automate Click Here. Select My Flows in the left panel, click on 'Import', Upload DataInsertionFlow from the package provided.
-
Click on Save as a new flow. Once imported, click on 'Edit'.
-
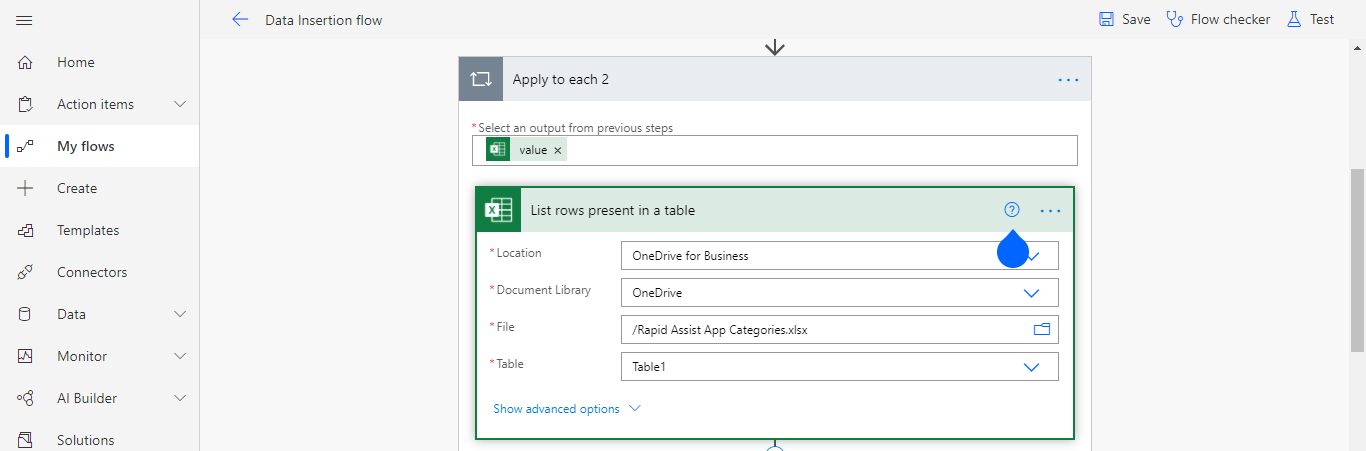
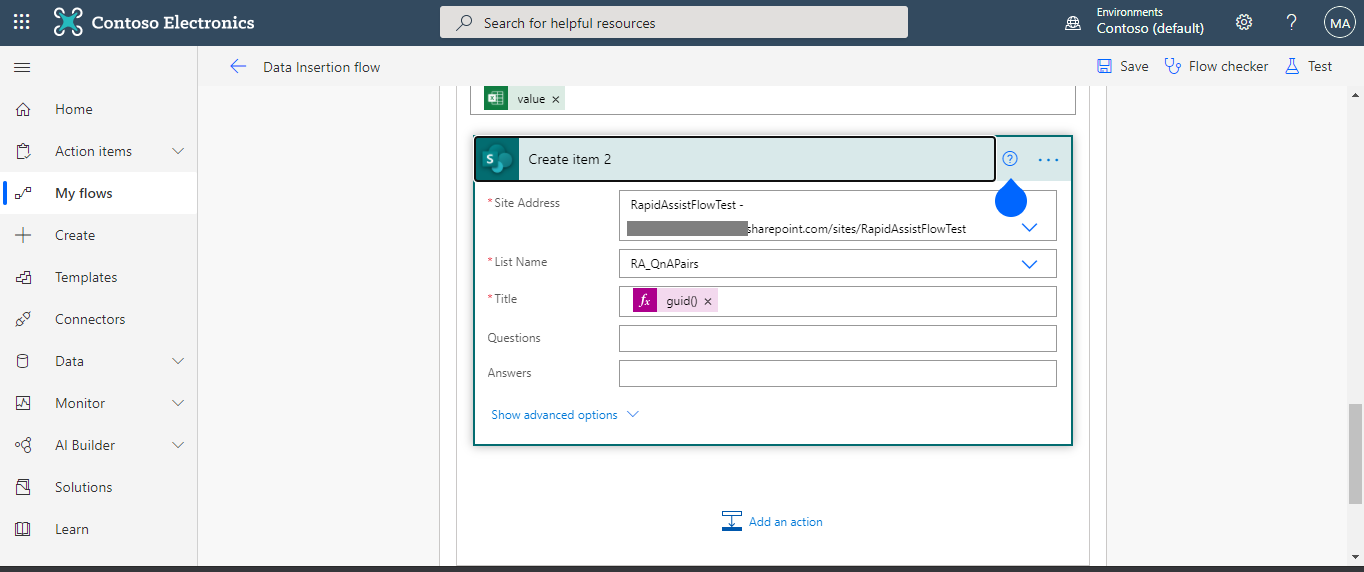
Replace all the SharePoint URL field with Rapid Assist site URL .
-
Change the file name with your uploaded excel file name under steps Get tables and List rows present in a table.
-
Select the appropriate table from the drop down under step List rows present in a table.
-
In step Create Item select the List RA_QnAPairs from the drop down .
-
Click on Test icon in the right top corner and then select Manually. Click on Save&Test.
-
A popup appears to enter the TeamSharePoint URL. Enter the Rapid Assist Team Site Url and then click on RunFlow, Now click on Done.
- Once the flow is successful the required data will get stored in the above mentioned list.
Step 3: Import and Setup Rapid Assist Apps.
There will be two apps
- Rapid Assist (for End users)
- Rapid Assist - Experts (for Experts persona)
Modifying the PowerApps ZIP Package
To import apps, we would need to make few modifications as given in below steps.
- Navigate to your SharePoint site created in step 1, click on RA_Requests as shown below.
- A new tab opens, Now click on gear Icon. Then select List Settings.
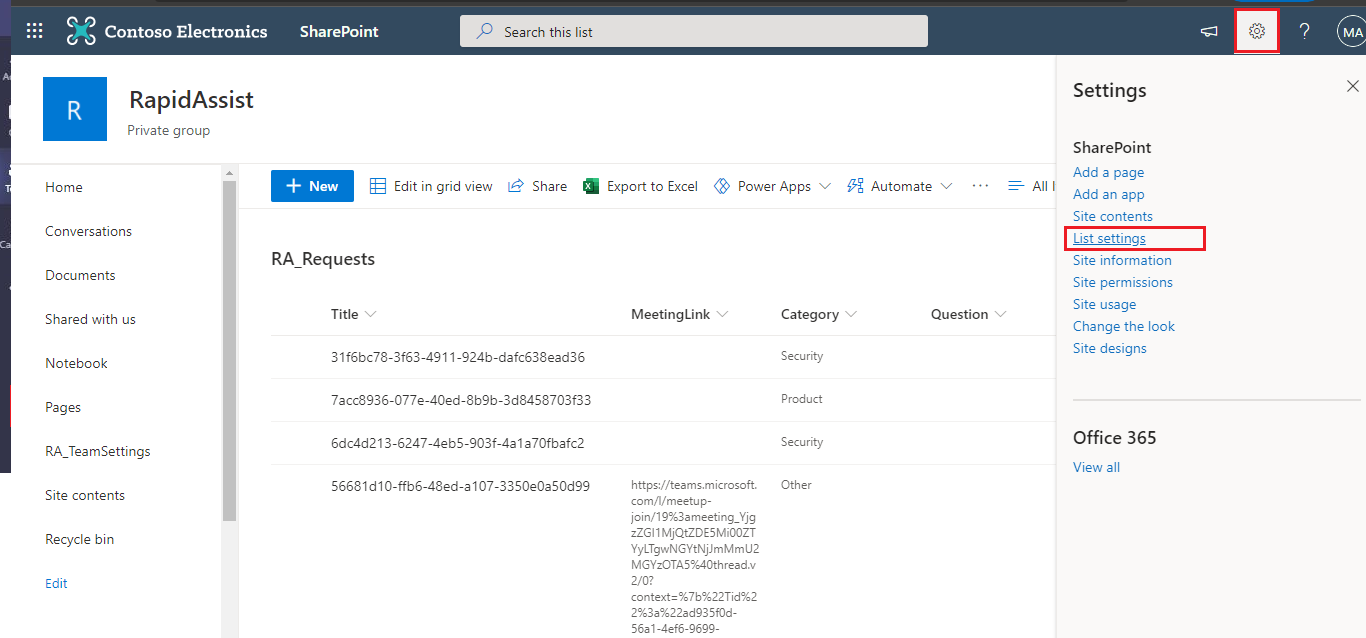
- Now copy the address URL, paste it in a notepad.
The URL looks like this : { https://<>.sharepoint.com/sites/RapidAssist/_layouts/15/listedit.aspx?List=%7B94cbdecc-8f31-487e-8d6a-b0fbf1864b05%7D }
-
Note the RA_Requests List GUID which is between %7B and %7D (in this example that would be 94cbdecc-8f31-487e-8d6a-b0fbf1864b05)
-
In the same way, Navigate to SharePoint site, click on RA_CategoryTeamMapping list. Follow the above step and note down the list Id for RA_CategoryTeamMapping.
-
Now we have SharePoint site url (from step 1), RA_Requests list ID, RA_CategoryTeamMapping list ID.
-
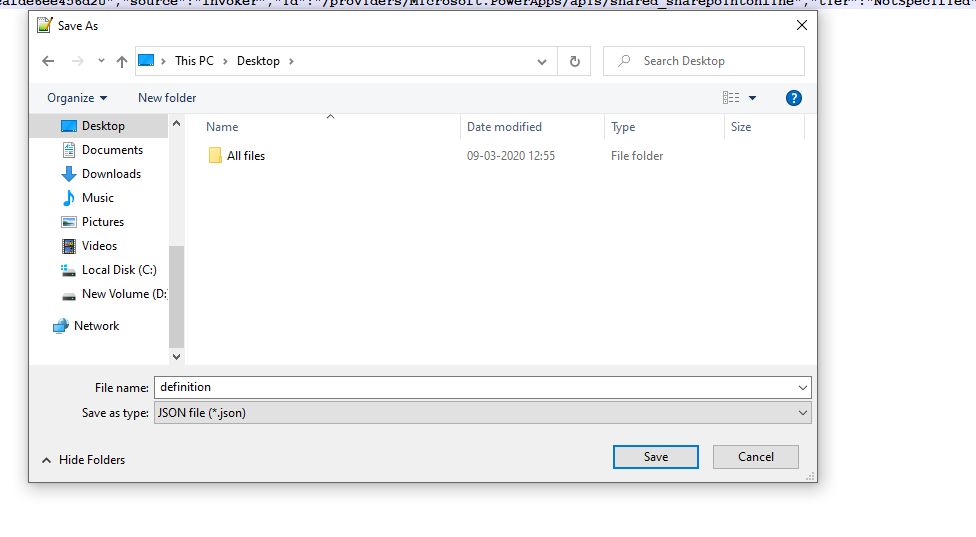
Navigate to path '\Power Apps\Rapid Assist.zip\Microsoft.Flow\flows{File Folder}' in the downloaded package and open 'definition.json' in a text/code editor. Note : DONOT unzip, modify the files and rezip the 'Rapid Assist.zip' package .
a. copy all the code from 'definition.json' and paste in a new file in Code Editor. b. Find and replace all instances of “RapidAssistSiteUrl” with the URL of your SharePoint site. (Note - There will be two occureneces to replace for site url). c. Find and replace all instances of “RA_RequestListId” with the GUID from step 2b (RA_Requests List Id) above. (Note - There will be two occurences for RA_RequestListId to replace). d. Once all the above instances are replaced, save the new file as json with file name as definition and file type as 'json' and save it on desktop (or any preferred location).
e. Move the new file 'defintion.json' from Desktop to the original definition file location i.e. {\Power Apps\Rapid Assist\Microsoft.Flow\flows{File Folder}\definition.json} f. Overwrite the existing one by Selecting 'Copy and Replace'. g. Open the file and ensure if all values are changed correctly. Note: Again, DO NOT try to extract and rezip. You must use this drag and drop method to maintain the integrity of the ZIP package.
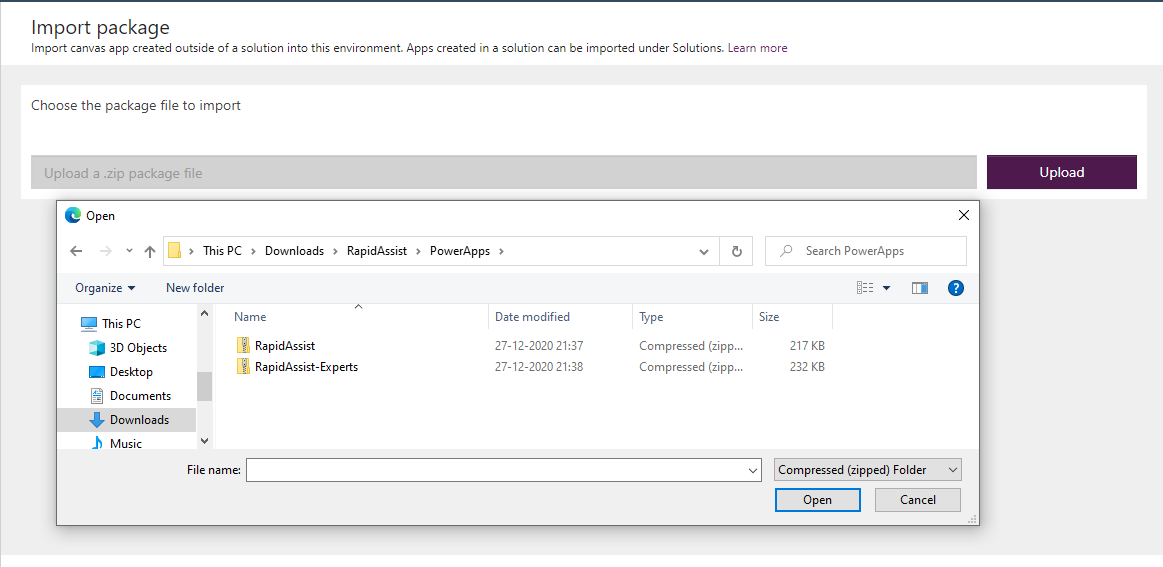
Import the app
-
Navigate to the Power Apps platform (https://make.powerapps.com/).
-
Click on Apps in the left side pane and click on Import canvas app.
-
Import the Rapid Assist.zip in PowerApps folder from package.
-
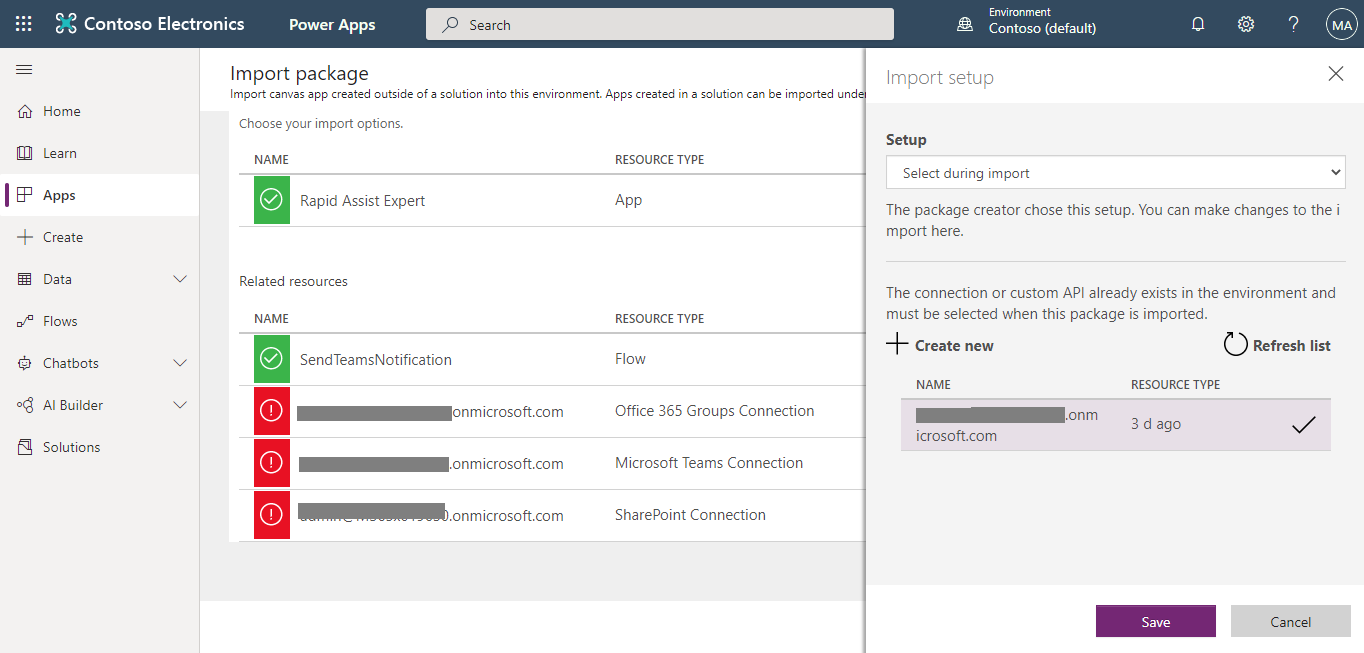
You will be automatically redirected to the details page.
-
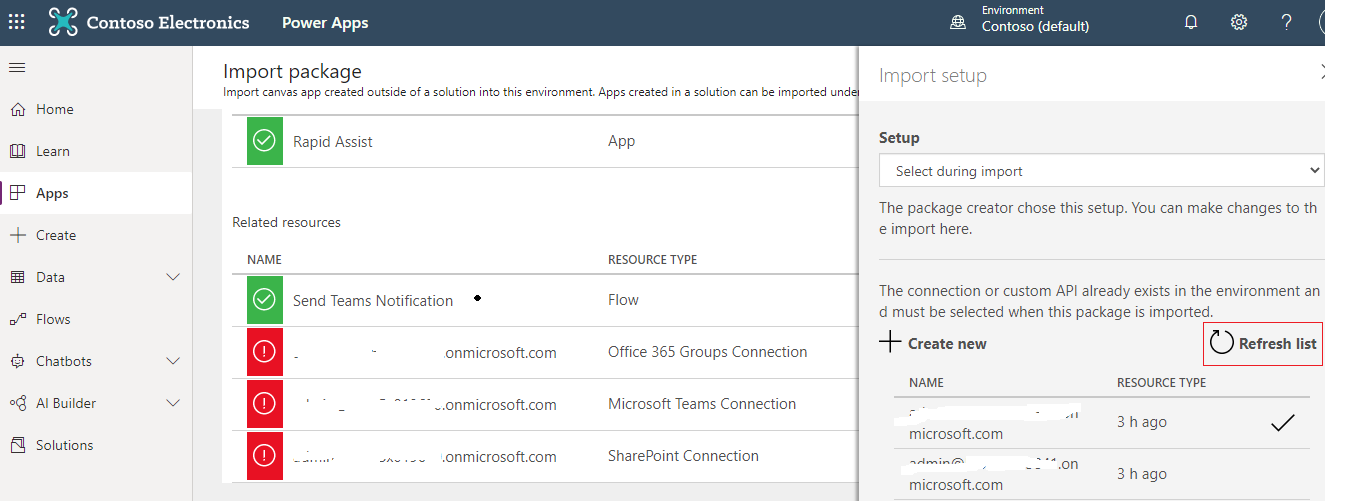
In the package details page, click on Select during import for SharePoint connection in import setup column.
-
If you do not find any existing connections, click on Create new button in the popup. The page will open in a new browser tab.
-
Click on Create a connection button.
- You will be able to see the list of available connections.
- Click on + for SharePoint connection.
- Check Connect directly (Cloud services) option in the popup and click on Create button.
-
Login to confirm the connection setup correctly.
-
Navigate back to the import package tab. Once the connection is created, you will be able to see the connection in the import setup dialog.
-
If you are not able to see the SharePoint connection, click on Refresh List button in the dialog.
-
Click on the connection name to select it and then click on Save
-
Follow the above steps for Office365 Group connection.
- Click on 'select during Import'
- Click on 'Create New'
- Search for 'Office365 Groups'
- Click '+' for 'Office365 Groups'
- Follow above steps(9-13)
-
Follow the above steps for Microsoft Teams connection.
- Click on 'select during Import'
- Click on 'Create New'
- Search for 'Microsoft Teams'
- Click '+' for 'Microsoft Teams(Preview)'
- Follow above steps(9-13)
-
Click on the Import button at the bottom of the page which will import the app in your tenant.
-
To import 'Rapid Assist - Experts' App.
- Click on Apps in left pane.
- Click on Import canvas app.
- Select Upload
- Select 'Rapid Assist-Experts'.zip in Power Apps Folder from downloaded package.
- Once App is imported, Click on 'Import'
Step 4: Update the SharePoint connections
This step is to remove the existing data sources and add newly created data stores.
-
After successful import. Go to (https://make.powerapps.com/).
-
Now click on 'Apps' in the left panel. You will be able to see 'Rapid Assist - Experts', 'Rapid Assist' apps.
-
Select More commands (...) for the 'Rapid Assist - Experts' app.
-
Select Edit from the context menu.
-
A popup will open asking for some permissions, select 'Allow'.
-
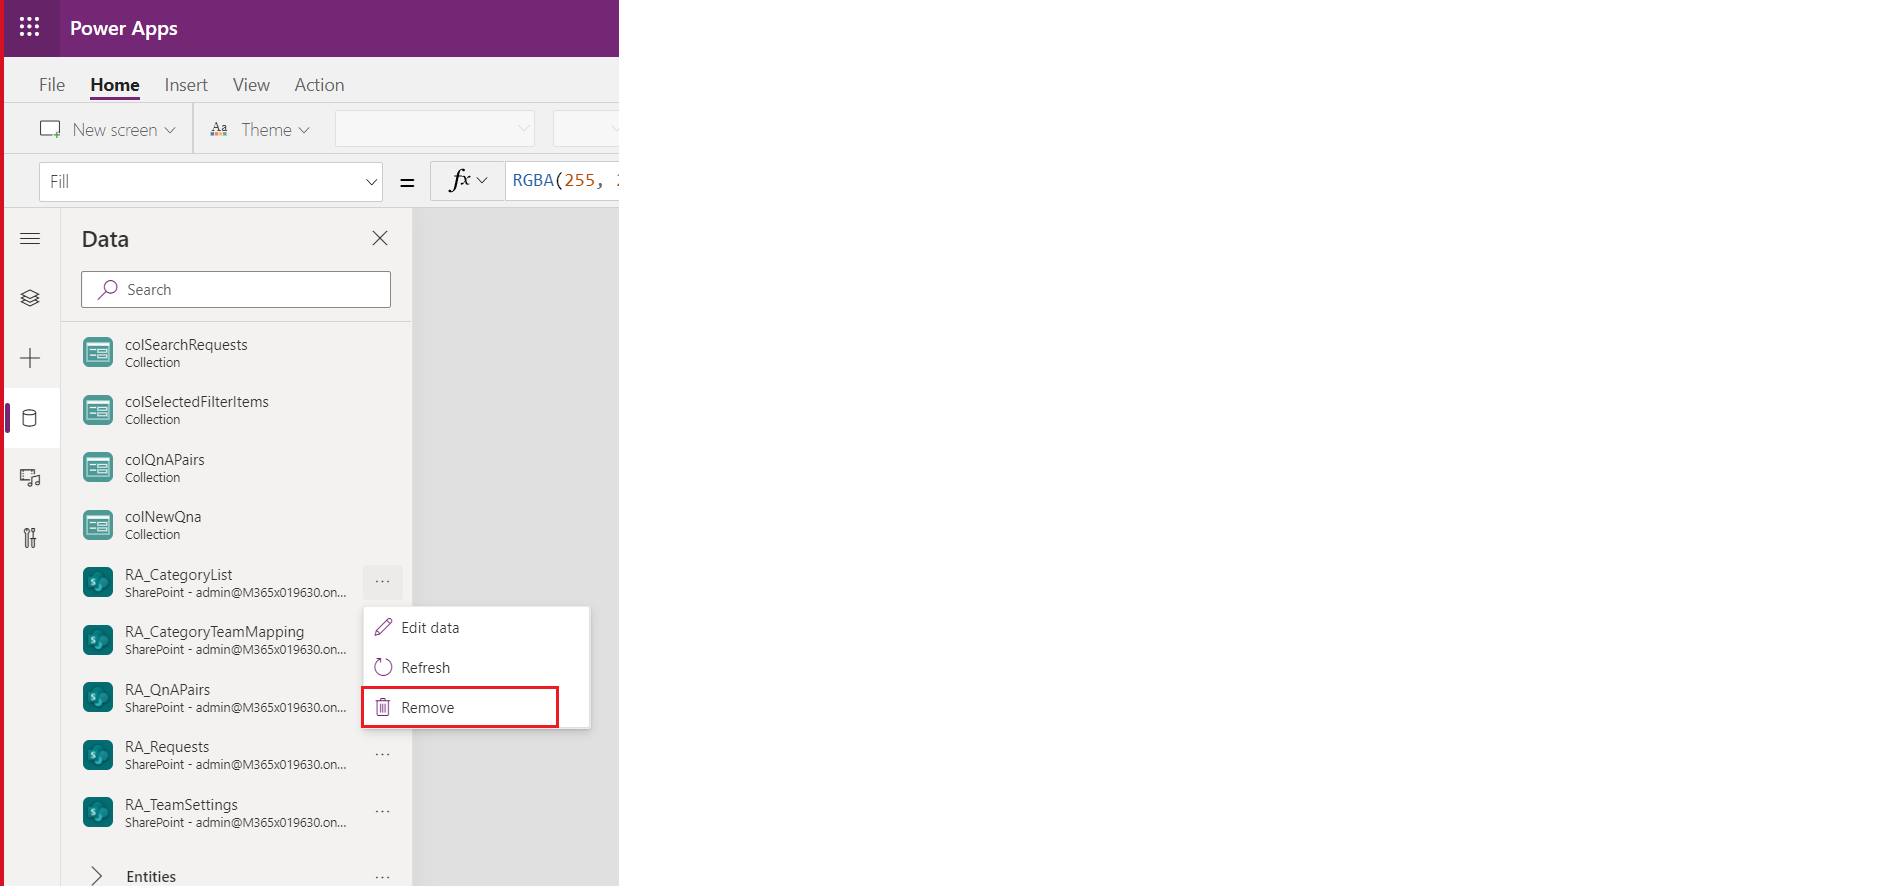
In the horizontal menu, click on View and select Data sources.
-
Click the "..." to remove existing SharePoint Lists inside the app, because they don't point to your current SharePoint site.
[Note] - Remove all the following lists (RA_Category, RA_CategoryTeamMapping, RA_Requests,RA_TeamSettings and RA_CategoryTeamMapping) by clicking on '...' and then click on 'Remove'.
- In search bar, Search for SharePoint and select it.
-
Enter the newly created SharePoint URL in the pop-up window.
-
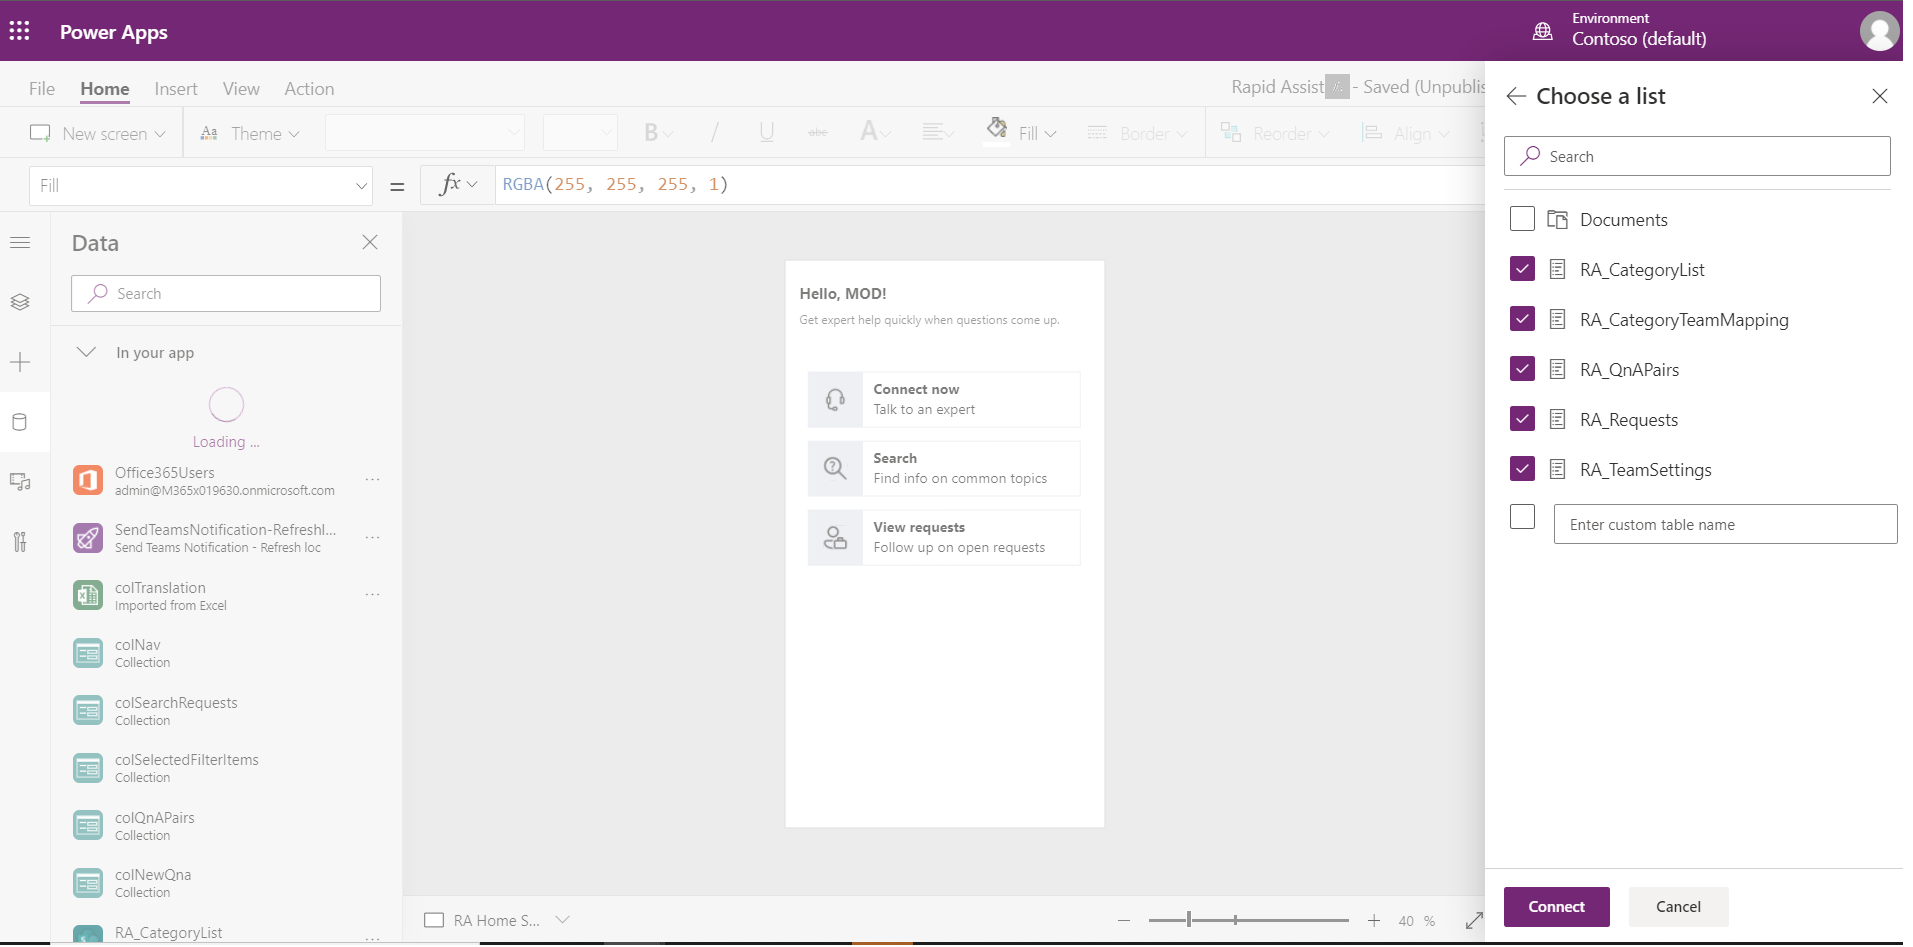
Choose RA_Category, RA_CategoryTeamMapping, RA_Requests ,RA_TeamSettingsand RA_CategoryTeamMapping lists and select connect.
-
From the File menu (on the left edge), select Save, and then select Publish.
-
Repeat all the above steps for removing sharepoint connections for the **Rapid Assist" app.
Validate SendTeamsNotification flow
Once the both apps are imported, Check of 'SendTeamsNotification' flow is imported and values are correct. To do that :
-
Navigate to https://www.flow.microsoft.com/
-
Select 'My Flows'.
-
You will be able to see 'SendTeamsNotification' flow.
-
If your flow is disabled as below. Select '...'. Select 'Turn On'

-
Select '...'
-
Select 'Edit'
-
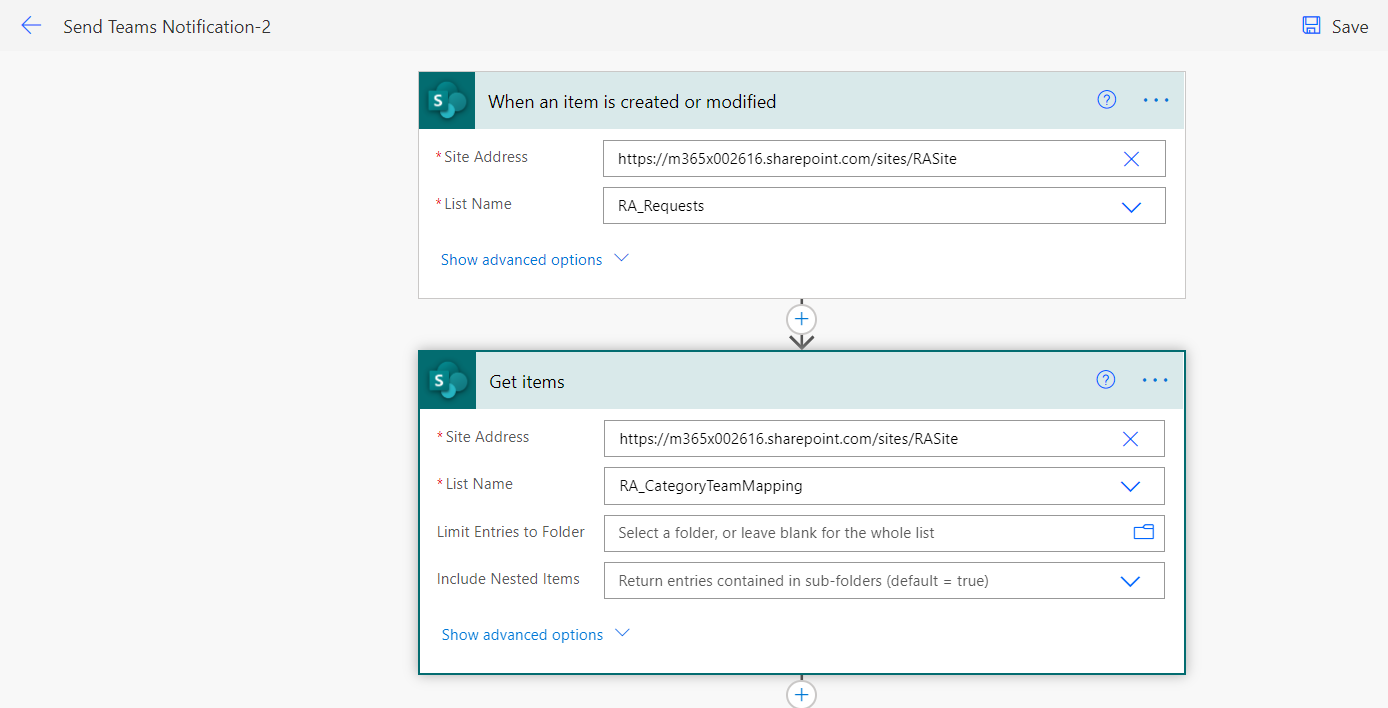
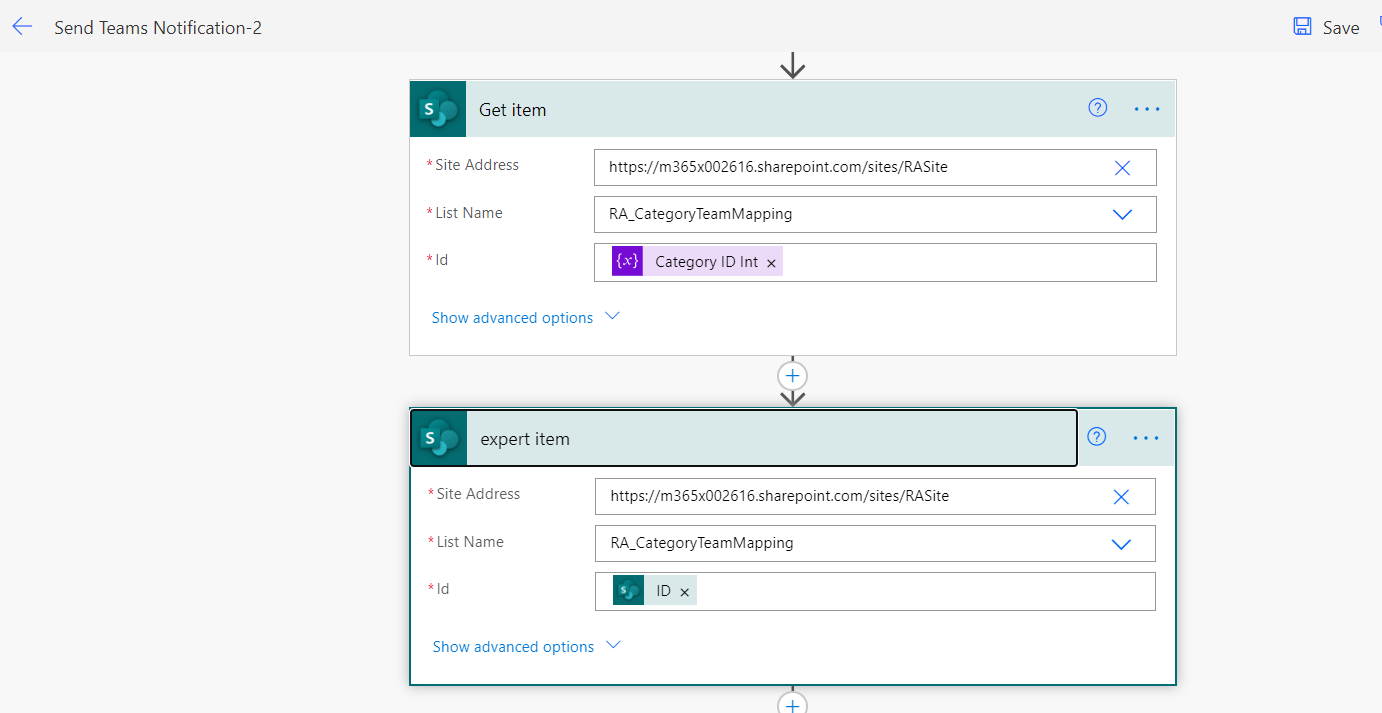
Make sure get item, update item steps are changed with new SharePoint site and lists.
-
If not changes below values, to recently created site, Lists accordingly.

- Select 'Save' on top right corner.
Step 5: Import and Setup Send Teams Notification-2 Flow.
Modifying the SendTeamsNotification-2 ZIP Package
Navigate to path '\Flows\SendTeamsNotification-2.zip\Microsoft.Flow\flows{File Folder}' in the downloaded package and open 'definition.json' in a text/code editor.
Note : DO NOT unzip, modify the files and rezip the 'SendTeamsNotification-2.zip' package.
a. copy all the code from 'definition.json' and paste in a new file in Code Editor.
b. Find and replace all instances of “RapidAssistSiteUrl” with the URL of your SharePoint site. (Note - There will be four occureneces to replace for site url).
c. Find and replace all instances of “RA_RequestListId” with the GUID from step 2b (RA_Requests List Id) of Step 3 above. (Note - There will be one occurence for RA_RequestListId to replace).
d. Find and replace all instances of “RA_CategoryTeamMappingListId” with the GUID from step 2c (RA_CategoryTeamMapping List Id) of Step 3 above. (Note - There will be three occurences for RA_CategoryTeamMappingListId to replace).
e. Once all the above instances are replaced, save the new file as json with file name as definition and file type as 'json' and save it on desktop (or any preferred location).
f. Move the new file 'defintion.json' from Desktop to the original definition file location i.e. {\Flows\SendTeamsNotification-2.zip\Microsoft.Flow\flows{File Folder}\definition.json}
g. Overwrite the existing one by Selecting 'Copy and Replace'.
h. Open the file and ensure if all values are changed correctly.
Note: Again, DO NOT try to extract and rezip. You must use this drag and drop method to maintain the integrity of the ZIP package.
Import SharepointListCreation Flow
-
Sign in to Power Automate Click Here.
-
Select My Flows in the left panel.
-
Select 'Import'.
-
Upload SendTeamsNotification-2.zip from Flows folder in package provided.
-
The import package page will open.
-
Add a SharePoint connection for the new flow by selecting the 'Select during import' link.
-
If you need to create a new SharePoint connection, select +Create new in the Import setup pane.
Note: a new tab/window will open to allow creating new connection keeping the existing tab open. Please do not close the existing tab.
-
Select 'New connection' on the command bar.
-
Search for the SharePoint connector and click on +.
-
Choose "Connect directly (cloud-services)" to connect to SharePoint online.
-
Return to the tab where the flow is being imported and select the connection you just created.
-
Select 'Save'.
-
Select 'Import'.
Note
- If you are getting below error while importing, Then click on "Save as a new flow" as below

- For any actions that have an orange triangle, open the action and set up a connection by clicking "Add new connection".
Validate SendTeamsNotification-2 flow
Once the both apps are imported, Check of 'SendTeamsNotification-2' flow is imported and values are correct. To do that :
-
Navigate to https://www.flow.microsoft.com/
-
Select 'My Flows'.
-
You will be able to see 'SendTeamsNotification-2' flow.
-
If your flow is disabled. Select '...'. Select 'Turn On'
-
Select '...'
-
Select 'Edit'
-
Make sure When an item is created or modified,get items, get item, expert item steps are changed with new SharePoint site and lists.
-
If not changes below values, to recently created site, Lists accordingly.
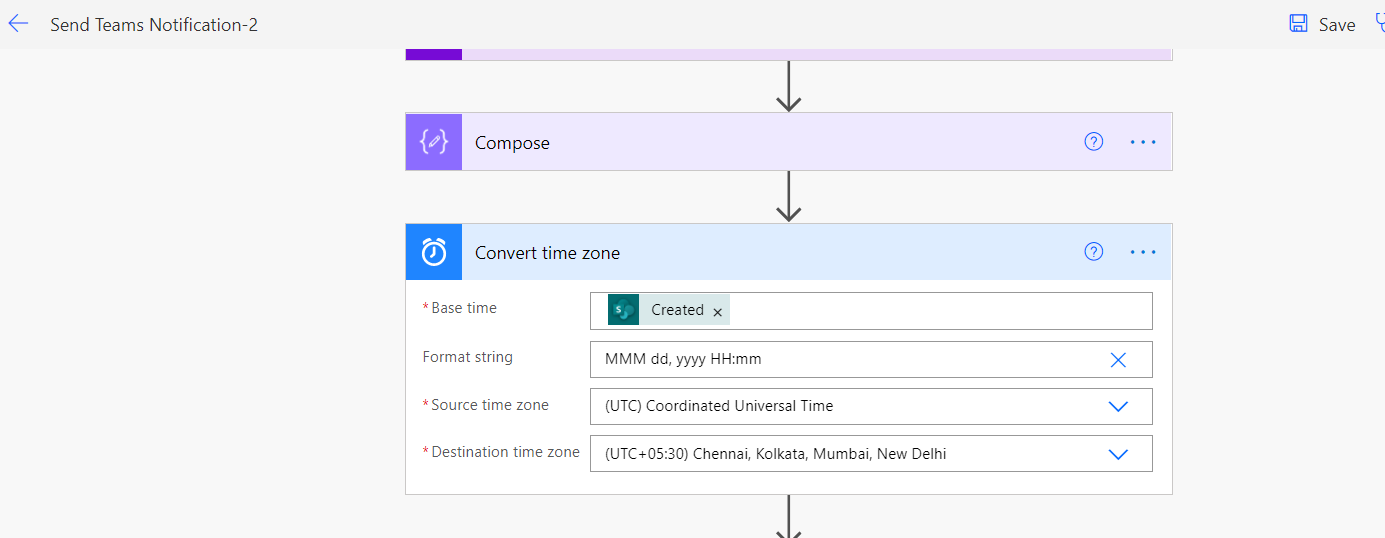
- In Convert to time zone step, change the Destination time zone value to Experts timezone.
- Select 'Save' on top right corner.
Step 6: Share Power App
The admin would need to share the app to all individuals who will be using the app (this includes the expert and end users).
-
Open the PowerApps user interface (https://make.powerapps.com/).
-
Go to the Apps menu in the left-hand side menu bar and you will be able to see the list of apps which have been imported.
-
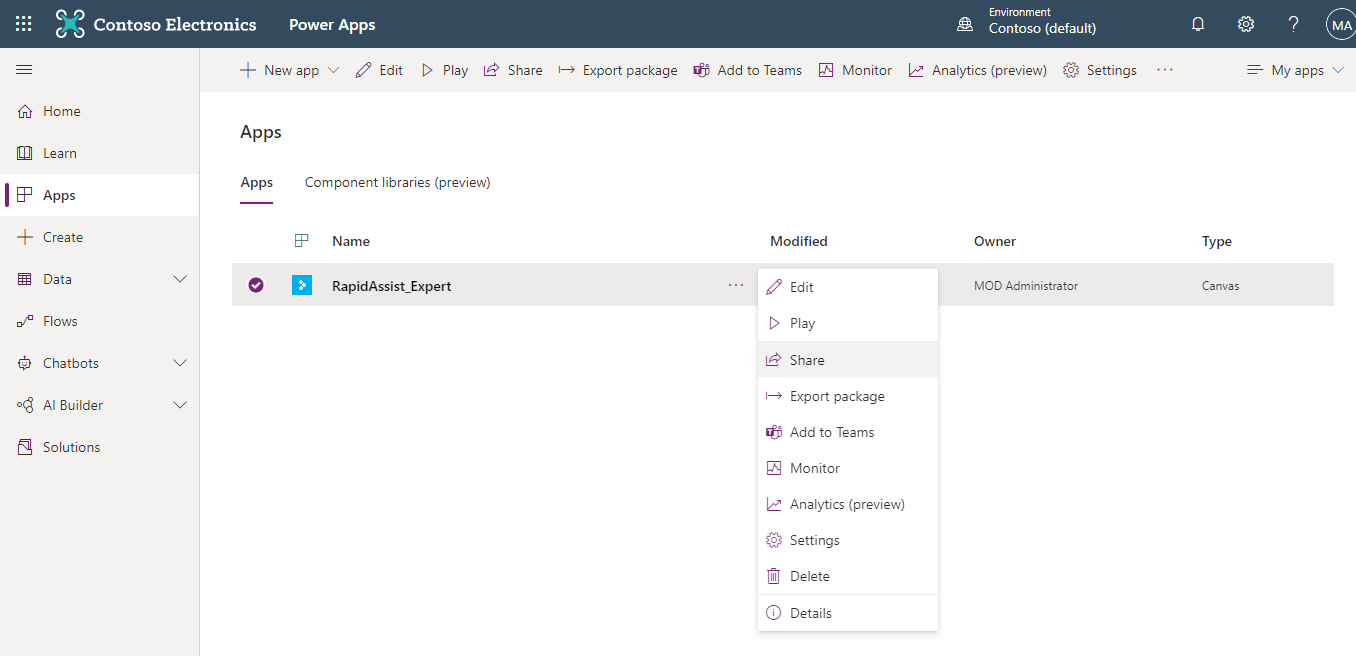
Click on the ellipses (3 dots) for your app, and click on Share.
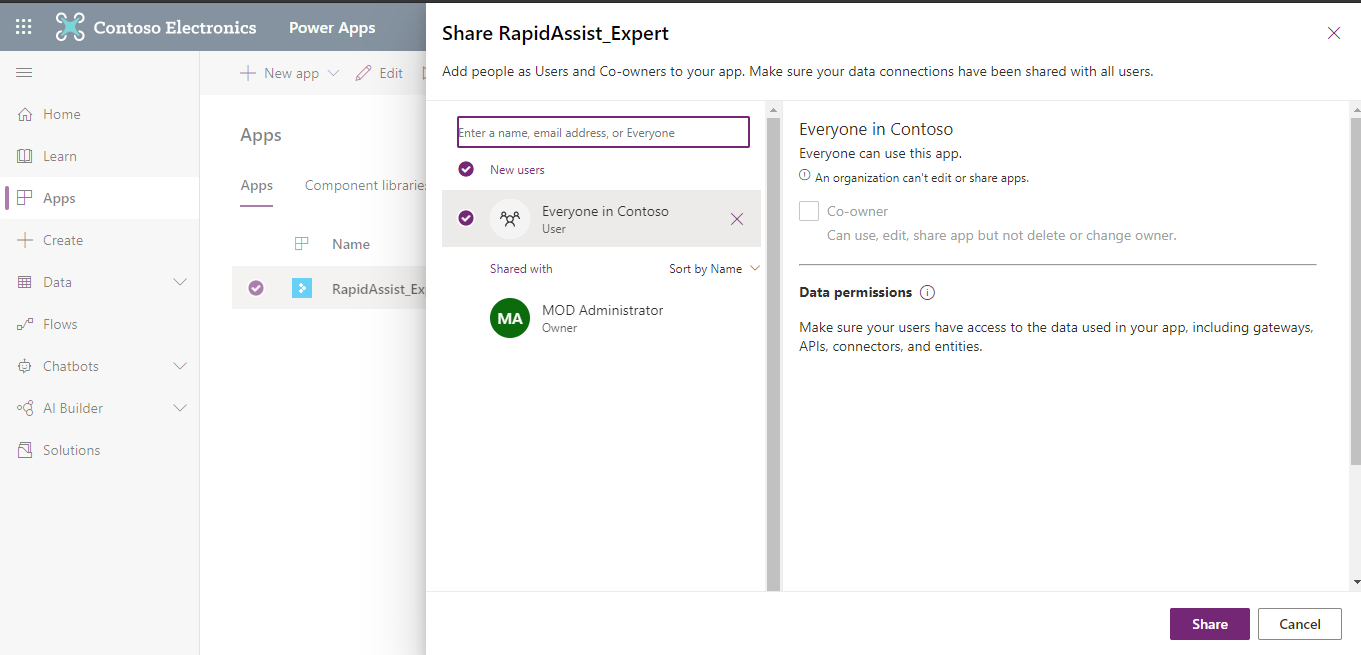
- Enter the users with whom you want to share the app, and click on Share.
Step 7: Download "Rapid Assist" and "Rapid Assist - experts" teams package
Note - Repeat below steps for both the power apps.
-
Navigate to Power Apps. (https://make.powerapps.com/)
-
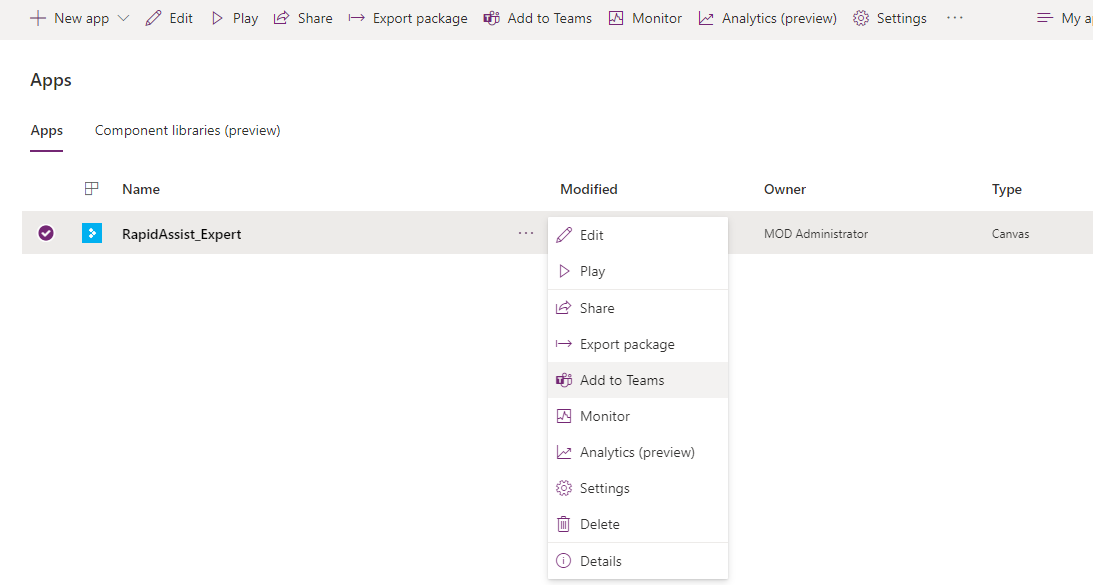
Click on the ellipses (3 dots) for your app, and click on Add to Teams.
- Click on "Download App" in the popup to download a zip package. This will download a zip file which can be uploaded to Microsoft Teams in the next step, so save the file to a location you can remember and easily access.
Step 8: Deploying "Rapid Assist" app to Microsoft Teams
-
Open the Microsoft Teams desktop app, or web app by navigating to the link here. (https://teams.microsoft.com)
-
Go to the apps menu on the left-hand side.
-
Click on the option that reads: Upload a custom app at the bottom-left. If you don't see Upload a custom app option it may mean that this option is disabled for your organisation. Contact you team's administrator.
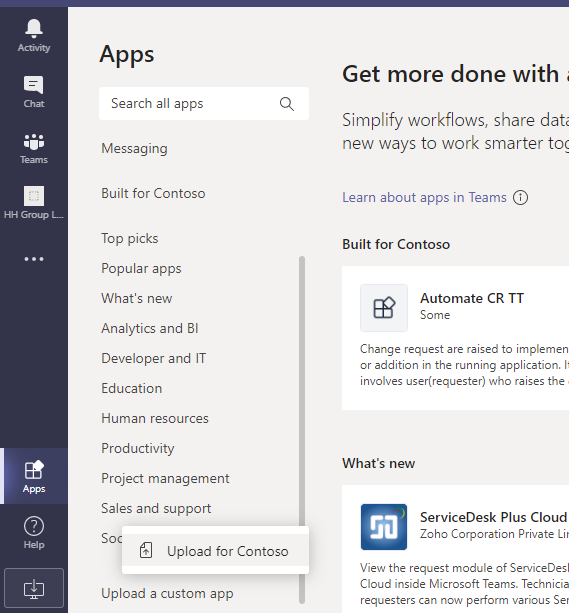
-
Click Upload for [Organisation Name] and upload the zip file for end-users (Rapid Assist) you downloaded from Power Apps in the prior step.
-
Once uploaded, the app appears in the app store.
Pin the app to your personal Microsoft Teams app bar (any Microsoft Teams user)
Even if your Teams Admin has not taken steps to add this app to the Microsoft Teams app bar for your tenant, any user can add this app their personal app bar.
-
Click the app from the app store.
-
Click Add to add app to your app bar.
-
Once the app icon appears on your app bar, right click the icon and select "pin". The app icon will remain on your app bar to provide you easy access, even after you navigate away from the app.
Step 9: Deploying "Rapid Assist - Experts" app to Microsoft Teams
-
Open the Microsoft Teams desktop app, or web app by navigating to the link here. (https://teams.microsoft.com)
-
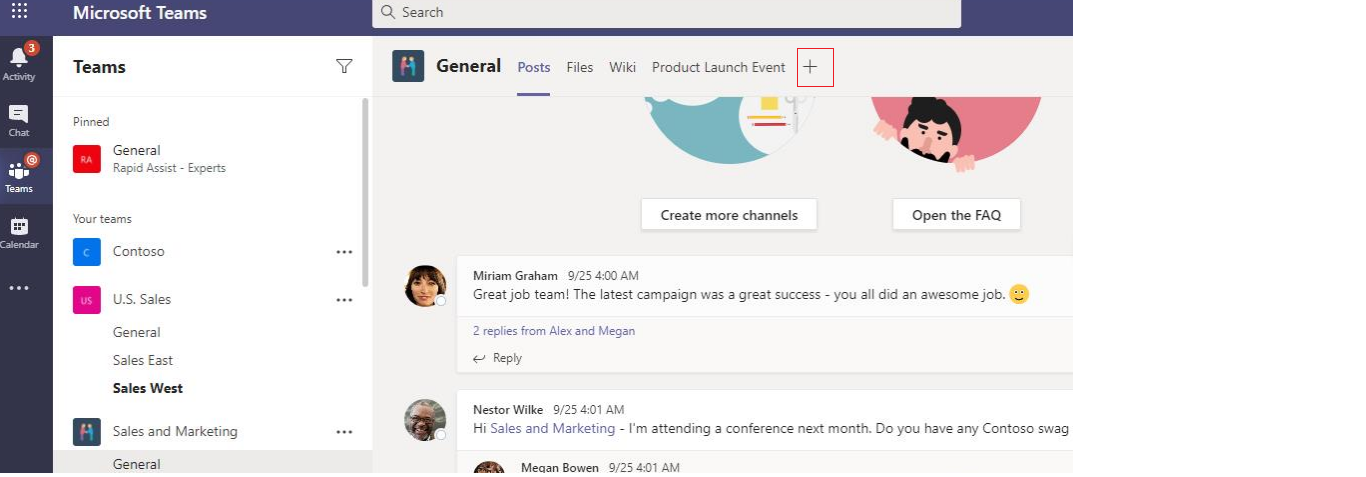
Go to the your Expert team where you want to add your app.
-
Click on the option '+' Icon in Microsoft Teamsas shown below.
- A new popup opens, Search for PowerApps and Select it.
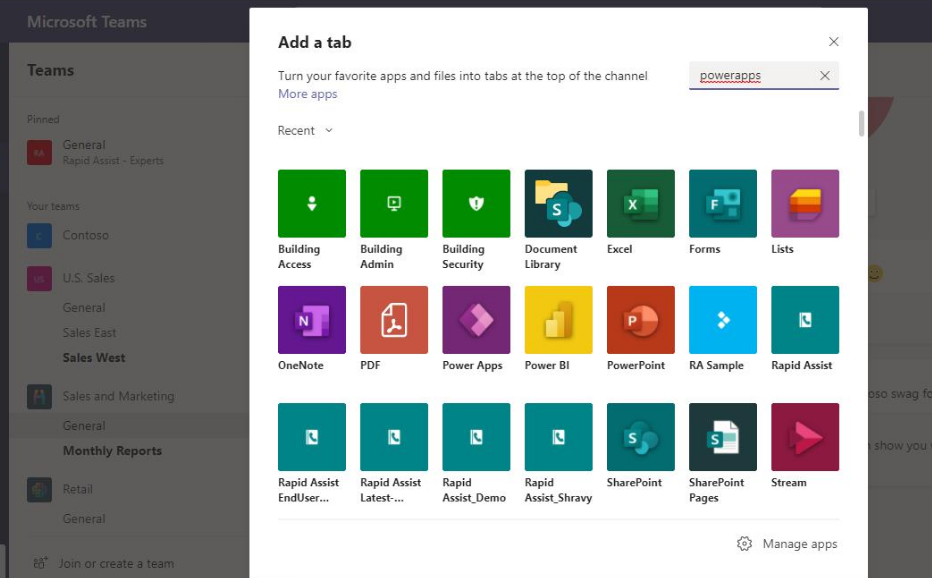
-
Select 'Add'.
-
Now Search for 'Rapid Assist - Experts' App and click on it.
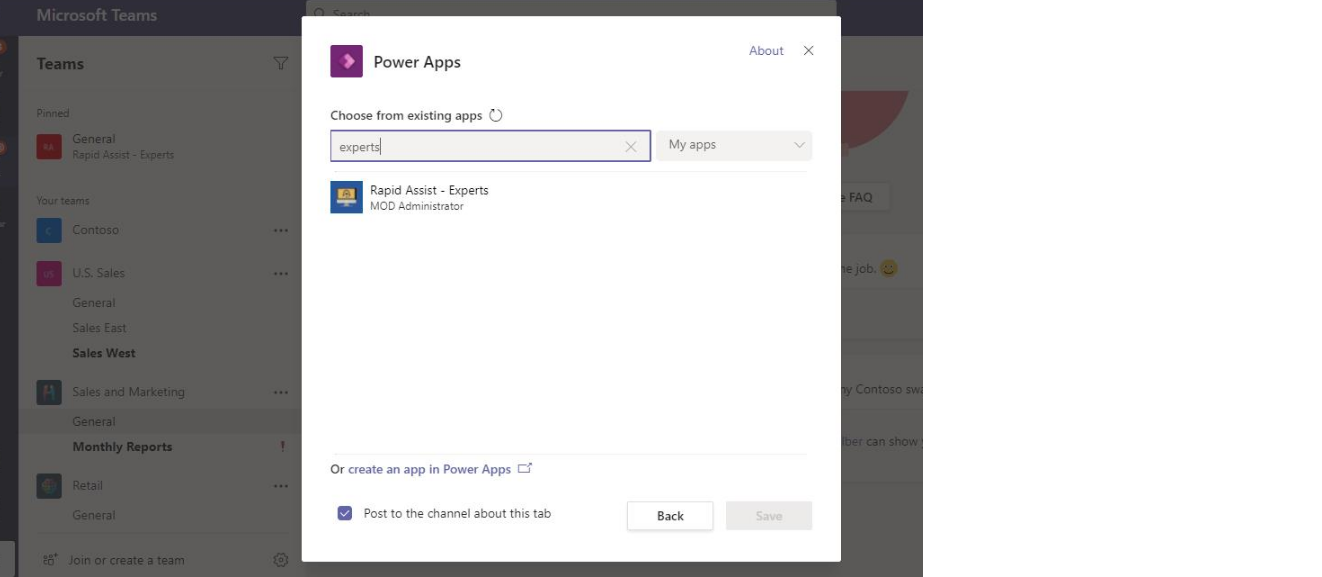
-
Select 'Save'.
-
Now you will be able to see your app added as tab, You are all set to go!
Step 10: Configure Experts Team
Before using the application expert team needs to be configured in the app. This is required in order to receive notification in the channels mapped with request category.
Note: We are considering only one expert team for managing all escalations. Please add channels under this team to manage requests.
Follow the below steps to configure expert team from the Rapid Assist - Experts app.
- Open Rapid Assist - Experts app from experts team.
- Click on Settings.
- Click on Manage a team.
- Select a team from dropdown and click on Save.
Now you are all set to use the app.