Tutorial 3 Run CDeep3M - CRBS/cdeep3m GitHub Wiki
This page provides instructions on how to run CDeep3M with trained model created in:
Tutorial 2: Launch and train CDeep3M
- Upload data to segment onto CDeep3M instance
- Run CDeep3M
- Check on CDeep3M status
- Download results
- Required tool installation instructions
- Completed Tutorial 2: Launch and train CDeep3M and still have a running instance of CDeep3M
A. Download the ZIP file entitled datasetthree.zip from:
https://github.com/CRBS/cdeep3m/wiki/data/datasetthree.zip
B. Unzip the contents to an easily accessible location:
- For Windows 7/8/10: Unzip the file into a new folder in your home directory. If you used the IMOD cygwin install, the home directory will be C:\Users\<username> (for windows 10 it may be C:\cygwin\home\<username>)
From the cygwin terminal this can be done with this command ($HOMEPATH is an environment variable in Windows set to the user's home directory):
cd ~
unzip $HOMEPATH/Downloads/datasetthree.zip-
For Mac: Unzip the file into a new folder (e.g. /Users/<username>/datasetthree).
-
For Linux: Unzip the file into a new folder (e.g. /home/<username>/datasetthree).
C. If not already open already, open your terminal program
D. Navigate to the directory to which you unzipped the dataset, using the cd command in the terminal:
cd ~/datasetthreeE. List the directory's contents using the ls command. you should see one file, sbem_volume.mrc

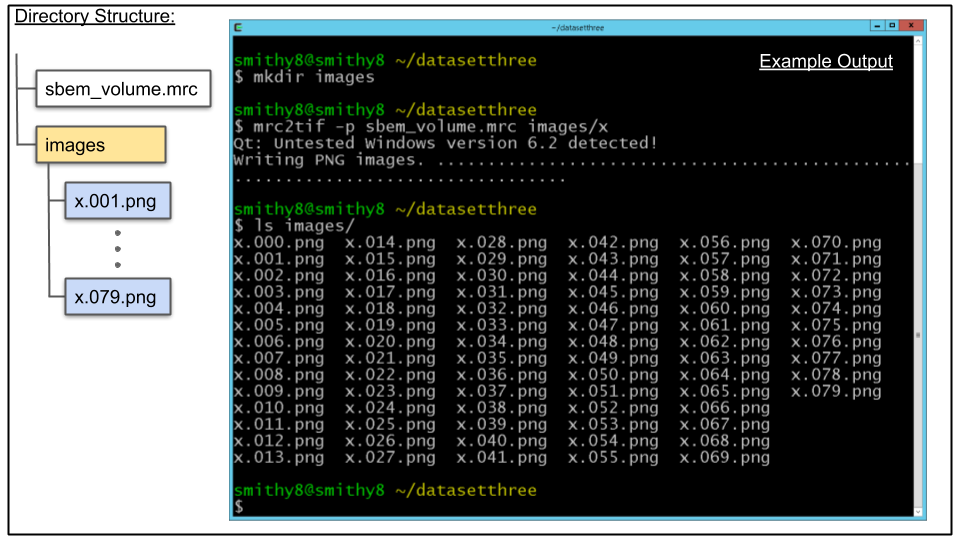
A. CDeep3M works on stacks of images, but not MRC files so lets convert the volume. First lets create a directory to hold the images using the mkdir command as seen below
mkdir imagesB. To extract images we will use the mrc2tif program again. Run the following:
mrc2tif -p sbem_volume.mrc images/xC. The above should have populated the images/ directory with PNG files as shown below with ls command:
A. Upload images directory to CDeep3M instance created in Tutorial 2 - Step 1.
NOTE: This tutorial assumes $cdeep3mhost variable is set, Click here for instructions
scp -i ~/.ssh/id_rsa -r images ubuntu@$cdeep3mhost:/home/ubuntu/.
B. Connect to CDeep3M instance and verify images directory was uploaded
ssh -i ~/.ssh/id_rsa ubuntu@$cdeep3mhost
ls images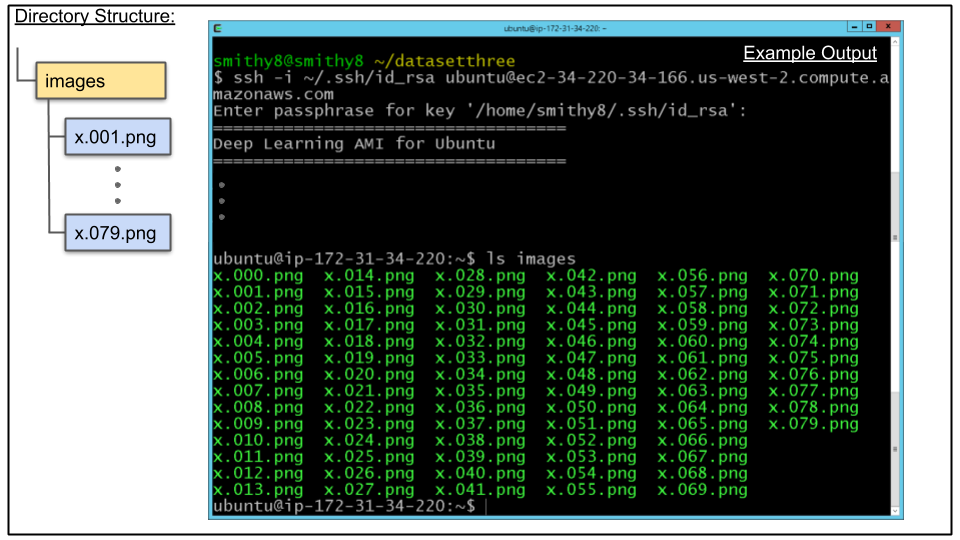
A. Run screen command and hit enter key to get past screen information.
screenB. Run CDeep3M prediction by invoking runprediction.sh
Information about runprediction.sh can be found here
runprediction.sh --augspeed 10 ~/model ~/images ~/predictOutput:
octave: X11 DISPLAY environment variable not set
octave: disabling GUI features
Starting Image Augmentation
Check image size of:
/home/ubuntu/images/
Reading file: /home/ubuntu/images/x.000.png
z_blocks =

    1   80

Start up worker to generate packages to process
Start up worker to run prediction on packages
Start up worker to run post processing on packages

To see progress run the following command in another window:

tail -f /home/ubuntu/predict/logs/*.log
octave: X11 DISPLAY environment variable not set
octave: disabling GUI features
warning: your version of GraphicsMagick limits images to 16 bits per pixel
warning: called from
    imformats>default_formats at line 256 column 11
    imformats at line 79 column 3
    imageIO at line 106 column 11
    imread at line 106 column 30
    /home/ubuntu/cdeep3m/EnsemblePredictions.m at line 50 column 31
Saving Image # 1 of 80: /home/ubuntu/predict/ensembled/Segmented_0001.png
.
.
Saving Image # 80 of 80: /home/ubuntu/predict/ensembled/Segmented_0080.png
Elapsed time for merging predictions is 000024 seconds.

Prediction has completed. Results are stored in /home/ubuntu/predict/ensembled
Have a nice day!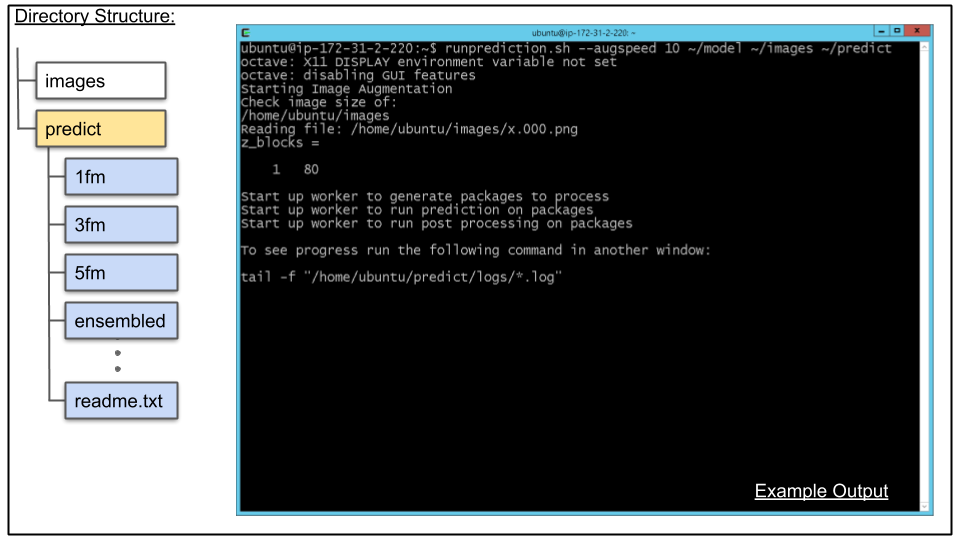
A. Convert PNG files to TIF files
Although this can be done after the download, lets convert the PNG files to TIF files here since the IMOD command we will be using in the next tutorial requires TIF files. This will be done with the ImageMagick command convert and a bash for loop. Run the following from the terminal (it is best to copy and paste this text):
NOTE: In the second line below the backtick key is used and NOT the single quote.
mkdir ~/mitochondria
for Y in `/bin/ls ~/predict/ensembled` ; do convert ~/predict/ensembled/$Y ~/mitochondria/$Y.tif ; done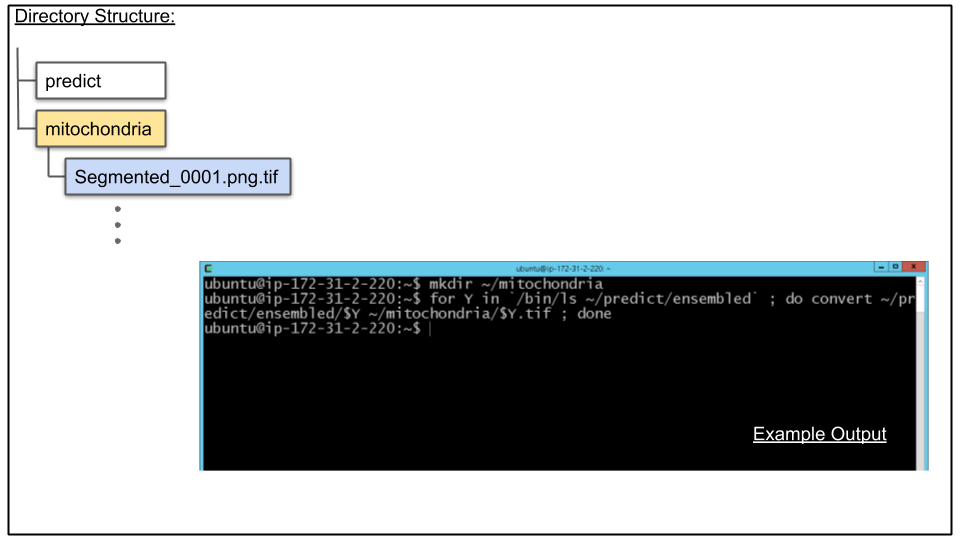
B. Verify conversion to TIF by looking at contents of ~/mitochondria directory. Run the following command to verify there are TIF files like seen in screenshot below:
ls ~/mitochondria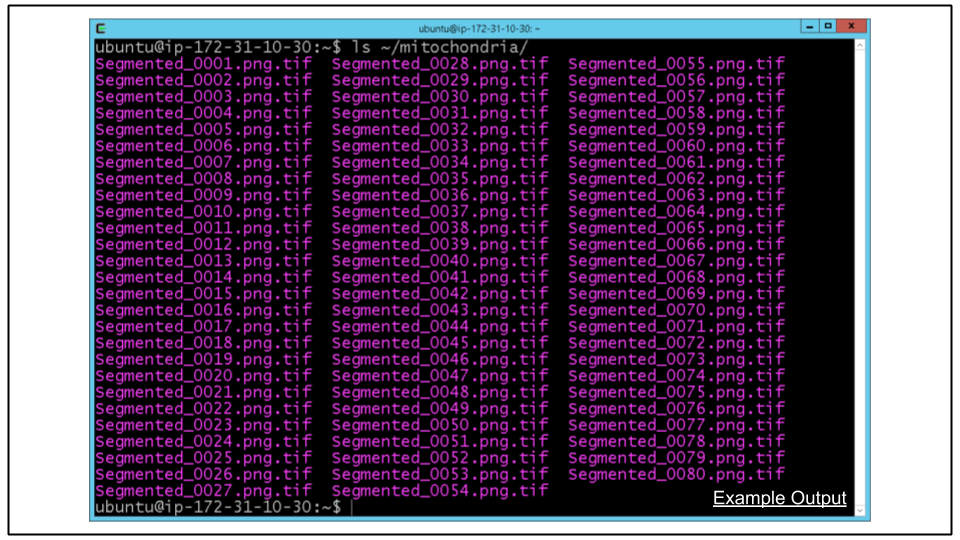
C. Exit from screen and Cdeep3M instance
exit
exit
D. From local terminal copy results back
scp -i ~/.ssh/id_rsa -r ubuntu@$cdeep3mhost:/home/ubuntu/mitochondria ./mitochondriaE. View results
For Windows the following can be run:
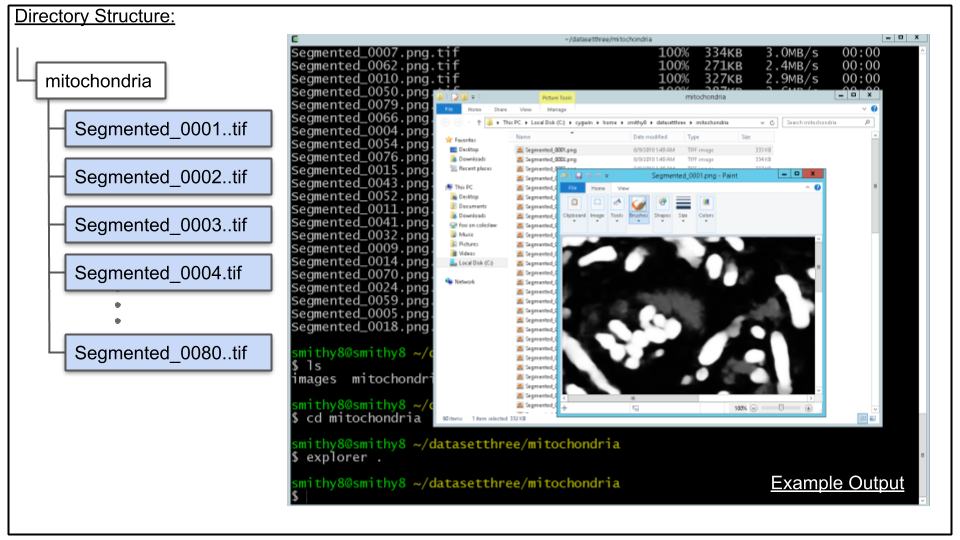
cd mitochondria
explorer .
The above will open a window showing a list of PNG image files (the result of CDeep3M). Double click on one of the files to see it in an image viewer as seen in screenshot below:
For Mac the following can be run:
cd mitochondria
open .
The above will open a window showing a list of PNG image files (the result of CDeep3M). Double click on one of the files to see it in an image viewer.
Congratulations on completing Tutorial 3.
Click here to continue with Tutorial 4: Post processing of Automatically Generated Segmentations
NOTE: If you are not continuing to the next tutorial be sure to shutdown your CDeep3M to avoid incurring additional EC2 charges.