GRID - AppDaddy-Software-Solutions-Inc/framework-markup-language GitHub Wiki
<GRID/> : <BOX/>
The <GRID/> widget is an adaptive layout widget made up of one or more grid <ITEM/>'s. Grids dynamically position their child <ITEM/>'s based on available space.
A grid can be either static or dynamic.
Static grids define all their child <ITEM/>'s.
Dynamic grids are created by defining a single prototype <ITEM/> and using the data attribute to tie it to a valid data source. An <ITEM/> is automatically created for each row in the data source using the prototype.
The height (for vertically scrolling grids) and width (for horizontally scrolling grids) is required on the <ITEM/> and must be smaller than the minimum screen size.
| Name | Type | Default | Description | Req |
|---|---|---|---|---|
| direction | string | vertical | Direction of grid list. Values are "vertical" or "horizontal" | |
| datasource | string | The id of a valid data source. Used for dynamic grid creation. | ||
| scrollshadows | bool | false | Show/Hide scroll shadows |
| Name | Values | Default | Description |
|---|---|---|---|
| selected | The data element of the selected <ITEM/>. This can be used in data binding using {selected.property} where property is the name of the field in the corresponding record |
| Name | Description |
|---|---|
| export() | Exports the grids data to a .csv formatted file |
| select(index) | Selects the item at the specified index |
| deselect(index) | Deselects the item at the specified index |
| clear() | deselects any/all selected items |
| insert(data, index) | Inserts a new item at the specified index. If index is not specified, the item is inserted in the first position. New items are created as a copy of the first item (the prototype) using the supplied data. The data value must be a valid json or xml string. This data is automatically added to the data source. |
| delete(index) | Deletes the item at the specified index, fires the ondelete event handler of the item (if specified) and removes the corresponding item from the data source. |
| move(indexFrom, indexTo) | Moves the item at position indexFrom to position indexTo. The associated item in the data source is also moved |
| forEach(eventString) | Executes the event string defined in eventString for each item in the grid. |
| scroll(pixels) | Scrolls the list +/- pixels specified in the direction of the primary axis |
| scrollTo(id, position) | Scrolls to the item with the specified id. The position parameter is optional and can be be either top, bottom, start or end. Note: This method does not function if the grid contains variable size items in the direction of scrolling |
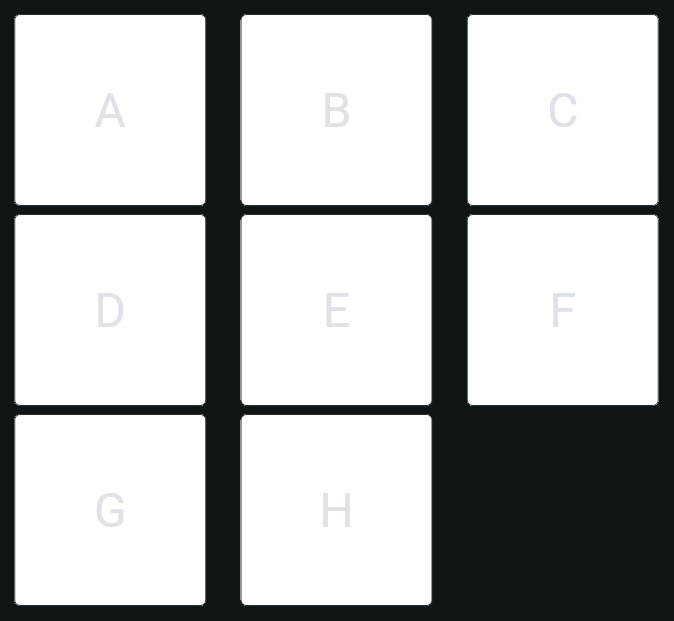
<FML>
    <GRID>
        <ITEM id="itm"  width="200" height="200">
            <BOX width="192" height="192" center="true" elevation="3" radius="6" color="={itm.selected} ? 'green' : 'white'">
                <TEXT size="48" label="A" />
            </BOX>
        </ITEM>
        <ITEM id="itm" width="200" height="200">
            <BOX width="192" height="192" center="true" elevation="3" radius="6" color="={itm.selected} ? 'green' : 'white'">
                <TEXT size="48" label="B" />
            </BOX>
        </ITEM>
        <ITEM id="itm" width="200" height="200">
            <BOX width="192" height="192" center="true" elevation="3" radius="6" color="={itm.selected} ? 'green' : 'white'">
                <TEXT size="48" label="C" />
            </BOX>
        </ITEM>
        <ITEM id="itm" width="200" height="200">
            <BOX width="192" height="192" center="true" elevation="3" radius="6" color="={itm.selected} ? 'green' : 'white'">
                <TEXT size="48" label="D" />
            </BOX>
        </ITEM>
        <ITEM id="itm" width="200" height="200">
            <BOX width="192" height="192" center="true" elevation="3" radius="6" color="={itm.selected} ? 'green' : 'white'">
                <TEXT size="48" label="E" />
            </BOX>
        </ITEM>
        <ITEM id="itm" width="200" height="200">
            <BOX width="192" height="192" center="true" elevation="3" radius="6" color="={itm.selected} ? 'green' : 'white'">
                <TEXT size="48" label="F" />
            </BOX>
        </ITEM>
        <ITEM id="itm" width="200" height="200">
            <BOX width="192" height="192" center="true" elevation="3" radius="6" color="={itm.selected} ? 'green' : 'white'">
                <TEXT size="48" label="G" />
            </BOX>
        </ITEM>
        <ITEM id="itm" width="200" height="200">
            <BOX width="192" height="192" center="true" elevation="3" radius="6" color="={itm.selected} ? 'green' : 'white'">
                <TEXT size="48" label="H" />
            </BOX>
        </ITEM>
    </GRID>
</FML>Example #2 : a dynamic grid tied to a data source
<FML>
  <TESTDATA id="USER"/>
  <BOX color="{THEME.surface},{THEME.surfacevariant}">
    <GRID datasource="USER" direction="vertical">
      <ITEM width="250" height="90" layout="col" center="true" elevation="0.1" radius="3" color="={this.selected} ? 'lightgreen' : {THEME.oninversesurface}" pad="10" margin="5" opacity="0.8">
            <TEXT size="12" label="{data.first} {data.last}" color="{THEME.onsurface}" />
            <TEXT size="12" label=" Age {data.age}" color="{THEME.onsurface}" />
            <TEXT size="12" label="Email: {data.email}" color="lightblue" />
      </ITEM>
    </GRID>
  </BOX>
</FML>

