Building Your Clan Banner: How To - xlxCLUxlx/Destiny2API GitHub Wiki
Example Code
You can find example code in the following repository which was written in C# to produce the images seen in this post. I will describe the overall process though so that you can apply the concepts in any language and this repository is simply for reference if you are interested.
https://github.com/xlxCLUxlx/DestinyClanBannerCreator
Notes
The example images of the clan banner creation process have been shrunken to half the size of what would be outputted by the program. This is to save space for this post.
Prerequisites
- Assumes you already have a developer API key.
- You will want to know your groupId of your clan.
- You will need to access the /GroupV2/{groupId}/ endpoint.
- You will need the to get the clan banner manifest database which can be accessed from the /Destiny2/Manifest/ endpoint under mobileClanBannerDatabasePath.
- Understanding of 2D graphics and how to manipulate 2D graphics in your language of choice (I use Windows GDI+ calls).
- You will also want to grab the flag staff and flag overlay which are not included in the manifest if want to produce a final image like Bungie does through their Banner Editor. You can download the two images from these links:
- If you would like to work with the JSON data from the clanbanner_sql_content database as composite objects you can grab my updates openapi-2.json from my fork: https://github.com/xlxCLUxlx/api/blob/master/openapi-2.json
Understanding the tables in the clanbanner_sql_content Database
You can see a description of each of the tables in the database below.
| Table Name | Description |
|---|---|
| Decals | This is the emblem which will consist of two images. The forground and background. |
| DecalPrimaryColors | Contains the forground emblem colors. |
| DecalSecondaryColors | Contains the background emblem colors. |
| Gonfalons | The banner. Currently there is only one. |
| GonfalonColors | Contains the colors that are applied to the Gonfalon. |
| GonfalonDetailColors | Contains the colors that are applied to the GonfalonDetails. |
| GonfalonDetails | The detail image that sits on top of the Gonfalon but below the Decals. |
| GonfalonSquareDetails | These are square icons which are used by the Banner Editor on Bungie.net for user selection. |
| SquareDecals | These are square icons which are used by the Banner Editor on Bungie.net for user selection. |
| sqlite_sequence | An internal table created by SQLite used to help implement AUTOINCREMENT. |
Below you can see the Clan Banner Editor that Bungie has provided at their website and I will use this to show you what each item in the Clan Banner Editor equals in relation to the table names in the clanbanner_sql_content database.
White = Bungie Clan Editor Name Red = clanbanner_sql_content table name

Now that we understand what each table represents in the database and how it relates to the Bungie Clan Banner Editor we can start to query the tables and extract the information we need to build our banner.
Getting your Clan Banner Data
First things first is we need to get our clan banner data so we can look up the values and start putting it all together.
Endpoint: GroupV2.GetGroup Example call: https://www.bungie.net/Platform/GroupV2/266859/
You can either work with the JSON directly or if you have opted to create a client from the OpenAPI spec you can refer to the following documentation GroupV2.ClanBanner
Snippet of the response which contains the clanBannerData:
{
  "clanBannerData": {
    "decalId": 4125445806,
    "decalColorId": 3396165378,
    "decalBackgroundColorId": 3568748757,
    "gonfalonId": 1473910866,
    "gonfalonColorId": 2157636321,
    "gonfalonDetailId": 1698031298,
    "gonfalonDetailColorId": 4128900498
  }
}
That is all there is to getting the hashes that we need to start building our clan banner. We can use these in conjunction with the clanbanner_sql_content SQLite database.
Querying the clanbanner_sql_content Database
Note: You will see me doing simple queries like
SELECT *
FROM DecalPrimaryColors
WHERE id = 3396165378;
I do not have to worry about the signed integers in the database because I have a routine that whenever I download a new manifest I update ids in the manifest to become unsigned if they are signed.
Alternatively, you can write a query as such if needed to handle signed values.
SELECT *
FROM DecalPrimaryColors
WHERE CASE
	  WHEN (id < 0) THEN (id + 4294967296)
	  ELSE id
	  END = 3396165378;
Queries and Results
clanBannerData.decalId
SELECT *
FROM Decals
WHERE id = 4125445806;
{
   "imageHash":4125445806,
   "foregroundImagePath":"/common/destiny2_content/icons/cb_decal_b424ddd57824169d3aa4acef9f954ddf.png",
   "backgroundImagePath":"/common/destiny2_content/icons/cb_decal_12542e06374778ee6864f1823dc53287.png"
}
clanBannerData.decalColorId
SELECT *
FROM DecalPrimaryColors
WHERE id = 3396165378;
{
   "colorHash":3396165378,
   "red":213,
   "green":131,
   "blue":55,
   "alpha":255
}
clanBannerData.decalBackgroundColorId
SELECT *
FROM DecalSecondaryColors
WHERE id = 3568748757;
{
   "colorHash":3568748757,
   "red":17,
   "green":17,
   "blue":18,
   "alpha":255
}
clanBannerData.gonfalonId
SELECT *
FROM Gonfalons
WHERE id = 1473910866;
{
   "imageHash":1473910866,
   "foregroundImagePath":"/common/destiny2_content/icons/cb_gonfalon_f6fada502c393950662df87b131bbb6f.png"
}
clanBannerData.gonfalonColorId
SELECT *
FROM GonfalonColors
WHERE id = 2157636321;
{
   "colorHash":2157636321,
   "red":17,
   "green":17,
   "blue":18,
   "alpha":255
}
clanBannerData.gonfalonDetailId
SELECT *
FROM GonfalonDetails
WHERE id = 1698031298;
{
   "imageHash":1698031298,
   "foregroundImagePath":"/common/destiny2_content/icons/cb_gdetail_51fb32512654c87aafb1b21e426afca7.png"
}
clanBannerData.gonfalonDetailColorId
SELECT *
FROM GonfalonDetailColors
WHERE id = 4128900498;
{
   "colorHash":4128900498,
   "red":69,
   "green":69,
   "blue":69,
   "alpha":255
}
Building the Clan Banner from the Queried JSON in the clanbanner_sql_content Database
You can build a few of the images in nonspecific order and what we will do first; however, when it comes time to combining them we will do that in a specific order.
Building the Decal
- Submit HTTP request to download the image from the
foregroundImagePathof our SQL query against the Decals table. Which in this case would be: https://www.bungie.net/common/destiny2_content/icons/cb_decal_b424ddd57824169d3aa4acef9f954ddf.png - Submit HTTP request to download the image from
backgroundImagePathof our SQL query against the Decals table. Which in this case would be: https://www.bungie.net/common/destiny2_content/icons/cb_decal_12542e06374778ee6864f1823dc53287.png - Apply the Decal Primary Color to the Decal Foreground image. You would apply the following color RGB(213,131,55) which was queried earlier to the entire image where the color is not transparent i.e. an RBGA(0,0,0,0). You will notice that for the color we are applying I only specified RGB rather than RGBA. This is because for non transparent pixels I will apply alpha channel for that current pixel with the RGB value that I got from the JSON. This allows for a smooth image and anti-aliasing effect otherwise you would have jaggies. These images are 32 bit PNG's because they use alpha transparency rather than index transparency.
{
   "colorHash":3396165378,
   "red":213,
   "green":131,
   "blue":55,
   "alpha":255
}
Here is what the image looks like after the color has been applied.
 4. Apply the Decal Secondary Color to the Decal Background image. You would apply the following color RGBA(17,17,18) which was queried earlier to the entire image where the color is not transparent i.e. an RBGA(0,0,0,0). This is the same strategy we just did with the Decal Foreground image.
{
   "colorHash":3568748757,
   "red":17,
   "green":17,
   "blue":18,
   "alpha":255
}
Here is what the image looks like after the color has been applied.
 5. We now can merge our Decal Foreground and Background images into one image to form the decal. You can see how they now look merged.
 6. We now need to clip the decal image that we just created based on the geometry of the gonfalon. This allows our decal to take on the shape of the gonfalon image. After clipping we can save the updated decal image. You can see how it looks now clipped.

Building the Gonfalon Detail
- Submit HTTP request to download the image from the
foregroundImagePathof our SQL query against the Gonfalons table. Which in this case would be: https://www.bungie.net/common/destiny2_content/icons/cb_gonfalon_f6fada502c393950662df87b131bbb6f.png - Submit HTTP request to download the image from the
foregroundImagePathof our SQL query against the GonfalonDetails table. Which in this case would be: https://www.bungie.net/common/destiny2_content/icons/cb_gdetail_51fb32512654c87aafb1b21e426afca7.png - Apply the Gonfalon Color to the Gonfalon image. You would apply the following color RGBA(17,17,18) which was queried earlier to the entire image where the color is not transparent i.e. an RBGA(0,0,0,0). This is the same strategy we just did with the Decal images.
{
   "colorHash":2157636321,
   "red":17,
   "green":17,
   "blue":18,
   "alpha":255
}
Here is what the image looks like after the color has been applied.
 4. Apply the Gonfalon Detail Color to the Gonfalon Detail image. You would apply the following color RGBA(69,69,69) which was queried earlier to the entire image where the color is not transparent i.e. an RBGA(0,0,0,0). This is the same strategy we just did with the Decal images.
{
   "colorHash":4128900498,
   "red":69,
   "green":69,
   "blue":69,
   "alpha":255
}
Here is what the image looks like after the color has been applied.
 5. We now need to clip the gonfalon detail image that we just created based on the geometry of the gonfalon. This allows our gonfalon detail to take on the shape of the gonfalon image. After clipping we can save the updated gonfalon detail image. You can see how it looks now clipped.

Building the Gonfalon Overlay
- Submit HTTP request to download the image https://www.bungie.net/img/bannercreator/flag_overlay.png
- We now need to resize and clip the overlay image based on the geometry of the gonfalon. This allows our overlay to take on the shape of the gonfalon image. After clipping we can save the updated overlay image. You can see how it looks now resized and clipped.

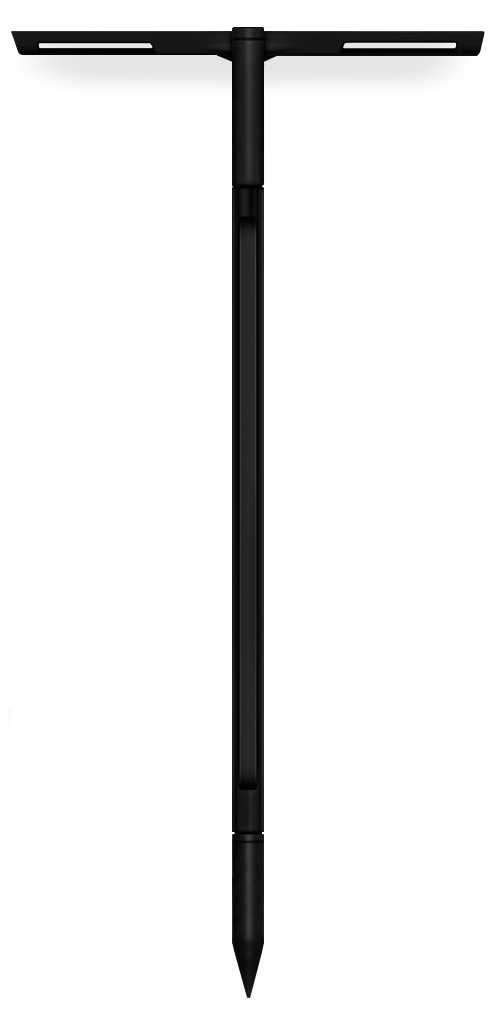
Resizing the Flag Stave
- Submit HTTP request to download the image https://www.bungie.net/img/bannercreator/FlagStand00.png
- Resize the image to 422x879.
Merging the Final Image We can now merge our final image into one image to create the Clan Banner. We will merge the images in the following order so 1. is on the bottom and then 2. sits on top of 1. and so on. I list it out like this because I use a Stack data structure LIFO (Last In First Out). You will also need to most likely change the offsets of where the images are drawn in order to make everything line up correctly.
- Flag Staff image
- Gonfalon Detail image
- Decal Image
- Overlay image.
You should now have a completed banner that you can use that looks like this.
 And finally here is a side by side comparison of the one Bungie produces vs. what I produced.
