Software guide (WiFi module installed) - webhdx/WiiMini-SDRST GitHub Wiki
Wii does system check on boot and won't start if you don't have WiFi card installed. This is why Wii Mini comes with its own set of IOS modules where WiFi functionality has been removed. So after installing WiFi card we can basically install full System Menu and all regular IOS to enable missing features.
There are multiple ways to do it. You can use google to find all modules but much safer method is to use software to download them directly from Nintendo servers.
The easiest method I found is using NUS Downloader (NUSD) for Windows. It can use custom scripts to download multiple files automatically.
Download latest NUSD from Wii Brew. At the time of writing this guide v1.9 Mod NUS-Fix - March 23rd, 2022 is the newest version available which is confirmed to be working.
Download full_backup_latest_ios.nus script from the gist I made and save it on your computer.
- Launch NUS Downloader.
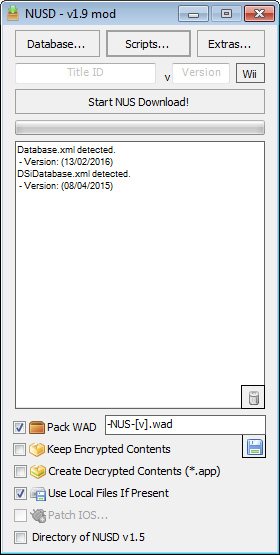
- Check
Pack WADoption, other options are not important but you can uncheck some of the options to speed up the process. Refer to the screenshot above. - Click
Scripts -> Load NUS Scriptand selectfull_backup_latest_ios.nusfile. - It will automatically start downloading all IOS modules and save them in
scripts/full_backup_latest_ios.nus_outputdirectory. - Go to the directory where files have been downloaded and use file explorer to filter all
*.wadfiles:
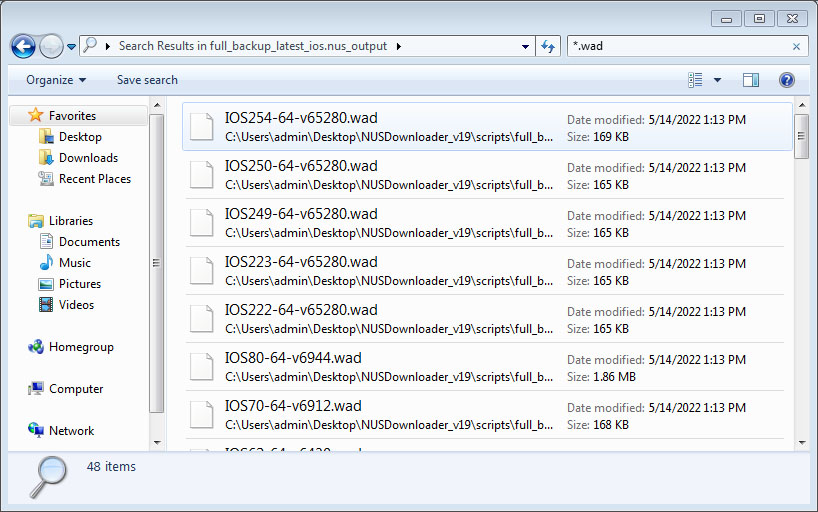
- Copy all
*.wadfiles towad/directory on the USB stick you've used with BlueBomb.
You are all done with downloading IOS files. Now we need to grab System Menu and EULA channel. Why you need full System Menu is pretty much self explanatory but EULA channel may confuse some of you - we only install it to be able to use RiiConnect24 later. It's up to you but I highly recommend installing it now.
- In NUSD open
Database -> System -> System Menuand select 4.3 version matching your console region:-
4.3J- Japan -
4.3U- USA/NTSC -
4.3E- Europe/PAL -
4.3K- Korea
-
- Click
Start NUS Download!. - Select
Database -> System -> EULA -> (Your Wii region) -> Latest Version. - Click
Start NUS Download!. - Go to
titles/directory and use file explorer to find all*.wadfiles. - Copy EULA and System Menu WAD files to
wad/directory on USB stick.
Warning
WiiMod Lite is no longer recommended. Use YAWM ModMii Edition instead.
Once you have all WADs you can install them on your Wii Mini. To do this you need to grab WiiMod Lite. You can use this guide: https://wii.guide/wiimodlite.html to get a brief overview on installing WADs, there is also a link to download the app.
Be careful! Installing WADs is very dangerous and can brick your console. I do not take responsibility for anything you do by following this guide. Do it at your own risk. You've been warned.
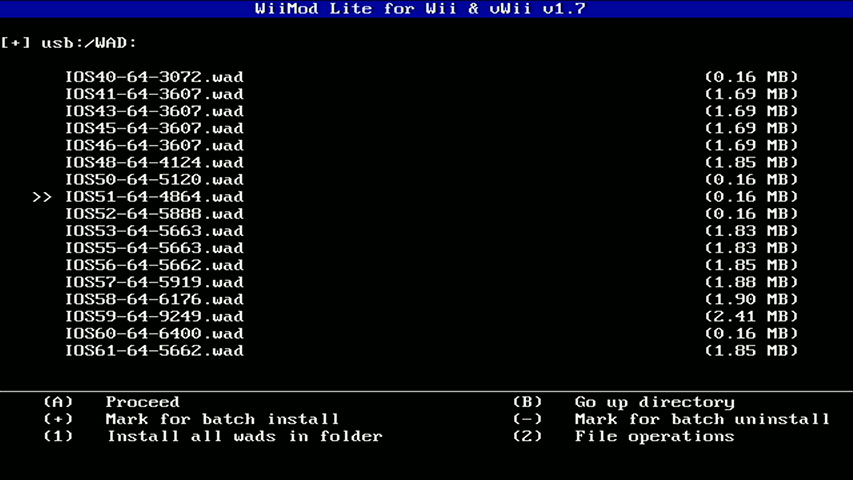
- Select
WAD Manager. - Select
USB Mass Storage Device. - Go to
wad/directory and press1to install all files in the directory. CAUTION Make sure there are only files downloaded in the previous step! Other*.wadfiles could be potentially dangerous.
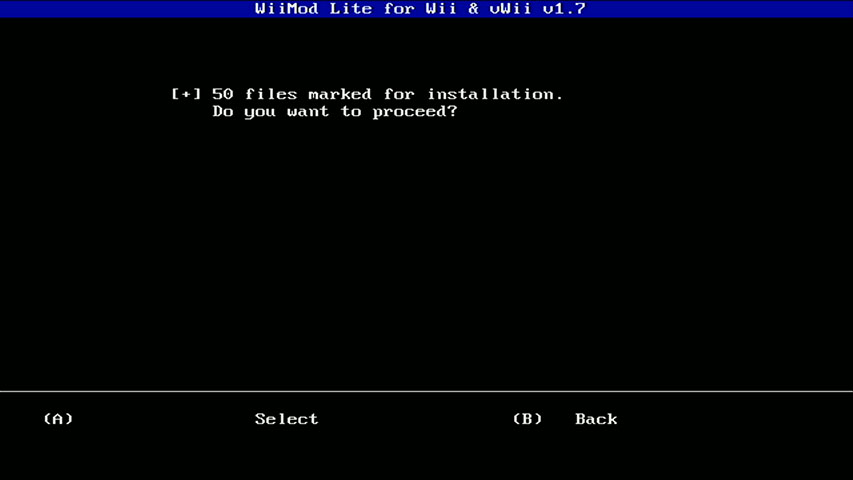
 4. Confirm installing WAD files.
- Wait a few minutes for WiiMod Lite to finish installing WADs.
- Reboot the console.
YOU ARE DONE! You Wii Mini is now running full System Menu 4.3 and all regular IOS modules. You can access SD card in Data Management and connect to WiFi network in System Settings.