PyQt5 Example Codes 1 - wangxl1029/my_chat GitHub Wiki
PY QuieT
INDEX
[TOC]
Overview
PyQt5 codes
Tutorial@Archi@Csdn
First App
代码来源:https://www.cnblogs.com/archisama/p/5444032.html
minimalist
import sys
from PyQt5.QtWidgets import QApplication, QWidget

if __name__ == '__main__':
    app = QApplication(sys.argv)

    w = QWidget()
    w.resize(250, 150)
    w.move(300, 300)
    w.setWindowTitle('Simple')
    w.show()

    sys.exit(app.exec_())
add icon
import sys
from PyQt5.QtWidgets import QApplication, QWidget
from PyQt5.QtGui import QIcon

class Example(QWidget):

    def __init__(self):
        super().__init__()

        self.initUI()

    def initUI(self):

        self.setGeometry(300, 300, 300, 220)
        self.setWindowTitle('Icon')
        self.setWindowIcon(QIcon('web.png'))
        self.show()

if __name__ == '__main__':

    app = QApplication(sys.argv)
    ex = Example()
    sys.exit(app.exec_())
button tips
鼠标指针悬停在Button上会有tool tip出现。 不过下面的截图上没有把tip的效果载出来,是截图的问题。
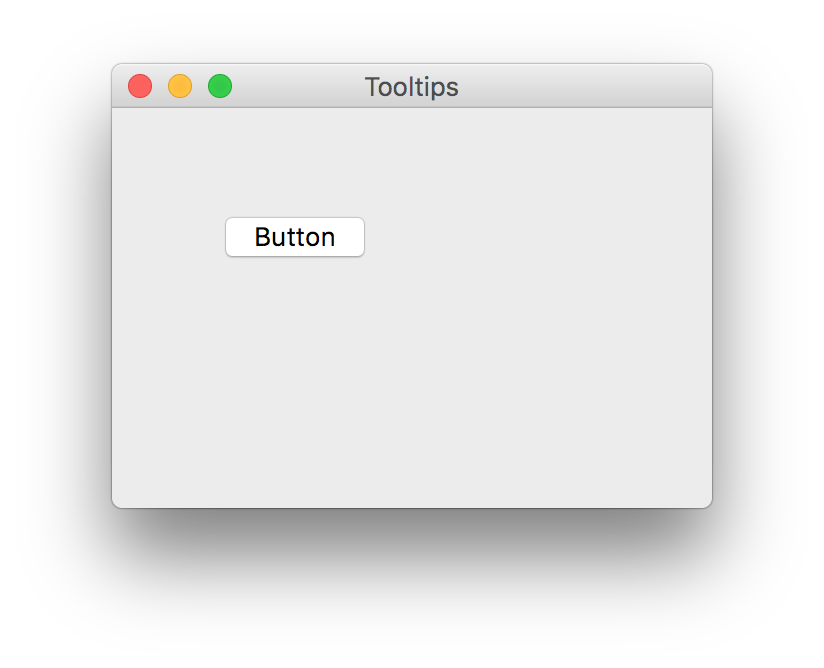
其效果如下。
import sys
from PyQt5.QtWidgets import (QWidget, QToolTip,
    QPushButton, QApplication)
from PyQt5.QtGui import QFont

class Example(QWidget):
    def __init__(self):
        super().__init__()

        self.initUI()

    def initUI(self):

        QToolTip.setFont(QFont('SansSerif', 10))

        self.setToolTip('This is a <b>QWidget</b> widget')

        btn = QPushButton('Button', self)
        btn.setToolTip('This is a <b>QPushButton</b> widget')
        btn.resize(btn.sizeHint())
        btn.move(50, 50)

        self.setGeometry(300, 300, 300, 200)
        self.setWindowTitle('Tooltips')
        self.show()

if __name__ == '__main__':

    app = QApplication(sys.argv)
    ex = Example()
    sys.exit(app.exec_())
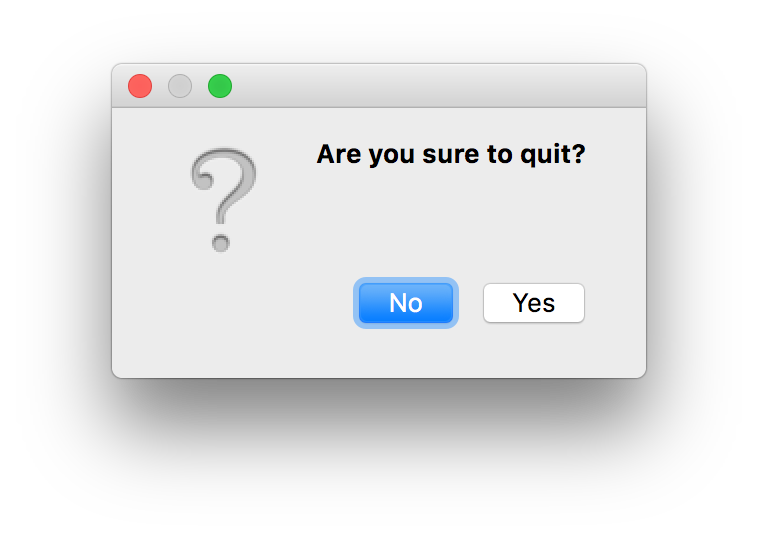
a message box
一个Yes or No的message box,用于确认是否退出。界面效果如下。
相应代码如下。
import sys
from PyQt5.QtWidgets import QWidget, QMessageBox, QApplication

class Example(QWidget):

    def __init__(self):
        super().__init__()

        self.initUI()

    def initUI(self):

        self.setGeometry(300, 300, 250, 150)
        self.setWindowTitle('Message box')
        self.show()

    def closeEvent(self, event):

        reply = QMessageBox.question(self, 'Message',
            "Are you sure to quit?", QMessageBox.Yes |
            QMessageBox.No, QMessageBox.No)

        if reply == QMessageBox.Yes:
            event.accept()
        else:
            event.ignore()

if __name__ == '__main__':

    app = QApplication(sys.argv)
    ex = Example()
    sys.exit(app.exec_())
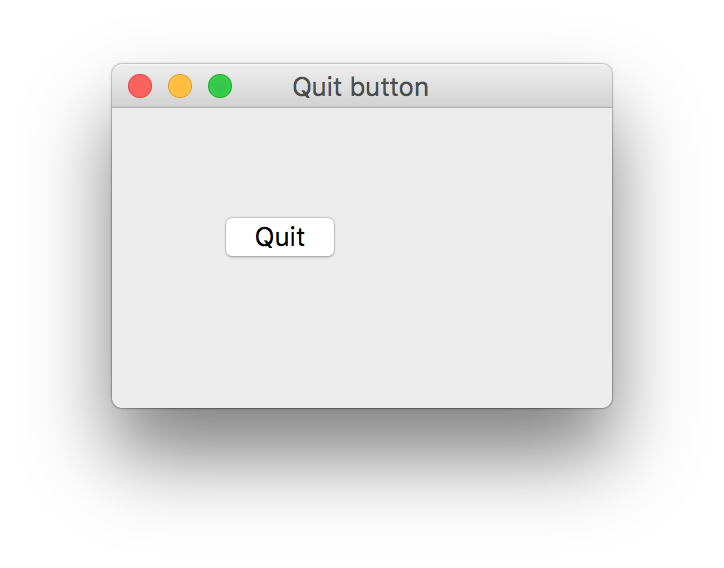
app quit button
此例是在主窗体上加了一个quit的button,这个quit button的click事件与应用程度的quit slot相连。 界面效果如下图。
代码如下。
import sys
from PyQt5.QtWidgets import QWidget, QPushButton, QApplication
from PyQt5.QtCore import QCoreApplication

class Example(QWidget):

    def __init__(self):
        super().__init__()

        self.initUI()

    def initUI(self):

        qbtn = QPushButton('Quit', self)
        qbtn.clicked.connect(QCoreApplication.instance().quit)
        qbtn.resize(qbtn.sizeHint())
        qbtn.move(50, 50)

        self.setGeometry(300, 300, 250, 150)
        self.setWindowTitle('Quit button')
        self.show()

if __name__ == '__main__':

    app = QApplication(sys.argv)
    ex = Example()
    sys.exit(app.exec_())
center widget
本例,即,将窗口置于屏幕中心。
import sys
from PyQt5.QtWidgets import QWidget, QDesktopWidget, QApplication

class Example(QWidget):

    def __init__(self):
        super().__init__()

        self.initUI()

    def initUI(self):

        self.resize(250, 150)
        self.center()

        self.setWindowTitle('Center')
        self.show()

    def center(self):
        #QRect & center position
        qr = self.frameGeometry()
        cp = QDesktopWidget().availableGeometry().center()
        qr.moveCenter(cp)
        self.move(qr.topLeft())

if __name__ == '__main__':

    app = QApplication(sys.argv)
    ex = Example()
    sys.exit(app.exec_())
Menu & Tool Bar
代码来源:https://www.cnblogs.com/archisama/p/5450834.html
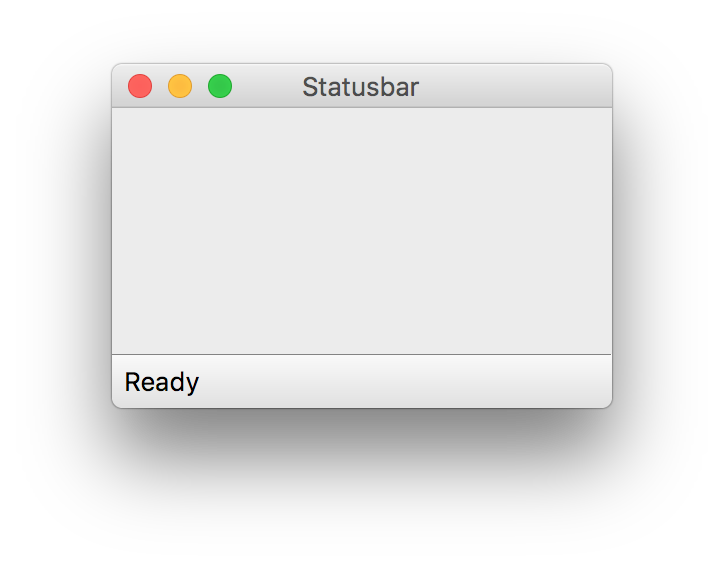
status bar
窗体效果如下。
代码如下。
import sys
from PyQt5.QtWidgets import QMainWindow, QApplication

class Example(QMainWindow):

    def __init__(self):
        super().__init__()

        self.initUI()

    def initUI(self):

        self.statusBar().showMessage('Ready')

        self.setGeometry(300, 300, 250, 150)
        self.setWindowTitle('Statusbar')
        self.show()

if __name__ == '__main__':

    app = QApplication(sys.argv)
    ex = Example()
    sys.exit(app.exec_())
menu bar
界面效果如下。

其代码如下,注意:
menubar.setNativeMenuBar(False)禁用了Mac风格的菜单;- 菜单项
' &Exit'和' &File'的开头都插入了一个空格。原因请参考:
import sys
from PyQt5.QtWidgets import QMainWindow, QAction, qApp, QApplication
from PyQt5.QtGui import QIcon

class Example(QMainWindow):

    def __init__(self):
        super().__init__()

        self.initUI()

    def initUI(self):

        exitAction = QAction(QIcon('exit.png'), ' &Exit', self)
        exitAction.setShortcut('Ctrl+Q')
        exitAction.setStatusTip('Exit application')
        exitAction.triggered.connect(qApp.quit)

        self.statusBar()

        menubar = self.menuBar()
        menubar.setNativeMenuBar(False)
        fileMenu = menubar.addMenu(' &File')
        fileMenu.addAction(exitAction)

        self.setGeometry(300, 300, 300, 200)
        self.setWindowTitle('Menubar')
        self.show()

if __name__ == '__main__':

    app = QApplication(sys.argv)
    ex = Example()
    sys.exit(app.exec_())
tool bar
界面效果如下。
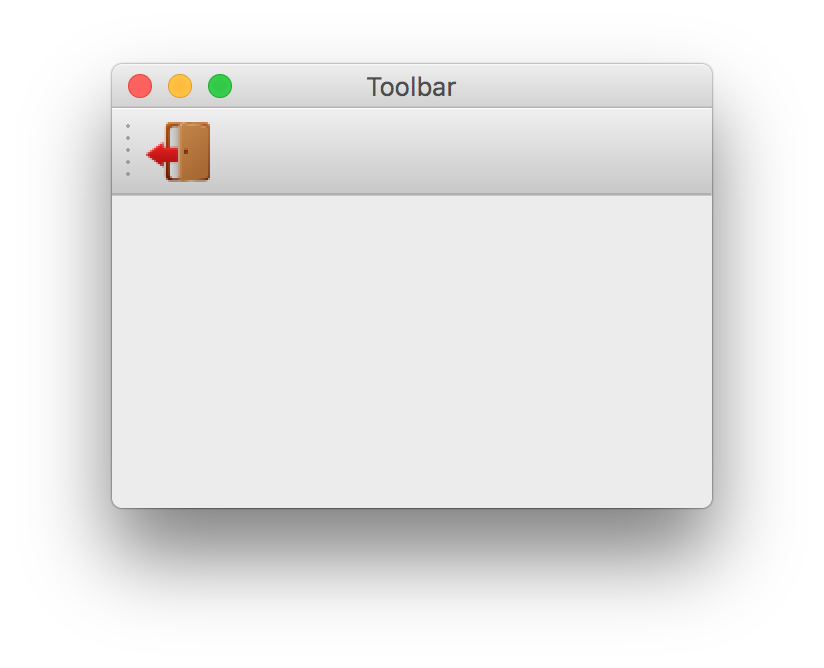
代码如下。
import sys
from PyQt5.QtWidgets import QMainWindow, QAction, qApp, QApplication
from PyQt5.QtGui import QIcon


class Example(QMainWindow):

    def __init__(self):
        super().__init__()

        self.initUI()


    def initUI(self):

        exitAction = QAction(QIcon('/Users/alanking/Downloads/exit1.png'), 'Exit', self)
        exitAction.setShortcut('Ctrl+Q')
        exitAction.triggered.connect(qApp.quit)

        self.toolbar = self.addToolBar('Exit')
        self.toolbar.addAction(exitAction)

        self.setGeometry(300, 300, 300, 200)
        self.setWindowTitle('Toolbar')
        self.show()


if __name__ == '__main__':

    app = QApplication(sys.argv)
    ex = Example()
    sys.exit(app.exec_())
综合
界面效果如图。
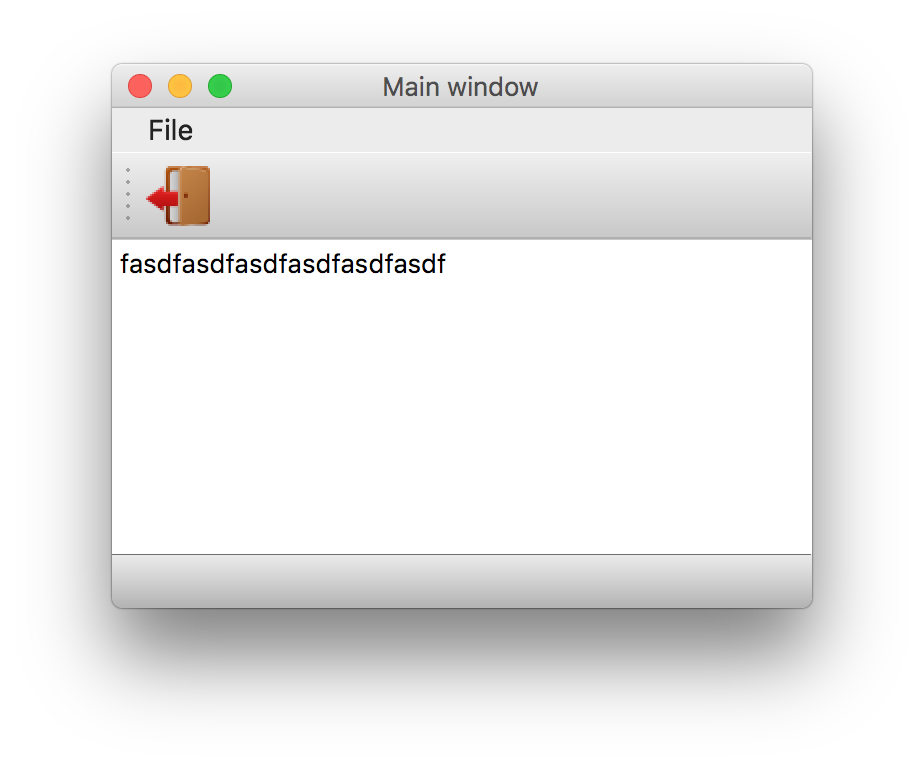
代码如下。
import sys
from PyQt5.QtWidgets import QMainWindow, QTextEdit, QAction, QApplication
from PyQt5.QtGui import QIcon


class Example(QMainWindow):

    def __init__(self):
        super().__init__()

        self.initUI()


    def initUI(self):

        textEdit = QTextEdit()
        self.setCentralWidget(textEdit)

        exitAction = QAction(QIcon('/Users/alanking/Downloads/exit1.png'), 'Exit', self)
        exitAction.setShortcut('Ctrl+Q')
        exitAction.setStatusTip('Exit application')
        exitAction.triggered.connect(self.close)

        self.statusBar()

        menubar = self.menuBar()
        menubar.setNativeMenuBar(False)
        fileMenu = menubar.addMenu(' &File')
        fileMenu.addAction(exitAction)

        toolbar = self.addToolBar('Exit')
        toolbar.addAction(exitAction)

        self.setGeometry(300, 300, 350, 250)
        self.setWindowTitle('Main window')
        self.show()


if __name__ == '__main__':

    app = QApplication(sys.argv)
    ex = Example()
    sys.exit(app.exec_())
Layout
absolute position
即,使用绝对坐标。
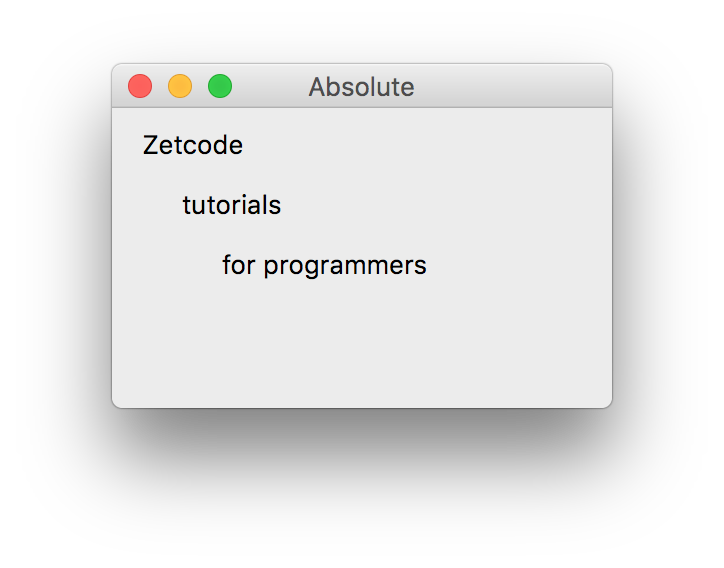
代码如下。
import sys
from PyQt5.QtWidgets import QWidget, QLabel, QApplication

class Example(QWidget):

    def __init__(self):
        super().__init__()

        self.initUI()

    def initUI(self):

        lbl1 = QLabel('Zetcode', self)
        lbl1.move(15, 10)

        lbl2 = QLabel('tutorials', self)
        lbl2.move(35, 40)

        lbl3 = QLabel('for programmers', self)
        lbl3.move(55, 70)

        self.setGeometry(300, 300, 250, 150)
        self.setWindowTitle('Absolute')
        self.show()

if __name__ == '__main__':

    app = QApplication(sys.argv)
    ex = Example()
    sys.exit(app.exec_())
box layout
即箱布局,有横箱(hBoxLoyout)和竖箱(vBoxLayout)最常用的两种箱布局。
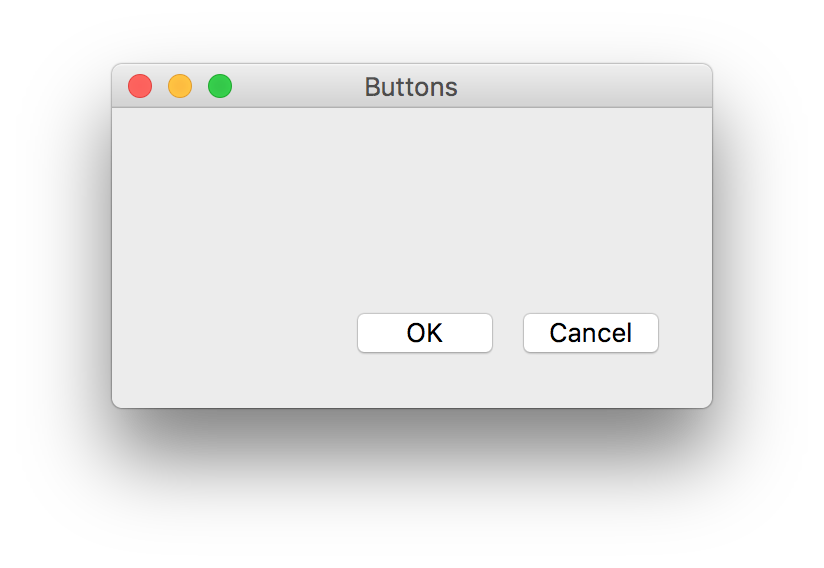
其代码如下。
import sys
from PyQt5.QtWidgets import (QWidget, QPushButton,
    QHBoxLayout, QVBoxLayout, QApplication)

class Example(QWidget):

    def __init__(self):
        super().__init__()

        self.initUI()

    def initUI(self):

        okButton = QPushButton("OK")
        cancelButton = QPushButton("Cancel")

        hbox = QHBoxLayout()
        hbox.addStretch(1)
        hbox.addWidget(okButton)
        hbox.addWidget(cancelButton)

        vbox = QVBoxLayout()
        vbox.addStretch(1)
        vbox.addLayout(hbox)

        self.setLayout(vbox)

        self.setGeometry(300, 300, 300, 150)
        self.setWindowTitle('Buttons')
        self.show()

if __name__ == '__main__':

    app = QApplication(sys.argv)
    ex = Example()
    sys.exit(app.exec_())
grid layout
即,网格布局,其布局效果如下。
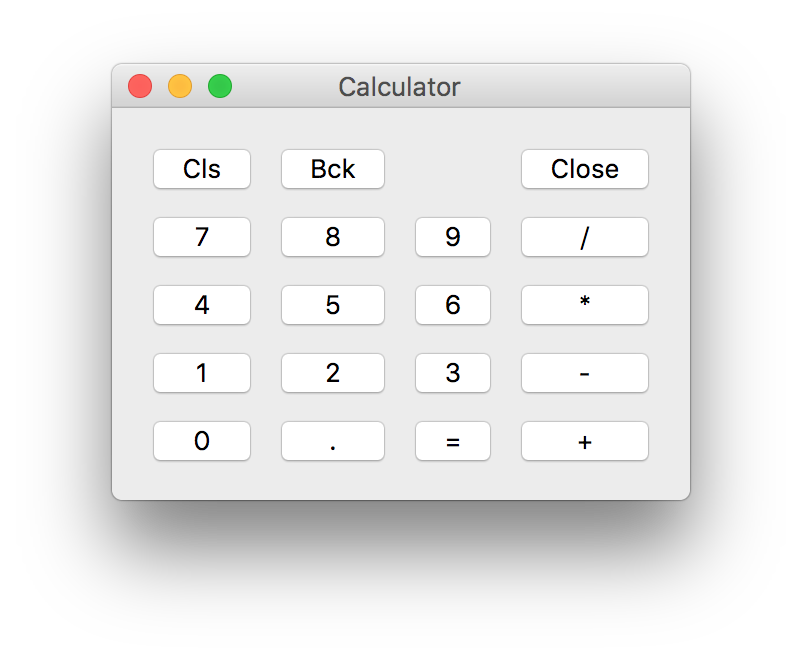
相应代码如下。
import sys
from PyQt5.QtWidgets import (QWidget, QGridLayout,
    QPushButton, QApplication)


class Example(QWidget):

    def __init__(self):
        super().__init__()

        self.initUI()


    def initUI(self):

        grid = QGridLayout()
        self.setLayout(grid)

        names = ['Cls', 'Bck', '', 'Close',
                 '7', '8', '9', '/',
                '4', '5', '6', '*',
                 '1', '2', '3', '-',
                '0', '.', '=', '+']

        positions = [(i,j) for i in range(5) for j in range(4)]

        for position, name in zip(positions, names):

            if name == '':
                continue
            button = QPushButton(name)
            grid.addWidget(button, *position)

        self.move(300, 150)
        self.setWindowTitle('Calculator')
        self.show()

if __name__ == '__main__':

    app = QApplication(sys.argv)
    ex = Example()
    sys.exit(app.exec_())
跨列文本
使用grid layout,文本控件跨列。界面效果哪下。
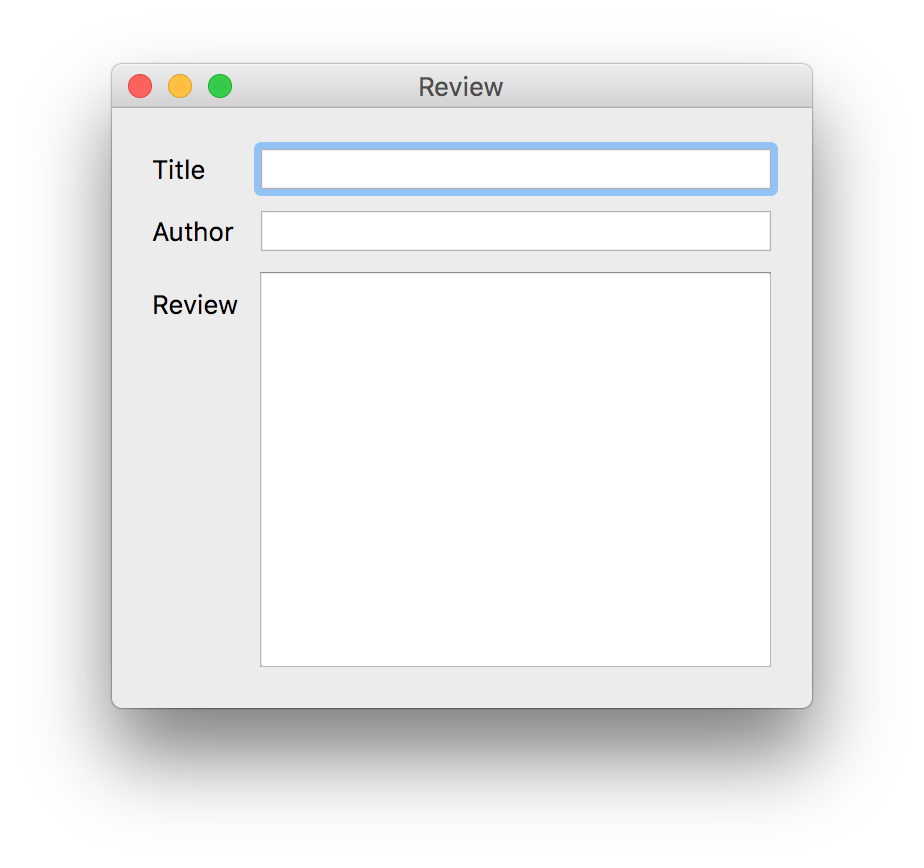
其代码如下。
import sys
from PyQt5.QtWidgets import (QWidget, QLabel, QLineEdit,
    QTextEdit, QGridLayout, QApplication)


class Example(QWidget):

    def __init__(self):
        super().__init__()

        self.initUI()

    def initUI(self):

        title = QLabel('Title')
        author = QLabel('Author')
        review = QLabel('Review')

        titleEdit = QLineEdit()
        authorEdit = QLineEdit()
        reviewEdit = QTextEdit()

        grid = QGridLayout()
        grid.setSpacing(10)

        grid.addWidget(title, 1, 0)
        grid.addWidget(titleEdit, 1, 1)

        grid.addWidget(author, 2, 0)
        grid.addWidget(authorEdit, 2, 1)

        grid.addWidget(review, 3, 0)
        grid.addWidget(reviewEdit, 3, 1, 5, 1)

        self.setLayout(grid)

        self.setGeometry(300, 300, 350, 300)
        self.setWindowTitle('Review')
        self.show()

if __name__ == '__main__':

    app = QApplication(sys.argv)
    ex = Example()
    sys.exit(app.exec_())
Event
代码来源:https://www.cnblogs.com/archisama/p/5454200.html
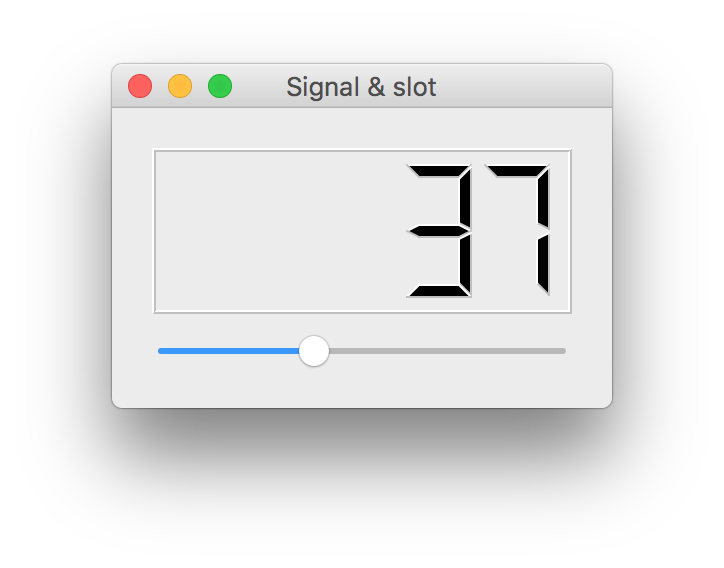
Signal/Slot
即,把滚动条的value change的signal连接到液晶屏幕显示的display的slot上。 界面效果如下。
import sys
from PyQt5.QtCore import Qt
from PyQt5.QtWidgets import (QWidget, QLCDNumber, QSlider,
    QVBoxLayout, QApplication)

class Example(QWidget):

    def __init__(self):
        super().__init__()

        self.initUI()

    def initUI(self):

        lcd = QLCDNumber(self)
        sld = QSlider(Qt.Horizontal, self)

        vbox = QVBoxLayout()
        vbox.addWidget(lcd)
        vbox.addWidget(sld)

        self.setLayout(vbox)
        sld.valueChanged.connect(lcd.display)

        self.setGeometry(300, 300, 250, 150)
        self.setWindowTitle('Signal & slot')
        self.show()

if __name__ == '__main__':

    app = QApplication(sys.argv)
    ex = Example()
    sys.exit(app.exec_())
override handler
即,重写信号的处理。如下代码定义了ESC键按下为关闭窗口,代码验证OK,且界面是一个空的窗体,就不给出截图了。
import sys
from PyQt5.QtCore import Qt
from PyQt5.QtWidgets import QWidget, QApplication


class Example(QWidget):

    def __init__(self):
        super().__init__()

        self.initUI()


    def initUI(self):

        self.setGeometry(300, 300, 250, 150)
        self.setWindowTitle('Event handler')
        self.show()


    def keyPressEvent(self, e):

        if e.key() == Qt.Key_Escape:
            self.close()


if __name__ == '__main__':

    app = QApplication(sys.argv)
    ex = Example()
    sys.exit(app.exec_())
get sender
即,取得signal的sender情报。如下截图展示了状态栏打印出哪个按键被按下。
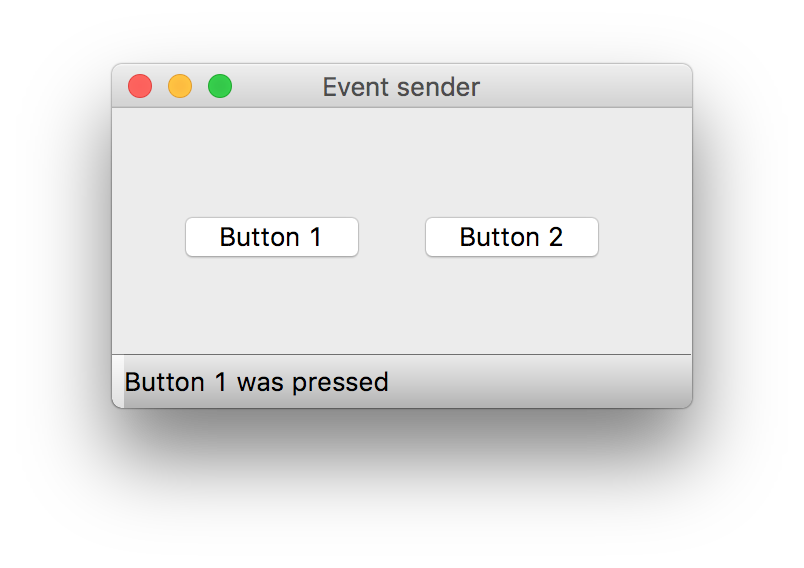
相应代码如下。
import sys
from PyQt5.QtWidgets import QMainWindow, QPushButton, QApplication


class Example(QMainWindow):

    def __init__(self):
        super().__init__()

        self.initUI()

    def initUI(self):

        btn1 = QPushButton("Button 1", self)
        btn1.move(30, 50)

        btn2 = QPushButton("Button 2", self)
        btn2.move(150, 50)

        btn1.clicked.connect(self.buttonClicked)
        btn2.clicked.connect(self.buttonClicked)

        self.statusBar()

        self.setGeometry(300, 300, 290, 150)
        self.setWindowTitle('Event sender')
        self.show()


    def buttonClicked(self):

        sender = self.sender()
        self.statusBar().showMessage(sender.text() + ' was pressed')

if __name__ == '__main__':

    app = QApplication(sys.argv)
    ex = Example()
    sys.exit(app.exec_())
emit signal
即,发信号。如下代码,自定了一个信号并绑定在窗体的close的槽上,鼠标点击事件里trigger这个signal,并关闭窗体。代码验证OK,此例窗口为空,不附截图。
import sys
from PyQt5.QtCore import pyqtSignal, QObject
from PyQt5.QtWidgets import QMainWindow, QApplication


class Communicate(QObject):

    closeApp = pyqtSignal()


class Example(QMainWindow):

    def __init__(self):
        super().__init__()

        self.initUI()


    def initUI(self):

        self.c = Communicate()
        self.c.closeApp.connect(self.close)

        self.setGeometry(300, 300, 290, 150)
        self.setWindowTitle('Emit signal')
        self.show()


    def mousePressEvent(self, event):

        self.c.closeApp.emit()

if __name__ == '__main__':

    app = QApplication(sys.argv)
    ex = Example()
    sys.exit(app.exec_())
Common Dialog
代码来源:https://www.cnblogs.com/archisama/p/5454922.html
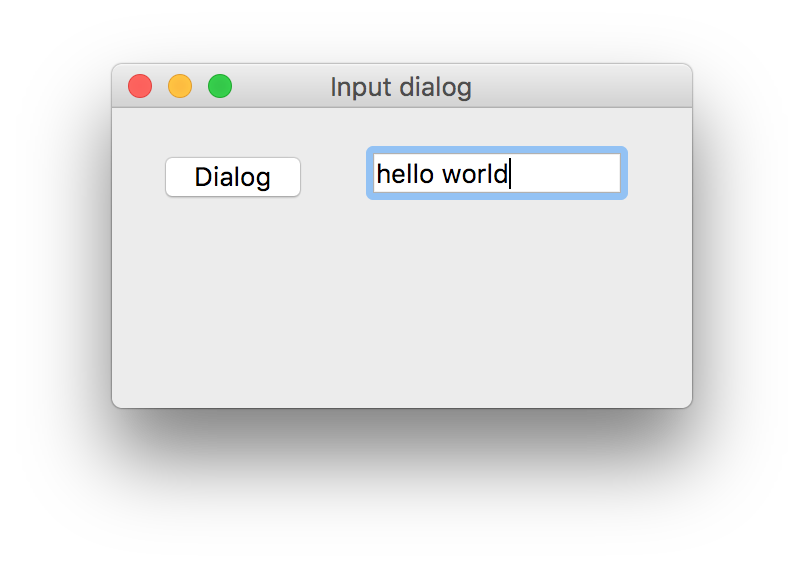
input dialog
一个实用的控件input dialog,即,输入控件。这个控件对话框有一个text edit和两个button,在MSVC好像没有发现这个控件,其效果如下。
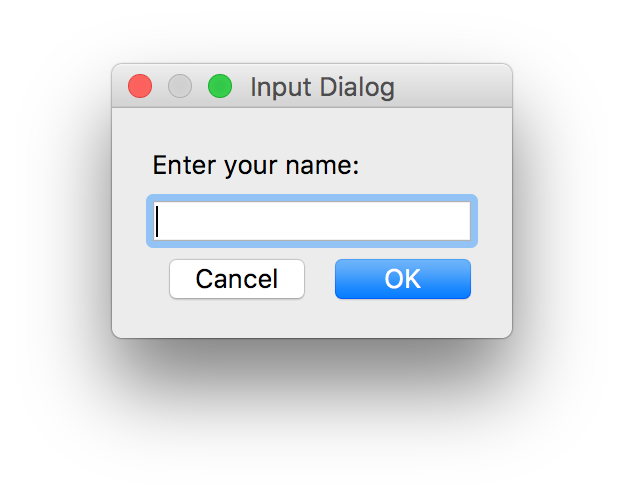
主窗体效果如下,点击dialog按钮会弹出input dialog,输入了your name并OK后会,在text edit中显示出name。
其代码如下 。
import sys
from PyQt5.QtWidgets import (QWidget, QPushButton, QLineEdit,
    QInputDialog, QApplication)

class Example(QWidget):

    def __init__(self):
        super().__init__()

        self.initUI()

    def initUI(self):

        self.btn = QPushButton('Dialog', self)
        self.btn.move(20, 20)
        self.btn.clicked.connect(self.showDialog)

        self.le = QLineEdit(self)
        self.le.move(130, 22)

        self.setGeometry(300, 300, 290, 150)
        self.setWindowTitle('Input dialog')
        self.show()

    def showDialog(self):

        text, ok = QInputDialog.getText(self, 'Input Dialog',
            'Enter your name:')

        if ok:
            self.le.setText(str(text))

if __name__ == '__main__':

    app = QApplication(sys.argv)
    ex = Example()
    sys.exit(app.exec_())
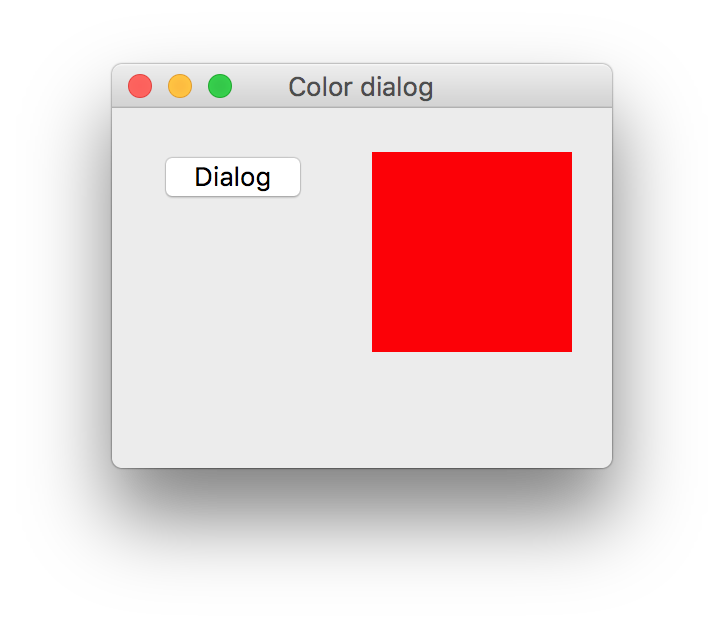
color dialog
见下图,该例中的color dialog可见mac os的color dialog比windows 7里的color dialog要强大。
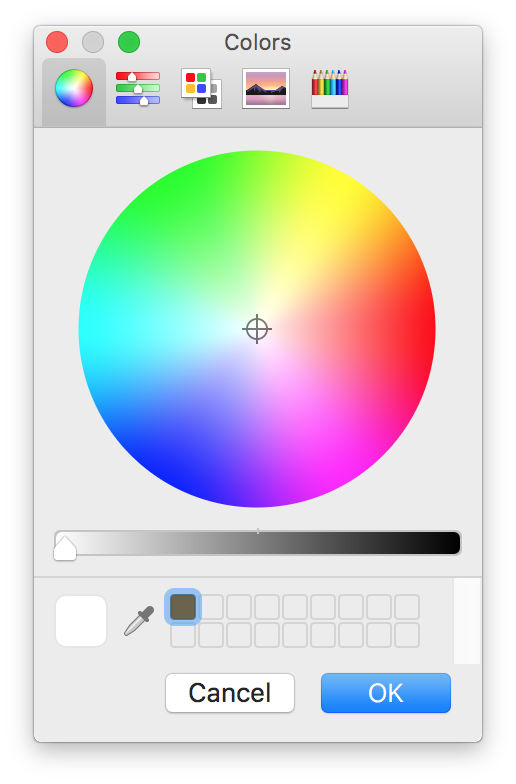
见下图,是程序的主窗体,上图的color dialog选出的color会显示在正方形里。
颜色dialog的代码如下。
import sys
from PyQt5.QtWidgets import (QWidget, QPushButton, QFrame,
    QColorDialog, QApplication)
from PyQt5.QtGui import QColor

class Example(QWidget):

    def __init__(self):
        super().__init__()

        self.initUI()

    def initUI(self):

        col = QColor(0, 0, 0)

        self.btn = QPushButton('Dialog', self)
        self.btn.move(20, 20)

        self.btn.clicked.connect(self.showDialog)

        self.frm = QFrame(self)
        self.frm.setStyleSheet("QWidget { background-color: %s }"
            % col.name())
        self.frm.setGeometry(130, 22, 100, 100)

        self.setGeometry(300, 300, 250, 180)
        self.setWindowTitle('Color dialog')
        self.show()

    def showDialog(self):

        col = QColorDialog.getColor()

        if col.isValid():
            self.frm.setStyleSheet("QWidget { background-color: %s }"
                % col.name())

if __name__ == '__main__':

    app = QApplication(sys.argv)
    ex = Example()
    sys.exit(app.exec_())
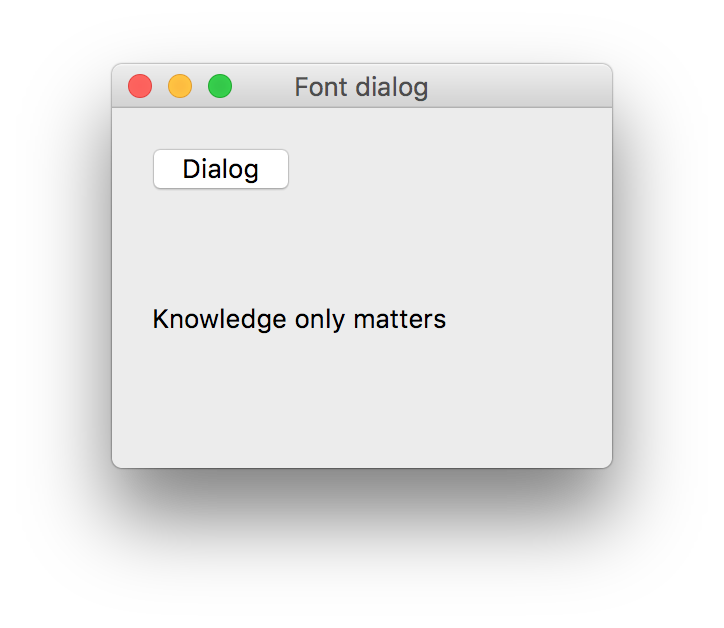
font dialog
字体对话框效果如下。
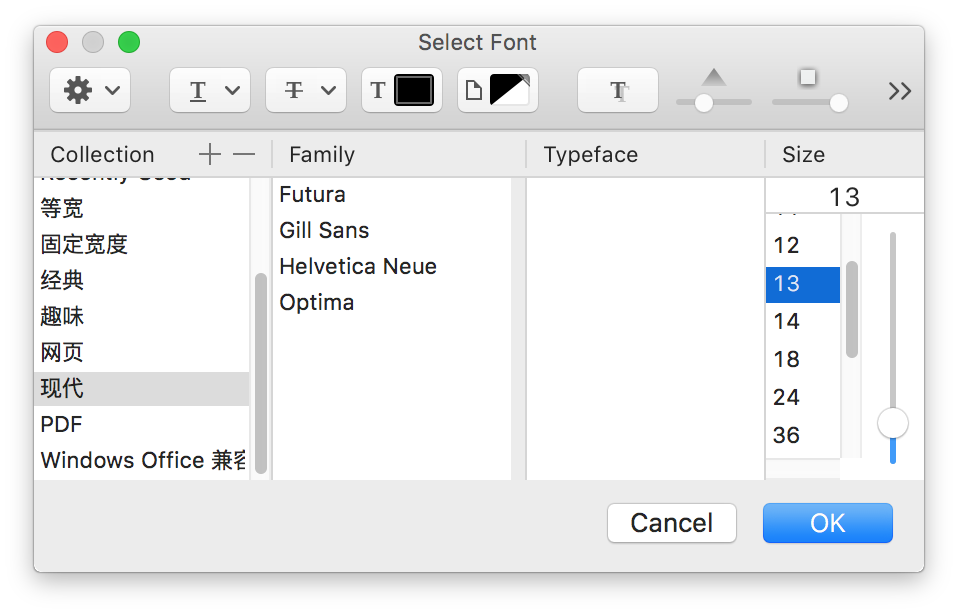
如下图,点击dialog button会弹出font dialog对话框。并把选择的font设定到Knowledge的label上,但是label并没有发生改变,这可能是mac os系统的问题。
对应代码如下。
import sys
from PyQt5.QtWidgets import (QWidget, QVBoxLayout, QPushButton,
    QSizePolicy, QLabel, QFontDialog, QApplication)


class Example(QWidget):

    def __init__(self):
        super().__init__()

        self.initUI()

    def initUI(self):

        vbox = QVBoxLayout()

        btn = QPushButton('Dialog', self)
        btn.setSizePolicy(QSizePolicy.Fixed,
            QSizePolicy.Fixed)

        btn.move(20, 20)

        vbox.addWidget(btn)

        btn.clicked.connect(self.showDialog)

        self.lbl = QLabel('Knowledge only matters', self)
        self.lbl.move(130, 20)

        vbox.addWidget(self.lbl)
        self.setLayout(vbox)

        self.setGeometry(300, 300, 250, 180)
        self.setWindowTitle('Font dialog')
        self.show()

    def showDialog(self):

        font, ok = QFontDialog.getFont()
        if ok:
            self.lbl.setFont(font)

if __name__ == '__main__':

    app = QApplication(sys.argv)
    ex = Example()
    sys.exit(app.exec_())
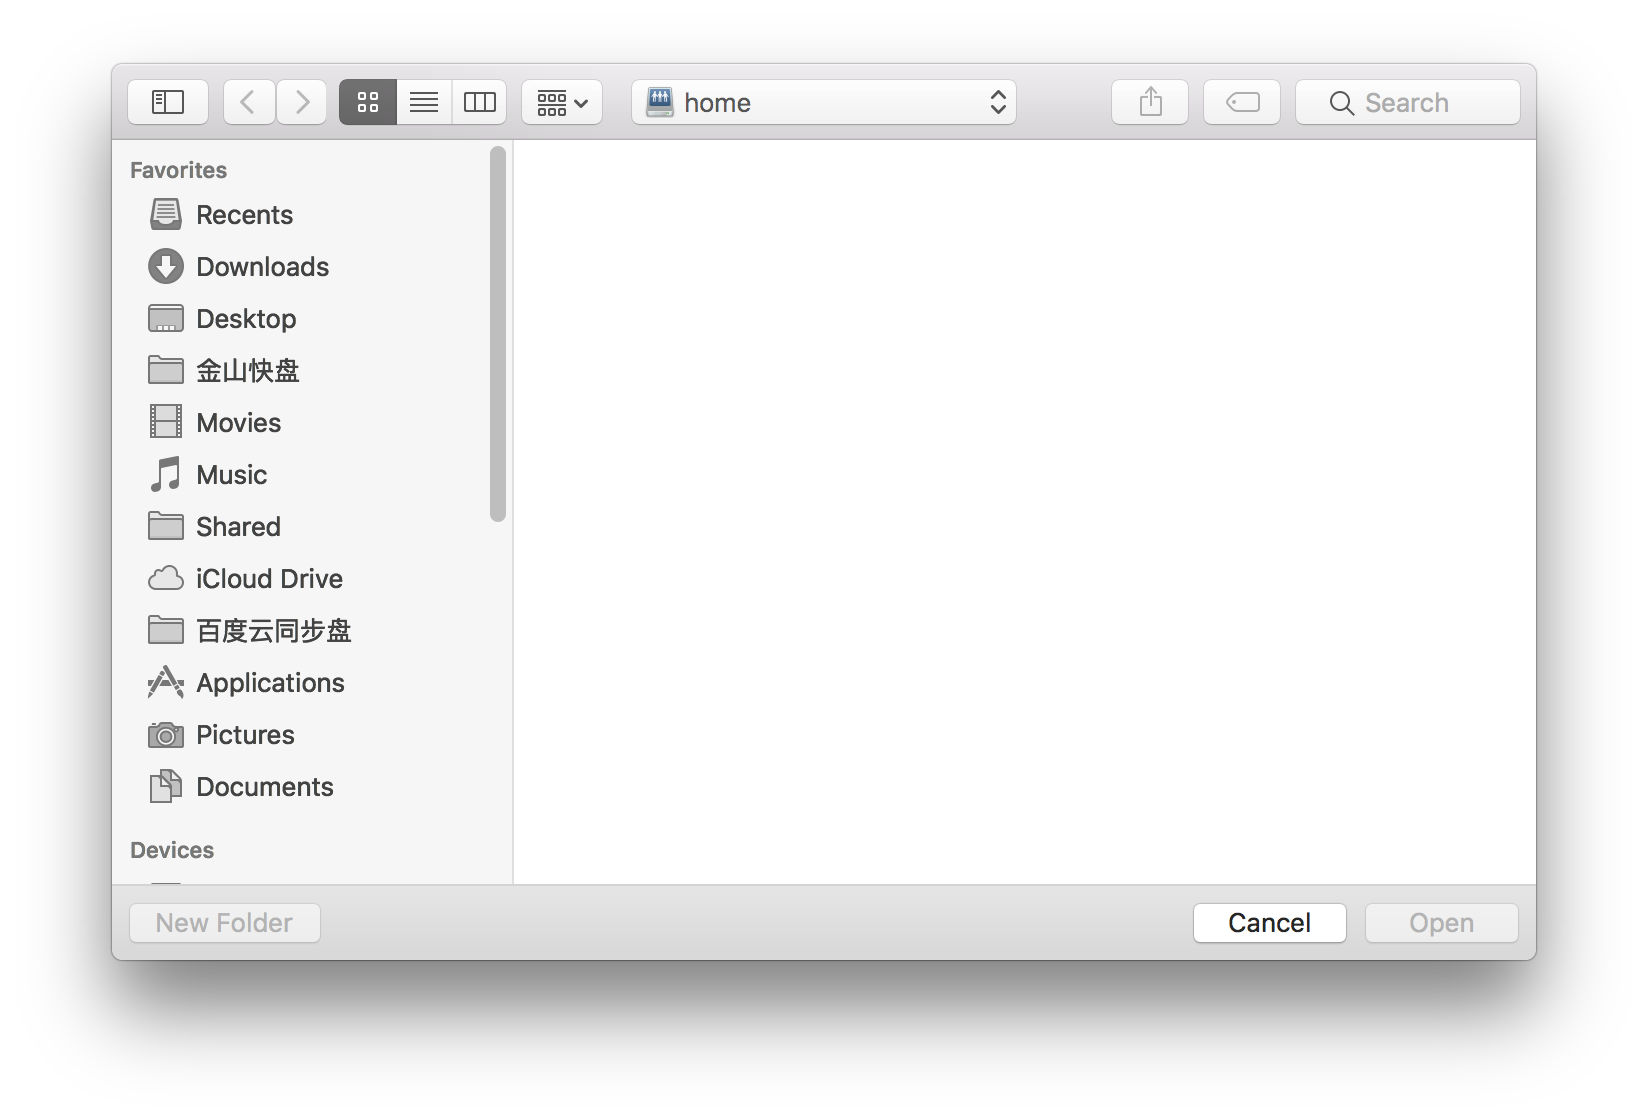
file dialog
如下图mac os的dialog界面如下。
打开file dialog的菜单项如下。

选择一个文本文档,会显示在主界面的text area上,效果如下。
相应代码如下。
import sys
from PyQt5.QtWidgets import (QMainWindow, QTextEdit,
    QAction, QFileDialog, QApplication)
from PyQt5.QtGui import QIcon

class Example(QMainWindow):

    def __init__(self):
        super().__init__()

        self.initUI()


    def initUI(self):

        self.textEdit = QTextEdit()
        self.setCentralWidget(self.textEdit)
        self.statusBar()

        openFile = QAction(QIcon('open.png'), 'Open', self)
        openFile.setShortcut('Ctrl+O')
        openFile.setStatusTip('Open new File')
        openFile.triggered.connect(self.showDialog)

        menubar = self.menuBar()
        fileMenu = menubar.addMenu('&File')
        fileMenu.addAction(openFile)

        self.setGeometry(300, 300, 350, 300)
        self.setWindowTitle('File dialog')
        self.show()

    def showDialog(self):

        fname = QFileDialog.getOpenFileName(self, 'Open file', '/home')

        if fname[0]:
            f = open(fname[0], 'r')

            with f:
                data = f.read()
                self.textEdit.setText(data)

if __name__ == '__main__':

    app = QApplication(sys.argv)
    ex = Example()
    sys.exit(app.exec_())
Control Component
代码来源:https://www.cnblogs.com/archisama/p/5465104.html
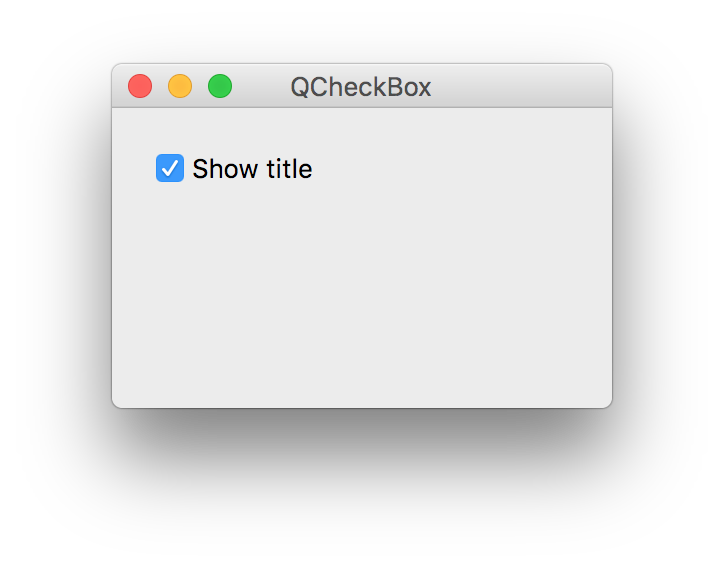
check box
Mac OS的check box效果如下。
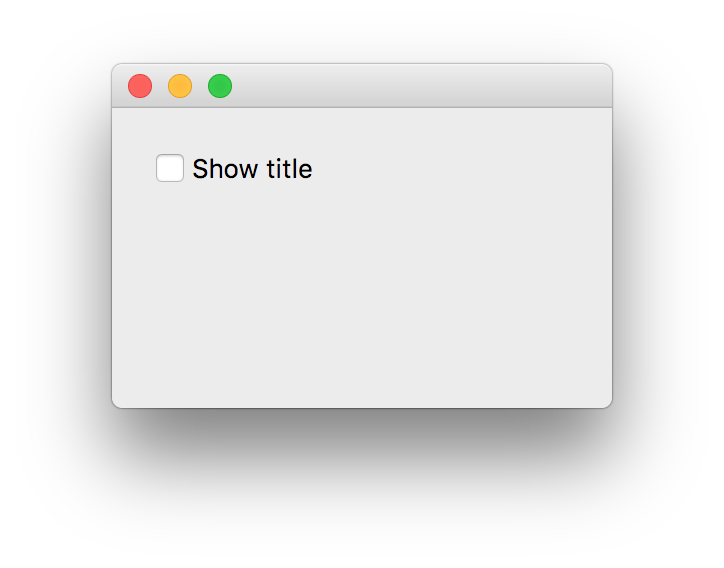
勾选check box会在主窗体的title上显示QCheckBox的字样。
其代码如下:
import sys
from PyQt5.QtWidgets import QWidget, QCheckBox, QApplication
from PyQt5.QtCore import Qt

class Example(QWidget):

    def __init__(self):
        super().__init__()

        self.initUI()

    def initUI(self):

        cb = QCheckBox('Show title', self)
        cb.move(20, 20)
        cb.toggle()
        cb.stateChanged.connect(self.changeTitle)

        self.setGeometry(300, 300, 250, 150)
        self.setWindowTitle('QCheckBox')
        self.show()


    def changeTitle(self, state):

        if state == Qt.Checked:
            self.setWindowTitle('QCheckBox')
        else:
            self.setWindowTitle('')

if __name__ == '__main__':

    app = QApplication(sys.argv)
    ex = Example()
    sys.exit(app.exec_())
toggle button
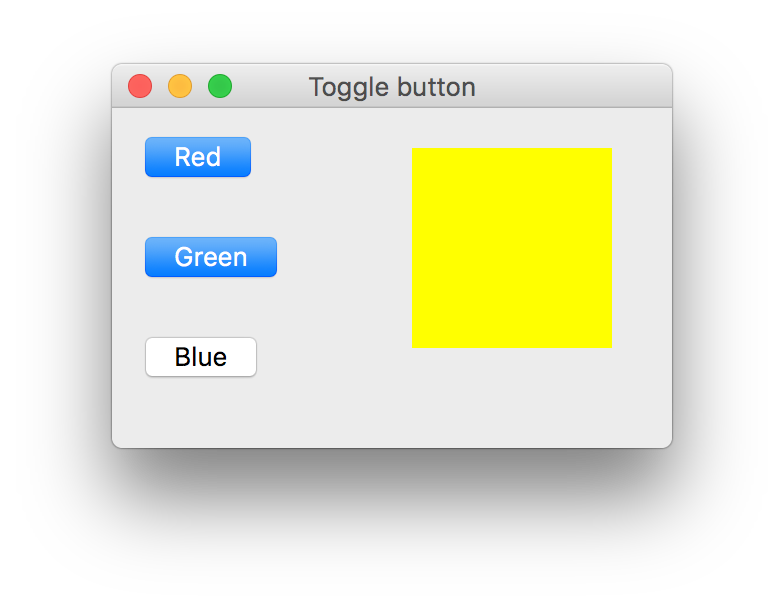
这是一种二态的button,要么压下,要么抬起。正方形内的颜色由RGB三个button的颜色组合而成,需要手动刷新正方形内的颜色,例如:最小化再恢复。界面效果如下图。
相应代码如下。
import sys
from PyQt5.QtWidgets import (QWidget, QPushButton,
    QFrame, QApplication)
from PyQt5.QtGui import QColor


class Example(QWidget):

    def __init__(self):
        super().__init__()

        self.initUI()


    def initUI(self):

        self.col = QColor(0, 0, 0)

        redb = QPushButton('Red', self)
        redb.setCheckable(True)
        redb.move(10, 10)

        redb.clicked[bool].connect(self.setColor)

        redb = QPushButton('Green', self)
        redb.setCheckable(True)
        redb.move(10, 60)

        redb.clicked[bool].connect(self.setColor)

        blueb = QPushButton('Blue', self)
        blueb.setCheckable(True)
        blueb.move(10, 110)

        blueb.clicked[bool].connect(self.setColor)

        self.square = QFrame(self)
        self.square.setGeometry(150, 20, 100, 100)
        self.square.setStyleSheet("QWidget { background-color: %s }" %
            self.col.name())

        self.setGeometry(300, 300, 280, 170)
        self.setWindowTitle('Toggle button')
        self.show()


    def setColor(self, pressed):

        source = self.sender()

        if pressed:
            val = 255
        else: val = 0

        if source.text() == "Red":
            self.col.setRed(val)
        elif source.text() == "Green":
            self.col.setGreen(val)
        else:
            self.col.setBlue(val)

        self.square.setStyleSheet("QFrame { background-color: %s }" %
            self.col.name())


if __name__ == '__main__':

    app = QApplication(sys.argv)
    ex = Example()
    sys.exit(app.exec_())
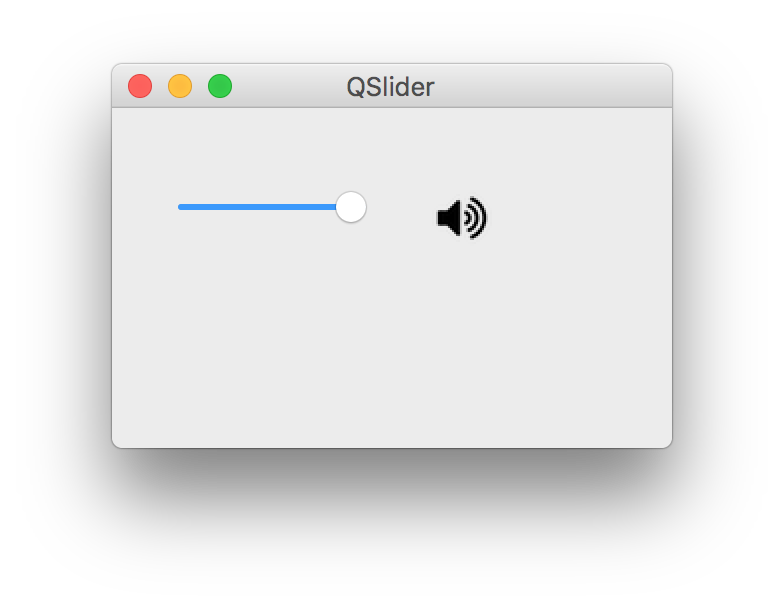
slider
即,滑块条控件。如下图,移动滑块可调节量。最大音量效果如下图。
小音量效果如下图。
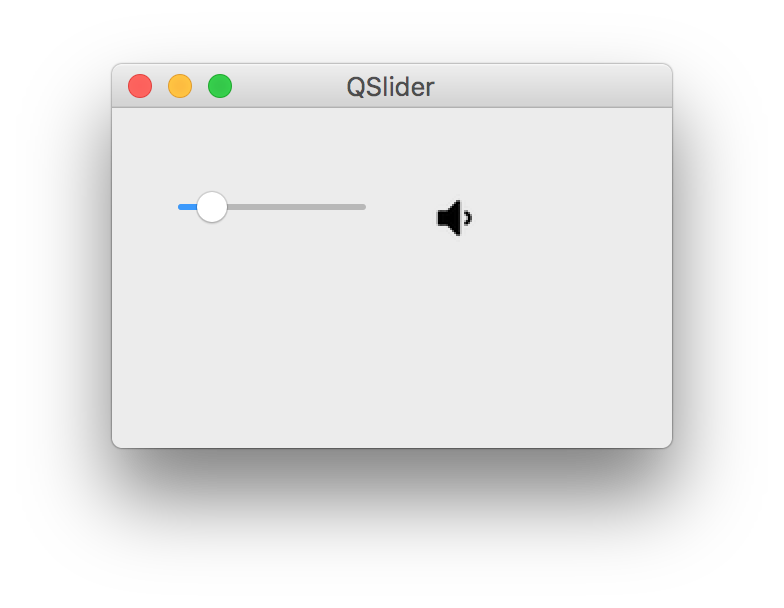
相应代码如下。
import sys
from PyQt5.QtWidgets import (QWidget, QSlider,
    QLabel, QApplication)
from PyQt5.QtCore import Qt
from PyQt5.QtGui import QPixmap


class Example(QWidget):

    def __init__(self):
        super().__init__()

        self.initUI()


    def initUI(self):

        sld = QSlider(Qt.Horizontal, self)
        sld.setFocusPolicy(Qt.NoFocus)
        sld.setGeometry(30, 40, 100, 30)
        sld.valueChanged[int].connect(self.changeValue)

        self.label = QLabel(self)
        self.label.setPixmap(QPixmap('/Users/alanking/Desktop/pyqt5ex/mute.png'))
        self.label.setGeometry(160, 40, 80, 30)

        self.setGeometry(300, 300, 280, 170)
        self.setWindowTitle('QSlider')
        self.show()


    def changeValue(self, value):

        if value == 0:
            self.label.setPixmap(QPixmap('/Users/alanking/Desktop/pyqt5ex/mute.png'))
        elif value > 0 and value <= 30:
            self.label.setPixmap(QPixmap('/Users/alanking/Desktop/pyqt5ex/minvol.png'))
        elif value > 30 and value < 80:
            self.label.setPixmap(QPixmap('/Users/alanking/Desktop/pyqt5ex/medvol.png'))
        else:
            self.label.setPixmap(QPixmap('/Users/alanking/Desktop/pyqt5ex/maxvol.png'))


if __name__ == '__main__':

    app = QApplication(sys.argv)
    ex = Example()
    sys.exit(app.exec_())
progress bar & timer
即,进度条。如下图,起了一个timer推进progress bar从0到100%。
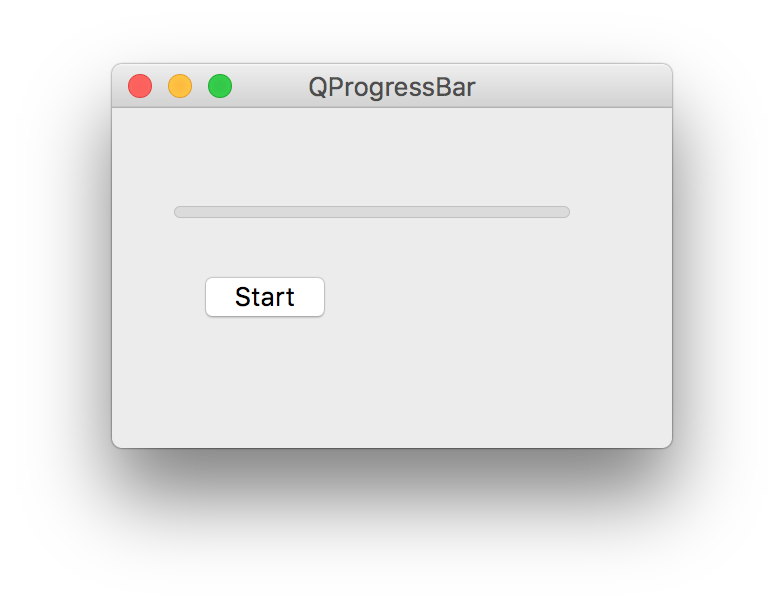
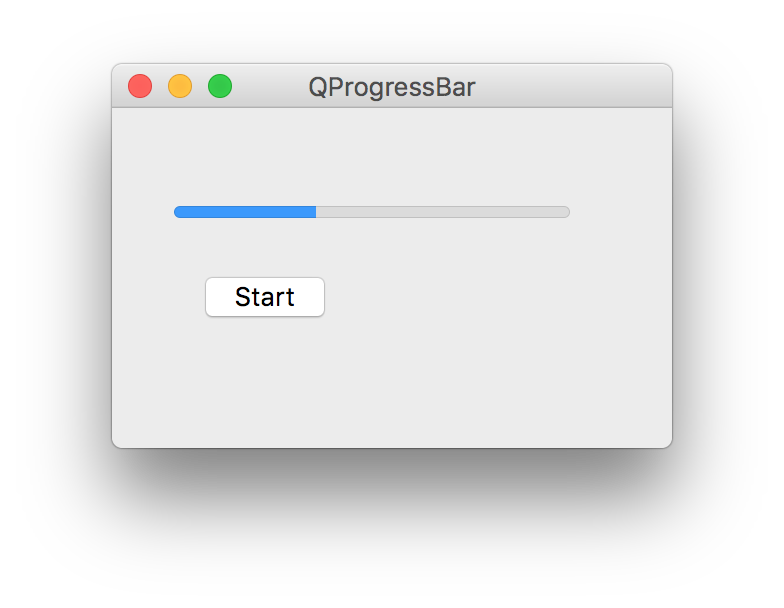
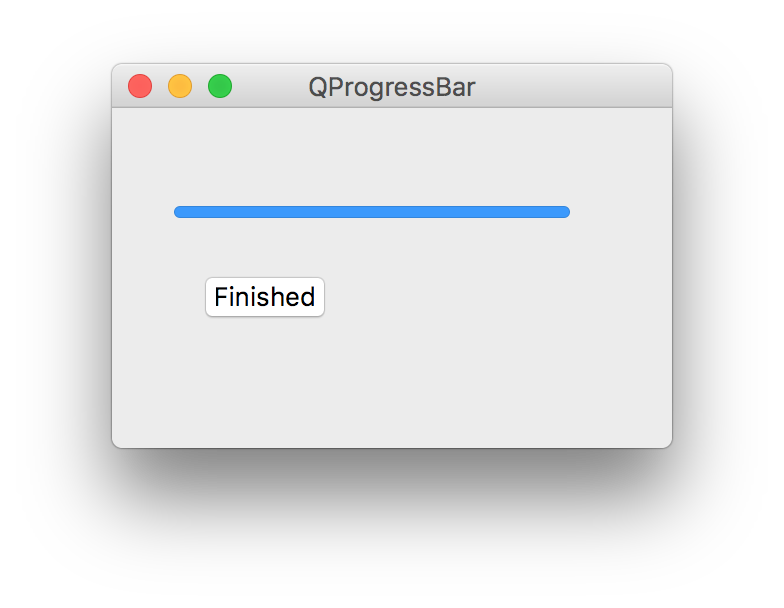
其代码如下。
import sys
from PyQt5.QtWidgets import (QWidget, QProgressBar,
    QPushButton, QApplication)
from PyQt5.QtCore import QBasicTimer


class Example(QWidget):

    def __init__(self):
        super().__init__()

        self.initUI()


    def initUI(self):

        self.pbar = QProgressBar(self)
        self.pbar.setGeometry(30, 40, 200, 25)

        self.btn = QPushButton('Start', self)
        self.btn.move(40, 80)
        self.btn.clicked.connect(self.doAction)

        self.timer = QBasicTimer()
        self.step = 0

        self.setGeometry(300, 300, 280, 170)
        self.setWindowTitle('QProgressBar')
        self.show()


    def timerEvent(self, e):

        if self.step >= 100:
            self.timer.stop()
            self.btn.setText('Finished')
            return

        self.step = self.step + 1
        self.pbar.setValue(self.step)


    def doAction(self):

        if self.timer.isActive():
            self.timer.stop()
            self.btn.setText('Start')
        else:
            self.timer.start(100, self)
            self.btn.setText('Stop')


if __name__ == '__main__':

    app = QApplication(sys.argv)
    ex = Example()
    sys.exit(app.exec_())
calender
日历控件如下,选择日期会更新窗体下部的日期文字。
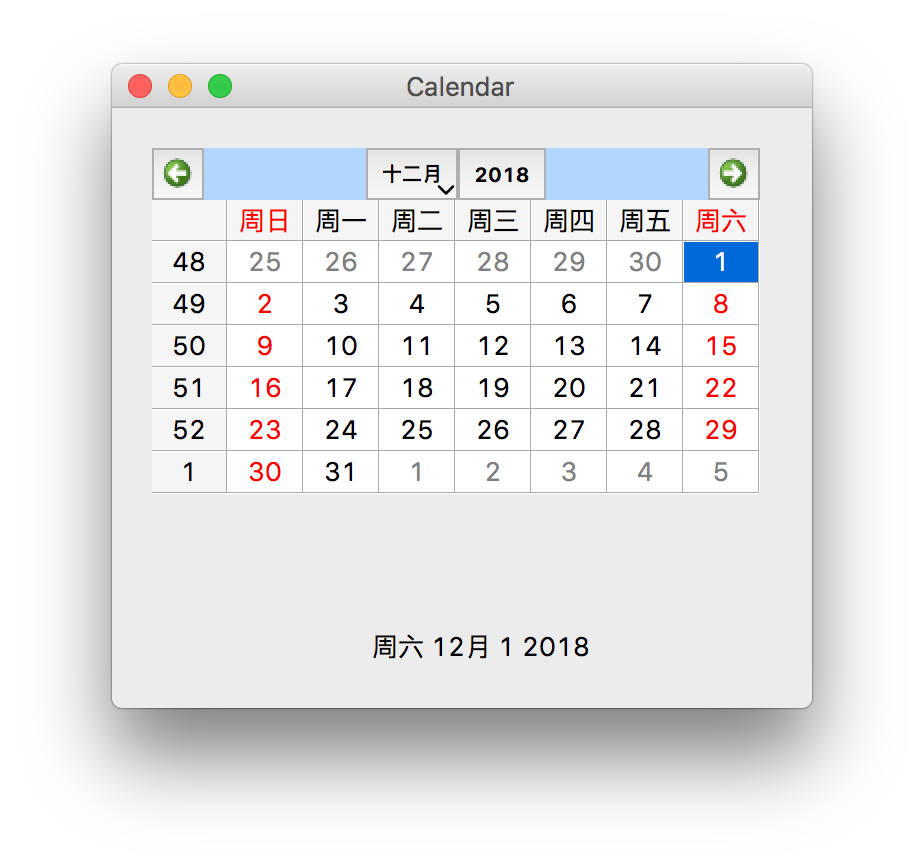
其代码如下。
import sys
from PyQt5.QtWidgets import (QWidget, QCalendarWidget,
    QLabel, QApplication)
from PyQt5.QtCore import QDate


class Example(QWidget):

    def __init__(self):
        super().__init__()

        self.initUI()


    def initUI(self):

        cal = QCalendarWidget(self)
        cal.setGridVisible(True)
        cal.move(20, 20)
        cal.clicked[QDate].connect(self.showDate)

        self.lbl = QLabel(self)
        date = cal.selectedDate()
        self.lbl.setText(date.toString())
        self.lbl.move(130, 260)

        self.setGeometry(300, 300, 350, 300)
        self.setWindowTitle('Calendar')
        self.show()


    def showDate(self, date):

        self.lbl.setText(date.toString())


if __name__ == '__main__':

    app = QApplication(sys.argv)
    ex = Example()
    sys.exit(app.exec_())
Control Component II
代码来源:https://www.cnblogs.com/archisama/p/5503526.html
pixmap
简单的使用文件,效果如下。
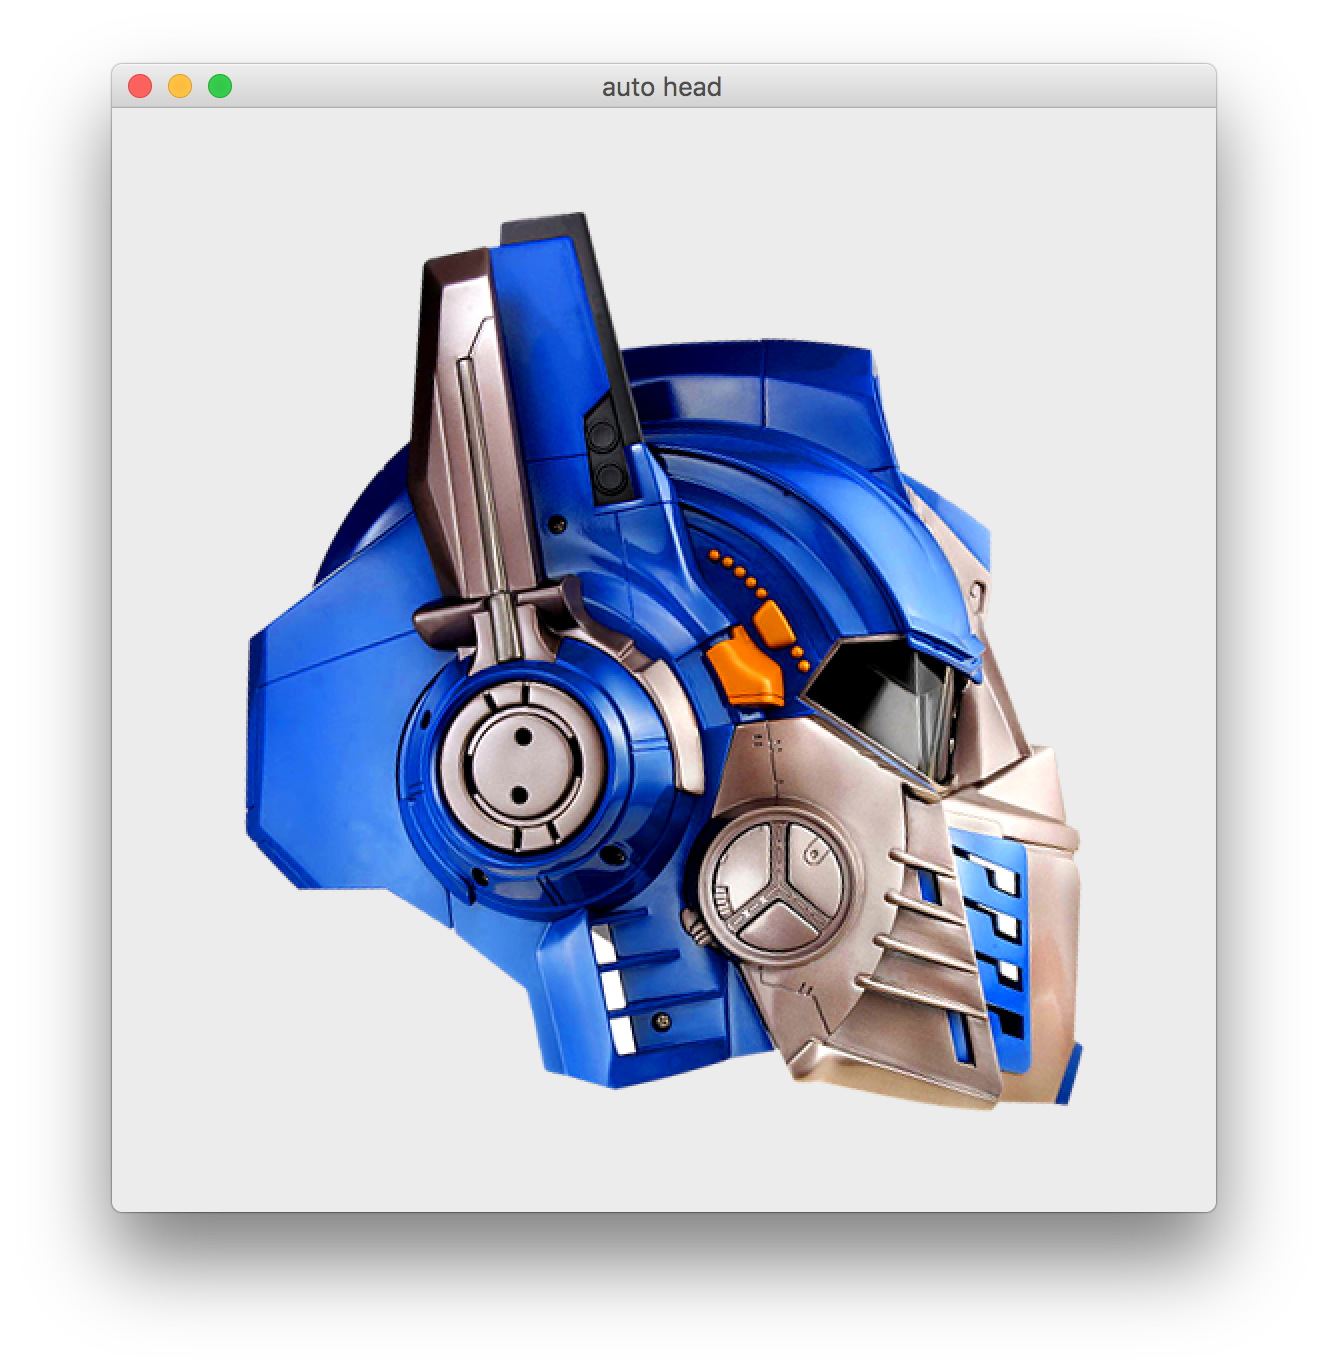
代码如下。
import sys
from PyQt5.QtWidgets import (QWidget, QHBoxLayout,
    QLabel, QApplication)
from PyQt5.QtGui import QPixmap


class Example(QWidget):

    def __init__(self):
        super().__init__()

        self.initUI()


    def initUI(self):

        hbox = QHBoxLayout(self)
        pixmap = QPixmap("https://s1.ax1x.com/2018/12/04/FQ4tnx.png")

        lbl = QLabel(self)
        lbl.setPixmap(pixmap)

        hbox.addWidget(lbl)
        self.setLayout(hbox)

        self.move(300, 200)
        self.setWindowTitle('auto head')
        self.show()


if __name__ == '__main__':

    app = QApplication(sys.argv)
    ex = Example()
    sys.exit(app.exec_())
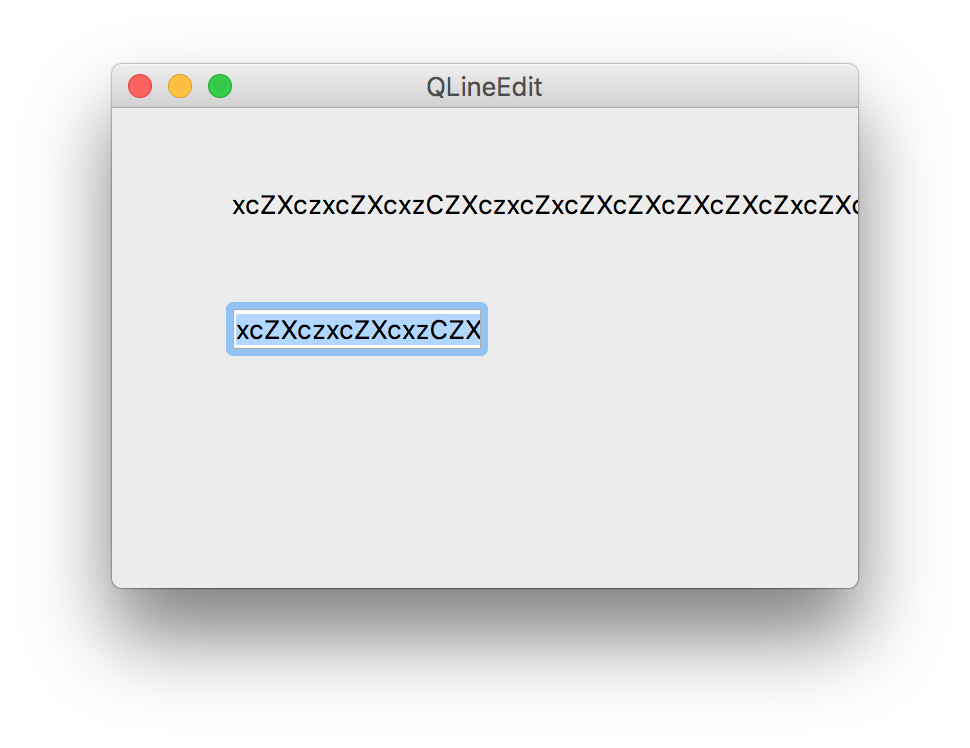
line edit
即,行文本编译控件。效果如下。
代码如下。
import sys
from PyQt5.QtWidgets import (QWidget, QLabel,
    QLineEdit, QApplication)


class Example(QWidget):

    def __init__(self):
        super().__init__()

        self.initUI()


    def initUI(self):

        self.lbl = QLabel(self)
        qle = QLineEdit(self)

        qle.move(60, 100)
        self.lbl.move(60, 40)

        qle.textChanged[str].connect(self.onChanged)

        self.setGeometry(300, 300, 280, 170)
        self.setWindowTitle('QLineEdit')
        self.show()


    def onChanged(self, text):

        self.lbl.setText(text)
        self.lbl.adjustSize()


if __name__ == '__main__':

    app = QApplication(sys.argv)
    ex = Example()
    sys.exit(app.exec_())
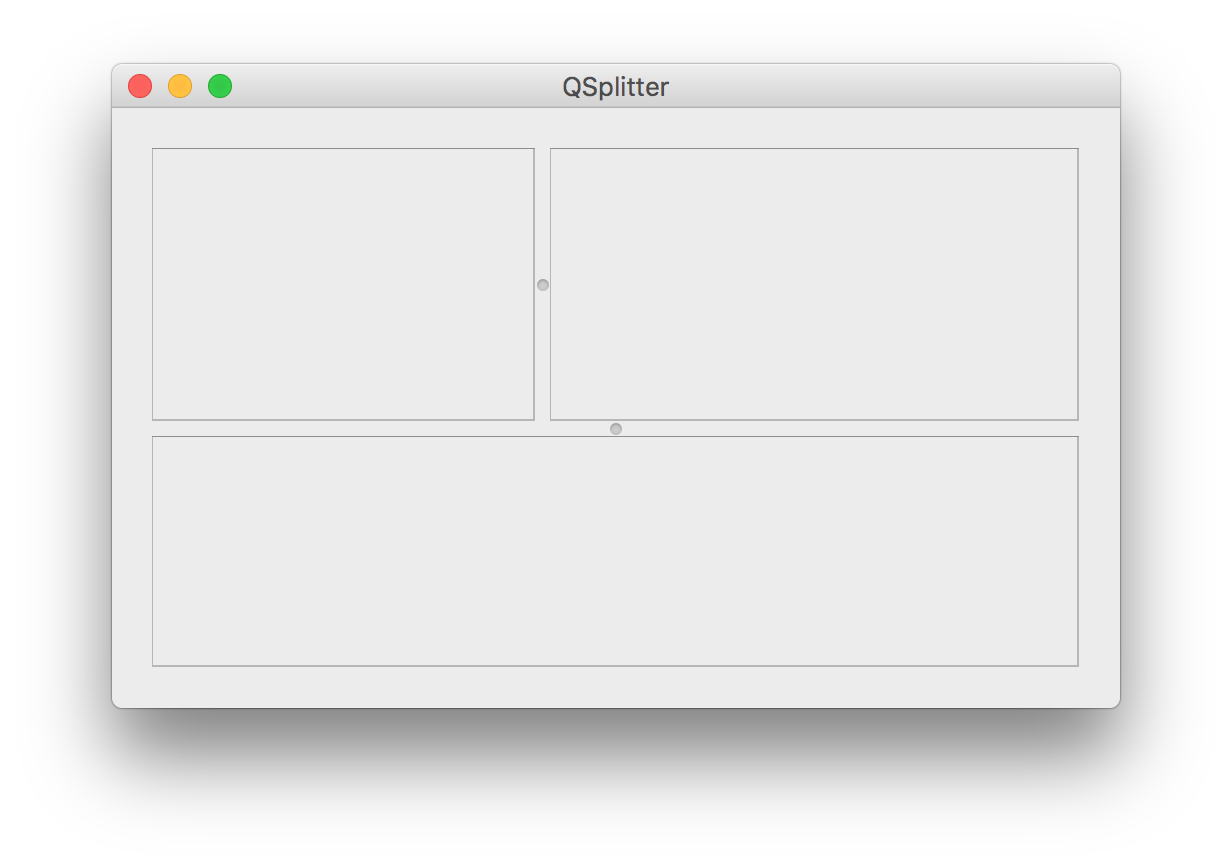
splitter
即,分割条,这个对于chatting界面的设计有参考价值。
其代码如下。
import sys
from PyQt5.QtWidgets import (QWidget, QHBoxLayout, QFrame,
    QSplitter, QStyleFactory, QApplication)
from PyQt5.QtCore import Qt


class Example(QWidget):

    def __init__(self):
        super().__init__()

        self.initUI()


    def initUI(self):

        hbox = QHBoxLayout(self)

        topleft = QFrame(self)
        topleft.setFrameShape(QFrame.StyledPanel)

        topright = QFrame(self)
        topright.setFrameShape(QFrame.StyledPanel)

        bottom = QFrame(self)
        bottom.setFrameShape(QFrame.StyledPanel)

        splitter1 = QSplitter(Qt.Horizontal)
        splitter1.addWidget(topleft)
        splitter1.addWidget(topright)

        splitter2 = QSplitter(Qt.Vertical)
        splitter2.addWidget(splitter1)
        splitter2.addWidget(bottom)

        hbox.addWidget(splitter2)
        self.setLayout(hbox)

        self.setGeometry(300, 300, 300, 200)
        self.setWindowTitle('QSplitter')
        self.show()


    def onChanged(self, text):

        self.lbl.setText(text)
        self.lbl.adjustSize()


if __name__ == '__main__':

    app = QApplication(sys.argv)
    ex = Example()
    sys.exit(app.exec_())
combine box
即,复合列表框,效果如下。
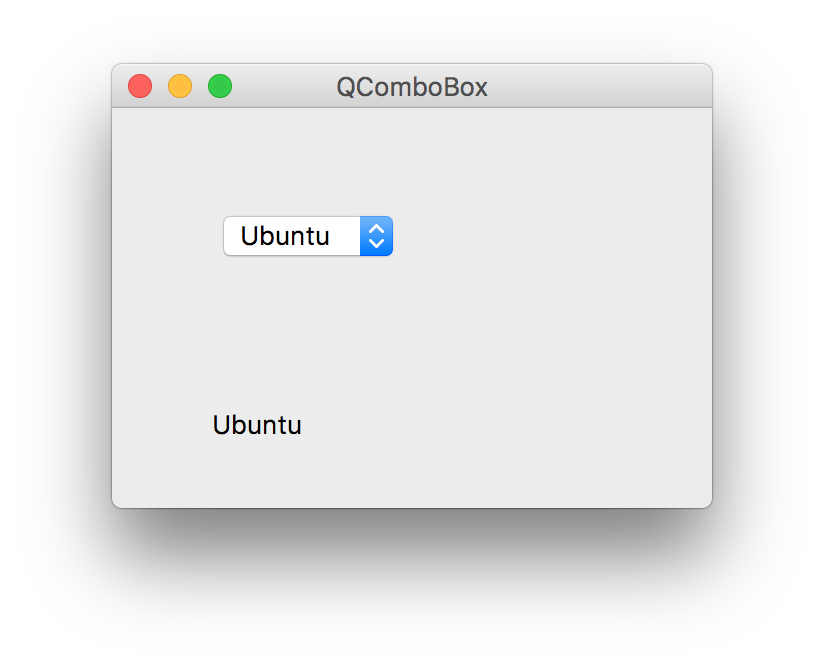
其代码如下。
import sys
from PyQt5.QtWidgets import (QWidget, QLabel,
    QComboBox, QApplication)


class Example(QWidget):

    def __init__(self):
        super().__init__()

        self.initUI()


    def initUI(self):

        self.lbl = QLabel("Ubuntu", self)

        combo = QComboBox(self)
        combo.addItem("Ubuntu")
        combo.addItem("Mandriva")
        combo.addItem("Fedora")
        combo.addItem("Arch")
        combo.addItem("Gentoo")

        combo.move(50, 50)
        self.lbl.move(50, 150)

        combo.activated[str].connect(self.onActivated)

        self.setGeometry(300, 300, 300, 200)
        self.setWindowTitle('QComboBox')
        self.show()


    def onActivated(self, text):

        self.lbl.setText(text)
        self.lbl.adjustSize()


if __name__ == '__main__':

    app = QApplication(sys.argv)
    ex = Example()
    sys.exit(app.exec_())
Extra Zetcode
Drag and Drop
代码来源:http://zetcode.com/gui/pyqt5/dragdrop/
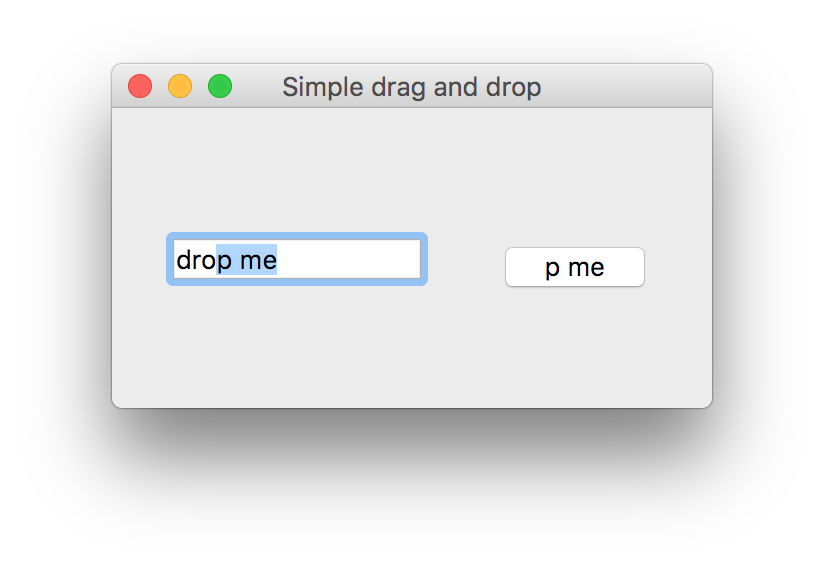
simple drag/drop
下图所示,拖拽line edit里的text到button上,button上的标签会变成drop的text。
代码如下。
from PyQt5.QtWidgets import (QPushButton, QWidget,
    QLineEdit, QApplication)
import sys

class Button(QPushButton):

    def __init__(self, title, parent):
        super().__init__(title, parent)

        self.setAcceptDrops(True)


    def dragEnterEvent(self, e):

        if e.mimeData().hasFormat('text/plain'):
            e.accept()
        else:
            e.ignore()

    def dropEvent(self, e):

        self.setText(e.mimeData().text())


class Example(QWidget):

    def __init__(self):
        super().__init__()

        self.initUI()


    def initUI(self):

        edit = QLineEdit('', self)
        edit.setDragEnabled(True)
        edit.move(30, 65)

        button = Button("Button", self)
        button.move(190, 65)

        self.setWindowTitle('Simple drag and drop')
        self.setGeometry(300, 300, 300, 150)


if __name__ == '__main__':

    app = QApplication(sys.argv)
    ex = Example()
    ex.show()
    app.exec_()
drag/drop button
如下代码,演示了鼠标右键可拖拽主窗体上唯一的button,改变button的位置。不截图了,只有一个主窗体和一个button。
from PyQt5.QtWidgets import QPushButton, QWidget, QApplication
from PyQt5.QtCore import Qt, QMimeData
from PyQt5.QtGui import QDrag
import sys

class Button(QPushButton):

    def __init__(self, title, parent):
        super().__init__(title, parent)


    def mouseMoveEvent(self, e):

        if e.buttons() != Qt.RightButton:
            return

        mimeData = QMimeData()

        drag = QDrag(self)
        drag.setMimeData(mimeData)
        drag.setHotSpot(e.pos() - self.rect().topLeft())

        dropAction = drag.exec_(Qt.MoveAction)


    def mousePressEvent(self, e):

        super().mousePressEvent(e)

        if e.button() == Qt.LeftButton:
            print('press')


class Example(QWidget):

    def __init__(self):
        super().__init__()

        self.initUI()


    def initUI(self):

        self.setAcceptDrops(True)

        self.button = Button('Button', self)
        self.button.move(100, 65)

        self.setWindowTitle('Click or Move')
        self.setGeometry(300, 300, 280, 150)


    def dragEnterEvent(self, e):

        e.accept()


    def dropEvent(self, e):

        position = e.pos()
        self.button.move(position)

        e.setDropAction(Qt.MoveAction)
        e.accept()


if __name__ == '__main__':

    app = QApplication(sys.argv)
    ex = Example()
    ex.show()
    app.exec_()
Painting
代码来源:http://zetcode.com/gui/pyqt5/painting/
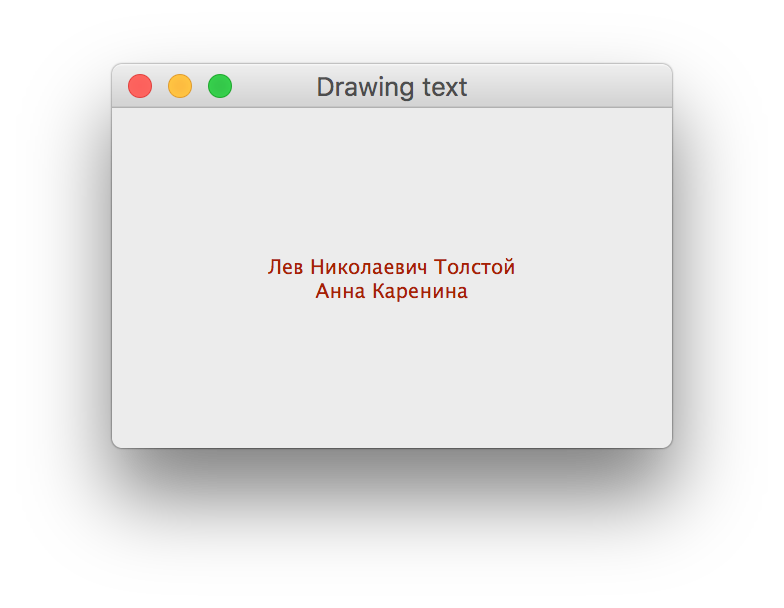
draw text
即,在界面上绘制文本。
代码如下。
import sys
from PyQt5.QtWidgets import QWidget, QApplication
from PyQt5.QtGui import QPainter, QColor, QFont
from PyQt5.QtCore import Qt

class Example(QWidget):

    def __init__(self):
        super().__init__()

        self.initUI()


    def initUI(self):

        self.text = "Лев Николаевич Толстой\nАнна Каренина"

        self.setGeometry(300, 300, 280, 170)
        self.setWindowTitle('Drawing text')
        self.show()


    def paintEvent(self, event):

        qp = QPainter()
        qp.begin(self)
        self.drawText(event, qp)
        qp.end()


    def drawText(self, event, qp):

        qp.setPen(QColor(168, 34, 3))
        qp.setFont(QFont('Decorative', 10))
        qp.drawText(event.rect(), Qt.AlignCenter, self.text)


if __name__ == '__main__':

    app = QApplication(sys.argv)
    ex = Example()
    sys.exit(app.exec_())
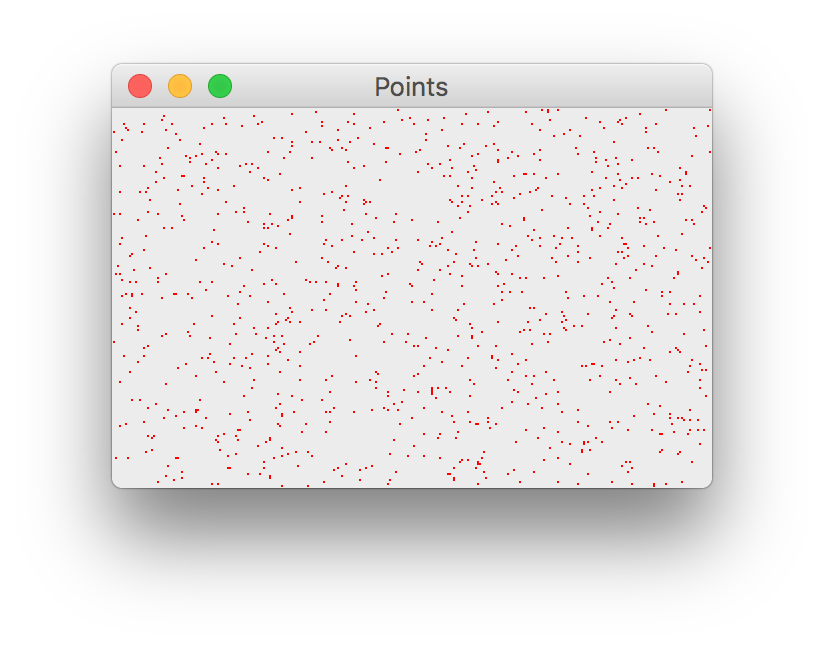
draw points
即,在界面上绘制点。效果如下图。
代码如下。
from PyQt5.QtWidgets import QWidget, QApplication
from PyQt5.QtGui import QPainter
from PyQt5.QtCore import Qt
import sys, random

class Example(QWidget):

    def __init__(self):
        super().__init__()

        self.initUI()


    def initUI(self):

        self.setGeometry(300, 300, 300, 190)
        self.setWindowTitle('Points')
        self.show()


    def paintEvent(self, e):

        qp = QPainter()
        qp.begin(self)
        self.drawPoints(qp)
        qp.end()


    def drawPoints(self, qp):

        qp.setPen(Qt.red)
        size = self.size()

        for i in range(1000):
            x = random.randint(1, size.width()-1)
            y = random.randint(1, size.height()-1)
            qp.drawPoint(x, y)


if __name__ == '__main__':

    app = QApplication(sys.argv)
    ex = Example()
    sys.exit(app.exec_())
color brush
如下图,使用QColor和QBrush的效果。
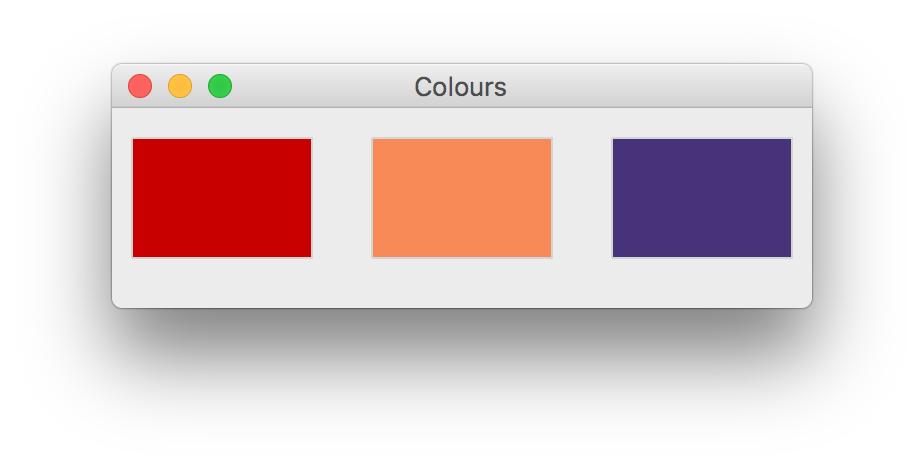
代码如下。
from PyQt5.QtWidgets import QWidget, QApplication
from PyQt5.QtGui import QPainter, QColor, QBrush
import sys

class Example(QWidget):

    def __init__(self):
        super().__init__()

        self.initUI()


    def initUI(self):

        self.setGeometry(300, 300, 350, 100)
        self.setWindowTitle('Colours')
        self.show()


    def paintEvent(self, e):

        qp = QPainter()
        qp.begin(self)
        self.drawRectangles(qp)
        qp.end()


    def drawRectangles(self, qp):

        col = QColor(0, 0, 0)
        col.setNamedColor('#d4d4d4')
        qp.setPen(col)

        qp.setBrush(QColor(200, 0, 0))
        qp.drawRect(10, 15, 90, 60)

        qp.setBrush(QColor(255, 80, 0, 160))
        qp.drawRect(130, 15, 90, 60)

        qp.setBrush(QColor(25, 0, 90, 200))
        qp.drawRect(250, 15, 90, 60)


if __name__ == '__main__':

    app = QApplication(sys.argv)
    ex = Example()
    sys.exit(app.exec_())
pen style
如下图,使用笔的线型。
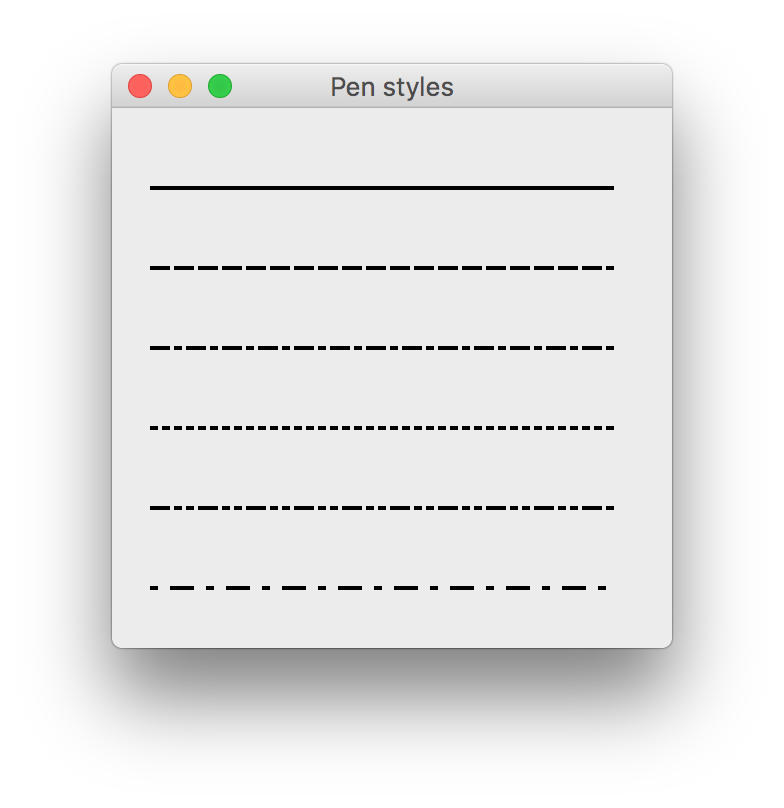
代码如下。
from PyQt5.QtWidgets import QWidget, QApplication
from PyQt5.QtGui import QPainter, QPen
from PyQt5.QtCore import Qt
import sys

class Example(QWidget):

    def __init__(self):
        super().__init__()

        self.initUI()


    def initUI(self):

        self.setGeometry(300, 300, 280, 270)
        self.setWindowTitle('Pen styles')
        self.show()


    def paintEvent(self, e):

        qp = QPainter()
        qp.begin(self)
        self.drawLines(qp)
        qp.end()


    def drawLines(self, qp):

        pen = QPen(Qt.black, 2, Qt.SolidLine)

        qp.setPen(pen)
        qp.drawLine(20, 40, 250, 40)

        pen.setStyle(Qt.DashLine)
        qp.setPen(pen)
        qp.drawLine(20, 80, 250, 80)

        pen.setStyle(Qt.DashDotLine)
        qp.setPen(pen)
        qp.drawLine(20, 120, 250, 120)

        pen.setStyle(Qt.DotLine)
        qp.setPen(pen)
        qp.drawLine(20, 160, 250, 160)

        pen.setStyle(Qt.DashDotDotLine)
        qp.setPen(pen)
        qp.drawLine(20, 200, 250, 200)

        pen.setStyle(Qt.CustomDashLine)
        pen.setDashPattern([1, 4, 5, 4])
        qp.setPen(pen)
        qp.drawLine(20, 240, 250, 240)


if __name__ == '__main__':

    app = QApplication(sys.argv)
    ex = Example()
    sys.exit(app.exec_())
hatched brush
如下图,使用填充的画刷。
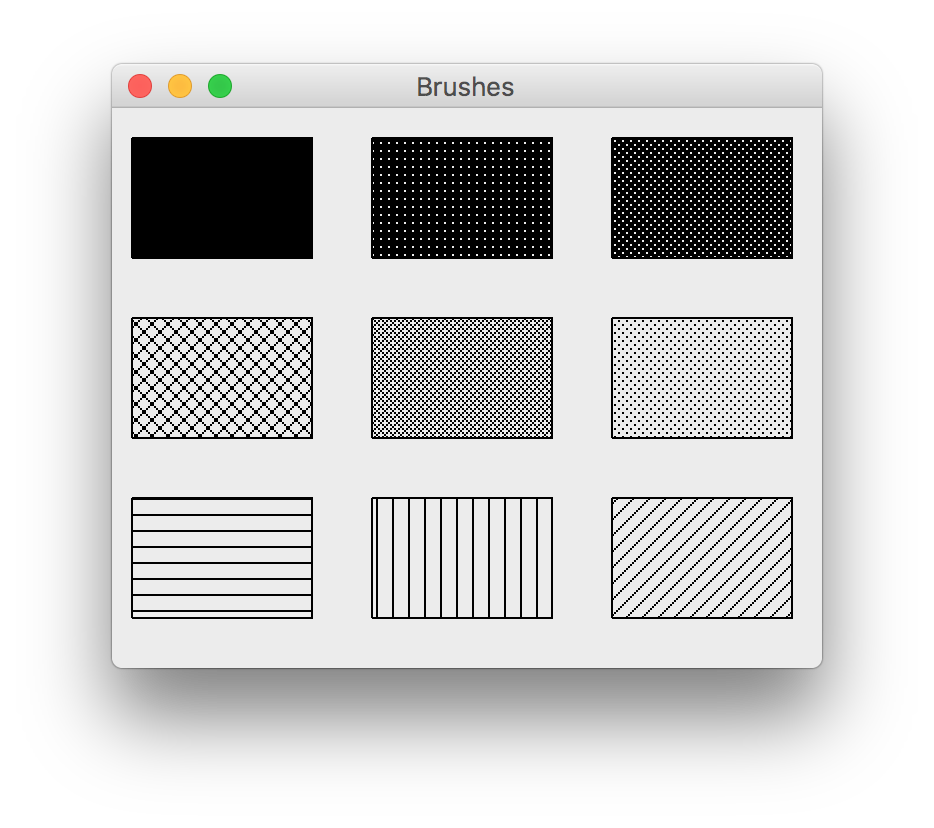
代码如下。
from PyQt5.QtWidgets import QWidget, QApplication
from PyQt5.QtGui import QPainter, QBrush
from PyQt5.QtCore import Qt
import sys

class Example(QWidget):

    def __init__(self):
        super().__init__()

        self.initUI()


    def initUI(self):

        self.setGeometry(300, 300, 355, 280)
        self.setWindowTitle('Brushes')
        self.show()


    def paintEvent(self, e):

        qp = QPainter()
        qp.begin(self)
        self.drawBrushes(qp)
        qp.end()


    def drawBrushes(self, qp):

        brush = QBrush(Qt.SolidPattern)
        qp.setBrush(brush)
        qp.drawRect(10, 15, 90, 60)

        brush.setStyle(Qt.Dense1Pattern)
        qp.setBrush(brush)
        qp.drawRect(130, 15, 90, 60)

        brush.setStyle(Qt.Dense2Pattern)
        qp.setBrush(brush)
        qp.drawRect(250, 15, 90, 60)

        brush.setStyle(Qt.DiagCrossPattern)
        qp.setBrush(brush)
        qp.drawRect(10, 105, 90, 60)

        brush.setStyle(Qt.Dense5Pattern)
        qp.setBrush(brush)
        qp.drawRect(130, 105, 90, 60)

        brush.setStyle(Qt.Dense6Pattern)
        qp.setBrush(brush)
        qp.drawRect(250, 105, 90, 60)

        brush.setStyle(Qt.HorPattern)
        qp.setBrush(brush)
        qp.drawRect(10, 195, 90, 60)

        brush.setStyle(Qt.VerPattern)
        qp.setBrush(brush)
        qp.drawRect(130, 195, 90, 60)

        brush.setStyle(Qt.BDiagPattern)
        qp.setBrush(brush)
        qp.drawRect(250, 195, 90, 60)


if __name__ == '__main__':

    app = QApplication(sys.argv)
    ex = Example()
    sys.exit(app.exec_())
Bézier curve
即,贝赛尔曲线,效果如下图。
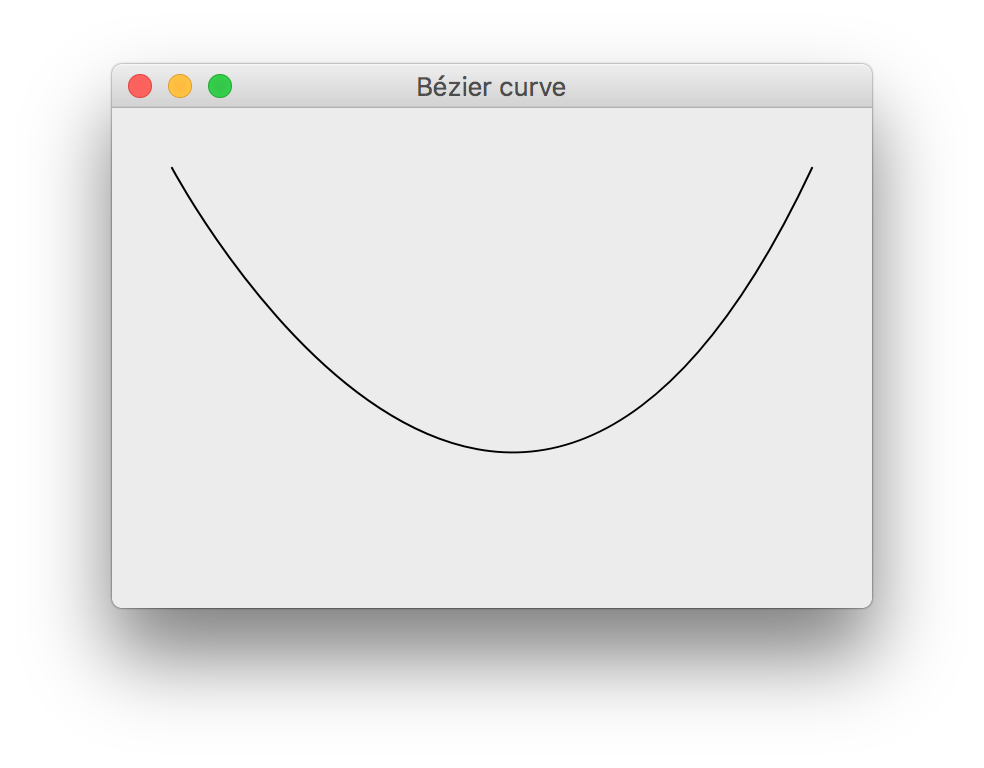
代码如下。
from PyQt5.QtWidgets import QWidget, QApplication
from PyQt5.QtGui import QPainter, QPainterPath
from PyQt5.QtCore import Qt
import sys

class Example(QWidget):

    def __init__(self):
        super().__init__()

        self.initUI()


    def initUI(self):

        self.setGeometry(300, 300, 380, 250)
        self.setWindowTitle('Bézier curve')
        self.show()


    def paintEvent(self, e):

        qp = QPainter()
        qp.begin(self)
        qp.setRenderHint(QPainter.Antialiasing)
        self.drawBezierCurve(qp)
        qp.end()


    def drawBezierCurve(self, qp):

        path = QPainterPath()
        path.moveTo(30, 30)
        path.cubicTo(30, 30, 200, 350, 350, 30)

        qp.drawPath(path)


if __name__ == '__main__':

    app = QApplication(sys.argv)
    ex = Example()
    sys.exit(app.exec_())
Customize Widget
代码来源:http://zetcode.com/gui/pyqt5/customwidgets/
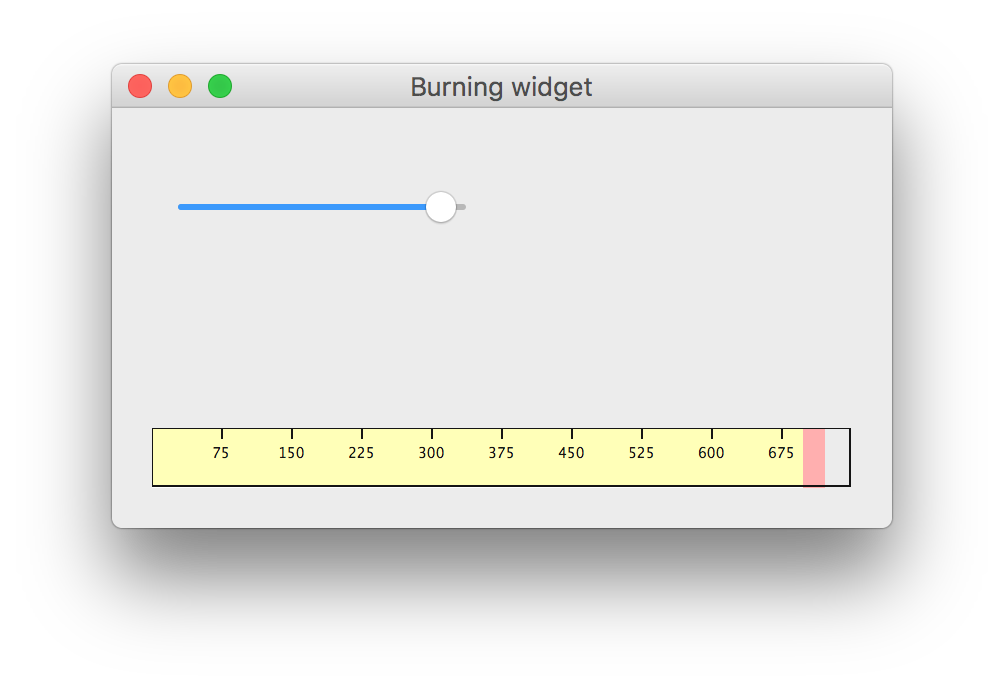
burning widget
定制窗体。
代码如下。
from PyQt5.QtWidgets import (QWidget, QSlider, QApplication,
    QHBoxLayout, QVBoxLayout)
from PyQt5.QtCore import QObject, Qt, pyqtSignal
from PyQt5.QtGui import QPainter, QFont, QColor, QPen
import sys

class Communicate(QObject):

    updateBW = pyqtSignal(int)


class BurningWidget(QWidget):

    def __init__(self):
        super().__init__()

        self.initUI()


    def initUI(self):

        self.setMinimumSize(1, 30)
        self.value = 75
        self.num = [75, 150, 225, 300, 375, 450, 525, 600, 675]


    def setValue(self, value):

        self.value = value


    def paintEvent(self, e):

        qp = QPainter()
        qp.begin(self)
        self.drawWidget(qp)
        qp.end()


    def drawWidget(self, qp):

        MAX_CAPACITY = 700
        OVER_CAPACITY = 750

        font = QFont('Serif', 7, QFont.Light)
        qp.setFont(font)

        size = self.size()
        w = size.width()
        h = size.height()

        step = int(round(w / 10))


        till = int(((w / OVER_CAPACITY) * self.value))
        full = int(((w / OVER_CAPACITY) * MAX_CAPACITY))

        if self.value >= MAX_CAPACITY:

            qp.setPen(QColor(255, 255, 255))
            qp.setBrush(QColor(255, 255, 184))
            qp.drawRect(0, 0, full, h)
            qp.setPen(QColor(255, 175, 175))
            qp.setBrush(QColor(255, 175, 175))
            qp.drawRect(full, 0, till-full, h)

        else:

            qp.setPen(QColor(255, 255, 255))
            qp.setBrush(QColor(255, 255, 184))
            qp.drawRect(0, 0, till, h)


        pen = QPen(QColor(20, 20, 20), 1,
            Qt.SolidLine)

        qp.setPen(pen)
        qp.setBrush(Qt.NoBrush)
        qp.drawRect(0, 0, w-1, h-1)

        j = 0

        for i in range(step, 10*step, step):

            qp.drawLine(i, 0, i, 5)
            metrics = qp.fontMetrics()
            fw = metrics.width(str(self.num[j]))
            qp.drawText(i-fw/2, h/2, str(self.num[j]))
            j = j + 1


class Example(QWidget):

    def __init__(self):
        super().__init__()

        self.initUI()


    def initUI(self):

        OVER_CAPACITY = 750

        sld = QSlider(Qt.Horizontal, self)
        sld.setFocusPolicy(Qt.NoFocus)
        sld.setRange(1, OVER_CAPACITY)
        sld.setValue(75)
        sld.setGeometry(30, 40, 150, 30)

        self.c = Communicate()
        self.wid = BurningWidget()
        self.c.updateBW[int].connect(self.wid.setValue)

        sld.valueChanged[int].connect(self.changeValue)
        hbox = QHBoxLayout()
        hbox.addWidget(self.wid)
        vbox = QVBoxLayout()
        vbox.addStretch(1)
        vbox.addLayout(hbox)
        self.setLayout(vbox)

        self.setGeometry(300, 300, 390, 210)
        self.setWindowTitle('Burning widget')
        self.show()


    def changeValue(self, value):

        self.c.updateBW.emit(value)
        self.wid.repaint()


if __name__ == '__main__':

    app = QApplication(sys.argv)
    ex = Example()
    sys.exit(app.exec_())
Game
代码来源:http://zetcode.com/gui/pyqt5/tetris/
Tretris
(未完)