Milestone #3 vCenter - wAlber47/Tech-Journal GitHub Wiki
Installing VCSA
Fairly easy setup, very similar to setting up a new VM with an ISO file.
On xubuntu-wan, mount the VCSA-VMWare-6.7 file that was downloaded previously.
Navigate to the /media/william/VMWare VCSA/vcsa-ui-installer/lin64 folder, and run ./installer. From here, a UI installer should pop up.
For the settings, we should select the defaults unless prompted for information. When setting the Appliance Deployment target, enter super4.cyber.local as the host and the username/password for that machine. Accept the SHA warning and move on.
Change the VM name to vcenter and choose a strong root password. Mine will be stored on my local PC's desktop.
Stick with a tiny deployment, and a default storage size. Place the appliance on the larger datastore with thin disk enabled.
This will be the network configurations:
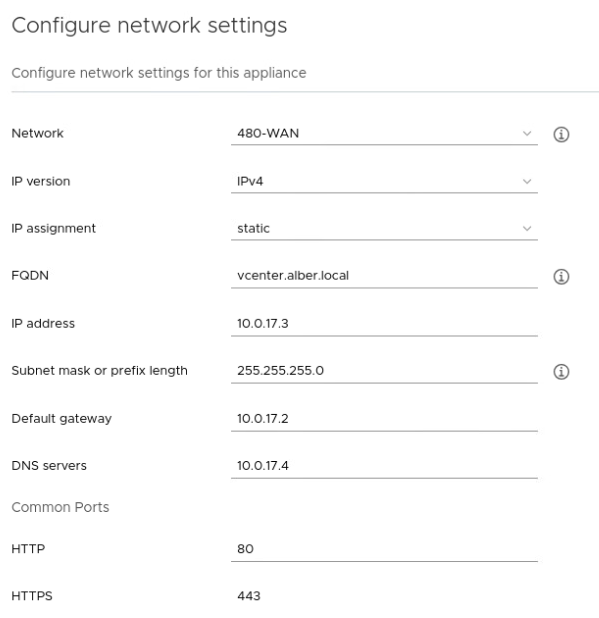
Finish and wait for the appliance to be installed. Once installed, continue with the installation.
Select Synchronize time with NTP Servers and enter pool.ntp.org.
Now create the SSO configuration for the vCenter appliance. We will not join this to the domain. This will also be stored on my local PC's desktop.
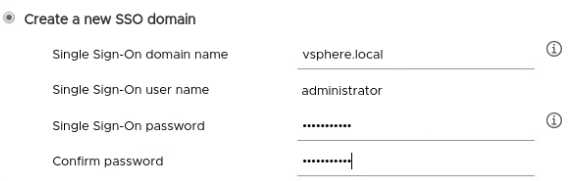
Once it finishes, the install is complete. The next thing is to navigate to the getting start page at: https://vcenter.alber.local:443. To login, enter [email protected] and the password we set earlier.
Creating Datacenters
Right click on vcenter.alber.local, and select New Datacenter. Name this, alber.local. This is essentially a collection of EXSi hosts.
Adding Hosts
Right click on vcenter.alber.local, and select Add Host.
The first machine to add should be super4.cyber.local. Enter the hostname, then the login settings. It should then proceed after displaying a SHA warning.
From here, you can select all default settings.
After a second or so, the machines should populate within vCenter.