raspberrypi install venus image - victronenergy/venus GitHub Wiki
Intro & where to get help
This page explains how to install the Victron Energy Venus OS onto a Raspberry Pi.
Note that the Raspberry Pi image is a community effort: do not contact our service department or sales managers with questions about it. Also don't make any issues on GitHub. Instead, for any questions or issues, use the Modifications section on Community.
More background on how this project initially started is here.
And for an easy read about all this, make sure to check the Victron's Venus OS on a Raspberry Pi post on the Panbo, the marine electronics blog.
Supported platforms
- Raspberry Pi Zero: not supported
- Raspberry Pi Zero W & WH: not supported
- Raspberry Pi Zero 2W: Venus OS v2.90~12 or later.
- Raspberry Pi 1 A+: not supported
- Raspberry Pi 1 B: not supported
- Raspberry Pi 2: supported
- Raspberry Pi 3 A+: not supported
- Raspberry Pi 3 B: supported, including on-board WiFi, and Bluetooth (use v2.70 or newer for Bluetooth)
- Raspberry Pi 3 B+: supported. Same notes as the Rpi3 B.
- Raspberry Pi 4 - board rev 1.2 and 1.3: Venus OS version v2.70 or newer.
- Raspberry Pi 4 - board rev 1.4 and 1.5: Venus OS v2.90 or newer.
- Raspberry PI CM4: supported as per RPI4 rev 1.4/1.5. Tested on a Waveshare CM4-IO-BASE-A, with CM4 (WiFi / 4GB / 32 GB) with image written to eMMC
- Raspberry Pi 5 - supported from Venus OS v3.70 onwards
Image Support
The raspberrypi2 image supports:
- Raspberry Pi 2.
- Raspberry Pi 3 B.
- Raspberry Pi 3 B+.
- Raspberry Pi Zero 2W.
The raspberrypi4 image supports:
- Raspberry Pi 4.
- Raspberry Pi CM4.
- Raspberry Pi 400.
The raspberrypi5 image supports:
- Raspberry Pi 5.
Getting started:
- Download the latest image, a
.wic.gzfile from here, and for the Raspberry Pi 4, go up one folder and select theraspberrypi4subfolder. - Get an SD card, put it in your computer.
- Burn the image file (
.wic.gz) on an SD card. On windows, use win32diskimager or balenaEtcher. - Insert the SD card in the Raspberry Pi.
- Connect to your local router, using an ethernet cable.
- Power it on.
- In case you have a display connected to the HDMI output port, you'll see the Root console: a terminal prompt where you're logged in as root; see below in case you want to see the GUI on the HDMI output.
- (optional) Setup Wifi: using the VictronConnect App, you're able to join the Raspberry Pi into a WiFi network
- Access the UI, aka Remote Console, which requires first to find the IP address.
- Use VictronConnect App; it will scan your network, and, assuming your phone is on the same LAN/Wifi network as the Raspberry Pi, it will find your device.
- Use VictronConnect App; scan via Bluetooth; to see IP settings for both LAN and WiFi.
- Type http://venus.local in your browser.
- In case you do have a display and see the terminal prompt, type
ip addrto see its IP configuration.
- Open a browser, and navigate to the IP address, for example http://192.168.52.3. If all went well, you would see the Remote Console page loading, and will be able to browse the menus.
- The VRM Portal ID is derived from the Ethernet LAN MAC address, stripped from its colons and in lower case. When in doubt, login to Remote Console, then Settings -> VRM Portal. The ID is shown in that menu.
To later update the now installed Venus OS, see last chapter of this document.
Root console on HDMI (before Venus OS v3.70)
For debugging purposes, a root console is available if you plug in a keyboard and a monitor. You can also obtain the IP address here, by typing:
ip addr ls dev eth0
To make the GUI visible on the HDMI output port, change the read only rootfs to read/write, and then remove the /etc/venus/headless file. Warning, you'll have to do that again after every firmware update - unless you make a script that does it for you. See here.
When keeping the HDMI in Console mode, you might want to get rid of the logo, how to do that is explained here:
Root console on HDMI (since OS v3.70)
The Raspberry Pis no longer look for the /etc/venus/headless file, but will boot to the UI by default instead. The terminal is now available in the Classic UI (at the moment not in the New UI) instead, by pressing ALT F2. ALT F1 will switch back to the UI. Note this is only available on a physical display and if the Access Level is Superuser. CTRL + and CTRL - will increment / decrement the font size respectively. Scroll Lock (depends on the keyboard) can be used to scroll back with page up/down or the arrow keys (or use a pager, like less). CTRL d will close the terminal.
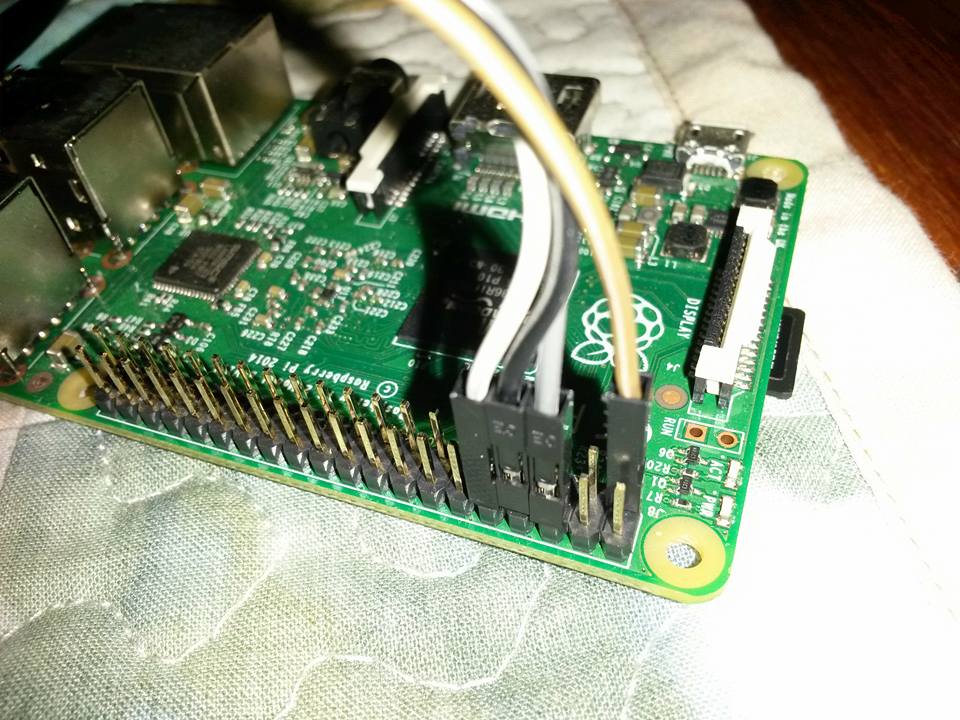
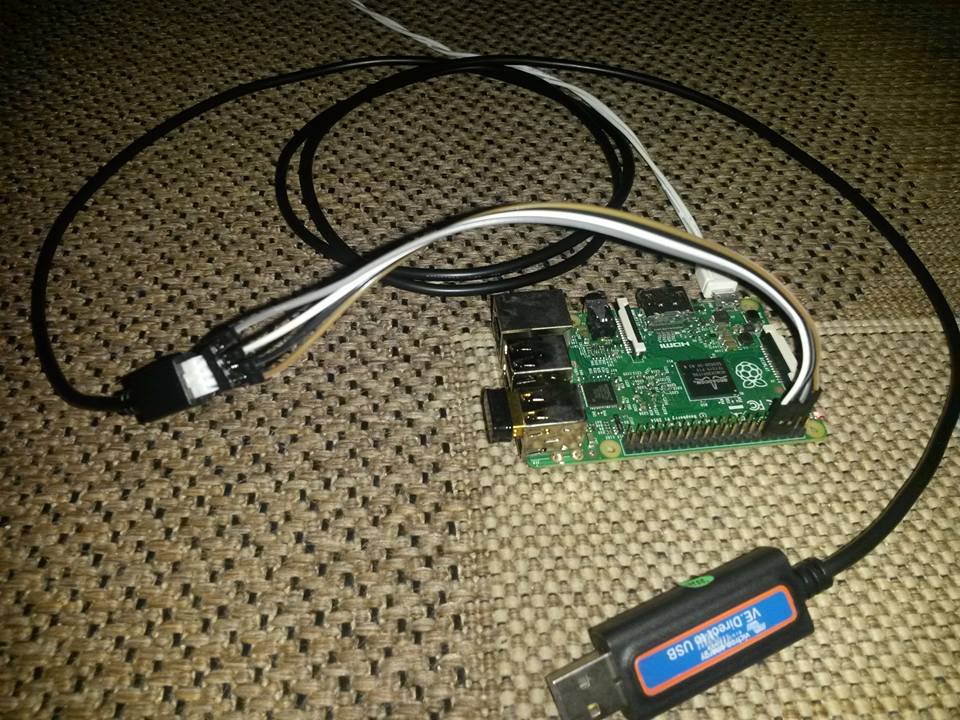
Serial console
A serial console with a root prompt is also provided on GPIO pins 6, 8 and 10. The pin out is available here. Remember that the serial port is 3.3V TTL and is not 5V tolerant.
You can use the Victron VE-Direct USB cable for this. Note that the VE.Direct USB cable is galvanically isolated and must be powered from both ends. A 3.3V supply is available on pin 1 of the Raspberry Pi.
DO NOT USE THE 5V SUPPLY TO POWER THE VE.DIRECT CABLE!
Alternative to our VE.Direct cable are the Adafruit and other common cables.
NOTE: The Raspberry PI 5 uses a dedicated debug UART for this, instead of the GPIO pins. See Raspberry Pi Debug Probe
Generic
- The software provided by this image is the same as what runs on the Color Control GX, see CCGX User manual
- Victron Live open source page - CCGX & Venus
- For any questions or issues, use the Modifications section on Community. Note that the Raspberry Pi image is not supported like our commercial products, do not contact our service department or sales managers with questions about it.
Enabling SSH (developer feature) and other command line shell details
To get root access, follow the instructions here.
Note that Venus OS is not the same as Raspbian or Debian. It is much more minimalistic. Therefore:
- The library of prebuilt optional to install packages is smaller than what Raspbian offers. To see the packages that are available, see the information about opkg in one of the two Venus OS Commandline manuals. Or simply google on opkg. And, opkg is the package manager. There is no apt-get. More info here.
- Operational command line manual for Venus OS: commandline operational
- Development command line manual for Venus OS: commandline development
Rooting the image without a network connection
If you don't have a wired network connection available, you will not be able to access the console and set a root password. You can however still set the password manually using the debug console.
-
Attach either a serial connection to the relevant GPIO pins or debug UART as explained above, or attach a monitor and a keyboard to gain access to the debug console.
-
Now set the password using the
passwdcommand:passwd
Connecting to SSH remotely
There are many ways to do that, and one is written up here:
Connect via WiFi
See Settings -> Wifi. Note that not all WiFi USB sticks are supported. See CCGX Manual internet section for the two that we do support.
If you need to enable WiFi but you lack an Ethernet connection and cannot access the GUI, you can use connmanctl to enable it. Follow these instructions.
Connecting products
Connecting products works similar as Venus devices, besides:
Connection to a VE.Direct product
Use our VE.Direct to USB cable for that. We strongly recommend to not make cables yourself. The low cost USB-Serial devices out there in the market prove to cause all sorts of issues; and also the original ones have isolation: really necessary.
There are plenty examples of people for whom their self-made non-isolated cable worked, and then some day it didn't anymore, and then went into a long-time consuming search. And not only their time, but time from others, including Victron employees as well since they use Community to ask for help with their troubles. Frustrating!
More here: https://community.victronenergy.com/questions/48562/vedirect-diy-cable.html
Connecting to a VE.Bus product (Multi, Quattro, etc)
Since there is no onboard MK3 on the Pi, nor is there an expansion board available, a MK3-USB needs to be used. Plugging in the MK3 should work out of the box, no additional configuration is required. The mk2-usb is not supported.
Please note that the AC Input settings in Settings -> System Setup will show Unknown and cannot be set until an MK3-USB has been detected.
Connect to a VE.Can product
A number of CAN interface devices have been tested and are detailed here: RPi CAN Interfaces
Adding/defining more relays
By default, our Raspberry Pi image defines one GPIO pin as a relay. You can add more. In the rootfs you'll have to modify /etc/venus/gpio_list.
To see what code handles that read here:
That package populates, at each boot, the /dev/gpio/relay_* links. Which are in turn then consumed by systemcalc,
here, which puts them on D-Bus.
And that (D-Bus) is how the GUI and the other processes in Venus OS interface to the relays.
Raspberry Pi Touchscreen display
The "Official Raspberry Pi 7" Touchscreen" makes a good local display for Venus. It works more or less out of the box, but if you want the display to dim and blank from Venus, you need to install some things. I've written a script that does the work and even reapplies the changes after a Venus update:
HDMI Display
You can also use an HDMI touch screen. You'll probably need to add display parameters to match your display. For example:
# custom setup for 1024x600 HDMI touchscreen
hdmi_group=2
hdmi_mode=87
hdmi_cvt=1024 600 60 6 0 0 0
hdmi_force_hotplug=1

# allow HDMI display to enter low power mode
# doesn't appear to work so not enabled
# hdmi_blanking 1

# no overscan
disable_overscan=1
Keep in mind that there is no mechanism within HDMI to support dimming or blanking (screen saver).
Digital inputs and relays
The default programming for Raspberry PI GPIO pins is for the first 8 to have pull UPs and the remaining pins to have pull DOWNS. The Venus digital inputs are assigned to GPIOs 5, 6, 13, 19 and 26 so the first two appear high and the rest appear low with nothing attached. There is no way to change pull-up/down with the GPIO file system interface used in Venus OS.
If you want to make all digital inputs work the same way, I have created an overlay to fix this:
This repo also contains definitions for additional relays, however only two relays actually work. Only the first can be controlled by Venus OS functionality. The second is controllable manually from the GUI. More than two relays causes systemcalc to crash. There is a fix for this but these would still be restricted to manual control and the GUI would need to be modified. So for now, only two relays are set up.
How to update
Just like normal commercial GX devices, a Raspberry Pi running Venus OS can be updated using an online download; either initiated manually as well as automatically.
And it can be updated by providing an update file (.swu) on a USB stick.
User settings (aka the data partition) are retained during an update with a .swu file.
Re-imaging required now and then
Now and then, installing a new image is required. There is a technical reason behind that, due to the way a Raspberry Pi boots. Basically: when we want to add new Raspberry Pi models to the list of supported models, update Linux kernel significantly, or make some other fundamental improvements, then re-imaging is required.
And Pi's running a prior installation will then not update, and show "No update found" instead.
To do re-image, you need to reflash the SD card, using a .wic.gz image, which means starting from scratch. Download that file from the link provided above, in the installation chapter. Note that (both of course as well as unfortunately) all settings will be lost by doing that. There are ways to retain them, see Community Modifications section. Do know that it can be just as fast to just start fresh and reconfigure it afterwards.
An (inclusive) list of versions where re-imaging was required:
- Raspberry Pi 3 updates from before to v2.70 to after v2.70 (due to fixes in WiFi and Bluetooth and more)
- All Pi models, running v2.86 or up to v2.90~10 to later: also required reimaging, as noted in v2.90 (beta) release notes.