ERPLAB Studio Panels: ERPsets - ucdavis/erplab GitHub Wiki
The ERPsets panel allows you to load and import ERP data, see and control which ERPsets are currently loaded, select which ERPsets are currently active, and perform simple operations on the ERPsets.
You select an ERPset by clicking on it, and you can select multiple ERPsets by shift-clicking, control-clicking, option-clicking, etc. Selecting one or more ERPsets causes them to be plotted in the plotting area and to be used as the inputs to ERPLAB’s processing functions.
You can Duplicate or Rename the selected ERPsets, and you can click Add Suffix to add the same suffix to the ERPset name for each selected ERPset. You can Append multiple ERPsets together (assuming they have the same number of channels, the same sampling rate, etc.). You can also change Matlab’s Current Folder (the folder where it will first look for files).
The Save button saves the selected ERPsets to disk as .erp files. If a selected ERPset is already linked to a file (e.g., it was loaded from disk or saved to disk in the current session), the current version will simply overwrite the previous file. If the ERPset is not linked to a file, it will be saved as a file in the Current Folder using the setname for the filename.
The Save a Copy button is similar to the Save As... operation that is used in many software packages. It duplicates the current ERPsets and then saves them to .erp files on disk (using filenames that you select).
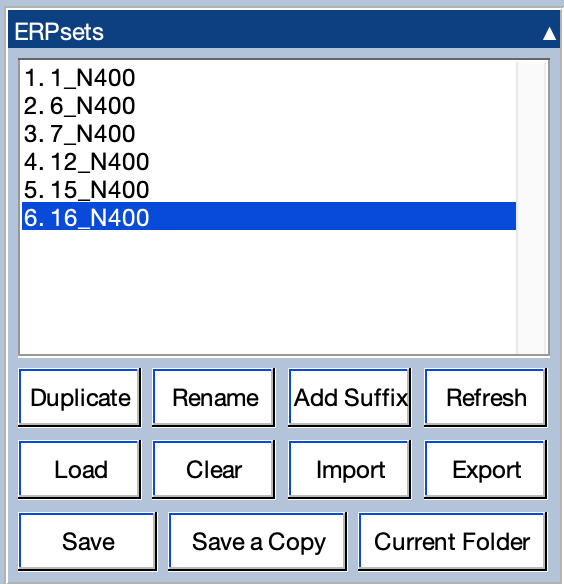
The Refresh button is used to synchronize ERPLAB Studio with the ALLERP data structure. It is typically used when a script has created or modified one or more ERPsets while ERPLAB Studio is running. For example, imagine that you run a script that adds new ERPsets to the ALLERP variable. ERPLAB Studio won’t know that this variable has changed, so it won’t change the list of ERPsets in the ERPsets panel. If you click Refresh, the ERPsets panel will be updated to include the new ERPsets.
You can export ERPsets to a text file. Two different formats are supported: ERPSS Text and Universal Text. Both formats allow you to specify which bin(s) and channel(s) to export.
Exporting in Universal format. The universal format creates a separate file for each bin, adding the bin description to the filename you specify in the top line of the GUI (see screenshot below). For example, if you specify a filename of 1_400 and Bin 1 has a label of Related Primes, the first file created will be named 1_400_Related_Primes.txt.
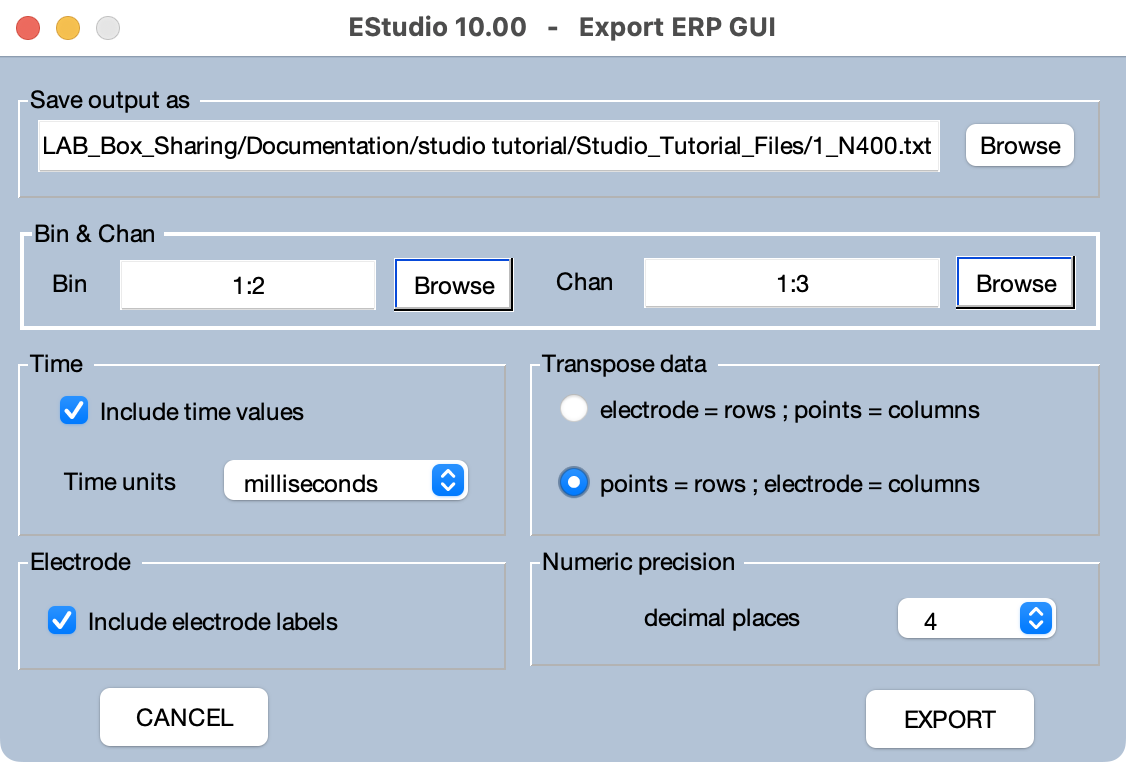
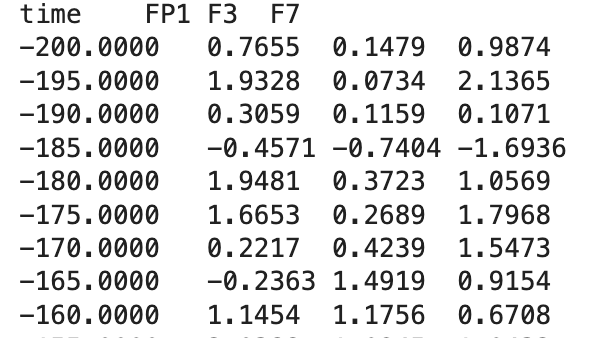
The screenshot below shows the first few lines of the text file that will be created with the parameters set as in the screenshot above. The first line is a set of labels (because Include electrode labels is set). Each subsequent line represents the data from a time point. The left column shows the time at each point (because Include time values is set). Each subsequent column shows the voltage from a given electrode site. The columns are separated by tabs, and the labels and voltages will be nicely aligned if imported into a spreadsheet program. If the electrode = rows option were set, the rows and columns would be transposed, with each channel in a different row and each time point in a different column.
Exporting in ERPSS format. The best way to understand the ERPSS Text format is to export an ERPSet in this format and examine the resulting text file. The file begins with a header that defines basic parameters, such as the sampling rate and channel names. It then creates a set of lines for each bin. For each bin, it contains a set of line for each channel. Note that it will create a Bin 0 with an artificial calibration pulse, which is necessary for importing the files into ERPSS.