ERPLAB Studio Panels: Append ERPsets - ucdavis/erplab GitHub Wiki
The Append ERPsets panel is used to concatenate multiple ERPsets into a single ERPset. When you append multiple ERPsets together, the bins from the first ERPset retain their original numbers (e.g., bin 1, bin 2, etc.), and the bins from the additional ERPsets are added onto the end. For example, if the first ERPset has 3 bins and the second ERPset has 2 bins, bins 1-3 in the new ERPset will be bins 1-3 from the first ERPset, and bins 4-5 in the new ERPset will be bins 1-2 from the second ERPset.
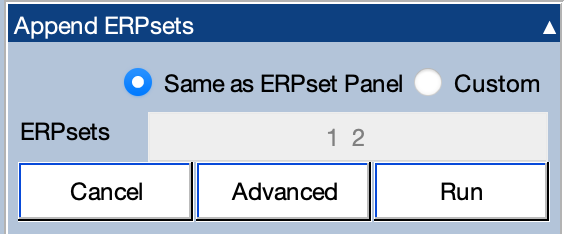
Note that, although you can have different numbers of bins in the ERPsets that are being combined, factors such as the sampling rate and epoch must be identical for the original ERPsets.
If you click the Advanced button, you will see the window shown below.
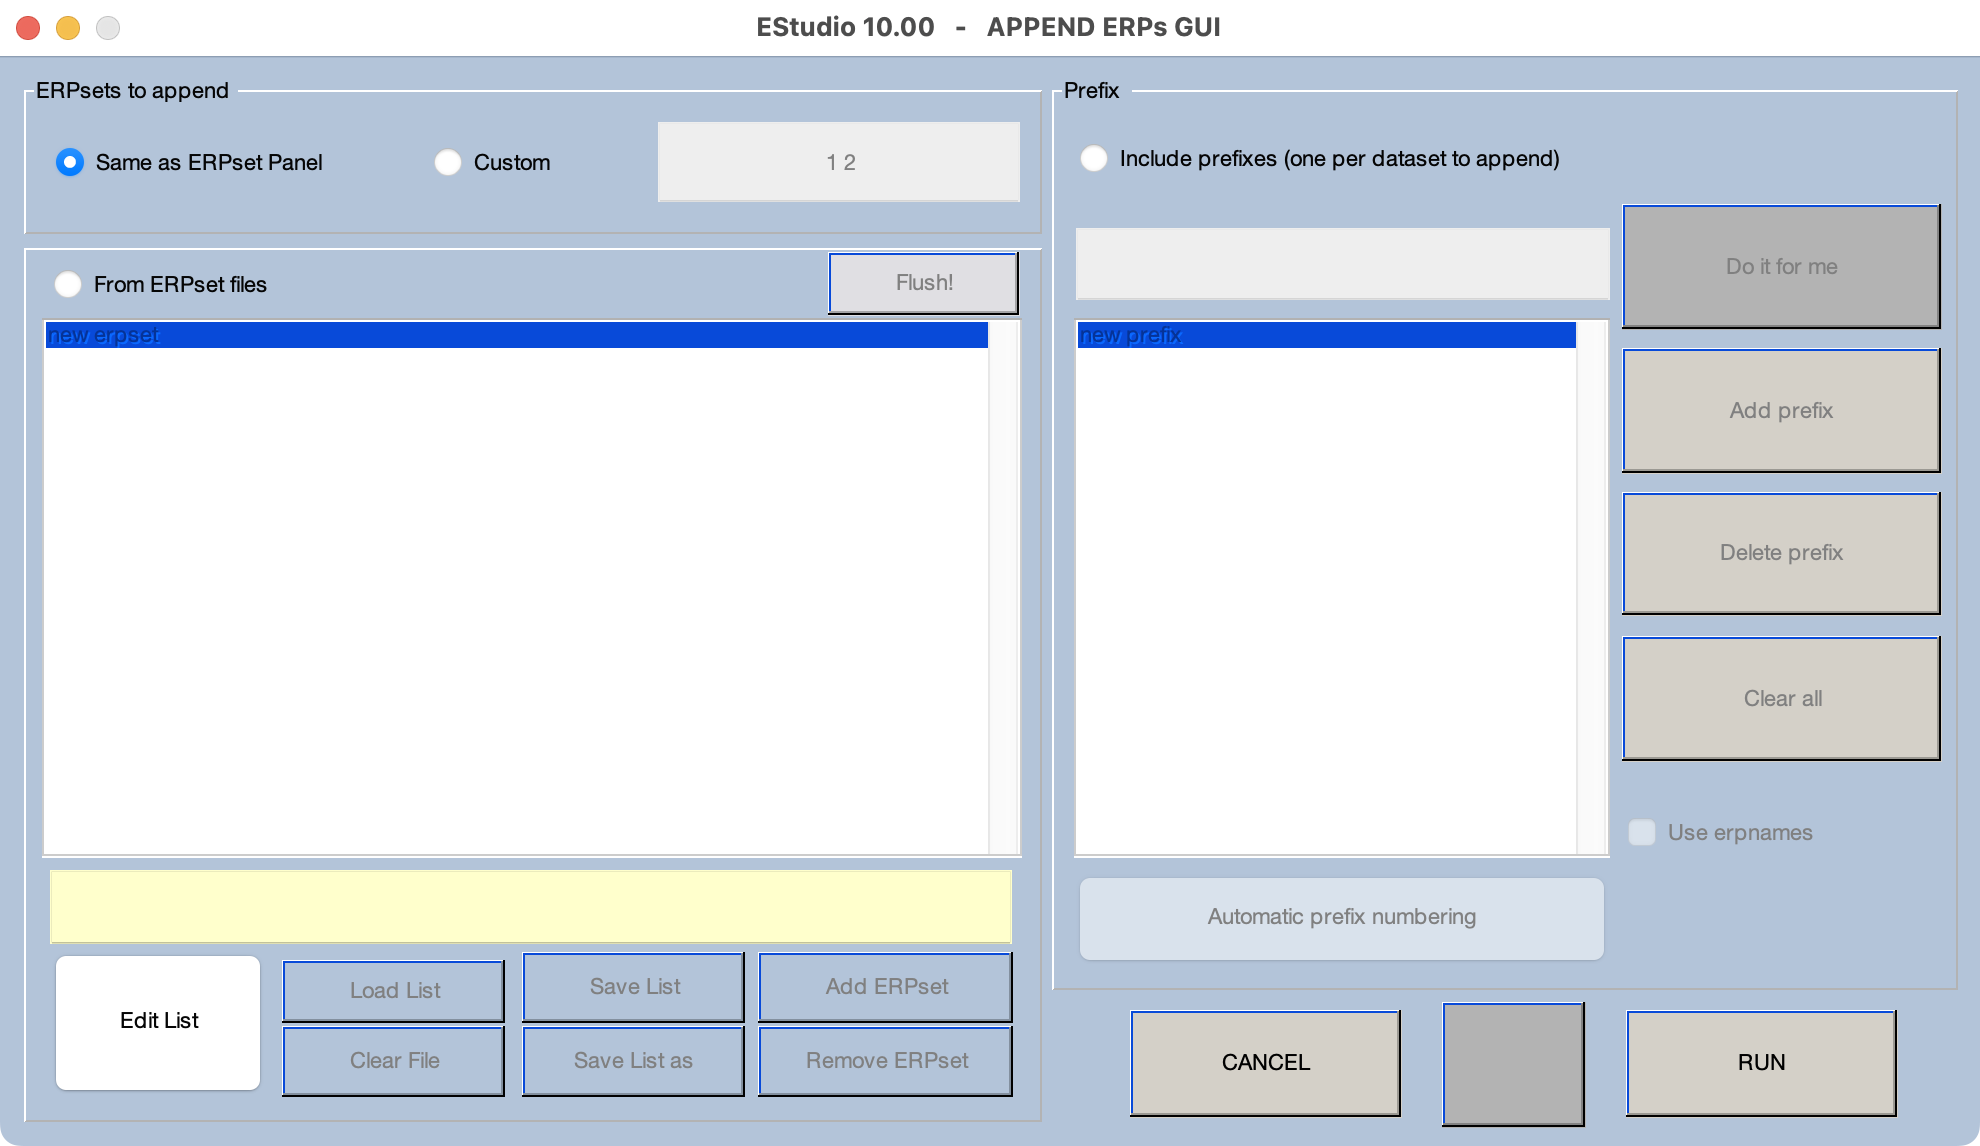
This window gives you two ways to indicate which ERPsets should be appended together (which are controlled by the options on the left side of the window). First, you can select the ERPsets by specifying their indexes from the ERPsets panel (e.g., specifying "1:3" to append the first 3 ERPsets in the ERPsets panel). Second, you can provide a list of filenames if the ERPsets have been stored on disk. For this latter option, you can store the list of filenames in a text file so that you don't have to type them in every time.
In many cases, the bins in the ERPsets being appended have identical names (e.g., the name of bin 1 in the first ERPset is the same as the name of bin 2 in the second ERPset). The Advanced window has a "prefix" option that can disambiguate these bins in the newly created ERPset (controlled by the options on the right side of the window shown in the screenshot above). The easiest way to use this is to check the Use erpnames option. If you do this, each bin label will have the name of the ERPset prepended to it. For example, if Bin 1 is named "Targets", and you append the data from two ERPsets named "S1" and "S2", the new bins will be named "S1: Targets" and "S2: Targets". You can also enter names manually.