Servo Replacement for the Parrot Disco - uavpal/disco-docs GitHub Wiki
![]()
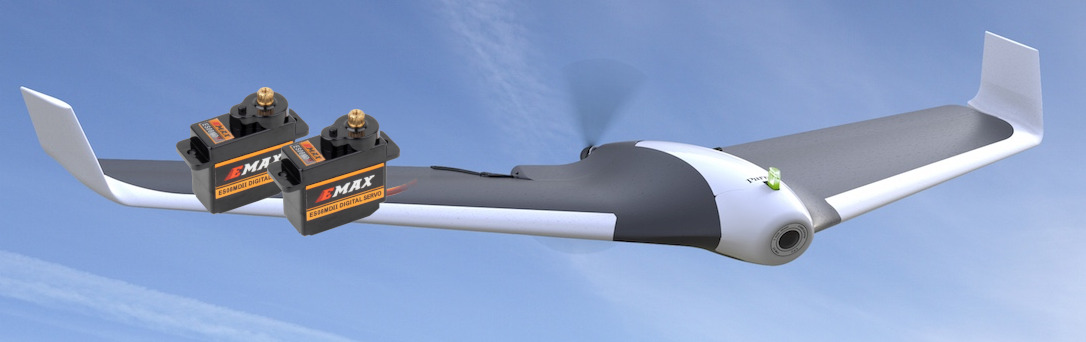
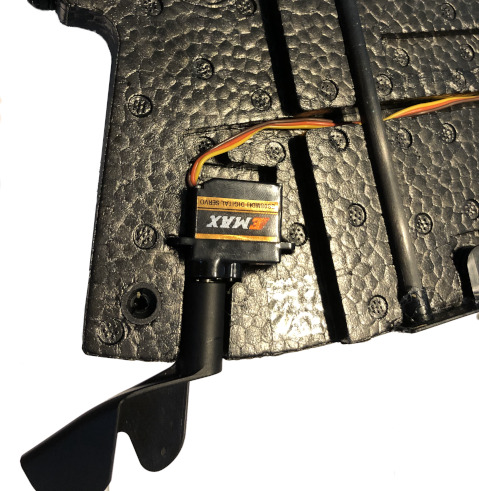
EMAX ES08MD II Digital Servo Replacement for the Parrot Disco
Introduction
The Parrot Disco comes with two built-in servos which control the wings' elevons (combined elevator and aileron). These stock servos have caused issues for some pilots which have led to crashes of the Disco. This has happened after very few flights for some pilots, but mostly after many flights as these servos don't seem to be very durable.
This How-to Wiki article explains in detail how you can replace the servos with a better option that fits nicely.
Requirements
-
2x EMAX ES08MD II Digital Servos, you can buy a 4-pack for US$25.23 from AliExpress (direct link)
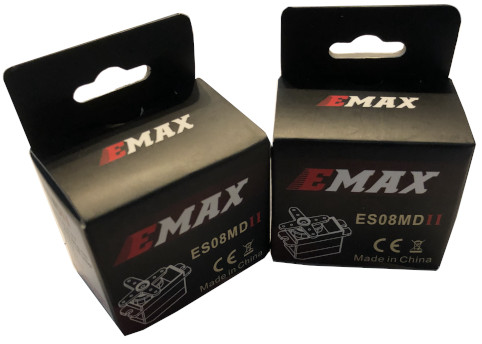
:warning: Note: many online shops sell counterfeited EMAX servos, which are of sub-standard quality!
The ones we ordered from the link provided above are genuine EMAX servos.
The EMAX package has a sticker below labeled "Scratch coating to check its authenticity". The number that shows is what you need to enter on the manufacturer's website.
:point_right: there is also a analog variant, EMAX ES08MA II. They have been reported to develop high temperature during flights. We have seen reports of burnt out "MA" servos which led to Discos crashing. Hence, our recommendation to use the digital "MD" variant. -
Cross-tip screwdriver (aka "Phillips head")
-
Torx T8 screwdriver
-
Glue or double-sided tape
Instructions
You have to open the central body/fuselage first. Remove the wings if you haven't done so already.
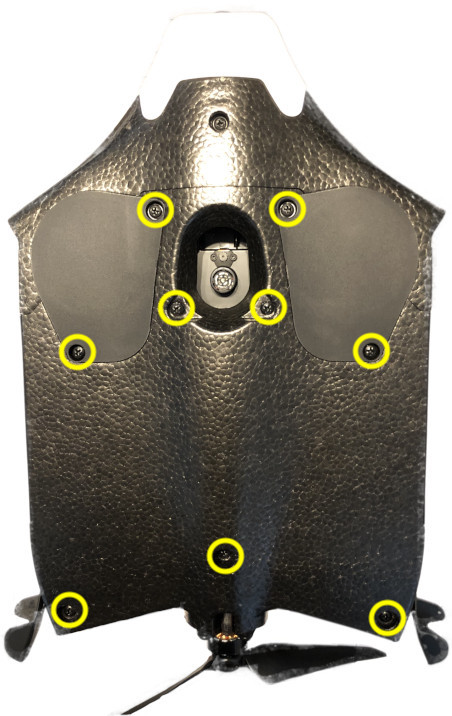
Remove the circled plastic screws with the cross-tip screwdriver from the bottom: 3x behind, 4x Wi-Fi antenna cover, 2x left and right of the opening.
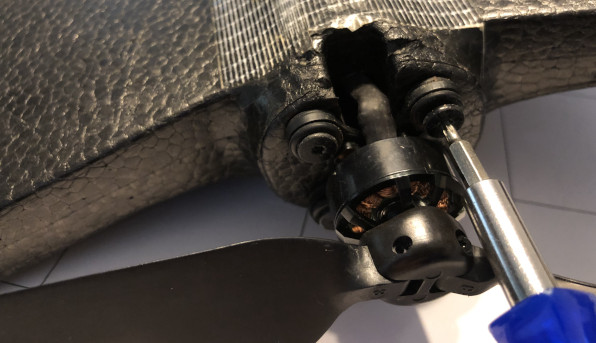
Remove the two lower screws of the motor mount using the Torx T8 screwdriver.
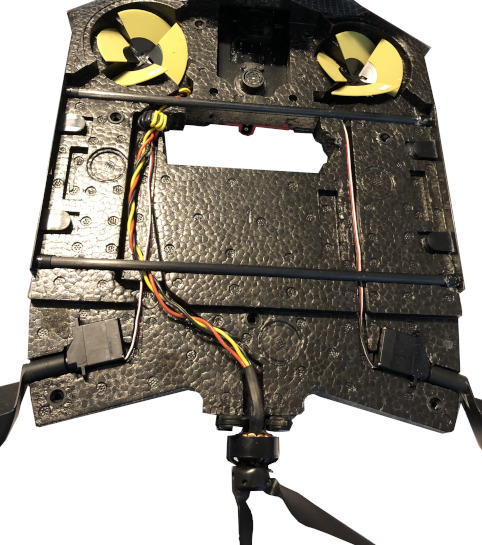
The lower part of the fuselage can be removed now.
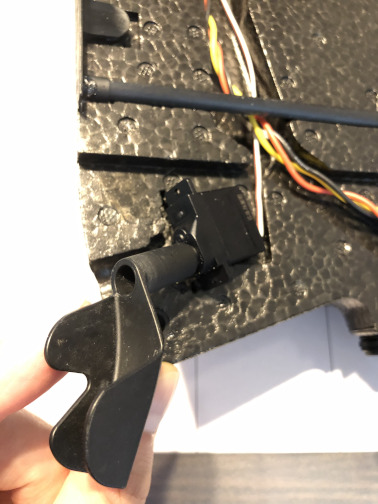
Remove the servos from the body by wiggling them gently while pulling them out - the double-sided tape should come off the foam. Unplug the old servos from CHUCK and wire the new ones via the canal the old ones were put in.
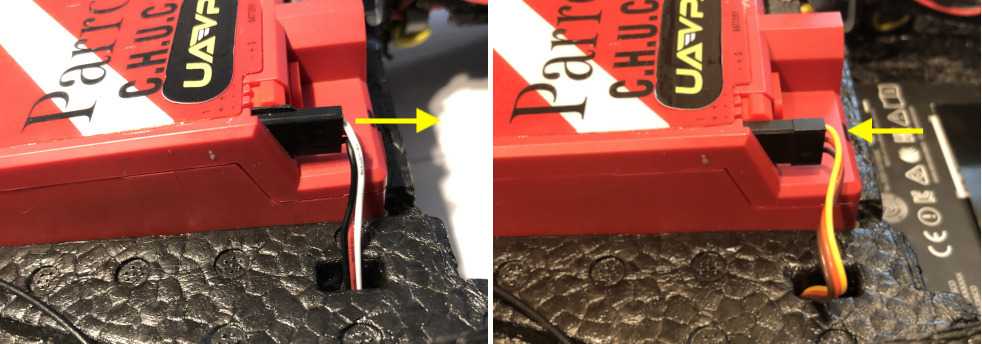
When you plug the new servo cables into CHUCK, make sure the yellow wire is on top (for both servos).
Push the new servos into the notch. Apply a drop of (hot) glue or apply double-sided tape on the servos.
Unscrew the horns from the original servos using the cross-tip screwdriver. Do not attach the wings yet! Turn on CHUCK so the servos are moved to their neutral position.
:point_right: We recommend to use a servo tester to set the servos' neutral positions correctly before attaching the horns. The servos should ideally be tested for 10 to 20 minutes as well.
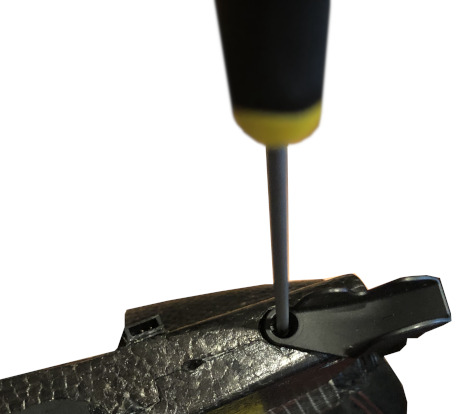
Now you can attach the horns to the new EMAX servos. Don’t re-use the old servo screws, use the black ones that came with the new servos.
Make sure the horns are aligned and somewhat horizontal. Power off CHUCK and close the Disco's body and put all screws back.
:warning: Note: Before attaching the wings, make a few tests with powering the Disco on and off. Make sure the horns don't rotate more than 90 degrees, as that might damage the wings!
Also check out our amazing 4G/LTE softmod if you are interested in flying your Parrot Disco without any range limitation!
Test before take-off
To test the servos, you have to simulate a take-off. The Disco needs GPS signal (flashing green power LED), so should be done outdoors. Press the take-off button on the Skycontroller 2 but hold the Disco firmly in your hand. The motor will spin and the Disco will stop the motor after 15 seconds if not being released into the air. During these 15 seconds, rotate the Disco along the central axis and observe the elevons. They should move upwards when the wing goes up and vice-versa.
:point_right: This test is strongly recommended as part of every Disco pre-flight check! It helped me to identify that one stock servo was faulty before taking-off (and facing an unexpected crash).
Community

Instructions too technical? Having trouble installing the EMAX servos? Questions about our 4G/LTE softmod? Interested in other mods (batteries, LEDs, etc.)? Interested to meet like-minded people? Having a great idea and want to let us know?
We have a great and very active community on Slack, come join us!
These steps were kindly provided by our community members Miklos, Justin and SarahD - thanks guys!